
User's Manual


Synology DiskStation User's Guide
Based on DSM 4.0
136 Chapter 15: Safeguard Your Environment with Surveillance Station
2 Click Save.
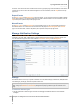
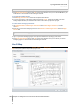
To set the notification schedule for a notification type:
1 Choose a notification type, and go to Notification Schedule > Settings.
2 Do either of the following to set the notification schedule:
For New camera added and Camera deleted, click Allow Notification or Delete, and then click or drag on
the grid to limit event notification to certain periods of a week.
For the remaining notification types, choose a camera from the Camera drop-down menu to specify which
camera will trigger event notification, click Allow Notification or Delete, and then click or drag on the grid to
limit the camera's event notification to certain periods of a week.
Note: If you choose New camera default settings from the Camera drop-down menu, the notification schedule
you specified will be applied to all cameras added to Surveillance Station in the future.
3 If you also want to apply the notification schedule to other event notification types, tick Also apply this
schedule to and do either of the following:
For New camera added and Camera deleted, choose a notification type from the Notification type drop-
down menu.
For the remaining notification types, choose a notification type from the Notification type drop-down menu,
and choose a camera from the Camera drop-down menu to apply the notification schedule to that camera.
Note: If you choose another notification type (other than New cameras added or Camera deleted), and then
choose All from the Camera drop-down menu, the schedule will be applied to the specified event for all
cameras.
4 Click OK.
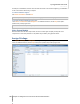
To batch edit notification schedule for notification types:
1 Go to Notification Schedule > Batch Edit. The welcome page of the Batch Notification Scheduling Wizard
will appear.
2 Follow the onscreen instructions to complete the setup.
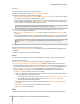
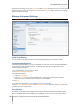
Email
You can set up email notification in order for Surveillance Station to send you a system notification by email.
To enable e-mail notification:
Tick Enable e-mail notifications, and do either of the following to complete the settings:
Apply the notification settings in the Management UI: Surveillance Station will use the identical email
account information to which maintained by the DSM Management UI to sent the event notification mails. You
can set up this email information at Main Menu > Control Panel > Notification of the DSM Management UI.
Apply the following email information: You are required to set up a particular email information for
Surveillance Station. The notification mails will be sent based on this setting when system events occur.
a SMTP server: Enter the SMTP server name or IP address.
b SMTP port: By default, the SMTP port number is 25. Modify the number if you have specified a different
SMTP port while setting up port forwarding rules.
If your SMTP server requires SSL connection, tick This server requires a secure connection (SSL).
If your SMTP server requires SMTP authentication, tick Authentication required, enter your
username and password for the email server.
c Enter the email address that will receive the notification mails in the Primary email or the Secondary
email field.
d Click Send a test mail to see if your email settings are set up properly.
e Click Save to save the configuration.
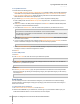
SMS
You can set up SMS notification to receive system notifications from Surveillance Station via SMS messages.