
User's Manual


Synology DiskStation User's Guide
Based on DSM 4.0
43 Chapter 5: Access your DiskStation from the Internet
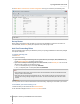
http://dnspod.com
http://changeIP.com
http://ddo.jp
http://www.selfhost.de/
http://www.dyndns.org/
http://www.no-ip.com/
http://www.3322.org/
http://www.twodns.de/
2 Tick Enable DDNS support and enter the hostname, username, and password for your Synology DiskStation.
3 Click Apply.
Note: Remember to enter the full domain name in the Hostname field. (e.g. philip1234.dyndns.org)
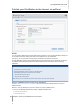
Method 2: Register a DDNS account from Synology
1 Tick Enable DDNS support, choose Synology from the Service provider drop-down menu, and then click
Register Now.
2 In the window that appears, enter the hostname you want in the Hostname field.
3 Enter your account information:
If you already have a Synology account, select Register a new hostname with an existing Synology
account and enter the account information in the Email and Password field to log in.
If you don't have a Synology account, select Create a Synology account and register a new
hostname, fill out all the required fields, and then click OK to register a new account.
4 Click Apply to finish. The newly registered hostname for your Synology DiskStation will be activated in just a
few seconds.
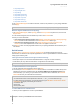
QuickConnect
Go to Main Menu > Control Panel > ezCloud > QuickConnect to manage the QuickConnect service.
QuickConnect is a solution that can help client applications to connect to your DiskStation via the Internet without
setting up port forwarding rules.
Client applications with QuickConnect support include the following:
DS file (see "Chapter 18: Communicate with Mobile Devices" on Page 161 for more information)
Cloud Station (see "Sync Files via Cloud Station" on Page 68 for more information)
Note: Before enabling QuickConnect for client applications, make sure relevant DSM services are already enabled.
To enable QuickConnect for client applications:
1 Tick the checkboxes for the applications and then click Apply.
2 You will see your ezCloud ID in the ezCloud Info section, which is a combination of numbers used by client
applications to gain access to DSM services (see To access DSM services via QuickConnect below for
more information). If you want to give your ezCloud ID a name that is easier to remember, tick Customize
ezCloud ID and enter your customized ID in the text field.
Note:
The customized ID should consist of alphanumeric characters, "-", and "_", and cannot start with a digit.
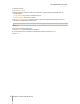
For better QuickConnect performance, it is recommended that you go to Main Menu > Control Panel > Router
Configuration to configure port forwarding for each service:
Cloud Station: 6690
DS file: 5005
DS file (HTTPS): 5006
To access DSM services via QuickConnect:
1 Launch your client application to connect to your DiskStation.