
User's Manual


Synology DiskStation User's Guide
Based on DSM 4.0
58 Chapter 7: Set Up File Sharing
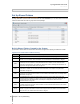
Name Description
NetBackup
The NetBackup folder is created automatically when Network Backup Service is enabled. For more
information about network backup, see "Network Backup" on Page 78.
usbshare
The usbshare[number] folder is created automatically when you connect an USB disk to
Synology DiskStation’s USB port. For more information about external USB disks, see "Manage External
Disks" on Page 38.
esatashare
The esatashare folder is created automatically when you connect an eSATA disk to Synology DiskStation’s
eSATA port. For more information about external eSATA disks, see "Manage External Disks" on Page 38.
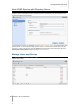
Create a Shared Folder
If you are admin or a user belonging to the administrators group, you can also create shared folders and assign
access privileges to the folders.
To create a new shared folder:
1 Click Create.
2 Enter the name and description for the shared folder, and select a volume
1
3 Tick Hide this shared folder in "My Network Places" if you want to hide the folder in Windows "My Network
Places".
where the folder will be created.
Note: If you have access privilege to a shared folder hidden in "My Network Places", you can still access it by
pressing Windows-R and entering \\Synology_Server_Name\Shared_Folder_Name in the Open field.
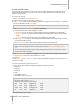
4 If you want to encrypt the shared folder, do the following:
a Tick Encrypt this shared folder in the window that appears, enter and confirm the encryption key, and then
choose the size of the AES encryption key in the Encryption key size(bit) field.
b Tick Mount automatically on startup to mount the encrypted folder automatically for access. If you didn't
tick this checkbox, the encrypted folder will be unmounted next time Synology DiskStation restarts. To view
or access an unmounted folder, you will need to mount the folder manually by importing or entering the
encryption key.
5 If you want to define Windows ACL privileges for the shared folder, click the Windows ACL tab. See "Define
Windows ACL Privileges for Shared Folder" on Page 61 for more information.
6 If you want to index contents within this shared folder, click the File Indexing tab. See "Index Shared Folder
Contents" on Page 62 for more information.
7 Click OK.
Note: One Synology DiskStation can contain up to 100 or 200
2
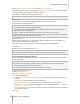
Remove a Shared Folder
shared folders, including the built-in shared folders.
If you are admin or a user belonging to the administrators group, you can remove any shared folder created by
yourself.
To remove a shared folder:
1 Select the shared folder you want to remove from the shared folder list.
2 Click Delete, and tick the checkbox on the dialogue prompt for confirmation.
3 Click OK.
Important: Removing any shared folder also removes all data within it. If you still need the data, back them up first.
---------
1
Multiple volumes are available only on DiskStation with more than 1 bay.
2
200 shared folders are supported on specific models only. Visit www.synology.com for more information.