
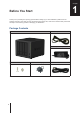
Installation Manual


7
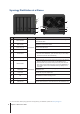
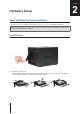
Chapter 2: Hardware Setup
•
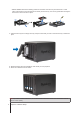
For 2.5” drives:
Remove the fastening panels from the sides of the drive tray and store them in a safe
place. Place the drive in the blue area (shown below) of the drive tray. Turn the tray upside down and tighten
the screws to secure the drive in place.
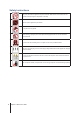
3
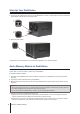
Insert the drive tray into the empty drive bay and push it back until you hear a click when the tray is locked into
place.
4
Repeat the steps above to assemble the other drives you have prepared.
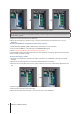
5
Drives are numbered as shown below:
1
2
3
4
1
2
3
4
Note:
If you want to create a RAID volume, we recommend that all installed drives are of the same size to make the
best use of drive capacity.