User’s Guide (Document #: SDS2.0-050915_enu) Based on DS2.0 Ver. 2.
Synology DS-101j Copyright Notice All title, copyright and other intellectual property rights in and to the Software Product (including but not limited to any relevant media, images, photographs, animations, video, audio, music, text, and applets incorporated into the Software Product), the accompanying manuals and other documents, and on-line or electronic documents, if any, (collectively “Software Product”) are owned by Synology Inc. Unless otherwise expressly licensed by Synology Inc.
Synology DS-101j Limited Warranty Synology provides limited warranty for its product only to the person or entity that originally purchased the product from Synology or its authorized distributor or retailer. Synology guarantees that every hardware portion of the product will be free from physical defects in material and workmanship for one year from the date of purchase. If the product proves defective during this warranty period, contact with the local dealer in order to obtain assistance.
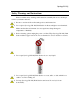
Synology DS-101j Safety Warnings and Instructions Please read this safety warnings and instructions carefully before use, and keep it well for your future reference. 1. Be sure to read and follow all warning notices and instructions. 2. Do not place Synology DS-101j Disk Station in direct sunlight or near chemicals. Make sure that the environment does not experience abrupt changes in temperature or humidity. 3. Before cleaning, please unplug the power cord first.
Synology DS-101j 7. There are slots on the side covers for ventilation. To make sure Synology DS-101j Disk Station is operating under normal condition, please do not block or cover those slots to avoid its being overheat. 8. The operation temperature is from 50°F to 90°F (10°C to 35°C). Care must be taken to allow sufficient air circulation or space between units. 9.
Synology DS-101j Table of Contents Copyright Notice................................................................................................................. 2 Trademark Notice ............................................................................................................... 2 Limited Warranty................................................................................................................ 3 Revisions.........................................................................
Synology DS-101j 3. Share ..................................................................................................................... 54 4. Time ...................................................................................................................... 59 5. Hardware Manager................................................................................................ 60 4.3 Network (Network Setting).....................................................................................
Synology DS-101j About this User’s Guide This User’s Guide covers the Synology DS-101j Disk Station’s hardware, installation, operation and troubleshooting, etc. Each chapter provides detailed information and helps you acquire clear concepts of the operation of the Synology DS101j Disk Station. Enjoy your use of Synology DS-101j Disk Station! Organization of This User’s Guide Chapter 1, Get to Know your DS-101j Disk Station Describes the features of Synology DS-101j Disk Station in detail.
Synology DS-101j Chapter 1 Get to Know your DS-101j Disk Station 1.1 Introduction Congratulations on your purchase of Synology DS-101j Disk Station! Synology DS-101j Disk Station is a 6-in-1 server specially designed for SOHO, home users, and workgroups. Integrating a file server, backup server, and printer server, Synology DS-101j Disk Station provides file storing and sharing, automatic file backup, and USB printer sharing to meet SOHO and home users’ demands.
Synology DS-101j In addition, the Synology DS-101j Disk Station also offers an FTP service. You can use the FTP service to upload and download files directly from the Web management Graphic User Interface (GUI) of the Synology DS-101j Disk Station. Through the FTP service, you can share all kinds of data with your friends on the Internet. For business people, you don’t need to carry the data you need with you, but use FTP to put it on the Internet, and you can open it anywhere through the Internet.
Synology DS-101j 11
Synology DS-101j 1.2 Get Started Before use, please read this User’s Guide thoroughly and use the DS-101j Disk Station only in accordance with the instructions in the User’s Guide. Also keep this User’s Guide in a secure place where it can be referred to easily. Packing List Before you begin, please open the box and make check off the package contents to verify that you have received the items below. Warning: HDD is not included.
Synology DS-101j 1.3 Install HDD 1. Prepare a 3 1/2 “ IDE HDD which is brand new or never been formatted by DS101j Disk Station, and adjust the jumper to “Master” position. 2. Screw up the two HDD holding brackets on both sides of the HDD. 3. Take off the side cover with USB COPY button, being careful to keep the cable connected to the main board. 4. Put the USB cable underneath the HDD cable. This is to eliminate electromagnetic waves.
Synology DS-101j 5. Connect the power plug and IDE HDD cable to the HDD. 6. Attach the HDD brackets to the main board using 4 screws provided. 7. Attach the aluminum foil sticker between the hard disk and LAN port as described in the picture. This can also help to eliminate electromagnetic waves. 8. Adjust the IDE HDD cable and close the side cover.
Synology DS-101j 9. Tighten the last two screws on the back of the side cover to finish the HDD installation. Warning: Please do not have AC adapter connected to the power when installing the HDD during above steps. 10. Connect the AC adapter and the LAN cable to the DS-101j. Press the power button, and the POWER LED will flash while processing a self-test for about 40 seconds. You will hear a beep sound after the DS-101j completes the self-test, and then the POWER LED becomes still.
Synology DS-101j 1.4 Synology DS-101j Disk Station Applications With keen innovation and state-of-the-art design technology, DS-101j Disk Station is an ideal NAS device for the following applications. Small Office and Home Office Small business users, such as accountants, art designers, dentists, lawyers, and real-estate brokers often store years of valuable client information on their Windows or Mac PC hard drives without doing any backup or redundancy.
Synology DS-101j family. The Synology DS-101j Disk Station is easy to install, configure, and operate for home users. It’s a DHCP-enabled device. When it’s connected to an IP sharing Router, it will search for and acquire an IP address automatically. There is a copy switch on the front panel. You just need to press this to save pictures, videos, image files and data onto DS-101j Disk Station from a USB device. It’s quick and easy.
Synology DS-101j 1.5 Synology DS-101j Disk Station Advantages 6-in-1 Server The Synology DS-101j Disk Station is a 6-in-1 server. A file server for file storing and file sharing; a backup server which can back up files automatically for Windows clients with the installation of the free Data Replicator software; and a printer server to share USB printer throughout the network. In addition, it can perform as a FTP server to provide high-speed data transfer, a static web server, and a photo browser.
Synology DS-101j • Automatic file backup for Windows clients with installation of Synology Data Replicator • Easy to use Web-based Synology management UI and user friendly Webbased help • Network Time Protocol (NTP) Support • HDD sleep mode support High performance and high throughput for data storage Noise Free With a fan-less design, the Synology DS-101j Disk Station provides users with a quiet and noise-free office environment. USB 2.0 Support There are three USB 2.0 ports available to use.
Synology DS-101j 1.6 Limitations 1. DS-101j supports up to 1 USB printer with a USB hub or without. 2. DS-101j supports up to 3 USB disks without a USB hub, and multiple card readers. 3. USBCopy function only supports USB disks under 4GB capacity. 4. Some digital cameras are defined as a USB still image device, such as Canon's, and the DS-101j will support USB Copy function only (No USB share function support). 5. Please refer to "Recommendation" before connecting a USB device. 6.
Synology DS-101j 1.7 Software Features Network Transport Protocols: TCP/IP AppleTalk Network File Protocols: Microsoft Networks CIFS Apple File Protocol AFP 3.0 Client Support: Microsoft Windows 98 / ME / NT 4.0 / 2000 / XP / Windows Server 2003 Apple Macintosh OS 7.x, 8.x, 9.x, 10.
Synology DS-101j 1.8 Hardware Specifications Processor: Intel IXP420BB Memory: 32MB SDRAM 2MB Flash IDE Port: 1 X IDE Port for HDD Network Connection: RJ-45 10/100Mbps Ethernet USB Support: USB 2.0 support Up to 480Mbps (High Speed Mode) or 12MBps (Full Speed Mode) for data transmission 1 X USB printer supported (For Mac users, DS-101j supports only USB printers with PostScript.
Synology DS-101j Chapter 2 Install your DS-101j Disk Station 2.1 Synology DS-101j Disk Station External Components Front Panel A. LED meanings POWER LED – The POWER LED light will blink when turning on and shutting down the DS-101j Disk Station. It will remain lit up while the machine is powered on. STATUS LED – The STATUS LED shows the internal hard drive’s status.
Synology DS-101j C. USB COPY button with LED – The USB COPY button will light up when you plug in a USB device. Press this button and it will copy the data from the connected USB device to the DS-101j Disk Station’s internal HDD. D. USB ports – The DS-101j Disk Station offers three USB ports for adding external hard drives, USB printers, or other USB devices. One USB port is on the front panel, and other two are on the back panel. Back Panel A.
Synology DS-101j 2.2 Table of LED Descriptions The table can help you get to how DS-101j Disk Station is working by LED status. LED Indication Color Status Blinking Power Blue Solid Light Light off Solid green Light Solid orange light Status Blinking orange Green/Orange light HDD Green LAN Green Rotating 5 sec. solid orange light & 5 sec. blinking orange light Light off Blinking Light off Solid Light Blinking Light off 25 Description 1. During System boot up 2.
Synology DS-101j Chapter 3 Install your DS-101j Disk Station 3.1. DS-101j Disk Station Quick Installation Step 1. Please check the following conditions for connecting DS-101j on the network. Condition 1, Office Network: 1. Connect the AC power adapter to the DS-101j Disk station, and plug the AC power cord into a power outlet. 2. Plug the RJ-45 LAN cable into the DS-101j Disk Station, and connect the other side of the LAN cable to your switch/hub/router. 3.
Synology DS-101j Condition 3, Home Network without IP Sharing: 1. Connect the AC power adapter to the DS-101j Disk station, and plug the AC power cord into a power outlet. 2. Without IP sharing, you need to install a router to set up the network first. 3. Plug the RJ-45 LAN cable into the DS-101j Disk Station, and connect the other side of the LAN cable to your switch/hub/router. (Please refer to the schematic as the above.) 4. Press the Power button to start DS-101j Disk Station.
Synology DS-101j Step 2. Run the setup utility – DSAssistant 1. Insert the DS Resource CD into your PC’s CD-ROM drive. 2-A Windows users: 1) An auto-run menu should appear after a few seconds. 2) If the auto-run menu does not appear, click Start button on the bottom left of the screen, and select Run. Enter D:\autorunmenu.exe (where D is the letter of your CD-ROM drive) into the Open window and click OK. The auto-run menu will appear soon. 3) After the above is done, refer to 4 to continue.
Synology DS-101j 2-B Mac users: Warning: DS-101jj Disk Station does not support installing on Mac OS 9. 1) Double click on the icon of CD-ROM. 2) Double click on the icon to open it and select the operation system you use. 3) Double click on DSAssistant icon to run the program. 4) After the above is done, refer to 3 to continue.
Synology DS-101j 3. The setup of the DS-101j Disk Station is performed using the following steps: Please perform the following steps to complete the setup of the DS-101j Disk Station. Connect the AC power adapter to the DS-101j Disk station, and plug the AC power cord into a power outlet. Click Next to continue. 4. Plug the RJ-45 LAN cable into the DS-101j Disk Station, and connect the other side of the LAN cable to your switch/hub/router or PC/notebook. Click Next to continue.
Synology DS-101j 5. Press the power button on the DS-101j Disk Station’s front panel to turn the DS101j Disk Station on. Wait until the POWER LED becomes solid in blue light. Click Next to run DSAssistant. 6. DSAssistant will help you to finish the setup simply in a few clicks. If you want to set up more than one DS-101j Disk Station please set them up one by one. 7. DSAssistant will scan the network and list the system that is not configured yet.
Synology DS-101j 10. Choose to set up the Disk Station step by step by yourself, or to complete the system configurations automatically using One-Click Setup. The wizard will then automatically assign a DHCP IP for the system. 11. If you chose One-Click Setup, please refer to Step 17 to continue. 12. Enter a System name. The default system name is DiskStation. Enter a new system name if you want to change the default one, and click Next to go on. Keep the system name in mind for later use.
Synology DS-101j 13. Enter the administrator’s password (set the password by yourself) and re-enter to confirm it; then click Next to go on. Keep the password in mind for later use. 14. Now, select the network setting. You can get it automatically or you can set the IP manually. Then click Next to go on.
Synology DS-101j 15. Please select the time zone of your location. Then enter the date and time of the system. Then click Next to continue. 16. Check the settings again and if they are correct, click Finish.
Synology DS-101j 17. Refer to the window to check progress. 18. While the HDD is being formatted, the POWER LED will start blinking again. Please wait until the POWER LED shows a constant blue light, and the STATUS LED a constant green light. 19. Congratulations! The DSAssistant setup has now completed successfully.
Synology DS-101j Step 3. You can start to use DS-101j Disk Station. Welcome to use the DS-101j Disk Station; and you can start to store your data. 3.1. After the DSAssistant setup completed, please enter the administrator’s password which you entered in 3-13, and you can start to use the DS-101j Disk Station. 3.2. The system will automatically display the mapped drive/volume (public share), at the end of setup. 3.3. You can start to store your data to this drive/volume (public share.) 3.4.
Synology DS-101j Step 4. Map drive of shared network folder that you will often access in the future. Warning: Map drive function is for Windows only. Mapping a shared folder as a mapped network drive makes it easy and quick to access the shared folder from My Computer on your desktop. 4.1. Choose your DS-101j Disk Station, and click Map Drive on the left side.
Synology DS-101j 4.2. Map drive wizard will list the shared network folders that you can access on the selected DS-101j Disk Station. Click on the folder you want to connect, and click Next to continue. 4.3. Enter a user name in Account column, and password in Password column. Click Finish to continue.
Synology DS-101j 4.4. You will see the following page if you map a network drive successfully. You can either enter the shared folder by clicking Finish button or through “My Computer” later on.
Synology DS-101j 3.2. Tips – Without DS Resource CD, you can also use and manage DS-101j easily with the following tips. 1. Copy or access data on DS-101j Disk Station from PC. 1.1 Click “Start” at the bottom. Select “Run” and click it. 1.2 Enter “\\system-name” (type two backslashes followed by the system name; the system name should be the same as what you entered in 3-12; and if you didn’t change the system name, please enter \\DiskStation) and click “OK” to open shares on DS-101j Disk Station.
Synology DS-101j 1.3 Then you can see all shares that can be used, including the public share. Access “public” and then you can start to use this folder. For example, you can copy some data and store it to this “public” folder.
Synology DS-101j 2. Use Microsoft Internet Explorer to manage DS-101j Disk Station from PC or Mac. 2.1 Open your Microsoft Internet Explorer. (IE 6.0 or above for PC, 5.2 or above for Mac.) 2.2 Enter “http:// system-name:5000” (type two forward slashes followed by the system name; the system name should be the same as what you entered in 3-12. If you didn’t change the system name, please enter http://DiskStaion:5000) and click “Go” button. 2.
Synology DS-101j 2.4 Then you can start to manage your DS-101j Disk Station from the management page.
Synology DS-101j 3. Use Microsoft Internet Explorer to change your user information on DS-101j Disk Station. 3.1 Open your Microsoft Internet Explorer. (IE 6.0 or above for PC, 5.2 or above for Mac.) 3.2 Enter “http:// system-name:5000” (type two forward slashes followed by the system name; the system name should be the same as what you entered in 3-12. If you didn’t change the system name, please enter http://DiskStaion:5000) and click “Go” button. 3.
Synology DS-101j 3.4 Then you can view your account information on this Disk Station and modify it.
Synology DS-101j Chapter 4 Manage your DS-101j Disk Station Please note that the DS-101j Disk Station only supports browser based management using Internet Explorer 6.0 or above for PC, 5.2 or above for Mac. 4.1 Home (Home Information) 1. Summary In this page you can see the basic information of the system, including your server name, IP address, unused space, and disk usage. You can also see the clear sitemap shown in the middle of this page.
Synology DS-101j 2. Status In this page you can see a summary of all system devices and their status. The information is only for your reference. You will not be able to do any modifications here. If you want to change any settings, please go to Wizard in Tools. (4.
Synology DS-101j 3. Log In this page you can see five items, which are System log, Connection log, Current connection, Backup log, and USB Copy log. These five logs are just like a diary keeping a record of all the actions and events on the DS-101j Disk Station. In this way, you will be able to know what has happened on your DS-101j Disk Station by checking these logs, furthermore, you can also check the users who are now accessing the system resources.
Synology DS-101j 4. About In this page we have put our Copyright Notice and Trademark Notice for your reference.
Synology DS-101j 4.2 System (System Setting) 1. User In this page you may add or remove users who can access the DS-101j Disk Station. A user account is assigned its name and password by the administrator. This password is used to obtain the data inside the shared folder. If a user does not have the proper user account credentials, they will be denied when accessing data.
Synology DS-101j To create a new user Step 1 Click Create button to add a new user. Step 2 Enter the name of the user in the User name column; this should reflect the user added. Step 3 Enter the user’s full name in the User description column. The user description will help to identify different users on the DS-101j Disk Station. Step 4 Enter the user’s password. The password is associated with the user. It can be up to 12 characters and can contain hyphens, spaces, and underscores.
Synology DS-101j 2. Group In this page you may classify users who can access to DS-101j Disk Station into groups. Setting up groups can help you assure data security. For example, a user group is a group of users with specific access privileges to a specific shared folder. You can create groups here as well. For example, a businessman may want to create an “Executive” group for adding all of its managers and supervisors to this group.
Synology DS-101j To create a new group Step 1 Click Create button to add a new user group. Step 2 Enter the name of the group in the Group name column; this should reflect the types of users added. Step 3 Enter a description of the group added in the Group description column. The group description is used to identify different groups on DS-101j Disk Station. One brief sentence or phrase regarding the users inside of the group is suggested.
Synology DS-101j 3. Share In this page you may create folders so that you can store data on the DS-101j Disk Station via network. Meanwhile, you may also assign access privileges of users or groups on the local network. Access to shares can be controlled via Group and User permissions. By default, there are two shares called “public” and “usbshare” that cannot be deleted.
Synology DS-101j To create a new share Step 1 Click Create button to add a new share. Step 2 Enter the name of the share in the Share name column; this should reflect the purpose of shares added. Step 3 Make some description about the share added in the Description column. The share description is used to identify different shares on the DS-101j Disk Station. One brief sentence or phrase regarding the use of the share is suggested. Step 4 Click “OK” to apply all settings.
Synology DS-101j To assign privileges of users and groups to access shares: Warning: Before you assign access privileges, please note two following points: If your account name is not on the user list, the system will automatically transform your account name into “guest”. So that you won’t be able to access the share folder, which was set to be accessed by some specific users or groups. If you must assign privilege to secure shares, we strongly suggest you: a. Go to User in System (P.
Synology DS-101j Step 1 Click Edit to turn on users or groups permissions. By assigning different access privileges you have the ability to secure a share. Step 2 You can assign different privileges to users or groups. There are three kinds of privileges which are No access (NA), Read only (RO), and Writeable (RW). Click on the users or groups you want to assign privileges to.
Synology DS-101j Step 3 Click the privilege button you wish to assign to the users or groups you chose in the previous step, and click OK to apply all setting. Step 4 Click Continue button to complete the settings you made.
Synology DS-101j 4. Time In this page you may set up time. The time must be set to work on exact schedule and maintain proper logs. Choose the time zone first so the DS-101j Disk Station can configure the time correctly. You can either set the proper time and date manually or connect to an NTP (Network Time Protocol) time server. The server will help you to set up the time automatically.
Synology DS-101j 5. Hardware Manager In this page we provide three services. Power Recovery Check the checkbox to enable the Power Recovery function. The system will boot up automatically when power is supplied after the system shuts down abnormally because of power failure. Write Cache Support Check the checkbox to turn on disk write cache support. Disk write cache is only effective on the hard disks that support it. I/O performance will improve when the disk write cache is turned on.
Synology DS-101j To set up the time Step 1 Click the Idle time column, and select the time you wish. Step 2 Click OK to apply all setting.
Synology DS-101j 4.3 Network (Network Setting) 1. LAN In this page you will have to enter a server name for identifying the system on the network. Below this you need to choose an IP setting. By default, the DS-101j Disk Station will attempt to obtain an IP address from a DHCP server. If there is no DHCP server available you can assign an IP manually based on your network environment.
Synology DS-101j 2. Win/Mac OS In this page, the setting of Workgroup or AppleTalk Zone allows you to access the DS-101j Disk Station through “My Network Places.” Workgroups and Zones are used to organize networks. A Workgroup is a collection of Windows computers on the same network; a Zone is a logical grouping unit of all devices on an Apple Network. If you want the DS-101j Disk Station to be browsed through “My Network Places” then it needs to be placed in the same Workgroup as the PC’s on the network.
Synology DS-101j Workgroup A Workgroup means a collection of computers that are under the same network; setting workgroups allows you to manage network access easily. You can determine the Workgroup and WINS server IP. ** WINS (Microsoft Windows Internet Name Service) WINS is a Net BIOS name-to-IP-address mapping service, so it is easy for Windows users to configure and register their DS-101j Disk Station through TCP/IP with a WINS server.
Synology DS-101j 3. FTP Service DS-101j Disk Station offers a facility for downloading or uploading all kinds of data easily and efficiently using Microsoft Internet Explorer 6.0 or above. This page allows you to control whether the FTP service is available. Check the “Enable FTP Service” checkbox and click “OK”. Users are required to enter their passwords before they can start to use the FTP service.
Synology DS-101j 4. Web Service DS-101j Disk Station offers Synology Photo Station as an online album, and Synology Web Station as a web server. The Synology Photo Station is an autobuild service that will generate image files automatically, allowing users to easily create online albums. The Synology Web Station is a simple service for building a static web site easily with .html files.
Synology DS-101j 5. Mail (E-mail Notification) In this page you may enter your e-mail address. The DS-101j Disk Station will send e-mails to notify the administrator when any important and critical events or errors occur. Please enter the SMTP server and assign up to 2 e-mail addresses for getting the notifications. SMTP (Simple Mail Transfer Protocol) Most e-mail system that sends mail over the Internet use SMTP to send messages from one server to another.
Synology DS-101j 4.4 Tools 1. Wizard In this page the Wizard will guide you through setting up the DS-101j Disk Station step by step. Click on the Run Wizard button to go through the settings. Step 1 System Setting. You will need to confirm your server name and your password. Click Next to continue.
Synology DS-101j Step 2 LAN Setting. You will need to choose whether you want to get the IP directly from a DHCP server or manually. Click Next to continue. Step 3 Time Setting. You will have to select the time zone of where you are, and set up the time of the DS-101j Disk Station. Click Next to continue.
Synology DS-101j Step 4 You will need to set up the workgroup and code page. After going through all the steps, click Finish to apply all settings. It will take some time to apply settings you made. Please wait.
Synology DS-101j 2. Configuration In this page you may backup the system setting, and restore the system setting in the future. You can backup the system configuration (not data; to backup data, please refer to “Backup.”) and save it as a .dss file, or you can also restore the configuration from a selected .dss file.
Synology DS-101j 3. Factory Default In this page you may replace all the system settings with factory default settings. However, you can choose if you want to keep the current settings or restore back to the original factory settings when formatting the HDD.
Synology DS-101j 4. Update By connecting to Synology Website, you can check if the current firmware is the updated one; if it’s not, you can also link to Synology Website to download the latest version and update it from this page. To update the firmware of the DS-101j Disk Station, please perform the following steps. 1. Enter the management User Interface of the DS-101j Disk Station. Go to Update in Tools. You may get the firmware version of this DS-101j Disk Station. 2. Go to Download at http://www.
Synology DS-101j 5. Backup This page allows the DS-101j Disk Station’s data to be backed up to an attached USB HDD. Backing up data is important in the event that the DS-101j Disk Station is being damaged. Without backing up, you will have the risk of losing data if a catastrophe happens. To do data backup, please plug in a USB HDD, and read the following 4.5-1 USB Disk to format your USB HDD first.
Synology DS-101j After the USB HDD is formatted for data backup, you will see the page below. You can select shares you want to backup first and then choose whether to backup immediately, or to set a time so that the data will be backed up according to a schedule.
Synology DS-101j 4.5 Device (USB Settings) 1. USB Disk An attached USB disk can be configured as an additional shared folder. If the USB disk is setup as a backup disk, it cannot be shareable and accessible. As a USB backup disk, the DS-101j Disk Station will format the attached USB disk.
Synology DS-101j Connecting USB disks to DS-101j Disk Station will enlarge the capacity of the DS-101j Disk Station. The data on the USB disk can be shared if the name of the data starts with “usbshare.” This share will be removed automatically when the USB disk is ejected from the system. USB Disk Formats There are two different types of format for you to choose, FAT32 and Native format. FAT32 is a format you can use with all Windows PC and Mac that runs Mac OS X.
Synology DS-101j 2. USB Printer You may see this page before you plug in your USB printer. An USB printer can be used if you connect it with a hub. For more instructions for using a USB shared printer, please go on to the next page.
Synology DS-101j By connecting a USB printer to DS-101j Disk Station, you will be able to share the USB printer through the network. Click Refresh button and USB printer status will become active as shown in the page below. Refresh the USB printer status Click Refresh for updated status of the USB printer. Eject the USB printer Please remember to always click Eject button, before you remove the printer.
Synology DS-101j Steps for setting up USB printer in Windows 1. Open Computers Near Me in My Network Places and double click on your DS101j Disk Station. 2. Double click on usbprinter; the system will prompt you to install a correct driver. 3. Click Finish when the setup is done. Then you may start using the printer.
Synology DS-101j Steps for setting up USB printer in Mac OS 10.2.X running AppleTalk Warning: For Mac users, DS-101j Disk Station only supports USB printers with PostScript. 1. Follow the path as Go / Applications / Utilities.
Synology DS-101j 2. Find Print Center and double click on it to open a dialog box. 3. Select Add to set up a new printer.
Synology DS-101j 4. Select the correct server and choose the type AppleTalk. 5. Select Generic for Printer Model.
Synology DS-101j 6. Click Add to finish.
Synology DS-101j Steps for setting up USB printer in Mac OS 10.2.X running TCP/IP 1. Follow the path as Go / Applications / Utilities.
Synology DS-101j 2. Find Print Center and double click on it to open a dialog box. 3. Select Add for setting up a new printer. 4. Choose the type IP printing.
Synology DS-101j 5. Enter the printer’s address. 6. Uncheck Use default queue on server, and enter ‘usbprinter’ for Queue Name. 7. Select Generic for Printer Model. 8. Click Add to finish.
Synology DS-101j Steps for setting up USB printer in Mac OS 10.3.X running AppleTalk 1. Follow the path as Go / Applications / Utilities.
Synology DS-101j 89
Synology DS-101j 2. Find the Printer Setup Utility, and click it to open a dialog box. 3. Select Add for setting up a new printer.
Synology DS-101j 4. Choose AppleTalk. 5. Select the correct server. 6. Select Generic for Printer Model. 7. Click Add to finish.
Synology DS-101j Steps for setting up USB printer in Mac OS 10.3.X running TCP/IP 1. Follow the path as Go / Applications / Utilities.
Synology DS-101j 2. Find Printer Setup Utility, and click it to open a dialog box. 3. Select Add for setting up a new printer. 4. Choose IP Printing.
Synology DS-101j 5. Select LPD/LPR for Printer Type. 6. Enter the printer’s address. 7. Enter ‘usbprinter’ for Queue Name. 8. Select Generic for Printer Model. 9. Click Add to finish.
Synology DS-101j Steps for setting up USB printer in Mac OS 9 running AppleTalk 1. Click on Chooser. 2. Under the LaserWriter 8, click the server. 3. Click Setup and then click Generic.
Synology DS-101j 4. Finish.
Synology DS-101j Steps for setting up USB printer in Mac OS 9 running TCP/IP 1. Launch Desktop Printer Utility. 2. Select Printer (LPR) and click OK.
Synology DS-101j 3. In the LPR section, click Change to bring up the Internet Printer window. 4. Enter the IP address or its domain name of DS-101j Disk Station. 5. Enter usbprinter for Queue Name. 6. Click on Verify to make sure the printer was found. 7. Click OK.
Synology DS-101j 8. Go to File menu and select Save. 9. Enter a name and location for the desktop printer icon and click OK. The default name is the printer’s IP address, and the default location is at the desktop.
Synology DS-101j 10. Finish.
Synology DS-101j 3. USBCopy By connecting a USB device to the front panel USB port of the DS-101j Disk Station, all data can be copied to the internal hard disk by pressing the USBCOPY button on the front panel of the DS-101j Disk Station. You can choose a share folder for storing data copied from the USB device here. The DS-101j Disk Station will automatically create a “USBCopy” folder in the specified share folder to store all data.
Synology DS-101j To access the data you copied from your USB device, please follow the instructions below. Step 1 Go to My Network Places. Step 2 Double click on Computers Near Me. Step 3 Double click on your system name of DS-101j Disk Station. Step 4 Double click on the specified share.
Synology DS-101j Step 5 Double click on USBCopy. Step 6 You will see the folders named by the date and time the Copy button on the front panel was pressed.
Synology DS-101j Chapter 5 Use Data Replicator Having data backed up is one of the methods to ensure data completeness. However, people are often too busy to do backup regularly. In order to have your files backed up in an efficient and real-time way, Data Replicator fully automates the backup process from Windows clients to the DS-101j Disk Station. It can: 1. Monitor specified folders on your computer and perform immediate backup for modified files to the DS-101j Disk Station; 2.
Synology DS-101j 5.1 Before You Begin 1. Install DS-101j Disk Station Before using Data Replicator, you must make sure the following thing: Your computer and DS-101j Disk Station have the same encoding setting. 2. Basic Computer Requirements • 5MB Hard Disk Space • Operating System: Windows 98/ME/2000/XP • Optimal Screen Resolution: 1024*768 or above • Microsoft Networking over TCP/IP protocol enabled, and the networking to DS101j Disk Station is properly configured. 3.
Synology DS-101j If the window above didn’t appear, please go to Start on the left bottom of the screen and select Run. Enter D:\autorunmenu.exe (where D is the letter of your CD-ROM drive) in the Open: box and click OK. The auto-run menu should appear. Then you can install Data Replicator according to the instructions on the screen. To make sure Data Replicator is installed properly, please shut down all running programs or remove the old version of Data Replicator before installation.
Synology DS-101j 5.2 Use Data Replicator 1. Backup Windows clients’ data to DS-101j Disk Station 1.1 Uploading A. All files At the first time running Data Replicator, you need to backup all the files in the selected folders to DS-101j Disk Station. After that, you may monitor for the modified versions. a. Click “Browse” on the top of the window to enter a server-searching window.
Synology DS-101j b. Select which DS-101j Disk Station you want to backup the file to. And click OK. c. Check the folders you want to backup and monitor in the “Source” list, and click “Upload” to go on.
Synology DS-101j d. Make sure the “All Files” option is selected, and click “OK” to start the upload. If this file version has a special representative meaning, you can select the option “Create a tag after upload” so that after the upload is complete this file version can be created with a tag to allow for easy restoration in the future. Please refer to “3. Tag Management” for the usage of “tags.” 1. Data Replicator only monitors the folders in the local hard disk.
Synology DS-101j C. Modified files since a designated time If for personal reason you have to upload files modified after a specified time, select the “Modified files since a designated time” and click “OK.
Synology DS-101j 1.2 Monitoring After first-time backup, you can continue monitoring the folders in your computer. Any changes made to the files in the folders will be uploaded to the DS-101j Disk Station automatically. To monitor the folders, select file folders and click the “Monitor” button, and the Data Replicator program will be minimized to the system tray to perform monitoring.
Synology DS-101j 2. Restore data to your computer 2.1 Select the “Restore” tab. 2.2 Select the destination where the file will be restored to in the “Restore to” section. 2.3 Select files or folders you want to restore, and click the “Restore” button, or right-click the files or folders and select “Restore.
Synology DS-101j 2.4 Choose which file version or tag to restore. Please refer to “3. Tag Management” for the usage of “tags.” 1. If you restore the files one by one, you can only choose which file version to restore. 2. If you restore multiple files and folders at a time, because different files and folders might have different versions, you can only choose to restore “Current Version” or a specific tag.
Synology DS-101j 3. Tag Management Data Replicator allows you to create tags up to 20. The purpose of creating a tag is to keep “the status of all files and folder on the DS-101j Disk Station at a specific time” on record. For example, if a software engineer has already completed program version 1.0 and is preparing to start coding version 2.0. To this engineer version 1.0 is the version with special representative meaning. While completing all version 1.
Synology DS-101j For example, if there are “file A” and “file B” on DS-101j Disk Station at the time you create “tag 22222” by uploading “file 1” and “file 2,” then “tag 22222” will tag “file A,” “file B,” “file 1,” and “file 2,” that is, in the future when you choose to restore “tag 22222,” not only “file 1” and “file2” will be restored, but also “file A” and “file B.” 3.2 Creating a new tag in the “Tag” tab. Please follow the steps below to create a tag: 1. Click the “Tag” tab. 2. Click “Create” button.
Synology DS-101j 4. Click “OK” to finish.
Synology DS-101j 4. Preferences 4.1 Files Uploading A. Upload before monitoring. When this option is checked, each time “Monitor” is executed, the program will check if there are files that have not been uploaded. If there are, the system will automatically upload these files. This is to prevent some files being updated but not uploaded. B. Upload before creating tag.
Synology DS-101j 4.2 File Copy A. Copy with compression In order to save storage space, when this option is enabled, the program will compress all backup files stored on the DS-101j Disk Station. B. Copy with encryption In order to ensure data security and prevent others from intercepting data, you can choose this option to set password protection for files in DS-101j Disk Station. 4.3 Setup A. Auto start when login. You can choose to run the program after logging on to Windows. B. Start with monitoring.
Synology DS-101j Chapter 6 Troubleshooting Here we have listed a few questions you might have when operating the Synology DS101j Disk Station, and we have listed some possible solutions to each question. 1. The DS-101j Disk Station does not work after the HDD was installed. Check If you’ve connected the DS-101j Disk Station with AC power adapter, power cord and RJ-45 LAN cable, put the plug in the power outlet, and pressed the Power button.
Synology DS-101j The USB device is not defective. Your USB device is not connected through a USB hub device. The USB device is formatted already. Change for another one if it’s defective. Change for another USB device. The DS-101j Disk Station doesn’t support USB storage devices through a USB hub. If it hasn’t been formatted yet, you can format it as a FAT32 file system from your PC or Mac. Please refer to 4.5-1 USB Disk in the User’s Guide for detailed instruction. 3.
Synology DS-101j 7. I can’t find DS-101j Disk Station on my computer. Check If you’ve unblocked DSAssistant in the firewall on your computer that is running Windows XP or protected by antivirus programs. Solution Click unblock button when the security alert message pops out. If DS-101j Disk Station has been connected to the network and turned on. If your computer is connected to the network. Connect DS-101j Disk Station to the network with RJ-45 LAN cable. And then turn it on.
Synology DS-101j Appendix A Suggested Periphery Suggested HDD Brand Model Size Seagate ST3200822A 200GB Samsung SV1604N 160GB Samsung SV1203N 120GB Hitachi IC35L180AVV207-1 185GB Hitachi HDS722525VLAT80 250GB Hitachi Deskstar 7K400 400GB Maxtor DiamondMax Plus 9 200GB Maxtor DiamondMax 16 160GB Maxtor DiamondMax 10 300GB Maxtor MaxLine II 5A300J0 300GB Maxtor MaxLine II Plus 7Y250B0 250GB WD WD1600 160GB WD WD2500 250GB Hitachi Deskstar 7K400 and Maxtor Diamond
Synology DS-101j Appendix B Technical Support 1. Hardware Problem If you need any assistance on hardware, please contact your local authorized Synology dealer or the suppliers. 2. Firmware Update If you need to upgrade your system, please visit www.synology.com to download the updated firmware version. 3. Installation and Setup Problem If you need any help while installing or setting up the system, please contact your local authorized Synology authorized local dealer or the suppliers.