SysKonnect SK-9Exx/9Sxx User Manual SK-9Exx and SK-9Sxx Gigabit Ethernet Server Adapters
SysKonnect SK-9Exx and SK-9Sxx Gigabit Ethernet Server Adapters User Manual (v1.00 / 4 January, 2005) Visit our web site: http://www.syskonnect.
Copyright © SysKonnect GmbH, 2004. All rights reserved. This manual refers to the adapters of the SysKonnect SK-9Exx/9Sxx Gigabit Ethernet Adapter Family. It describes the hardware and software installation and the functionality of the adapters. Contents are subject to change. Product and brand names are (registered) trademarks of their appropriate owners.
Conventions The following conventions apply to this manual. Warnings and Notes Used to indicate a potentially hazardous situation which, if not avoided, could result in death or serious injury. Example: dangerous voltage. Used to indicate a potentially hazardous situation which, if not avoided, may result in minor or moderate injury. Example: electrostatic discharge. i Used for additional information and advice.
Conventions Courier: Courier is used for the following elements: • • Terminal input to be entered by the user Terminal output issued by the system Examples: Enter sk98diag. If the test was successful, the message passed is issued. Underline Underline is used to identify hyperlinks. Example: Visit our web site:http://www.syskonnect.com.
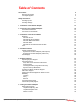
Table of Contents Conventions Warnings and Notes Font Styles applied 5 5 5 Safety Precautions Avoiding injuries Avoiding damage 11 11 11 1 Installation of the Network Adapter 13 2 Connection of the Network Adapter Transmission Distances Connection to the Network 15 15 15 3 Installation of the Driver Software Windows Windows NT 4.
Table of Contents Additional Functions of the Diagnostics Program Checking Other Displays and Data Starting the Main Program Reading Sensor Data Reading Configuration Data Reading Vital Product Data (VPD) Sample Usage of VPD / Asset Tag 35 35 35 36 36 37 38 7 Troubleshooting 41 8 Important Information Technical Support Returning an Adapter for Repair Additional Documentation and Updates Technical Specifications How to Identify your Network Adapter Type 43 43 43 44 45 47 Appendix A.
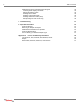
Table of Figures Figure 1: Insertion of the adapter into the computer 14 Figure 2: Connection of fiber-optics cables/plugs 16 Figure 3: Possible network configurations / connection options 23 Figure 4: Location of the LEDs (adapter variant 1) 25 Figure 5: Location of the LEDs (adapter variant 2) 26 Figure 6: Setup for loopback wrap plug testing 31 Figure 7: Typical display after a successful test (loopback wrap plug) 32 Figure 8: Typical error message from the diagnostics program 34 Figure 9
Table of Figures
Safety Precautions To protect yourself from injuries and avoid damage of the device, always observe the following safety instructions when installing the network adapter. Avoiding injuries Electrical current! Electrical current from power, phone, and communications cables can be hazardous. Never touch any electrical elements with bare hands. To avoid potential shock hazards: • • • • i Do not carry out any installation, maintenance, or (re)configuration work during a thunderstorm.
Safety Precautions For 1000Base-LX/SX adapters observe the following: Laser light! Laser light from fiber-optic transmission cables and components can damage your eyes. The laser components on the network adapter are Class 1 laser components. Class 1 lasers are considered incapable of producing damaging radiation levels during normal operation or maintenance and is, therefore, determined to be eye safe.
1 Installation of the Network Adapter The installation procedure in Hot-Plug systems may differ from the following. For Hot-Plug systems read the corresponding documentation. Have the computer manual ready and if necessary, a key and/or screwdriver to open the cover and remove the bracket. To install the adapter in the computer, proceed as follows: 1. 2. 3. 4. 5. i Switch off the computer in which the network adapter is to be installed. Disconnect the power cord from the power outlet.
1 Installation of the Network Adapter Figure 1.
2 Connection of the Network Adapter This chapter describes the physical connection of the network adapter to the network. General instructions for driver installation are given in chapter 3 “Installation of the Driver Software”. Transmission Distances Depending on the physical media (cable) different distances can be reached for transmission with the Gigabit Ethernet adapter: Adapter Type Physical Media Maximum Distance 1000Base-SX/LC (850 nm) 1000Base-SX 50.
2 Connection of the Network Adapter Figure 2. Connection of fiber-optics cables/plugs 7. 8. Turn on the computer and the switch. If no protocol driver has been loaded, go to chapter 3 “Installation of the Driver Software”. After driver installation, return to step 8 of this list. Check the link LED(s) to find out if the cable is connected correctly. If the appropriate LED is on, the connection is established and active.
3 Installation of the Driver Software The network drivers are located in the appropriate product directory on the enclosed installation CDROM and on the SysKonnect web site. The directory on the CD-ROM is organized into a number of subdirectories for the various operating systems. The subdirectories contain the driver files and the corresponding readme files. The readme files are available as ASCII text and in HTML format.
3 Installation of the Driver Software Windows SysKonnect offers drivers for Windows Server 2003, Windows XP, Windows 2000, Windows Me, Windows 98 SE, and Windows NT 4.0. Drivers downloaded from our web site are available in a packed format (.zip files). The downloaded file has to be unpacked before installation. Windows NT 4.0 The NDIS 4.0 32-bit Miniport driver for the SysKonnect SK-9Exx/9Sxx Gigabit Ethernet Server Adapter Family supports Windows NT 4.0. This driver does not support Windows NT 3.
Windows 19 Windows 98 Second Edition SysKonnect offers an NDIS 5.0 32-bit Miniport driver for the SysKonnect SK-9Exx/9Sxx Gigabit Ethernet Server Adapter Family supporting Windows 98 Second Edition (Windows 98 SE). This driver only supports Windows 98 SE and Windows Me. Due to the plug & play facility of PCI Express resp. PCI/PCI-X, Windows 98 SE is able to find, identify, and configure an adapter automatically. To install the driver, proceed as follows: 1.
3 Installation of the Driver Software 7. Type the path to the driver, e.g. e:\SK-9Exx\Windows\WinME, where “e” is the designation of the CD-ROM drive on your system. 8. Click NEXT. The window “Location of driver” is displayed. 9. Click NEXT to continue the installation. The menu “Windows has finished installing the new hardware device” is displayed. 10. Click FINISH. 11. Restart your computer. For more information, refer to the corresponding readme file. Windows 2000 SysKonnect offers an NDIS 5.
Linux 21 Windows XP and Windows Server 2003 SysKonnect offers an NDIS 5.1 32-bit Miniport driver for the SysKonnect SK-9Exx/9Sxx Gigabit Ethernet Server Adapter Family supporting Windows XP and Windows Server 2003. The installation procedure for Windows XP and Windows Server 2003 is identical. It is described for Windows XP. To install the driver, proceed as follows: 1.
3 Installation of the Driver Software Using the option EXPERT INSTALLATION, the driver is also compiled automatically and the resulting driver module object file is installed in a suitable location (similar to USER INSTALLATION). No source files of the driver are installed into the kernel directory. Only the driver module object file and the man page of the driver are installed on your system permanently.
4 Hardware Features The SysKonnect SK-9Exx/SK-9Sxx Gigabit Ethernet Adapter Family defines a series of network interfaces that combine server and workstation computers with the high-speed Gigabit Ethernet network (1000 Mbit/s) using fiber-optic and copper cables. At present there are twelve types available. They differ in terms of technology (PCI Express and PCI/PCI-X), number of ports, and transmission mode.
4 Hardware Features Adapter Characteristics The following table lists the characteristics of the SysKonnect SK-9Exx/9Sxx Gigabit Ethernet Server Adapter Family.
LED Displays 25 LED Displays Once the driver has been installed, the adapter is operational. The current status and speed are indicated by the LEDs. Adapter Variant 1 Figure 4.
4 Hardware Features Adapter Variant 2 Figure 5.
5 Software Features Operating System Support The drivers for the SysKonnect SK-9Exx/9Sxx Gigabit Ethernet Server Adapter Family support the following operating systems: • • Windows NT 4.0, Windows 98 Second Edition, Windows Millennium Edition, Windows 2000, Windows XP, and Windows Server 2003 Linux kernel 2.4.13 and higher stable versions The latest version of all available network drivers can be downloaded from the SysKonnect web site (see section “Additional Documentation and Updates”).
5 Software Features PXE / RPL Support The SysKonnect SK-9Exx/9Sxx Gigabit Ethernet Server Adapter Family supports both the standard PXE 2.1 (Pre-Boot eXecution Environment) and the protocol RPL (Remote Program Load). This allows networked computers that are not yet loaded with an operating system to be configured and booted remotely by an administrator. PXE resp.
User Diagnostics (DOS) 29 The following conditions have to be met in order for Hot-Plug to work on SysKonnect Gigabit Ethernet Adapters: • • • The target system has PCI Express resp. PCI/PCI-X Hot-Plug slots, i.e. the power can be switched on and off under the control of the operating system. The adapter is installed in one of the PCI Express resp. PCI/PCI-X Hot-Plug slots. The operating system supports PCI Express resp. PCI/PCI-X Hot-Plug on the target system.
5 Software Features For several operating systems, SysKonnect offers drivers that support VLAN tagging and thus can be applied for VLAN servers and terminal units. For more information on Virtual LANs, refer to the White Paper “Virtual Networks”, which can be found on the installation CD-ROM under “White Papers” or on our web site under “Technology”. Also see the corresponding readme files for the respective drivers.
6 Testing the Network Adapter Diagnostics Program The network adapter can be tested with the supplied diagnostics program (running on DOS). During testing the link of the tested port will be down, i.e. no data can be transferred. i During testing, observe the safety precautions given in chapter “Safety Precautions”.
6 Testing the Network Adapter To test the adapter, proceed as follows: 1. 2. 3. 4. 5. 6. 7. 8. 9. Switch off the computer. If the computer is still connected to the data network, unplug the data cable from the network adapter’s port. Connect the network adapter as follows: • For the simple test: Insert the protective plugs into the ports. • For the loopback test: Insert the wrap plug into the port. Boot to DOS. Wait until the operating system is loaded and the DOS prompt is displayed.
Diagnostics Program 33 Loopback Repeater Test To perform the loopback repeater test, you will have to connect the adapter to another adapter installed in a second computer running in repeater mode (further known as the “repeater computer”). The computer in which the adapter is installed, which is to be tested, is called “test computer”. To carry out the test, proceed as follows: 1. 2. 3. 4. 5. 6. 7. 8. 9. 10. 11. 12. 13. 14. 15. 16. 17. 18. 19. 20. 21. Install an adapter in the “repeater computer”.
6 Testing the Network Adapter Failure of a Test Figure 8. Typical error message from the diagnostics program For a test to be completed successfully, each of the following conditions must be met: • • • The network adapter operates correctly. The network adapter is cabled correctly for the test or is equipped with the correct plug. The network adapter has been installed correctly in the computer. The message failed does not necessarily imply that the network adapter is faulty.
Additional Functions of the Diagnostics Program 35 10. If necessary, remove the wrap plug from the port. 11. (Re)connect the ports to the data network. Additional Functions of the Diagnostics Program Checking Other Displays and Data In addition to performing the network adapter tests, the diagnostics program can also read out network adapter-specific data that may be useful for pinpointing the causes of failure.
6 Testing the Network Adapter Reading Sensor Data To read sensor data, proceed as follows: 1. 2. 3. Start the main program (see page 35). Select SHOW SENSORS in the main menu. A separate window will be displayed for the following sensor data: • Temperature of the board • Voltage on the PCI card (for PCI/PCI-X adapters only) • Voltage on the PCI I/O lines (for PCI/PCI-X adapters only) • Other supply voltages In the main menu, SHOW SENSORS changes to HIDE SENSORS.
Additional Functions of the Diagnostics Program 37 Figure 10. Display of configuration data Reading Vital Product Data (VPD) To read VPD, proceed as follows: 1. 2. Start the main program (see page 35). Select VPD DATA in the main menu. A submenu with the following options will be displayed: • EXIT (return to the main menu) • DISPLAY VPD DATA • CLEAR ERROR LOGS • ADD/MODIFY VPD DATA (you can enter user-defined data and keywords here) • DELETE VPD KEYWORDS Figure 11.
6 Testing the Network Adapter 3. Select the desired option or return to the main menu by selecting EXIT (default option). Sample Usage of VPD / Asset Tag Example You want to store the inventory number of the network adapter (123-45) in the asset tag. To store the inventory number, proceed as follows: 1. 2. 3. Look at all the VPD to determine the code for the asset tag. Start the main program (see page 35). Select VPD DATA > DISPLAY VPD DATA. The following screen is displayed: Figure 12.
Additional Functions of the Diagnostics Program 39 Figure 13. Screen showing updated asset tag For more information on the diagnostics program, refer to the corresponding readme file.
6 Testing the Network Adapter
7 Troubleshooting Problem What to do Another expansion card fails to work after the network adapter has been installed Make sure all cables are connected to the correct expansion cards. Make sure the expansion cards are correctly inserted. Check if any internal connections in the computer have been disengaged or were damaged during the installation of the network adapter. Check for resource conflicts in the computer. Check PCI Express resp. PCI/PCI-X configuration and resource allocation.
7 Troubleshooting
8 Important Information Technical Support If you encounter any problems, read the relevant chapters of the manual and the readme files on the CD-ROM. If you cannot solve your problems, consult our technical support.
8 Important Information 2. 3. 4. 5. i Complete the form. Return the form to us. We will send you a unique reference number and inform you if the product is still under warranty. Send us the faulty product packed in an antistatic bag, with a copy of the completed form enclosed in its original packaging (or comparable packaging). Write the reference number issued by SysKonnect clearly visible on the outer packaging.
Technical Specifications 45 Technical Specifications Network interface standard IEEE 802.3 and IEEE 802.3u (Ethernet and Fast Ethernet) IEEE 802.3ab and IEEE 802.3z (Gigabit Ethernet) IEEE 802.3x (Flow-control and Auto-negotiation) IEEE 802.1p (Quality of Services) IEEE 802.1q and IEEE 802.3ac (VLAN and VLAN tagging) Supported buses PCI/PCI-X: 64-bit PCI/PCI-X slots with clock speeds from 33 MHz to 133 MHz PCI Express: PCI Express 1.
8 Important Information Dimensions (max.) (without bracket) Temperature range Relative humidity Warranty SK-9E21: 118.4 mm x 60.3 mm SK-9S21: 167.64 mm x 57.3 mm SK-9E22: 118.4 mm x 68.94 mm SK-9S22: 167.64 mm x 64.41 mm SK-9E8x/SK-9E9x: 128.52 mm x 68.94 mm SK-9S8x/SK-9S9x: 167.64 mm x 64.
How to Identify your Network Adapter Type 47 How to Identify your Network Adapter Type If you are in any doubt, you can easily check which type of network adapter you have without having to open the computer cover. Simply compare the card’s fixing plate (in particular the ports and labeling) with the diagrams below. The type of adapter is also displayed in the header of the diganostics program (see section “Diagnostics Program”).
8 Important Information Adapter Variant 2 Model SK-9E21 SK-9E22 SK-9E81 SK-9E82 SK-9E91 SK-9E92 SK-9S21 SK-9S22 SK-9S81 SK-9S82 SK-9S91 SK-9S92 Interface/Port 10/100/ 1000Base-T Single Link 10/100/ 1000Base-T Dual Link 1000Base-SX Single Link 1000Base-SX Dual Link 1000Base-SX Single Link 1000Base-SX Dual Link Media Copper Copper Fiber Fiber Fiber Fiber Bracket
Appendix A. License and Warranty Information The Americas, Asia, Australia, New Zealand, Pacific Dear Customer, if you acquired your SysKonnect product in the UNITED STATES, CANADA or any other country in the AMERICAS, ASIA, AUSTRALIA, NEW ZEALAND, PACIFIC, the following license and purchase agreement applies to you. This is a legal agreement between you, the end user and SysKonnect Incorporation, a California U.S.A. Incorporation (SysKonnect Inc.). SysKonnect Inc.
Appendix A. License and Warranty Information Customer Remedies SysKonnect's entire liability and your exclusive remedy shall be, at SysKonnect's option, either return of the price paid, or repair or replacement of the SOFTWARE or HARDWARE that does not meet SysKonnect's Limited Warranty and which is returned to SysKonnect Inc. with a copy of your receipt. This Limited Warranty is void if failure of the SOFTWARE or HARDWARE has resulted from accident, abuse, or misapplication.
Deutschland, Schweiz, Österreich, Liechtenstein 51 Hardware The risk passes to you, the end user, upon taking possession (hand over) of the HARDWARE. Total qualities were not warranted. Limited Warranty for Hardware and Software Limited Warranty SysKonnect warrants that the SOFTWARE will perform substantially in accordance with the accompanying Product Manual(s) for a period of 90 days from the date of receipt if you have created the required technical preconditions.
Appendix A. License and Warranty Information anderen Speichervorrichtung eines Computers, der kein Netzserver ist, installiert wird und eine einzige Person diesen Computer zu mehr als 80 % der Zeit benutzt, die er in Benutzung ist, darf diese eine Person die Software auch auf einem tragbaren Computer oder einem Heimcomputer benutzen.
Visit us: www.syskonnect.com SysKonnect GmbH Siemensstrasse 23 D-76275 Ettlingen Support: +49 7243 502 330 E-mail: sales@syskonnect.