
Datasheet


Chapter 4 Using Your Tape Drive
Diagnostic Mode Event Codes
DLT-V4 Product Manual 52
Diagnostic Mode Event Codes 4
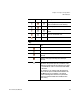
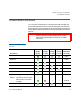
Press, hold, and release the unload button after six to nine seconds to start
the diagnostic mode. This displays the most recent event code. The
unload button then becomes a scroll button for additional event codes.
Press and release the unload button for the next most recent event code.
You can display up to five total events using this method. See table 17
for
details about the meaning of the various patterns.
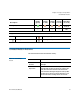
After you display the final available event code, the next button press
causes all LEDs to flash indicating that the next eight hex characters
displayed are the detailed error code of the most recent event. The first
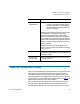
Read/write
diagnostic start
Caution: This feature overwrites any data
currently on the data cartridge. Before
performing this action, confirm that the
data cartridge in the tape drive does not
contain critical data.
Release the unload button to start an internal read/
write diagnostic. You must then load a data
cartridge to run the diagnostic. The tape drive
writes and reads 3.6 GB of data, then unloads the
data cartridge. This process takes approximately 13
minutes. When completed, the green LED remains
steadily on. At this point, push the
Eject button to
eject the cartridge.
The tape drive returns to normal operation if it
detects no errors. The appropriate LEDs illuminate
if an error occurs.
Emergency reset Release the unload button to force an internal reset.
The tape drive initializes as if you turned power off
and then on (POST).
Revert back to
normal mode
Release the unload button to return the tape drive
to normal operation.
Field/Mode Actions