TANDBERG Codian IP VCR Tutorial IP VCR 2200 Series MSE 8220 blade Version 4 Revision 4
TANDBERG Philip Pedersens vei 20 1366 Lysaker Norway Telephone: +47 67 125 125 Telefax: +47 67 125 234 Video: +47 67 117 777 E-mail: tandberg@tandberg.
Contents Introduction....................................................................................................................... 1 Connecting the IP VCR to your network.................................................................................... 2 Before connecting the power............................................................................................... 2 Assigning an IP Address to the IP VCR ..................................................................................
Introduction This tutorial provides detailed instructions on how to set up and administer the Codian IP Video Conference Recorder (IP VCR). It describes how to connect the unit, and then how to log in and use it to set up a connection with endpoints and conferences. Using the tutorial The tutorial is designed to be followed in the order in which the steps are provided. Online help complements this guide by providing detailed descriptions of each of field.
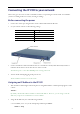
Connecting the IP VCR to your network This section gives an overview of the commands needed to set up and log in to the IP VCR. You will make your first recording in the next section, Creating recordings.
b. To assign a static IP address, enter the information using the following format and then press Enter: static If you do not have a DNS server, use 0.0.0.0 in place of the DNS server address – you must enter a DNS server address. For example, to assign an address of 192.168.1.2 where the default gateway is at 192.168.1.1, enter: static 192.168.1.2 255.255.255.0 192.168.1.1 0.0.0.
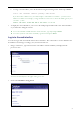
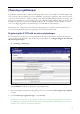
To configure the unit, you must log in as the admin user. 3 Click Change log in 4 Type in the username admin with no password and press Enter You are advised to set up a password for the admin account to restrict who is able to perform box-wide configuration changes such as changing the IP VCR’s IP address. Instructions are provided later in the tutorial.
5
Choosing a gatekeeper A gatekeeper is an H.323 entity on the network that provides services such as address translation and network access control for H.323 terminals, gateways, and MCUs. A gatekeeper is optional on an H.323 network but its presence allows end users to replay recordings stored on the IP VCR by dialing a number or entering a text string. H.323 capable devices can be configured to register their IP and alias addresses with a gatekeeper. The IP VCR can register E.
5 Ensure the Port A checkbox is selected 6 Enter a name for your IP VCR in the H.323 ID to register text box H.323 endpoints that are registered with the gatekeeper can Users can call the VCR using the ID given here. 7 Enter 71 in the Point to point incoming prefix text box The Point to point incoming prefix will be used later on in the tutorial.
3 Go to Gatekeeper 4 Select Enabled from the status drop down list The other fields can be left blank as they control gatekeeper neighboring. This is an advanced feature that is not covered by this tutorial. For more information on gatekeeper neighboring refer to the online help. 5 Click Apply changes to enable the built in gatekeeper The IP VCR can now be configured to register with the built-in gatekeeper.
7 For H.323 gatekeeper usage, select Enabled 8 For H.323 gatekeeper address enter the local IP loopback address 127.0.0.1 9 For Gatekeeper registration type, select Gateway If the IP VCR is configured to register prefixes Codian recommend registering the IP VCR as a Gateway. The “Which gatekeepers have been tested for the IP VCR?” FAQ in the Technical Support section of the Codian web site details any exceptions to this advice. 9 Enter a name for your IP VCR in the H.323 ID to register text box H.
Creating recordings There are a number of ways to create a recording: f Call out and record: the IP VCR, via its web interface, calls out to a H.
2 Click Call out and record 3 Type in a name for the recording – for example training recording 2 4 Type in the IP address or hostname of the endpoint that you want to record from 5 Select whether to connect to this endpoint using H.323 or SIP 6 Leave all other values as their default settings Later in the tutorial you will be shown how to pre-configure H.323 endpoints. This allows recordings to be started quickly using preconfigured settings.
Your browser will now show the Recordings list and the new “training recording 2” should be visible and have a status of Recording. Later in the tutorial you will watch the video that you recorded and also see how to upload a video recorded on another IP VCR. 9 Refresh your browser to update the Length information which shows the duration of the recorded call 10 Go to Connections The list of active connections shows recordings being made and recordings being played back.
12 Click Disconnect selected to disconnect the call and save the recording to the IP VCR Disconnecting the call from the H.323 endpoint will also stop and save the recording to the IP VCR. 13 Go to Recordings to view the Recordings list. The “training recording 2” recording will now be idle and the total length of the recording will be shown Recording using the Recording Console In the previous section you could not see what was being recorded while you were recording from your H.323 endpoint.
The recording console will appear on the endpoint display and you will hear audio instructions about which controls you may use. Recording does not start until you are ready.
Recording point-to-point H.323 calls In this section you record a point-to-point call that is routed through the IP VCR. A point-to-point call is one where just two endpoints are involved so you will need two endpoints to work through this section. The IP VCR must be configured to register a prefix with the H.323 gatekeeper for point-to-point recording to work. Recording of point-to-point calls is transparent. To start a recording call another endpoint by dialing the prefix followed by the endpoint number.
5 Go to Recordings In the list of recordings you see a recording called Recording__
If you are not using a gatekeeper with the IP VCR then you can still use this method to record a conference – but you must first set up a gateway on the IP VCR – as described later in the tutorial. 5 Click Call endpoint 6 Go to Connections You will see a recording underway called Record 123. Recording a conference when the MCU calls the IP VCR In this section you use an MCU to call the IP VCR.
5 On the IP VCR go to Connections to display the Connections list The connections list will show the active conference with a status of “Recording in progress”. Recording stops automatically when the conference ends. 6 To stop the recording, disconnect the IP VCR endpoint from the conference Before going on to other ways to make a recording, the next section shows some simple ways to play back recordings.
Playing back recordings The Codian IP VCR can stream recordings to a personal computer or play back recordings to H.323 and SIP endpoints. Recordings stored on the IP VCR can be replayed on a PC by RealPlayer™, QuickTime™, or Windows Media Player™. Playing back to a PC 1 Go to Recordings If there are more than 20 recordings, these will span a number of pages selectable by page number. The white arrow shows which column the list is sorted by and whether the list is in ascending or descending order.
By clicking Show advanced streaming options settings modifying the playback video window size and bit rate can be chosen. Viewing in RealPlayer 3 If you are not running the latest version of RealPlayer, upgrade to the latest version of the free player at http://www.real.com/realsuperpass.html.
The RealPlayer controls can be used to pause, restart, rewind and fast forward the recording. 6 Practice pausing, restarting, fast forwarding and rewinding the recording 7 Close RealPlayer Viewing in QuickTime 8 If you are not running the latest version of QuickTime, upgrade to the latest version at http://www.apple.
Viewing in Windows Media Player 13 If you are not running the latest version of Windows Media Player, upgrade to the latest version at http://www.microsoft.com/windows/windowsmedia/download/alldownloads.
Playing back to an endpoint 1 Go to Recordings 2 Click on the “training recording 2” made previously 3 Click Call out and play recording 23
4 Type in the IP address of the endpoint that you wish to play the recording on and select whether to connect to it using H.323 or SIP If the endpoint is reached via a H.323 gateway, enter the endpoint’s E.164 number in the Host name or IP address field instead of the IP address as above, and choose the H.323 gateway from the H.323 gateway list of configured devices. You learn how to set up a gateway later in the tutorial. If the endpoint is reached via a SIP registrar, tick the SIP registrar box.
Using the auto attendant By default, when an endpoint connects to the IP VCR, a menu known as the ‘auto attendant’ is displayed. Auto attendants are used to record sessions and play back recordings. In this section you will make a recording and you also update the auto attendant banner. In a later section you will use the auto attendant to play back a recording.
6 Go to Connections The active recording will be shown in the connections list.
The Status page shows detailed statistics about the connection including the received and transmitted Audio / Video formats for each connection, the recording time and the current file size. Note that the lower window is black unless you are sending H.239 content from your endpoint. 9 From the endpoint disconnect the call Customizing the auto attendant banner The auto attendant menu comprises two halves: the banner area and the menu options.
Using Folders Folders can be used both to organize recordings stored on the IP VCR and to restrict access to recordings. 1. To configure folders on the IP VCR go to Recordings > Folders 2. Click Create sub folder for the root folder You can create a whole hierarchy of folders using the create sub folder link which is automatically displayed for each folder. f The PIN allows this folder to be protected so only users knowing the PIN can view its contents f The Recording ID is an E.
3. Enter a name for the folder e.g. Training and assign 3 unused E.164 numbers to the Recording ID, Recording console ID and Auto attendant ID described above, entering a PIN and checking Able to make new recordings via the auto attendant, if required 4. Click Add new folder You are returned to the Folders list. 5. Click the configuration link for the new folder In the Current status section you see the registrations that were made. Recording directly to a folder 6.
Recording directly to a folder with the recording console 10. From the endpoint dial the Recording console ID specified above e.g. 312 The recording console displays the recording being made — as described earlier in the tutorial. 11. From the endpoint hang up or disconnect from the IP VCR 12. Go to Recordings and click on your newly created folder to see the recording you have just made Dialing the auto attendant for a specific folder 13. From the endpoint dial the Auto attendant ID specified above e.g.
Recording computer displays The IP VCR can be used to record and play back an additional video stream known as the content channel. This can be used to: f Record H.239 video streams from H.323 endpoints, in either single-endpoint or point-to-point recordings f Play back a recorded content channel to H.323 endpoints via H.239 f Stream the content channel to a web page To do this your IP VCR must be configured to use H.239. Configuring the IP VCR to use H.239 1 Go to Settings > H.
Recording the content channel 1 On the MCU set up a conference which includes an endpoint with an H.239 data channel. If necessary refer to the MCU Tutorial 2 On the IP VCR go to Recordings and click Call out and record 3 Type in a name for the recording e.g. Training H.239 Recording and make sure the H.
Using a gateway to call the IP VCR If you are not using a gatekeeper with the IP VCR and MCU units, each unit needs another method to identify how to find the other units.
Calling out to the MCU 1 Go to Recordings and click Call out and record 2 Type in a name for the recording 3 For Host name or IP address, type in the conference ID 4 Select the H.323 gateway called Training MCU from the drop-down list 5 Click Call endpoint 6 Go to Connections The recording will be shown with the name that you entered.
Transferring recordings You can transfer recordings from an IP VCR to a PC. This is often an intermediate step to transferring recordings from one IP VCR to another as there is no direct way to do this. You can also transfer a recording from one IP VCR to another by watching and re-recording; though this takes longer than transferring the recording file – and may also result in some degradation in quality. You try both these methods in this section.
4 Click Save 5 Select the folder and file name and then click Save The recording is saved as a file on your PC’s hard disk. Converting a Codian file to MPEG You can easily convert a ‘.codian’ file into an encoded MPEG by using the default settings of the MPEG Converter. The MPEG Converter can be downloaded from www.codian.com/downloads/software.htm. The installation program is called Codian MPEG Converter.msi. Converting a Codian file to an MPEG file preserves the H.
6 Open an MS-DOS command prompt window and navigate to the directory that you saved the ‘.codian’ recording file in 7 Type the conversion command in the format: codian_to_mpg .codian Example: codian_to_mpg recording_0_training_recording_2.codian This converts the downloaded Codian file to MPEG format e.g. recording_0_training_recording_2.mpg stored in the same directory.
Transferring a recording from one IP VCR to another You can transfer a recording directly from IP VCR to another and you will demonstrate this by copying a recording from your IP VCR to itself but under another name. When you are copying from one IP VCR to another, the IP VCR you are recording on needs to know how to connect to the IP VCR with the original recording on.
5 Click Update configuration 6 Return to the Recordings list and click Call out and Record 7 Type in a name for the recording that you wish to create, for example Copy of Training Recording 4 and ensure that the H.
11 Select the check box to the left of the original recording that is now being played back and then click Disconnect selected to stop the recording 12 Go to Recordings You now see your recordings. 13 Delete the copy that you just made by selecting its check box and then clicking Delete selected Managing endpoints You can pre-configure endpoints on the IP VCR in the same way as you can on the MCU. 1 Go to Endpoints and click Add H.
Setting up users and editing user privileges Adding a new user 1 Go to Users The list of current users is displayed. By default the IP VCR has an admin and guest account. You must be logged in as the admin user to be able to add new users or change another user’s configuration. 2 Click Add new user 3 Type in the User ID and Name for the new user The user ID is used to log in, the name is the preferred name for that user.
Editing the guest user’s configuration Anyone connecting to the IP VCR has guest privileges. By changing the configuration of the guest user you can limit what they can do. 7 Click the guest link 8 Change the access rights as required and click Update guest settings Entering a password for the admin user When you logged in as the admin user at the start of this tutorial there was a blank password. However, this is not secure and you should change the password to something meaningful to you.