ST.TM.E10100.1 Issue 1 ENGLISH (UK) INSTRUCTION MANUAL TT1260 Standard Definition Professional Receiver/Decoder Software Version 2.
Preliminary Pages ENGLISH (UK) READ THIS FIRST! ITALIANO LEGGERE QUESTO AVVISO PER PRIMO! If you do not understand the contents of this manual DO NOT OPERATE THIS EQUIPMENT. Se non si capisce il contenuto del presente manuale NON UTILIZZARE L’APPARECCHIATURA. Also, translation into any EC official language of this manual can be made available, at your cost. È anche disponibile la versione italiana di questo manuale, ma il costo è a carico dell’utente.
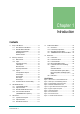
Preliminary Pages List of Contents Chapter 1: Introduction This chapter identifies the equipment versions covered by this manual; describes the purpose of the equipment in a typical system; provides a summary of its main features; identifies the controls, indicators and connectors in a guided tour of the front and rear panels; and lists the available options.
Preliminary Pages Index Forms Service/Repair Order Form Page iv Instruction Manual: TT1260 Standard Definition Professional Receiver/Decoder ST.TM.E10100.
Preliminary Pages About this Manual This manual provides instructions and information for the installation and operation of the TT1260 1U digital integrated Receiver/Decoder (IRD). It should be kept in a safe place for reference during the life of the equipment. Further copies of this manual can be ordered from the address shown on page vii. If passing the equipment to a third party, pass on the relevant documentation also.
Preliminary Pages Warnings, Cautions and Notes Heed Warnings All warnings on the product and in the operating instructions should be adhered to. The manufacturer can not be held responsible for injuries or damage where warnings and cautions have been ignored or taken lightly. Read Instructions All the safety and operating instructions should be read before this product is operated. Follow Instructions All operating and use instructions should be followed.
Preliminary Pages Contact Information TANDBERG Television Customer Services Support Services Our primary objective is to provide first class customer care that is tailored to your specific business and operational requirements. All levels are supported by one or more service performance reviews to ensure the perfect partnership between TANDBERG Television and your business.
Preliminary Pages Technical Training Training Courses TANDBERG Television provides a wide range of training courses on the operation and maintenance of our products and on their supporting technologies. TANDBERG can provide both regularly scheduled courses and training tailored to individual needs. Courses can be run either at your premises or at one of our dedicated training facilities.
Chapter 1 1. Introduction Contents 1.1 Scope of this Manual................................................. 1-3 1.1.1 Who Should Use this Manual ....................... 1-3 1.1.2 What this Manual Describes ......................... 1-3 Identifying the Equipment ............................. 1-3 Marketing Codes........................................... 1-4 Software Versions......................................... 1-4 1.2 Summary of Features................................................ 1-6 1.2.
Introduction List of Tables Table 1.1: Hardware Marketing Codes...........................................1-4 Table 1.2: Software Key Marketing Codes.....................................1-4 Page 1-2 Table 1.3: Main Features of the Decoder Range........................... 1-5 Table 1.4: Main Features of the Satellite Receiver Range ............ 1-5 Instruction Manual: TT1260 Standard Definition Professional Receiver/Decoder ST.TM.E10100.
Introduction 1.1 Scope of this Manual 1.1.1 Who Should Use this Manual This manual is written for operators/users of the TT1260 Professional Receivers and Decoders. It describes the unit’s functions and operation. The manual is written to assist in the installation and day-to-day care and operation of the unit. Maintenance information requiring the covers to be removed is not included. CAUTION... Removing the covers of this equipment may invalidate the warranty. 1.1.
Introduction Marketing Codes Table 1.1 gives a description of each hardware Marketing Code and Table 1.2 gives a description of each software key Marketing Code. Table 1.
Introduction Table 1.3: Main Features of the Decoder Range Marketing Code Inputs Input Data-rate TT1260/HWO/ASI 2 x ASI 0.350-160 Mbit/s Coding Digital Outputs 4 Table 1.4: Main Features of the Satellite Receiver Range Satellite 8PSK Marketing Code Inputs Input Frequency Input Symbol rate FEC Rates Digital Outputs TT1260/HWO/HM 2 x 8PSK 950 – 2150 MHz 1 – 44.
Introduction 1.2 Summary of Features 1.2.
Introduction · Conditional Access/Scrambling: · ² Remote Authorisation System (RAS) version I ² EBU Basic Interoperable Scrambling System (BISS) Mode-E ² EBU Basic Interoperable Scrambling System (BISS) Mode-1 ² VideoGuard Director ² TANDBERG Television Signal Protection TANDBERG Director system: ² Over-air remote control is available if the TT1260 is used as part of a TANDBERG Director system (Over-air software downloading, Re-start, Tuning and Retuning etc.) NOTES… · · · 1.
Introduction · 1.2.2 Control Methods: ² Front Panel User Interface ² Asynchronous serial remote control ² Over-air remote control (TANDBERG Director system) (optional) Inputs ASI Inputs (Decoders) Two BNC connectors support both byte-mode and single packet burst mode. L-Band Inputs Two F-type connectors connect the L-band output of a suitable LNB either directly or via a suitable attenuator giving lightning and surge protection.
Introduction There is a 25-way D-type connector on the optional Alarm Relay Card (TT1260/HDC/ALRM) with six relays for failure monitoring for NCP over-air. The operator can define (using the Alarm Menu pages) which alarm conditions that drive the relays and also the general front-panel ALARM LED. This is described in Chapter 4, Alarms and Annex C, Menus. 1.2.4 Conditional Access and Scrambling The transport stream received by the IRD may be encrypted.
Introduction 1.3 The Satellite Receiver 1.3.1 Typical Satellite System The TT1260 Satellite Receiver is a component of the MPEG-2/DVB compliant range of TANDBERG Television equipment. It is designed for use by broadcasters and distributors of video, audio and data services over satellite.
Introduction 1.3.2 Input Connections The Satellite Receiver interfaces directly to Low-Noise Block (LNB) and accepts an intermediate frequency (IF) input in the band 950 - 2150 MHz (L-band) for operation in the specified symbol-rate range (see Annex B, Technical Specification). The unit can provide dc power and polarisation switching to the LNB. 1.3.3 What the Satellite Receiver Does The Receiver can be tuned to a specified satellite channel frequency and polarisation.
Introduction 1.3.4 Over-air Software Download (TANDBERG Director Systems) The TT1260 Satellite Receiver is shipped with the appropriate software installed, but it is designed to allow replacement of this code by new versions of software transmitted over-air. The new code is downloaded as a background task in the same transport stream as used for the normal transmission of services. Figure 1.5 shows the system required for this function.
Introduction 1.4 The Decoder 1.4.1 Typical Decoder System The Decoder is a component of TANDBERG Television’s range of equipment. It is designed for use by broadcasters and distributors of video and audio services. It can be used as a transport stream monitor or to decode signals received over a telecommunications network.
Introduction 1.4.2 Input Connections The Decoder has the following inputs: Two ASI copper interfaces for operation up to 160 Mbit/s for 188 byte packets and 160 Mbit/s for 204 byte packets. 1.4.3 What the Decoder Does The ASI interfaces are used to present the transport stream in the format required by the internal Decoder circuitry. At this point, the operation of the unit is the same as the Satellite Receiver.
Introduction 1.5.2 Front Panel (Local) Modes Operating the IRD from the Front Panel is via two main operating modes: Navigate and Edit. See Section 3.3, Front Panel Operating Modes. Timeout (5 minutes) EDIT Off NAVIGATE EDIT EDIT On SAVE Figure 1.8: Front Panel States 1.5.3 Serial Remote Control Mode The unit enters this state when the RS232/RS485 REMOTE port receives a configuration change command or the Remote control mode is selected in the System Menu (#6); see Section C.9, System Menu.
Introduction 1.6 Guided Tour 1.6.1 Construction The TT1260 is constructed using a screened self-ventilated modular system; all operational inputs and outputs are via rear-panel connectors. The unit may be operated freestanding or mounted in a 19-inch rack. 1.6.2 Front Panel Controls The physical interface for the Front Panel consists of an alphanumeric LCD display, pushbuttons, and status LEDs that are used to set up and monitor the unit. The general layout is shown in Figure 1.9.
Introduction 1.6.5 Conditional Access and Scrambling Options VideoGuard Director There is a slot on the rear panel to allow the insertion of a Conditional Access (CA) card for the VideoGuard Director CA system. Remote Authorisation System (RAS 1) With the appropriate configuration, the TT1260 fully descrambles Remote Authorisation System (RAS) input transport stream. The ability to decrypt all the components in any other transport stream is a function of the specific CA system decryption.
Introduction BLANK Page 1-18 Instruction Manual: TT1260 Standard Definition Professional Receiver/Decoder ST.TM.E10100.
Chapter 2 2. Installing the Equipment Contents 2.1 Read This First!......................................................... 2-3 2.1.1 Handling........................................................ 2-3 2.1.2 Installing the Equipment ............................... 2-3 2.1.3 Lifting ............................................................ 2-3 2.2 Preliminary Checks ................................................... 2-3 2.2.1 Mechanical Inspection .................................. 2-3 2.2.
Installing the Equipment List of Figures List of Tables Figure 2.1: Air flow Through the Equipment...................................2-4 Figure 2.2: AC Power Inlet Assembly.............................................2-6 Figure 2.3: Location of the Technical Earth....................................2-8 Figure 2.4: Typical Decoder Rear Panel ........................................2-8 Figure 2.5: TT1260 Signal Connections.........................................2-9 Figure 2.
Installing the Equipment 2.1 Read This First! 2.1.1 Handling The TT1260 must be handled and installed carefully and thoughtfully to prevent safety hazards and damage. 2.1.2 Installing the Equipment Ensure the personnel designated to fit the unit have the appropriate skills and knowledge. If in any doubt, contact TANDBERG Television Customer Services (see Preliminary Pages for contact details).
Installing the Equipment 2.3 Installing the Equipment 2.3.1 Fixing The TT1260 is designed for fixed use only and has been shipped with fixing brackets suitable for a standard 19 inch rack. When installed in a rack, it should be secured using the fixing brackets. In addition, support shelves must be used to reduce the weight on the brackets. Ensure it is firmly and safely located and it has an adequate flow of free-air.
Installing the Equipment Protection from Moisture Do not install this equipment in areas of high humidity or where there is a danger of water ingress. 2.3.3 Installing Cables - Safety Power supply cables should be routed so that they are not likely to be walked on or pinched by items placed upon or against them. Pay particular attention to cables at plugs, convenience receptacles, and the point where they exit from the appliance. Do not run ac power cables in the same duct as signal leads.
Installing the Equipment WARNINGS… 1. THE TT1260 SHOULD ONLY BE OPERATED FROM THE TYPE OF POWER SOURCE INDICATED ON THE MARKING LABEL. IF YOU ARE NOT SURE OF THE TYPE TO YOUR BUSINESS, CONSULT YOUR APPLIANCE DEALER OR LOCAL POWER COMPANY. DO NOT OVERLOAD WALL OUTLETS AND EXTENSION CORDS AS THIS CAN RESULT IN A RISK OF FIRE OR ELECTRIC SHOCK. AC SUPPLY. 2. THE TT1260 RANGE OF RECEIVERS AND DECODERS ARE NOT FITTED WITH AN AC POWER ON/OFF SWITCH.
Installing the Equipment Table 2.2: Supply Cord Wiring Colours Earth: UK (BS 1363) EUROPE (CEE 7/7) USA (NEMA 5-15P) Green-and-yellow Green-and-yellow Green Blue Blue White Brown Brown Black Neutral: Live: If the colours2 do not correspond with the coloured markings identifying the terminals in a locally supplied plug, proceed as in Table 2.3. The inclusion of Table 2.3 is for reference. Table 2.3: Non Standard Supply Cord Wire Colours Wire Colour (UK) 2.5.3 Action green-and-yellow ...
Installing the Equipment Location of the Technical Earth Figure 2.3: Location of the Technical Earth 2.7 Signal Connections 2.7.1 General CAUTION... It is strongly recommended that the terminal marked at the rear panel of the equipment is connected to a site Technical Earth before any external connections are made and the equipment is powered. This limits the migration of stray charges. All signal connections are made via the rear panel. A typical rear panel is shown in Figure 2.4.
Installing the Equipment TT1260 Professional Receiver Motherboard (TT1260/DIRBAS) Frame Synchronisation RS-232/RS-485 Remote Control FRAME SYNC HI-Z RS232/RS485 REMOTE ASI OUT 1 ASI OUT 2 AUDIO 1 AUDIO 2 CVBS 1 CVBS 2 SDI 1 SDI 2 RS232 DATA ALARM ASI Transport Streams ASI Transport Streams Analogue/Digital Audio Output Analogue/Digital Audio Output Analogue Video Output Analogue Video Output Digital Video Output Digital Video Output Low-speed Async Data Alarms Alarm Relay Card (S12316) (TT1260/HWO/ALR
Installing the Equipment 2.7.2 TT1260 Base Unit (TT1260/DIRBAS) Rear Panel View Figure 2.6: Typical Decoder Rear Panel, with ASI Input and Alarm Option Fitted ASI Out Two BNC sockets output ASI transport streams with a maximum data rate of 160 Mbit/s. The specification for these connectors are given in Section B.5.2, Audio Outputs. ASI OUT 1/2 Table 2.
Installing the Equipment Table 2.5: Audio Decoding Pin-outs Item Specification Connector type 9-way, Female, D-type Connector designations AUDIO 1 AUDIO 2 Pin-outs Pin 1 ¾ Digital audio + Pin 2 ¾ Ground Pin 3 ¾ Left + Pin 4 ¾ Right + Pin 5 ¾ Ground Pin 6 ¾ Digital audio Pin 7 ¾ Ground Pin 8 ¾ Left Pin 9 ¾ Right - Nominal output impedance 50 W Maximum data rate 3.072 Mbit/s Output level +18dBm nominal clipping level. Selectable in range 12 to +24dBm.
Installing the Equipment Frame Synchronisation A BNC socket is used by the Decoder to frame lock to an external video source. The frame information is input as a composite synchronise signal, with or without active video. The user can offset the synchronisation to the video output by ±8 lines, with a resolution of 1 pixel. Lip sync error introduced by the Receiver is in the range – 10ms to +30ms. This implies audio frame skip and repeat.
Installing the Equipment Remote Control Connect to a PC and use the System Menu #6.1.2 to switch between the RS-232 and RS-485 input standards. The specification for this connector is given in Section B.5.4, Remote Connector. The Remote Control Protocol is published in manual ST.TS.E10100, and in the TANDBERG Television RS-232 remote control protocol document. RS232/RS485 REMOTE Table 2.
Installing the Equipment RS-232 Low-speed Asynchronous Data Output A 9-way, D-type female connector provides an asynchronous serial communications interface for the reception of low-speed data. The status of the data output on this connector is given in the Data menu #3.4. The technical specification for this connector is given in Section B.5.3, Data Outputs. RS232 DATA NOTE… Low-speed asynchronous data output is disabled when the High Speed RS-422 Data Enabler Card (TT1260/HWO/HSDATA) is fitted.
Installing the Equipment Connector Details Alarm Option The specification for this connector is given in Annex B, Section B.5.5, Alarm Connectors. 1 25 ALARM OPTION Table 2.13: Relay Alarm Output Specification Item Specification Connector type: 25-way, D-type, Female Connector designation: ALARM OPTION Contact Configuration: SPDT (Change-over) All volt-free contacts, fully isolated.
Installing the Equipment 2.8 Option Card Connectors Option cards are described in Chapter 5, Options. Page 2-16 Instruction Manual: TT1260 Standard Definition Professional Receiver/Decoder ST.TM.E10100.
Chapter 3 3. Operating the Equipment Locally Contents 3.1 Powering the Equipment ........................................... 3-3 3.1.1 Switching On................................................. 3-3 3.1.2 Power-up Operating Modes.......................... 3-4 3.2 Front Panel Controls and Pushbuttons ..................... 3-5 3.3 Front Panel Operating Modes................................... 3-5 3.3.1 General......................................................... 3-5 3.3.2 Navigate Mode..................
Operating the Equipment Locally List of Tables Table 3.1: Navigate Mode ..............................................................3-5 Table 3.2: Edit Mode ......................................................................3-6 Table 3.3: Selecting a Menu Option ...............................................3-7 Table 3.4: Entering a Menu Value..................................................3-7 Table 3.5: Setting Up the Satellite Receiver...................................3-8 Table 3.
Operating the Equipment Locally 3.1 Powering the Equipment 3.1.1 Switching On CAUTION... This equipment should not be operated unless the cooling fan is working and there is free-air flow around the unit. Refer to Section 2.3.2 Ventilation. Connect the signal inputs and ac power supply to the TT1260 and power up the unit. After a short period of initialisation and the TT1260 gaining lock, the unit will power-up in Navigate mode. This is the usual operating condition.
Operating the Equipment Locally 3.1.2 Power-up Operating Modes TT1260 INITIALISING is displayed during power-up.
Operating the Equipment Locally 3.2 Front Panel Controls and Pushbuttons Front Panel items are described under Section 1.6, Guided Tour. When the Front Panel pushbuttons are not used for approximately five minutes, the display will revert to Menu #1.1 and any unsaved edits will be lost. Alarm LED LCD display Lock LED Edit Save Left Up Down Right Figure 3.2: Front Panel Controls and Pushbuttons 3.3 Front Panel Operating Modes 3.3.
Operating the Equipment Locally 3.3.3 Edit Mode Edit mode edits the right display area and allows the user to alter control parameters that define the TT1260 behaviour. To enter Edit mode press the Edit pushbutton when on a page containing an editable control parameter and the front panel is the controlling user interface. Edit may be entered on some special pages at all times, for example on the page defining the controlling user interface.
Operating the Equipment Locally 3.4 Using the Local Controls 3.4.1 LCD Menu Descriptions Detailed LCD menu descriptions are given in Annex C, Menus. This chapter concentrates on describing the use of the menus for local operation. 3.4.2 Selecting a Menu Option Some items shown in the right display area of the front panel LCD display have a set number of options. An example of this is the VIDEO TEST PATTERN (Menu #3.1.6) which has a number of preset Video Test Patterns associated with it.
Operating the Equipment Locally 3.5 Setting Up the Input (Menu #2) 3.5.1 Satellite Receiver Use Table 3.5 to step through the set up procedure of the Satellite Receiver using Menu #2. The transmission parameters must be known before starting. Table 3.5: Setting Up the Satellite Receiver 3.5.2 Step Action Result 1 Go to Menu #2.2 and select SOURCE 1. The Receiver takes its signals from two sources. Set up both sources. 2 Scroll down to Menu #2.3. Enter the LNB FREQUENCY then press SAVE.
Operating the Equipment Locally 3.6 Service Configuration (Menu #3) 3.6.1 Selecting a Service Setting Up a Service Each transport stream may contain many Services. Menu #3 allows a Service to be chosen as current and the profile of its components to be specified. Table 3.7: Selecting a Service Step Action Result 1 Go to Menu #3.1 and select the required Service. The EDIT mode cannot be entered unless there are available Services.
Operating the Equipment Locally 3.6.3 5 Scroll down to Menu #3.1.7 and edit the parameter for framesync enable (ENABLED or DISABLED). Press SAVE. Edits the parameter for framesync enable. 6 Scroll down to Menu #3.1.8 and edit the PAL framesync offset range (-199999 to +199999 pixels) and the NTSC framesync offset range (-199999 to +199999 pixels). Press SAVE. Edits the PAL framesync offset range and the NTSC framesync offset range. 7 Scroll down to Menu #3.1.
Operating the Equipment Locally Selecting the Audio Manually It is possible to manually select any audio component from the active service by using the front panel controls or via the remote control interface. Select one of the audio components in the list or enter the correct PID. Table 3.10 describes the procedure for selecting a component using a Satellite Receiver. Table 3.10: Manually Selecting the Audio Components 3.6.4 Step Action Result 1 Go to the Menu #3.2 and press EDIT.
Operating the Equipment Locally 3.6.5 Setting Up Teletext The teletext data is transmitted in teletext PES packets. It uses its own PID to extract the teletext PES packets from the transport stream. Table 3.12: Setting Up Teletext 3.6.6 Step Action Result 1 Go to Menu #3.5 and press EDIT. Gains access to the Teletext insertion status. 2 Scroll down to Menu #3.5.1 and edit the insertion status (ENABLED or DISABLED). Press SAVE. Edits the insertion status.
Operating the Equipment Locally 3.6.7 Viewing the PCR PID Menu Table 3.14: Viewing the PCR PID Menu Step Action Result 1 Go to Menu #3.7. Gains access to the PCR PID selection menu. XXXX is the PCR PID YYYYYYYYYY is (PRESENT or NOT PRESENT) 3.6.8 Viewing the Network ID Menu Table 3.15: Viewing the Network ID Menu Step Action Result 1 Go to Menu #3.8. Gains access to the Network ID and the Original Network ID.
Operating the Equipment Locally · Periodic control word changes during transmission. VideoGuard, RAS and BISS The process for setting this up is as for the RAS CA. Changing the VideoGuard Customer ID (Menu #4.3.2) The unit must be re-powered with the appropriate Smart Card installed after the Customer ID has been changed. Basic Interoperable Scrambling System (BISS) (Menu #4.4) BISS mode 1 is similar to RAS in that it uses a fixed control word to encrypt the data in the transport stream.
Operating the Equipment Locally 3.6.10 Setting up the Transport Stream Output (TSO) Set-up Procedure Use Table 3.5 to step through the set up procedure of the Satellite Receiver using Menu #2. Use Table 3.17 to step through the Transport Stream Output set up procedure using Menu #4. This allows the transport stream for the current service to bypass the CA module on its way to the TSO module. Table 3.17: Setting up the Transport Stream Output (TSO) Step Action Result 1 Go to Menu #4.
Operating the Equipment Locally 3.7 Setting Up the Alarms (Menu #5) Menu #5 allows a selection of Alarms to be edited. Table 3.18: Setting up the Alarms 3.8 Step Action Result 1 Go to Menu #5. Accesses the Alarms menu. 2 Scroll down to Menu #5.1 and edit the BIT Edits the BER alarms menu. ERROR RATE range (9.9 E-1 to 1.
Operating the Equipment Locally Step Action Result 5 Scroll down to Menu #6.1.4 and edit the Subnet Mask. Press SAVE. Edits the Subnet Mask. 6 Scroll down to Menu #6.1.5 and activate/deactivate the Restore system defaults. Press SAVE. Edits the Restore System Defaults menu. 7 Scroll down to Menu #6.1.6 and edit the Service Hunt Mode (ENABLED or DISABLED). Press SAVE. Edits the Service Hunt Mode menu. 8 Scroll down to Menu #6.1.7 and edit the Customisation Key. Press SAVE.
Operating the Equipment Locally 3.10.2 Setting up a Preset Service Follow the steps in Table 3.22 to store the current Service as a preset. Table 3.22: Setting up a Preset Service Step Action Result 1 Use the menus to set up the unit so that the required Service is current. (Refer to Sections 3.5 and 3.6) This selects the Service and associated parameters for the preset process. 2 Go to Menu #1 to view the Preset menu.
Chapter 4 4. Alarms Contents 4.1 Introduction ............................................................... 4-3 4.2 Location of the Alarm and Indication LEDs ............... 4-3 List of Figures Figure 4.1: Front Panel LEDs ........................................................ 4-3 4.3 ALARM LED.............................................................. 4-3 4.4 Relays 4-4 Instruction Manual: TT1260 Standard Definition Professional Receiver/Decoder ST.TM.E10100.
Alarms BLANK Page 4-2 Instruction Manual: TT1260 Standard Definition Professional Receiver/Decoder ST.TM.E10100.
Alarms 4.1 Introduction There are two Front Panel LEDs that indicate the status of the TT1260. These are used to indicate abnormal performance of the unit. 4.2 Location of the Alarm and Indication LEDs The red ALARM LED is used to indicate an equipment fault condition, for example a missing or faulty input signal. It should be off during correct operation, although it may be lit briefly during power-up.
Alarms 4.4 Relays In addition to the one summary alarm, there is an Alarm Relay Card (TT1260/HDC/ALRM) with additional six relays. The alarm relays are programmable to reflect the state of one or more of the individual monitored alarm conditions. As alarm conditions may be of very short duration (i.e. less than the time required to activate a relay) the software ensures that any alarm condition is signalled for a minimum of one second.
Chapter 5 5. Options Contents 5.1 Option Card Locations .............................................. 5-3 5.2 ASI Input Card (TT1260/HWO/ASI) .......................... 5-3 5.2.1 General......................................................... 5-3 5.2.2 Rear Panel View ........................................... 5-3 5.2.3 Connector Details ......................................... 5-4 5.3 QPSK Input Card (TT1260/HWO/QPSK) .................. 5-4 5.3.1 General.................................................
Options BLANK Page 5-2 Instruction Manual: TT1260 Standard Definition Professional Receiver/Decoder ST.TM.E10100.
Options 5.1 Option Card Locations The functionality can be enhanced with the inclusion of option cards. Each card consists of a horizontally mounted PCB with rear panel connector(s). The cards are fitted into the positions indicated in Table 5.1. Euroboard Slot Mezzanine 1 Alarm Relay Card Connector MCD Slot AC Mains Supply RS-422 Data Card Connector Mezzanine 2 Figure 5.1: Option Card Slot Locations (Rear View) Table 5.
Options 5.2.3 Connector Details Provides a DVB-compliant copper connection. The input supports both byte-mode and single packet burst mode and is activated through the Input Menu (#2). The specification for these connectors are given in Section B.4.3. ASI IN 1/2 Table 5.
Options 5.3.3 Connector Details L-band Inputs Connect the L-band output of a suitable LNB to the F-type connector either directly or via a suitable attenuator giving adequate consideration to lightning and surge protection – refer to Section 2.3.4, Outdoor Antenna. The active input is chosen using the Input Status Menu (#2). QPSK IN 1/2 In most cases an attenuator will not be required. The following list summarises the circumstances when one should be used.
Options Audio Outputs A pair of 9-way female D-type connectors provide two stereo channels. Each connector carries a single channel of a stereo pair in both analogue and digital form. The output can be varied according to service and unit configuration. Audio control is through the Service Menu (#3). The specification for this connector is given in Annex B, Section B.5.2, Audio Outputs. AUDIO 1 / 2 Table 5.
Options 5.4.3 Connector Details The active input is chosen using the Input Status Menu (#2). The specification for this connector is given in Annex B, Section B.4.2, 8PSK/16QAM Satellite Receivers. QPSK/8PSK/16QAM IN 1/2 Table 5.5: 8PSK/16QAM Card Connectors Input Specification Connector type F-type, Female Connector designation QPSK/8PSK/16QAM IN 1 QPSK/8PSK/16QAM IN 2 Pin: Centre RF Input Shield Ground/Chassis LNB Supply Refer to Caution box below Impedance 75 W CAUTIONS... 1.
Options 5.5.2 Rear Panel View Figure 5.5: High Speed RS-422 Data Enabler Card Rear Panel 5.5.3 Connector Details High-speed data (synchronous data) is carried in a transport stream as private data. The specification for this connector is given in Annex B, Section B.5.3, Data Outputs. DATA OUT Table 5.6: RS-422 Synchronous Data Output Specification Item Specification Type: ITU-T V.
Options 5.6 QPSK/8PSK/16QAM (TT1260/SWO/16QAM) This option provides a software key license for TT1260/HWO/HM, enabling QPSK, 8PSK, and 16QAM. The key is downloaded via the Ethernet or entered via the front panel System Menu (#6), (see Annex C, Section C.9, System Menu). When the key is downloaded, hidden functionality in the software is unlocked. Contact TANDBERG Television Customer Services (refer to Contact Information on page vii, Preliminary Pages). 5.
Options 5.10 VideoGuard Director CA/TANDBERG Director NCP (TT1260/SWO/DIR) This option provides a software key to enable VideoGuard Director CA/TANDBERG Director NCP. The key is downloaded via the Ethernet or entered via the front panel System Menu (#6), (see Annex C, Section C.9, System Menu). When the key is downloaded, hidden functionality in the software is unlocked. Contact TANDBERG Television Customer Services (refer to Contact Information on page vii, Preliminary Pages). 5.
Chapter 6 6. Preventive Maintenance and Fault-finding Contents 6.1 Routine Checks......................................................... 6-3 6.1.1 Cooling Fan .................................................. 6-3 6.1.2 Cleaning........................................................ 6-3 6.2 Servicing ................................................................... 6-3 6.2.1 Conditions Requiring Servicing..................... 6-3 6.2.2 Replacement Parts ....................................... 6-4 6.2.
Preventive Maintenance and Fault-finding BLANK Page 6-2 Instruction Manual: TT1260 Standard Definition Professional Receiver/Decoder ST.TM.E10100.
Preventive Maintenance and Fault-finding 6.1 Routine Checks 6.1.1 Cooling Fan There are no routine checks associated with this equipment other than to ensure that the unit is adequately cooled. This equipment must never be operated unless the cooling fan is working; this should be checked periodically. CAUTION... The fan contained within this unit is not fitted with an insect/dust filter. Pay particular attention to the environment in which it is going to be used. Cooling Fan Figure 6.
Preventive Maintenance and Fault-finding 4. If the product does not operate normally by following the operating instructions. Adjust only those controls that are covered by the operating instructions, as an improper adjustment of other controls may result in damage and will often require extensive work by a qualified technician to restore the product to its normal operation. 5. If the product has been dropped or the case has been damaged. 6. When the product exhibits a distinct change in performance. 7.
Preventive Maintenance and Fault-finding 6.4 Fault-finding 6.4.1 General The information contained in this chapter is intended to isolate the unit as the faulty equipment if a system failure occurs. If the following information fails to clear the abnormal condition, please contact Customer Services using the information given in the Preliminary Pages of this manual. 6.4.2 Factory Default Settings TT1260 are dispatched with the factory defaults shown in Annex F.
Preventive Maintenance and Fault-finding Table 6.1: Fuse Information Item Specification Fuse Single pole, fitted in live conductor in power input filter at rear of unit. Fuse type 5 mm x 20 mm anti-surge (T) HBC, IEC127 (sheet v) Fuse rating 1.6 A, 250 Vac To replace the ac power fuse perform the following: WARNING… BEFORE REPLACING THE REAR PANEL FUSE, DISCONNECT THE EQUIPMENT FROM THE SUPPLY. FAILURE TO DO THIS MAY EXPOSE HAZARDOUS VOLTAGES. UNPLUG THE EQUIPMENT FROM THE LOCAL SUPPLY SOCKET. 1.
Preventive Maintenance and Fault-finding 6.6 Disposal 6.6.1 Moulded Plugs If the moulded plug fitted to the mains cable supplied with this equipment is not required, use another cable. If the supplied plug is to be changed cut it off and dispose of it safely. WARNING... IF THE MOULDED PLUG FITTED TO THE MAINS CABLE SUPPLIED WITH THIS EQUIPMENT IS NOT REQUIRED, PLEASE CUT IT OFF AND DISPOSE OF IT SAFELY.
Preventive Maintenance and Fault-finding BLANK Page 6-8 Instruction Manual: TT1260 Standard Definition Professional Receiver/Decoder ST.TM.E10100.
Annex A A. Glossary The following list covers most of the abbreviations, acronyms and terms used in TANDBERG Television Limited Manuals. All terms may not be included in this manual. mm Micrometre (former name - micron): a unit of length equal to one millionth (10-6) of a metre. 3:2 pulldown A technique used when converting film material (which operates at 24 pictures per second) to 525-line video (operating at 30 pictures per second).
Glossary B3ZS Bipolar with Three Zero Substitution: A method of eliminating long zero strings in a transmission. It is used to ensure a sufficient number of transitions to maintain system synchronisation when the user data stream contains an insufficient number of 1s to do so. B3ZS is the North American equivalent of the European HDB3. Backward Compatibility Refers to hardware or software that is compatible with earlier versions. BAT Bouquet Association Table: Part of the service information data.
Glossary COFDM Coded OFDM: COFDM adds forward error correction to the OFDM transmission consisting of Reed-Solomon (RS) coding followed by convolutional coding to add extra bits to the transmitted signal. This allows a large number of errors at the receive end to be corrected by convolutional (Viterbi) decoding followed by RS decoding. Compression Reduction in the number of bits used to represent the same information.
Glossary DVB SI Digital Video Broadcasting Service Information. DVB-PI DVB-Professional Interfaces: TTV Lan search shows – DVB Physical Interfaces Earth Technical Earth: Ensures that all equipment chassis within a rack are at the same potential, usually by connecting a wire between the Technical earth terminal and a suitable point on the rack. This is sometimes known as a Functional earth. Protective Earth: Used for electric shock protection. This is sometimes known as a safety earth.
Glossary ICAM Integrated Conditional Access Module: Embedded in the IRD and responsible for descrambling, plus packet filtering and reception. It also contains the physical interface to the subscriber’s viewing card. IEC International Electrotechnical Committee. IF Intermediate Frequency: Usually refers to the 70 MHz or 140 MHz output of the Modulator in cable, satellite and terrestrial transmission applications. Interframe Coding Compression coding involving consecutive frames.
Glossary LO Local Oscillator. LSB Least significant bit. Luminance The television signal representing brightness, or the amount of light at any point in a picture. The Y in YCRCB. LVDS Low Voltage Differential Signal: LVDS is a generic multi-purpose Interface standard for high speed / low power data transmission. It was standardised in ANSI/TIA/EIA-644-1995 Standard (aka RS-644). Macroblock A 16x16-pixel area of the TV picture. Most processing within the MPEG domain takes place with macro blocks.
Glossary nm Nanometre: a unit of length equal to one thousand millionth (10-9) of a metre. NTSC National Television Systems Committee: The group, which developed analogue standards used in television broadcast systems in the United States. Also adopted in other countries (e.g. Mexico, Canada, Japan). This system uses 525 picture lines and a 59.97 Hz field frequency. NVOD Near Video On Demand: Method of offering multiple showings of movies or events.
Glossary PPV Pay Per View: A system of payment for viewing services based on a usage / event basis rather than on on-going subscription. Subscribers must purchase viewing rights for each PPV event that they wish to view. PPV events may be purchased as IPPV or OPPV. Program PC - A sequence of instructions for a computer. TV - A concept having a precise definition within ISO 13818-1 (MPEG-2). For a transport stream, the timebase is defined by the PCR.
Glossary SFN Single Frequency Network: The SFN technique allows large geographic areas to be served with a common transmission multiplex. All transmitters in the network are synchronously modulated with the same signal and they all radiate on the same frequency. Due to the multi-path capability of the multi-carrier transmission system (COFDM), signals from several transmitters arriving at a receiving antenna may contribute constructively to the total wanted signal.
Glossary TSDT Transport Stream Descriptor Table: A component of the MPEG-2 PSI data. This table describes which type of Transport stream it is in (i.e. DVB, ATSC etc.). It may also contain other descriptors. TSP Transport Stream Processor. TVCT Terrestrial Virtual Channel Table (ATSC). U 44.45 mm (rack height standard). UART Universal Asynchronous Receiver Transmitter: A device providing a serial interface for transmitting and receiving data.
Annex B B. Technical Specification Contents B.1 Output B-3 B.1.1 International Television Standards ...............B-3 B.1.2 Video.............................................................B-4 Supported Video Resolutions .......................B-4 Supported Video Bit-rates.............................B-4 Performance Figures ....................................B-4 Vertical Blanking Signals ..............................B-5 B.2 Audio Decoding and Output Stage............................B-5 B.2.1 General....
Technical Specification Table B.7: Supported Audio Data Bit-rates (MPEG-2) .................. B-8 Table B.8: Analogue Audio Performance ...................................... B-9 Table B.9: Maximum User Bit-rates............................................... B-9 Table B.10: QPSK Satellite Receiver Input Specification ........... B-10 Table B.11: QPSK L-band Satellite Input — Eb/N0 Ratio............ B-11 Table B.12: LNB Power and Control ........................................... B-11 Table B.
Technical Specification B.1 Output B.1.1 International Television Standards Two composite video outputs are provided at the rear panel. These carry identical video. The standard is selectable to PAL- I, B, G, D, N, M and NTSC-M (with or without pedestal). Table B.1: International Television Standards - 625 Line Output As indicated in Menus: NTSC-M NTSC-NP PAL-M Lines / frame 525 525 525 Fields / second 60 60 60 Interlace 2/1 2/1 2/1 Frames / second 30 (29.97) 30 (29.97) 30 (29.
Technical Specification B.1.2 Video Supported Video Resolutions The TT1260 supports MP@ML and 4:2:2P@ML with video resolutions described in Table B.3. Table B.3: Supported Video Resolutions 625-line, 25 frame/s 525-line, 30 (29.
Technical Specification Vertical Blanking Signals The TT1260 range of Receivers and Decoders support the following VBI reinsertion and signalling: · · · · · · · · · VBI streams VPS data and pass through WSS data and pass through 525 VITC and 625 VITC Vertical Interval Test Signal (VITS) Video Index data AMOL pass through Closed Captioning (525-line sub-titling system) Insertion Test Signal (ITS) Insertion B.2 Audio Decoding and Output Stage B.2.
Technical Specification B.2.2 MPEG Audio The TT1260 supports decoding of MPEG audio as follows: · · · B.2.3 Compression layers: MPEG-1 layers I and II Sampling rates (kHz): 32, 44.1, 48 Maximum compressed data rate: 384 Kbit/s (layer II) Dolby Digital AC-3 Audio The TT1260 is able to decode and output the primary stereo pair of a Dolby Digital AC-3 encoded audio stream.
Technical Specification B.3.2 Analogue Audio The TT1260 supports level control of the audio outputs. Independent control of each output of each stereo pair is provided via the User Interface and remote interfaces. Audio output connector type: 2 X 9 way female D-type Output level: +18 dBm nominal clipping level. Selectable in range 12 to +24 dBm. Output impedance: 50 W (nominal). Table B.
Technical Specification · B.3.6 Right to both (right signal to left and right outputs) Dual Mono Where a dual mono service is available (i.e. stream 1 and stream 2 sharing the same PID), it is possible to configure the output as follows: · · · B.3.7 Stream 1 on both left and right channels Stream 2 on both left and right channels Stream 1 on left channel, and stream 2 on right channel Lip Sync The audio at the output remains synchronous to the decoded video by default (i.e.
Technical Specification B.3.10 Analogue Audio Performance Table B.8: Analogue Audio Performance Parameter Performance Voltage gain adjustment ± 1 dBm Maximum undistorted output (terminated with 600 W) 21 dBm Crosstalk 50 to 100 Hz: >80 dB 100 to 15 000 Hz: >60 dB Frequency response 50 to 16 000 Hz: ±0.5 dB Total harmonic distortion (THD), terminated in 600 W <0.5% Signal-to-noise ratio (referenced to 1 kHz tone at +9 dBm out) ³ 70 dB Audio Reference Level -9 dBm B.3.
Technical Specification B.5 Input Specifications B.5.1 QPSK Satellite Receivers General Table B.
Technical Specification Table B.11: QPSK L-band Satellite Input — Eb/N0 Ratio Convolutional FEC Rate Receive Eb/N0 Ratio (dB min) in IF Loop for Correct MPEG-2 System ½ 4.5 2/3 5.0 ¾ 5.5 5/6 6.0 7/8 6.4 Eb/N0 ratio is referred to user bit-rate Ru188. See EN 300 421 specification. For more detailed specification information and advice on performance in specific applications, please contact TANDBERG Television Customer Services.
Technical Specification B.5.2 8PSK/16QAM Satellite Receivers Table B.
Technical Specification Table B.14 shows the Eb/No requirements to ensure error free demodulation for all supported FEC rates. Table B.14 shows the minimum and maximum possible bit-rates for all FEC rates. Table B.14: Eb/No Requirements QPSK/8PSK/16QAM Modulator-Demodulator in IF Loop Modulation Eb/No Ratio (dB) for Demodulator Output BER < 1E-7 Rs < 20 Msymbol/s Rs > 20 MSymbol/s QPSK ½ 3.9 3.9 QPSK 2/3 4.4 4.5 QPSK ¾ 4.9 5.1 QPSK 5/6 5.4 5.8 QPSK 7/8 5.8 6.4 8PSK 2/3 6.3 6.
Technical Specification 16QAM/8PSK LNB Control The IRD supports voltage controlled LNBs only. The available voltages and current are shown in Table B.16. Typical LNB requirements are shown in Table B.17. Table B.16: LNB Power and Control (QPSK/8PSK/16QAM) Parameter Specification Voltage 13 V (Vertical) 18 V (Horizontal) On selected input (nominal voltage) Current 350 mA maximum Band selection 22 kHz tone Table B.
Technical Specification B.5.4 Frame Sync Connector The Decoder can frame lock to an external video source. The frame information is input as a composite synchronous signal, with or without active video. The user can offset the sync to the video output by ±8 lines, with a resolution of one pixel. Lip sync error introduced by the Receiver is in the range –10ms to +30ms. This implies audio frame skip and repeat. It is possible to connect multiple Receivers to the same reference signal.
Technical Specification Digital Video These connectors are located on the motherboard of the TT1260 Base Unit (TT1260/DIRBAS). Table B.21: Digital Video Output Connectors Item Specification Safety status SELV Connector type BNC, Female, 75W Connector designation CVBS 1 CVBS 2 Connector design SDI Output standard (UK/EEC): ITU-R RECMN BT.656-3 Interfaces for Digital Component Video Signals in 525-Line and 625-Line Television Systems Operating at the 4:2:2 Level of Recommendation ITU-R BT.
Technical Specification B.6.3 Data Outputs RS-232 Asynchronous (Low-speed) Data This connector is located on the motherboard of the TT1260 Base Unit (TT1260/DIRBAS). Table B.23: RS-232 Asynchronous (Low-speed) Data Connector Item Specification Safety status SELV Data-rates (bit/s) 1200; 2400; 4800; 9600; 19 200; 38 400 Standards EIA RS-232C / ITU-T BT. V.24/V.
Technical Specification B.6.5 Alarm Connectors Table B.26: Relay Alarm Output Specification Item Specification Connector designation: ALARM Connector type: 9-way D-type female for the summary alarm relay 25-way D-type female for the Alarm Relay Card (TT1260/HWO/ALRM) with six alarm relays Contact Configuration: SPDT (Change-over) All volt-free contacts, fully isolated.
Technical Specification B.7 Environmental B.7.1 Conditions Table B.28: Environmental Conditions Operational Temperature 0°C to +45°C (+32°F to +113°F) ambient air temperature with free airflow Humidity 0% to 95% (non-condensing) Cooling requirements Convection cooling/free airflow Handling/movement Fixed (non-mobile) use only Storage/Transportation B.7.2 Temperature -20°C to +70°C (-4°F to +158°F) Humidity 0% to 95% (non-condensing) Physical Table B.29: Physical Parameters B.
Technical Specification Item Specification Rated frequency 60 Hz ± 3 Hz (100 – 120 Vac) 50 Hz ± 3 Hz (200 – 250 Vac) Voltage selection Auto-ranging Rated current (max) 1.5 A Input connector CEE 22/IEC 320 3-pin male receptacle (A separate cable is used to connect the unit to the mains supply) Page B-20 Fuse rated voltage 250 Vac Fuse type T1.6AH, 250 V, 5x20mm, IEC 60127-2 sheet 5 specifications, UL recognised.
Technical Specification B.9 Compliance14 B.9.1 Safety This equipment has been designed and tested to meet the requirements of the following: EN 60950 European Safety of information technology equipment including business equipment. IEC 60950 International Safety of information technology equipment including business equipment. In addition, the product has been designed to meet the following: UL 1950 B.9.2 USA Safety of information technology equipment including business equipment.
Technical Specification B.9.3 CE Marking The CE mark is affixed to indicate compliance with the following directives: 89/336/EEC of 3 May 1989 on the approximation of the laws of the Member States relating to electromagnetic compatibility. 73/23/EEC of 19 February 1973 on the harmonisation of the laws of the Member States relating to electrical equipment designed for use within certain voltage limits. NOTE... The CE mark was first affixed to this product in 2002. B.9.
Annex C C. Menus Contents C.1 LCD Menus ...............................................................C-3 C.1.1 Using the Menus...........................................C-3 C.1.2 Menu Descriptions........................................C-3 C.8.4 Audio 1 Alarm Setup Menu ........................ C-18 C.8.5 Audio 2 Alarm Setup Menu ........................ C-18 C.3 The Menu Tree .........................................................C-4 C.9 System Menu (#6) .............................................
Menus Table C.24: Alarms Menu............................................................C-16 Table C.25: Satellite BER Alarm Setup Menu.............................C-16 Table C.26: Transport Stream Alarm Setup Menu......................C-17 Table C.27: Video Alarm Setup Menu.........................................C-17 Table C.28: Audio 1 Alarm Setup Menu......................................C-18 Table C.29: Audio 2 Alarm Setup Menu......................................C-18 Table C.30: System Menu........
Menus C.1 LCD Menus C.1.1 Using the Menus Detailed description of the use of menus is given in Chapter 3, Operating the Equipment Locally. C.1.2 Menu Descriptions This annex describes the front panel LCD menus. When the unit is first powered up, it progresses through a series of start-up pages on the LCD display. The menu is created in a tree structure, where each branch may contain items, new branches, or both.
Menus C.3 The Menu Tree SWITCH ON Boot Screen 2. Input Status Menu 1 Preset Menu 2 Input Menu 3 Service Menu 4 Conditional Access Menu 5 Alarms Menu 6 Systems Menu 6. System Menu Section C.9 6 Date/Time 6.1 Setup Operating Mode 6.1.1 LCD Contrast 6.1.2 Serial Remote Protocol 6.1.3 IP Address 6.1.4 Subnet Mask 6.1.5 Restore System Defaults 6.1.6 Service Hunt Mode 6.1.7 Customisation Key 6.2 IRD Details Software Version 6.2.1 Firmware Version 6.2.2 Hardware Version 6.2.3 PLD Version 6.2.
Menus C.4 Presets Menu Items (#1) The Presets menu contains up to 40 editable preset numbers in the range 01 – 40. Selecting a Service via the Presets menu automatically reconfigures the TT1260. Where a choice exists, each preset can have a selected language, network name and service provider associated with it. Table C.2: Presets Menu Items C.
Menus C.5.2 QPSK Satellite Menu The QPSK Satellite submenu accesses the QPSK parameters. Table C.5: QPSK Satellite Menu Display title: QPSK Satellite Description Quality PV BER -1 -3 -5 1.0 E-8 XXXXXXXXXXXXXXX XXXXXXXXXXXXXXX is a bar-graph indicating the current level (10 x -1 to –5 range) XXXXXXXX Eb/N0 margin XXX.X is a measure of the signal to noise ratio (first X is + or -) XXX.
Menus C.5.3 8PSK/16QAM Menu The 8PSK/16QAM submenu accesses the 8PSK/16QAM parameters. Table C.6: 8PSK/16QAM Menu Display title: 8PSK/16QAM Description Quality Eb/NO XXX.X dB XXX.X is a measure of the signal to noise ratio (first X is + or -) Source 1 Modulation FEC XXXX XXXX XXXX XXXX is the EDITABLE modulation and FEC rate QPSK 1/2 QPSK 2/3 QPSK 3/4 QPSK 6/7 QPSK 7/8 8PSK 2/3 8PSK 5/6 8PSK 8/9 8PSK Auto 16QAM 3/4 16QAM 7/8 16QAM Auto C.
Menus C.6.1 Display title: Service Description Section Teletext The Teletext submenu contains information about the audio format and quality of the currently decoded audio stream on the primary output. C.6.5 VBI The VBI status submenu displays the current status of the VBI components. C.6.6 PCR PID The PCR PID submenu displays the Program Clock Reference packet identifier and its status. C.6.
Menus Display title: Video Description MAGENTA STEP & FLAT (NTSC) FLAT FIELD RED (NTSC) LUMINANCE RAMP (NTSC) BOWTIE (NTSC) 100% COLOUR BARS (NTSC) MULTI PATTERN (NTSC) BLACK (NTSC) Framesync XXXXXXX YYYYYYYY XXXXXXX is the editable parameter for Framesync enable (ENABLED, DISABLED) YYYYYYYY shows the presence of a framesync input (SIGNAL NOT PRESENT, SIGNAL PRESENT, FRAME RATE MISMATCH, SIGNAL LOCKED); Framesync NTSC Offset YYYYYY XXXXXX is the editable PAL framesync offset range –199999 to+199999 pi
Menus C.6.3 Audio 2 Menu The Audio 2 signal status submenu contains information about the audio format and quality of the currently decoded audio stream on the secondary audio output. Table C.10: Audio 2 Menu Display title: Audio 02 Description XX Streams PID YYYY XX is the number of Audio streams present YYYY is the currently selected audio1 PID ZZZZ is the stream status (OK, STOP, FAIL) ZZZZ Bit-rate YYY Kbit/s XX.X is the Audio 2 sample rate YY is the Audio 2 bit-rate Delay Adjustment XXX.
Menus Table C.12: Sync Data Menu (High Speed RS-422 Data Enabler Card Fitted) Display title: Sync Data Description WW Streams PID XXXX WW is the number of High speed data streams present XXXX is the currently selected HSD PID YYYYYYYYYYY is the stream status (PRESENT, NOT PRESENT) YYYYYYYYYYY Bit-rate C.6.5 XXXXX is the Synchronous data bit-rate (Up to 2.
Menus Display title: VBI Description Video Index XXXXXXXXXXX XXXXXXXXXXX indicates the presence of Video Index data (PRESENT, NOT PRESENT) YYYYYYY is the editable parameter for enabling Video Index pass through (ENABLED, DISABLED) ZZZZ indicates the status of the output (OK, STOP, FAIL) YYYYYYY ZZZZ AMOL 1 & 2 XXXXXXXXXXX YYYYYYY ZZZZ Closed Captions XXXXXXXXXXX YYYYYYY ZZZZ XXXXXXXXXXX indicates the presence of Closed Captions (PRESENT, NOT PRESENT) YYYYYYY is the editable parameter for enabling Cl
Menus C.7 Conditional Access Menu (#4) The Conditional Access submenu contains the current status of the smart card, and also lists the effect the smart card has for the currently selected components. Table C.17: Conditional Access Menu Display title: CA Description XXXXXXXXXXXXXXXXXXXXXX XXXXXXXXXXXXXXXXXXXXXX is: CLEAR OR UNKNOWN CA RAS ENCRYPTED VIDEOGUARD ENCRYPTED SIGNAL PROTECT ENCRYPTED BISS ENCRYPTED YYYY is the current CA CAS ID (hex) CAS ID YYYYh C.7.
Menus C.7.3 Director Menu The Director submenu displays all Director status and version information and allows editing of the customer ID and local lock pins. Table C.
Menus C.7.4 BISS Mode 1 Menu The BISS Mode submenu allows editing of the control word keys for the BISS user IDs. Table C.
Menus C.8 Alarms Menu (#5) The Alarms menu provides a summary of the alarm status. Table C.24: Alarms Menu C.8.1 Display title: Alarms Description Section Satellite BER Alarm Setup Satellite BER alarm and relay settings. C.8.1 Transport Stream Alarm Setup Transport Stream alarm and relay settings. C.8.2 Video Alarm Setup Video alarm and relay settings. C.8.3 Audio 1 Alarm Setup Audio 1 alarm and relay settings. C.8.4 Audio 2 Alarm Setup Audio 2 alarm and relay settings. C.8.
Menus C.8.2 Transport Stream Alarm Setup Menu Table C.26: Transport Stream Alarm Setup Menu Display title: Alarms Description IF NO TRANSPORT STREAM YYYYYYYYYYYYYY is editable: YYYYYYYYYYYYYYY NO ALARM SET ALARM ONLY SET ALARM AND RELAY 1 SET ALARM AND RELAY 2 SET ALARM AND RELAY 3 SET ALARM AND RELAY 4 SET ALARM AND RELAY 5 SET ALARM AND RELAY 6 SET RELAY 1 ONLY SET RELAY 2 ONLY SET RELAY 3 ONLY SET RELAY 4 ONLY SET RELAY 5 ONLY SET RELAY 6 ONLY C.8.3 Video Alarm Setup Menu Table C.
Menus C.8.4 Audio 1 Alarm Setup Menu Table C.28: Audio 1 Alarm Setup Menu Display title: Description IF AUDIO 01 NOT RUNNING YYYYYYYYYYYYYY is editable: YYYYYYYYYYYYYY NO ALARM SET ALARM ONLY SET ALARM AND RELAY 1 SET ALARM AND RELAY 2 SET ALARM AND RELAY 3 SET ALARM AND RELAY 4 SET ALARM AND RELAY 5 SET ALARM AND RELAY 6 SET RELAY 1 ONLY SET RELAY 2 ONLY SET RELAY 3 ONLY SET RELAY 4 ONLY SET RELAY 5 ONLY SET RELAY 6 ONLY C.8.5 Audio 2 Alarm Setup Menu Table C.
Menus C.9 System Menu (#6) Table C.30: System Menu C.9.1 Display title: System Description Section Setup The Setup submenu allows the user to edit the operating mode, LCD contrast, serial remote protocol, IP address, subnet mask, service hunt mode, and the customisation key. C.9.1 IRD Details The IRD Details submenu diplays the software, firmware, hardware, PLD version and electronic serial number of the IRD. C.9.2 System Restart The System Restart submenu allows the user to restart the unit.
Menus C.9.2 IRD Details Menu The IRD Details submenu diplays the software, firmware, hardware, PLD version and electronic serial number of the IRD. Table C.32: IRD Details Menu Display title: IRD Details Description Software Version XX.XX.XX is the software version number XX.XX.XX Firmware Version XX.XX is the firmware version number XX.
Annex D D. Using the TT1260 with the TANDBERG Director System Contents D.1 Configuring the TT1260 for Use With Director ..........D-3 D.1.1 Getting Started..............................................D-3 D.1.2 Using the TT1260 in the Over-air Mode .......D-3 D.2 Response to Over-air Commands.............................D-4 D.2.1 General.........................................................D-4 D.2.2 Display On-screen Display (OSD) Messages .....................................................D-4 D.2.
Using the TT1260 with the TANDBERG Director System BLANK Page D-2 Instruction Manual: TT1260 Standard Definition Professional Receiver/Decoder ST.TM.E10100.
Using the TT1260 with the TANDBERG Director System D.1 Configuring the TT1260 for Use With Director D.1.1 Getting Started You must have VideoGuard CA, a Director Smart Card and be tuned to a Director stream. CAUTION Do not repeatedly insert and remove the Director Smart Card. 1. Insert the Director Smart Card before tuning to the service. 2. Check that the unit has VideoGuard installed (Menu #4.3). 3. Set the Receiver to DIRECTOR NCP mode (Menu #6.1). 4.
Using the TT1260 with the TANDBERG Director System D.2 Response to Over-air Commands D.2.1 General This section describes the Receiver’s response to over-air commands. D.2.2 Display On-screen Display (OSD) Messages Displays a text string on the LCD front panel. The display is forced to Menu #4.3, NCP MESSAGE. The message is displayed for a set time or until cleared from the head-end. NOTE... The viewing Monitor does NOT display messages; all user interaction is via the front panel. D.2.
Using the TT1260 with the TANDBERG Director System D.2.6 Force Service Selection Forces the Receiver to decode a different service or stored channel (which may require a retune). The command is generally used to hop between services. The Director system has to be informed of the frequency, FEC-rate and symbol-rate for each stream. This is set-up using the Multiplex Element Manager (MEM).
Using the TT1260 with the TANDBERG Director System BLANK Page D-6 Instruction Manual: TT1260 Standard Definition Professional Receiver/Decoder ST.TM.E10100.
Annex E E. Language Abbreviations The TT1260 supports the following languages. These are shown in alphabetical order.
Language Abbreviations The following non-ISO languages are supported: LANGUAGE ABBREVIATION MAIN ONE AUX TWO INTERNATIONAL SOUND INT AUDIO 1 AAA AUDIO 2 AAB AUDIO 3 AAC AUDIO 4 AAD AUDIO 5 AAE AUDIO 6 AAF AUDIO 7 AAG AUDIO 8 AAH AUDIO 9 AAI AUDIO 10 AAJ AUDIO 11 AAK AUDIO 12 AAL AUDIO 13 AAM AUDIO 14 AAN AUDIO 15 AAO AUDIO 16 AAP The non-ISO languages allow tagging of audio without reference to specific languages.
Annex F F. Factory Defaults Units are shipped with the following factory default parameters. These can be restored at any time using the System Menu. All other parameters are unaffected by restoring the factory defaults. Menu Page Description Default #2 Input ASI 2.2 SOURCE AUTO #2 Input QPSK/8PSK/16 QAM 2.4 SOURCE 1 2.3 LNB FREQUENCY 10750.0 MHz 2.3.1 SATELLITE FREQUENCY 12168.0 MHz 2.3.2 SEARCH RANGE 3000 kHz (5000 kHz) 2.3.3 SYMBOL RATE 27.5Msym/s 2.3.
Factory Defaults Menu #4 Conditional Access #5 Alarm #6 Setup Page F-2 Page Description Default 3.2.3 ROUTING STEREO 3.2.4 CLIPPING LEVEL 18dB 3.2.5 AC3 DOWNMIX METHOD SURROUND STEREO 3.4 ASYNC DATA (High Speed RS-422 Data Enabler Card Not Fitted) ENABLED 3.4 SYNC DATA (High Speed RS-422 Data Enabler Card Fitted) ENABLED 3.5 TELETEXT ENABLED 3.6.1 VPS ENABLED 3.6.2 WSS ENABLED 3.6.3 VITC INSERTION ENABLED 3.6.4 VITC 525 LINE 14 and 16 3.6.
Annex G G. Quick Reference Guide Contents G.1 Setting Up the Input ................................................. G-3 G.1.1 Satellite Receiver......................................... G-3 G.1.2 Decoder ....................................................... G-3 G.2 Service Configuration............................................... G-4 G.2.1 Setting Up a Service .................................... G-4 G.2.2 Setting Up the Service Hunt Mode .............. G-4 G.2.3 Setting up a Preset Service ..........
Quick Reference Guide BLANK Page G-2 Instruction Manual: TT1260 Standard Definition Professional Receiver/Decoder ST.TM.E10100.
Quick Reference Guide G.1 Setting Up the Input G.1.1 Satellite Receiver Table G.1 steps through the setting up the Satellite Receiver using Menu #2 Input, and the QPSK 1 and 2 inputs. The transmission parameters must be known before starting. Table G.1: Tuning the Satellite Receiver Step Action 1 Connect the cable to the QPSK 1 input. 2 Power up the unit and navigate to Menu # 2 Input. 3 Press the Right pushbutton to access Menu # 2.1, then press Edit.
Quick Reference Guide G.2 Service Configuration G.2.1 Setting Up a Service Each transport stream may contain many Services. Menu #3 allows a Service to be chosen as current and the parameters of its components to be specified. Table G.3: Setting Up a Service Step Action 1 Go to Menu # 3.1 Service, then press Edit. 2 Use the Up and Down pushbuttons to select the desired source, then press Save. 3 Navigate to Menu # 3.2, Audio 1. 4 Verify that the correct audio component is selected.
Quick Reference Guide G.2.3 Setting up a Preset Service Follow the steps in Table G.5 to store the current Service as a preset. Table G.5: Setting up a Preset Service Step G.2.4 Action 1 Set up a service as explained in Section G.2.1, Setting Up a Service. 2 Navigate to Menu # 1.1, PRESETS. 3 Press Edit. 4 Up and Down pushbuttons to select the slot to store the service. 5 Press Save. Loading a Preset Service Follow the steps in Table G.6 to select a preset service. Table G.
Quick Reference Guide BLANK Page G-6 Instruction Manual: TT1260 Standard Definition Professional Receiver/Decoder ST.TM.E10100.
Index The following conventions are used in this manual: a page number entry in bold indicates a reference to a heading; a page number entry in italic is a reference to a table or figure; otherwise the page number indicates a reference to an entry on that page.
Index connector information, B-17, B-18 front panel, 1-16 methods, 1-8 modem baud rate, 1-15 modes, 1-14 serial remote control mode, 1-15 customer services address, viii D data outputs, 1-6 RS-232 connector, B-17 RS-232 specification, B-17 data output, 1-8 decoder ASI connectors, 5-4 ASI copper input connector, B-14 input summary, 1-14 setting up the input, 3-8, G-3 typical system, 1-13 decoders main features, 1-5 default power-up service, 3-9 preset service, 3-17, C-5 default settings factory, 6-5, F-1 d
Index L language non-ISO languages, E-2 language, foreign manuals, ii L-band input frequency range, 1-11 L-band (#n) input specification, B-10, B-12 L-band input connector, 5-5 LCD display, 1-6 LEDs description, 1-16 front panel, 1-16 local lockout, 1-15 low-noise block (LNB), 1-11 dc power from the receiver, 5-5, B-11, B-14 specification, B-11 use of an attenuator, 5-5 M maintenance cleaning, 6-3 marketing numbers, 1-4 mechanical inspections, 2-3 menu #1 preset services, C-5 #2 input status, C-5 #3 servi
Index operation modes, 3-5 setting up preset service, 3-17 preset services preset menu (#1) pages, C-5 setting up, 3-17 programme delivery and control (PDC), 1-7 PSU.
Index QPSK input card, 5-5 remote control connector, B-17, B-18 RS-422 data input module, B-18 satellite QPSK input, B-10, B-12 video analogue composite output, B-15 video composite output, B-4 video digital output, B-16 spread mode, 3-15 storage/transportation, B-19 summary alarm, 4-3 summary of features, 1-6 supply cord general description, 2-6 switching on, 3-3 synchronous data output RS-422 output connector, 5-8 T TANDBERG Director control words, 3-13 GUI, 1-7 system, 1-7, 1-12 TANDBERG Director syste
Index BLANK Index-6 Instruction Manual: TT1260 Standard Definition Professional Receiver/Decoder ST.TM.E10100.
PROFORMA INVOICE INVOICE NO: DATE: YOUR REF: OUR REF: SENDER : CONSIGNEE: TANDBERG TELEVISION ASA PHILIP PEDERSENS VEI 20 N-1366 LYSAKER NORWAY SHIPPED PER: TNT (Account 237067) DELIVERY ADDRESS: TANDBERG TELEVISION REPAIR C/O HADELANDPRODUKTER AS MOHAGEN N-2770 JAREN NORWAY TERMS OF PAYMENT: N/C, RETURN FOR SERVICE/REPAIR TERMS OF DELIVERY: EX WORKS GOODS FOR SERVICE/REPAIR WITH NO COMMERCIAL VALUE. WILL BE RETURNED BACK TO (FILL IN YOUR COUNTRY) AFTER REPAIR.
Side 1 av 1 Repair/service Order Form (Non Norwegian Customers) Delivery is to be done by TNT. TANDBERG Television's TNT account is 237067. The unit(s) must be shipped using TANDBERG Television AS as receiver address, and HAPRO AS as delivery address. Receiver Address: TANDBERG Television AS Att: CS_Logistics Philip Pedersens Vei 20 N-1366 Lysaker Norway Service reference No.