» D00864010A CD-01 U /CD-01UPro CD PLAYER OWNER’S MANUAL ˛
Important Safety Precautions O CAUTION: TO REDUCE THE RISK OF ELECTRIC SHOCK, DO NOT REMOVE COVER (OR BACK). NO USER-SERVICEABLE PARTS INSIDE. REFER SERVICING TO QUALIFIED SERVICE PERSONNEL. The lightning flash with arrowhead symbol, within equilateral triangle, is intended to alert the user to the presence of uninsulated “dangerous voltage” within the product’s enclosure that may be of sufficient magnitude to constitute a risk of electric shock to persons.
Important Safety Instructions O 1 Read these instructions. • Do not expose this apparatus to drips or splashes. 2 Keep these instructions. • Do not place any objects filled with liquids, such as vases, on the apparatus. 3 Heed all warnings. 4 Follow all instructions. 5 Do not use this apparatus near water. 6 Clean only with dry cloth. • Do not install this apparatus in a confined space such as a book case or similar unit.
Safety Information O Safety This product has been designed and manufactured according to FDA regulations "title 21, CFR, chapter 1, subchapter J, based on the Radiation Control for Health and Safety Act of 1968", and is classified as a class 1 laser product. There is no hazardous invisible laser radiation during operation because invisible laser radiation emitted inside of this product is completely confined in the protective housings. The label required in this regulation is shown 1.
Table of contents 1 - Introduction Supplied accessories ..................................6 Environmental considerations .....................6 Some notes and precautions ..........................6 Beware of condensation .....................6 Back up memory .................................6 Rack - mounting the unit .......................7 Handling of compact discs ...........................7 2 - Remote control unit Some notes and precautions .......................8 Batteries .........................
1 - Introduction ΠEnvironmental considerations Thank you for your purchase of the TASCAM CD01U/CD-01U Pro CD player. Before connecting and using the unit, please take time to read this manual thoroughly to ensure you understand how to properly set up and connect the CD-01U/CD-01U Pro, as well as the operation of its many useful and convenient functions. After you have finished reading this manual, please keep it in a safe place for future reference.
1 - Introduction ΠEnvironmental considerations Rack-mounting the unit Use the rack-mounting kit to mount the unit in a standard 19-inch equipment rack, as shown below. Remove the feet of the unit before mounting. If you are mounting the unit in a rack, leave 1U of space above it and 10cm (4 in) or more of space at the rear. The CD-01U/CD-01U Pro can be mounted in any angle between 0 to 90 degrees. SeeEnvironmental considerationson the previous page.
2 - Remote control unit Some notes and precautions Batteries ≠ When the remote control will not be used for an extended period of time, please remove the batteries to prevent the possibility of battery acid leakage which could damage the unit. Should leakage occur, remove and discard the batteries, and wipe the battery case thoroughly with a cloth. Avoid getting the battery liquid on the skin. After cleaning, replace with new batteries.
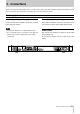
3 - Connections Before connecting the CD-01U/CD-01U Pro to other units, please read their operation manuals thoroughly to ensure proper connection. Turn the power on only after all connections have been made. Audio equipment Connecting analog audio equipment Connecting digital audio equipment Connect analog stereo amplifiers, mixers and recorders to the analog line outputs. Digital stereo amplifiers, mixers and recorders can be connected through the optical digital output terminal.
4 - Features and their functions Front panel 1 POWER switch 2 Disc slot Insert CD into the slot, label side upwards. 3 Remote signal sensor 4 EJECT key Pressing this key changes the time mode on the display. Even when the power is turned off, the time mode is retained. When in menu mode, exits the menu mode. q SHIFT key and indicator Ejects a disc. This key cannot be used when Eject Block is on and disc is being played back.
4 - Features and their functions Display 1TRACK indicator 2 Track number display Shows the track number. In the menu mode, shows the menu number. 3 MP3 indicator Lights when a MP3 CD-ROM disc is inserted. 4 INDEX/DIR indicator Shows the index number (CD-DA) or directory number (MP3). 5 T and REMAIN indicators When the time mode is set to remain time mode, these indicators light. Total remain mode: Both T and REMAIN indicators light. Track remain mode: REMAIN indicator lights.
4 - Features and their functions Rear panel 1 ANALOG OUTPUT terminals The analog line output terminals are for RCA pin jacks. The maximum output level is +6 dBV. 5 ANALOG OUTPUT (BALANCED) terminals (CD01U Pro only) The analog line output terminals are for XLR connectors. The maximum output level is +20 dBu. 2 DIGITAL (OPTICAL) OUTPUT terminal Provides the digital audio signal in S/PDIF format. This connector outputs the 44.1KHz digital signals constantly even if pitch control is activated.
4 - Features and their functions 5 PITCH key +/- keys Use these keys to perform the pitch control function. 6 KEY ORIG key This turns the Key Original function on and off. 7 A.CUE/DEL key Sets the Auto Cue level. During program input, the selected program number track is deleted. 8 A.RDY/INS key Turns the Auto Ready function on and off. During program input, inserts a track into the program list. 9 REPEAT key Turns the Repeat Play mode on and off.
5 - Menu operation The various settings and editing operations possible with the CD-01U/CD-01U Pro are performed through menu options shown on the display. Among the many No. Menu Function menu setting options, some may be made directly using the keys on the remote control.
6 - Playback Discs for playback The CD-01U/ CD-01U Pro can playback the types of discs listed below. ≠ MP3 files recorded in ISO9660 format on CD-R and CD-RW discs, and properly finalized. ≠ Ordinary audio CDs available commercially (recorded in CD-DA format). ≠ CD-R/RW discs that have not been finalized cannot be played back. Make sure the disc has been properly finalized before loading into the player. ≠ CD-R and CD-RW discs recorded in CD-DA format, and properly finalized.
6 - Playback Playback modes There are four different playback modes. The mode selected is indicated on the display. changes the playback mode in the following order: Cont ∑ Single ∑ Program ∑ Random Normal (continuous) playback mode: no indication lamp Single playback mode: S is lit Program playback mode: PGM is lit Random playback mode: RANDOM is lit You can also select the playback mode pressing the CALL/PLAY MODE key on the front panel when in SHIFT mode.
6 - Playback Selecting by track number Frame search Using the number keys on the remote control, the number of the desired track can be entered directly. Even numbers with two (Audio CD) or three (MP3) digits can be entered easily. For example: During playback standby, using the PITCH knob in shift mode performs the frame accurate search. Also, during playback standby, pressing the JOG +/keys on the remote control performs the frame search. Track 9 (Audio CD): press 0 then press 9.
7 - Advanced operations Auto Cue When the Auto Cue function is turned on and a track is selected, the point where sound begins (not where the track begins) on that track is located to and the unit enters pause mode. When the ¥ key is pressed, playback begins at exactly that point. Turning the Auto Cue function on and off Press the µ key on the front panel when SHIFT indicator is lit or A.CUE/DEL key on the remote control to select the auto cue level. Auto Cue is not supported for MP3 playback.
7 - Advanced operations Incremental play This function allows auto-cueing of the playback point to the start of the next track when the ª key on either the front panel or remote control is pressed, or a stop command is received from the external device. Turning the Incremental play function on and off Set the incremental play function on and off on the menu (menu number 11 INCR). Pressing the ª key again or receiving the stop command again, unit enters stop mode.
7 - Advanced operations Intro Check The Intro Check function allows only the beginning of each track to be played for 10 seconds. This function is operational both at stop and during normal playback. 1 Press the STOP/INTRO CHECK key on the front panel when SHIFT indicator is lit and playback stops. Or, pressing the INTRO CHECK key on the remote control to turn the intro check function on and off. Int is shown on the display. 2 Press the ¥?π key on the front panel or ¥key on the remote control.
7 - Advanced operations Changing the palyback speed without changing the key (Key Original) When the Key Original function is ON, you can change the playback speed without changing the key. Turn the Key Original function on and off on the menu (menu number 01 KEY-O). Or pressing the KEY ORIG key on the remote control turns this function on and off. When the Key Original function is ON, you may find that the audio has artifacts not present when just Pitch is used.
7 - Advanced operations Deleting a programmed track 1 Enter the program mode. 2 Use the SEARCH keys to select the track for deletion. Also using the PITCH knob on the front panel to select the track for deletion. The track number will be shown in the display. 3 Pressing the DISPLAY key and SEARCH ∆ key simultaneously on the front panel or pressing the A.CUE/DEL key deletes the selected track. 4 Pressing the PITCH knob on the front panel or PGM key on the remote control exits the program mode.
7 - Advanced operations Time display switching During audio CD playback (or playback standby), when the DISPLAY key on either the front panel or the remote control is pressed, the time display will switch through several modes in the following order. Elapsed track time (no display light indication) Remaining track time (REMAIN is lit in the display) Remaining disc time (T.
7 - Advanced operations Event start Connect the RELAY IN jack (mini jack) on the rear panel and event start terminal on the external device which supports the event start function. The relay play menu (menu number 06 RELAY) should be set to ON. Restoring factory default settings To restore all settings to their factory defaults: The following settings are restored to default values. 1 Select the factory preset menu (menu number 14 FPRE).
8 - Specifications Specifications Type Discs Formats Number of channels Resolution Sampling frequency Analog line outputs Connectors Maximum Output level Output impedance Analog line outputs (CD-01U PRO only) Connectors Maximum Output level Output impedance Headphones Connectors Maximum Output level Compact Disc player 8 or 12cm (3.1 to 4.7inch) CD, CD-R/CD-RW Audio CD (CD-DA), MP3 2-channel 16-bit 44.
8 - Specifications 333.9mm (13.1") 435mm (17.1") 482.6mm (19") 44mm (1.7") 50mm (2") 16.5mm (0.6") 310.8mm (12.2") 6.6 mm (0.
CD-01U/CD-01UPro 27
» CD-01 U /CD-01UPro TEAC CORPORATION Phone: +81-422-52-5082 3-7-3, Nakacho, Musashino-shi, Tokyo 180-8550, Japan www.tascam .com TEAC AMERICA, INC. Phone: +1-323-726-0303 7733 Telegraph Road, Montebello, California 90640 www.tascam.com TEAC CANADA LTD. Phone: +1905-890-8008 Facsimile: +1905-890-9888 5939 Wallace Street, Mississauga, Ontario L4Z 1Z8, Canada www.tascam.com TEAC MEXICO, S.A. De C.V Phone: +52-555-581-5500 Campesinos No.