
MiniDisc Player User Manual

24 TASCAM MD-02/MD-02B
5. Press the MULTI JOG dial on the main unit or the
ENTER key on the remote control.
When "Level" is selected
ª
If the input signal is analog and its level becomes less than
–41 dB for two seconds or more, a new track is created
(track number incremented) when an input level of –41 dB
is detected again.
If the input signal is digital (COAXIAL or OPTICAL), and
the input source is not a CD or MD, new tracks are created
in the same manner as for analog input, but the detection
level is –61 dB.
When the input signal is digital (COAXIAL or OPTICAL),
and the input source is a CD or MD, new tracks are
created when both track information and level changes are
detected.
When "Time" is selected
ª
When the auto track operation time is reached, a new track
is automatically created (track number incremented). Use
the “A_TRK TIME?” item in the menu to set this time.
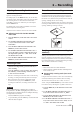
Setting the auto track operation time
1. Press the MENU key on the main unit or the remote
control.
2. Use the MULTI JOG dial on the main unit or the
+/– keys on the remote control to select “A_TRK
TIME?”
3. Press the MULTI JOG dial on the main unit or the
ENTER key on the remote control.
4. Use the MULTI JOG dial on the main unit or the +/–
keys on the remote control to set the operation time.
The setting range is between 1 and 10 minutes (in
one minute increments). The default value is five
minutes.
5. Press the MULTI JOG dial on the main unit or the
ENTER key on the remote control.
NOTE
All auto track settings are retained even when the power
is turned OFF.
If the auto track operation time is changed while
recording, the new time setting becomes effective after
the next track.
Manually creating tracks (incrementing track
numbers)
When recording, press the RECORD key whenever you
want to create a new track (increment the track number).
Creating track after recording
Tracks can be created by dividing existing tracks (see
“Dividing tracks (DIVIDE)” on page 27).
In addition, you can merge tracks (see “Combining tracks
(COMBINE)” on page 28).
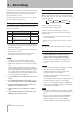
Fade-in and fade-out recording
This unit can fade-in the beginning of a recording and
fade-out the end of a recording.
The following procedures assume that preparation has
been made for recording and that a recordable disc is
loaded and in recording standby.
1. In recording standby, press the FADER key on the
remote control.
Recording starts, fading in over the set time.
2. To fade-out during recording, press the FADER key
on the remote control.
The recording fades out over the set time, and the unit
returns to recording standby.
Setting the fade-in and fade-out times using
the menu
1. Press the MENU key on the main unit or the remote
control.
2. Use the MULTI JOG dial on the main unit or the +/–
keys on the remote control to select “FADE IN?”
3. Press the MULTI JOG dial on the main unit or the
ENTER key on the remote control.
4. Use the MULTI JOG dial on the main unit or the +/–
keys on the remote control to set the fade-in time
in a range between 1 and 10 seconds (in one second
increments). The default value is 3 seconds.
5. Press the MULTI JOG dial on the main unit or the
ENTER key on the remote control.
6. Follow the same procedures to set the fade-out time
in the FADE OUT menu.
NOTE
You can use either fade-in or fade-out without using
•
the other.
You can also fade-out during a fade-in and fade-in
•
during a fade-out. For example, if fade-in time is set
to 10 seconds, press the FADER key to start fade-in
recording and then press the FADER key again 5
seconds after the start of recording to fade-out.
6 − Recording