
Solid State Stereo Audio Recorder Owner's Manual
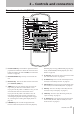
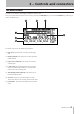
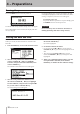
Table Of Contents
- Contents
- 1 − Introduction
- 2 − Controls and connectors
- 3 − Menu screens
- 4 − Preparations
- 5 − Playback
- Files that can be played
- Play area
- Basic playback operations
- Selecting a track
- Fast-forward/rewind search
- Time search
- Time skip
- Playback modes
- Program play
- Switching the playback time display mode
- Power-on play
- Repeat play
- Pitch Control play
- Key Control play
- Auto Cue function
- Auto Ready function
- Call function
- Incremental Play function
- Playing in monaural
- Resume Playback
- Flash Start function
- End of disc/track message (EOM)
- 6 − Recording
- Selecting the input source
- Specifying the recording file format
- Using the sampling rate converter
- Monitoring the input signal
- Adjusting the input signal level and balance
- Basic recording operation
- Switching the recording time display mode
- Sync recording
- Sync Record operation
- Auto Track function
- Assigning a new track number manually
- Applying the compressor while recording
- Specifying the name of the recorded file
- 7 − Using the folder finder
- 8 − Using the playlist finder
- 9 − Other settings
- 10 − Operation using a computer keyboard
- 11 − Using the RS-232C connector
- 12 − Messages
- 13 − Troubleshooting
- 14 − Specifications
4 − Preparations
18 TASCAM SS-R1
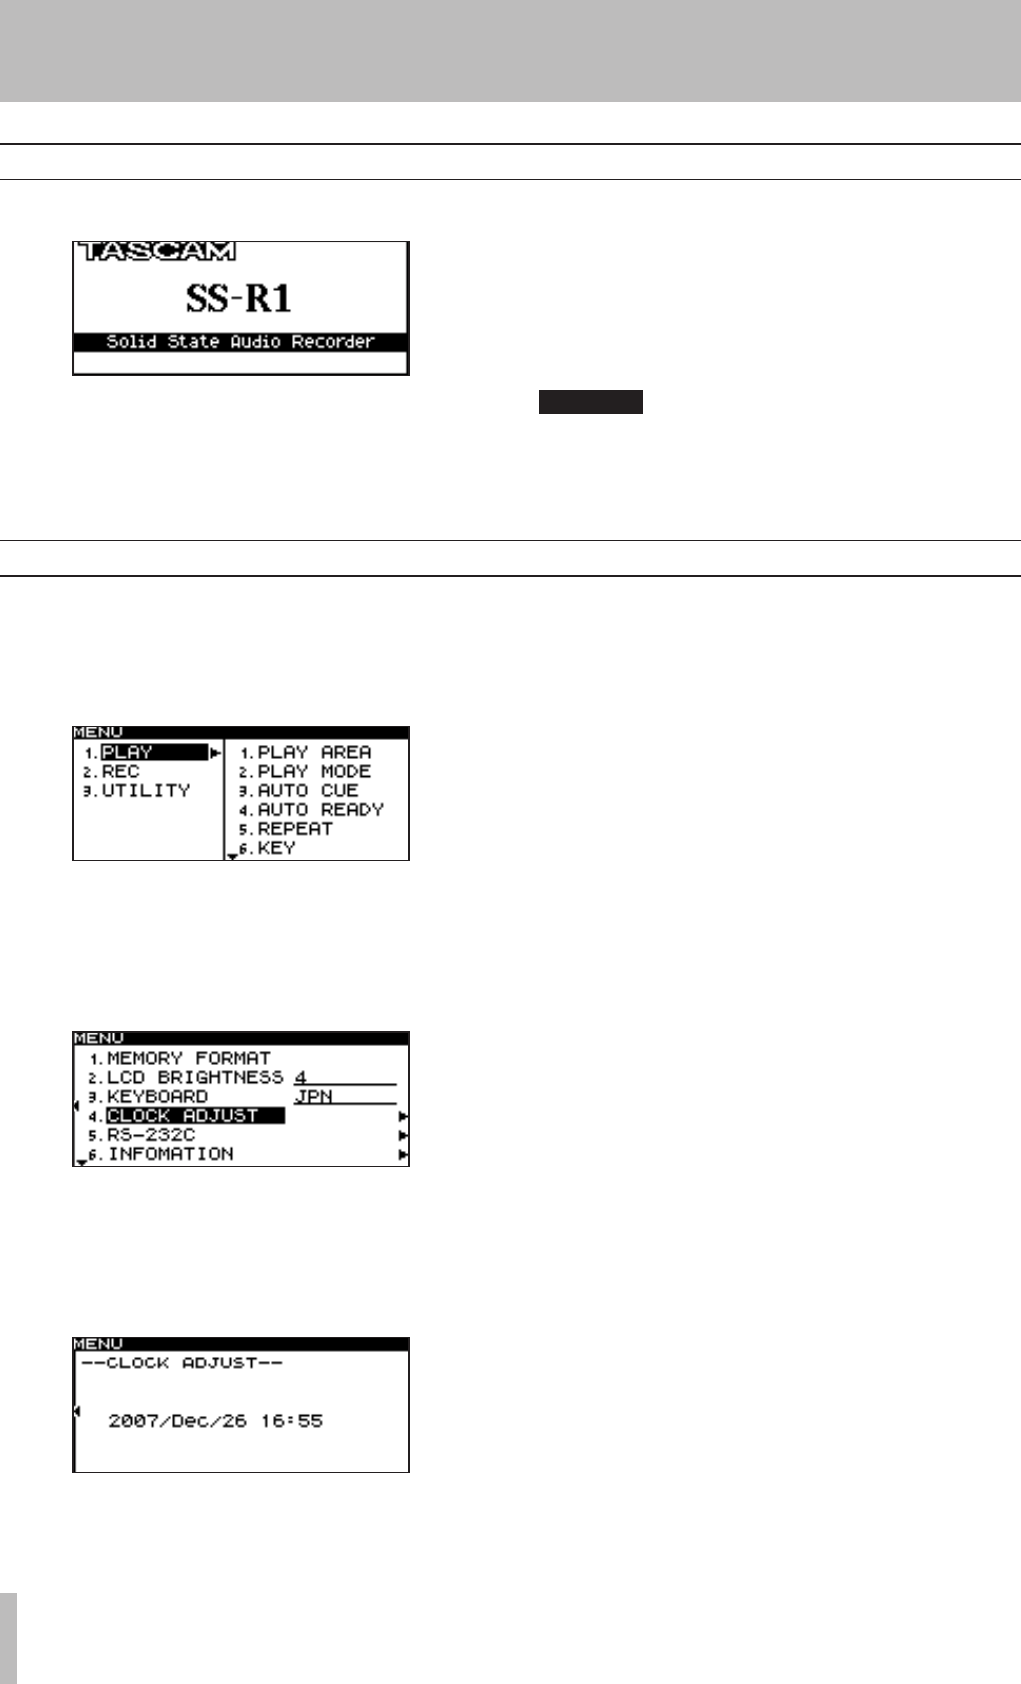
Turning the power on
Press the POWER switch to turn the power on.
The SS-R1 will start up, and the startup screen will appear.
If no CompactFlash card is inserted, the display will indi-
cate NO MEDIUM
.
If a CompactFlash card is inserted, the display will indi-
cate MEDIUM READING
, and the card will be read. When
reading is completed, the home screen will appear.
To turn the power off:
No special shutdown operation is required. Simply press
the POWER switch to turn the power off.
CAUTION
Do not turn the power off while the CF indicator is
blinking (indicating that data is being written).
Setting the date and time
Here’s how to set the date and time of the internal clock.
When you record, the date and time are recorded in the
audio file.
1 Press the MENU key to access the menu list screen.
2 Turn the front panel MULTI JOG dial (or use the
remote’s CURSOR § , ¶ keys) to highlight
UTILITY, and press the MULTI JOG dial (or the
remote’s ENTER key).
The UTILITY menu selection screen will appear.
3 Turn the front panel MULTI JOG dial (or use
the remote’s CURSOR § , ¶ keys) to highlight
CLOCK ADJUST, and press the front panel ˚
key (or the remote’s CURSOR ¥ key).
The clock setting screen will appear.
4 Press and hold the front panel MULTI JOG dial (or
the remote’s ENTER key).
07 will be highlighted.
5 Set the date and time as follows.
• Use the front panel ∆ , ˚ keys (or the remote’s
CURSOR ˙ , ¥ keys) to move the highlighted area to
edit.
• Turn the front panel
MULTI JOG dial (or use the
remote’s CURSOR § , ¶ keys) to change the value
highlighted.
6 When you’ve finished making settings, press the
front panel MULTI JOG dial (or the remote’s
ENTER key) to finalize the date and time settings.