TASER CAM User Manual IT-INST-TC-001 Rev: C August 28, 2006 ©2006 TASER International, Inc. All rights reserved.
TASER CAM User Manual TABLE OF CONTENTS WARNINGS ......................................................................................................................... 3 CAUTIONS........................................................................................................................... 3 THE TASER CAM: A GENERAL OVERVIEW ..................................................................... 4 TASER CAM Features.................................................................................
TASER CAM User Manual Note: The following warnings and cautions are in addition to the TASER® X26 device warnings and cautions. WARNINGS Never point the X26 at the eyes or face. Always make certain that the safety is in the down (SAFE) position whenever the X26 is loaded and not intended for immediate use. To prevent fire or shock hazard, do not immerse the TASER CAM™ in water or expose it to significant moisture. Do not disassemble or alter the TASER CAM in any way.
TASER CAM User Manual Avoid dropping the TASER CAM. Only recharge the TASER CAM using the approved cable(s) and charger. Do not plug the TASER CAM cable into a PC or wall charger if there is physical damage to the cable. Do not unplug the USB download cable from the PC while downloading from the device. The camera lens can be scratched if not handled with care, possibly resulting in a distorted image.
TASER CAM User Manual position. Note: There is an approximately 1.5-second delay between the safety being placed in the up (ARMED) position and when the TASER CAM begins to record. • The TASER CAM contains the video and audio records; the X26 contains the firing records. Because these data are kept in different places, it is preferred to use the same TASER CAM and X26 together. • There is a distinct difference between the TASER CAM battery and a DPM/XDPM.
TASER CAM User Manual 5. After unplugging the cable from the TASER CAM, remember to replace the dataport plug on the TASER CAM to prevent damage from any debris or moisture. Charging the TASER CAM Using the PC USB Download Cable Note: Before charging the TASER CAM with a PC, ensure that the proper software is installed on the computer (See TASER CAM PC Software Installation). 1. Connect the USB download cable to the TASER CAM. 2. Connect the USB download cable to the PC.
TASER CAM User Manual OPERATING THE TASER CAM When the TASER CAM is inserted into a X26 and disconnected from an external charging source (PC or wall power), it provides power to the weapon and to the sensitive camera and microphone used by the TASER CAM. Testing the TASER CAM 1. Remove the TASER Cartridge from the X26. 2. Disconnect the TASER CAM from the PC or wall power. 3. Confirm that the X26 safety is in the down (SAFE) position. 4. Remove the DPM. 5.
TASER CAM User Manual Note: Remember that the X26 is being powered by the TASER CAM, and as with any X26, it must not be without power for an extended period of time (4 or more hours) in order to maintain the integrity of the software and clock. If the TASER CAM is removed from a X26, a DPM/XDPM should be inserted to keep the unit continually powered. The X26 (with weapon software that supports the TASER CAM) will support older version DPM/XDPMs.
TASER CAM User Manual Figure 1 4. Click Next to begin the installation. 5. Designate the folder where the software will be installed. The wizard will designate a default location (recommended) or you may choose a different location (Figure 2). IT-INST-TC-001 Rev: C August 28, 2006 ©2006 TASER International, Inc. All rights reserved.
TASER CAM User Manual Figure 2 6. Click Next to continue. IT-INST-TC-001 Rev: C August 28, 2006 ©2006 TASER International, Inc. All rights reserved.
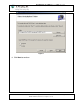
TASER CAM User Manual 7. The system displays the Confirm Installation screen. Click Next to continue (Figure 3). Figure 3 IT-INST-TC-001 Rev: C August 28, 2006 ©2006 TASER International, Inc. All rights reserved.
TASER CAM User Manual 8. The installation status displays (Figure 4). Figure 4 IT-INST-TC-001 Rev: C August 28, 2006 ©2006 TASER International, Inc. All rights reserved.
TASER CAM User Manual 9. The installation is complete. Click Close to exit (Figure 5). Figure 5 TASER CAM DRIVER INSTALLATION After installing the software, you need to install the TASER CAM USB driver. Note: Repeat this process for each USB port you will use with the TASER CAM. You can install the TASER CAM USB driver by following the steps below: 1. Insert the TASER CAM USB data cable into the TASER CAM. 2. Plug the TASER CAM USB data cable into the PC. 3.
TASER CAM User Manual Figure 6 4. Click Next to continue. IT-INST-TC-001 Rev: C August 28, 2006 ©2006 TASER International, Inc. All rights reserved.
TASER CAM User Manual 5. The Found New Hardware Wizard asks where you would like to search for the TASER CAM USB driver. Select Install from a list or specific location (Advanced) (Figure 7). Figure 7 6. Click Next to continue. IT-INST-TC-001 Rev: C August 28, 2006 ©2006 TASER International, Inc. All rights reserved.
TASER CAM User Manual 7. Select Search for the best driver in these locations and select Include this location in the search (Figure 8). The location should be c:\Program Files\TASER International\TASER CAM V1\drivers. You may browse to this location or type it directly into the location box. Figure 8 8. Click Next to continue. IT-INST-TC-001 Rev: C August 28, 2006 ©2006 TASER International, Inc. All rights reserved.
TASER CAM User Manual 9. If you are running Windows XP or some versions of Windows 2000, you might see the following Hardware Installation screen (Figure 9) during the install process. Click Continue Anyway to continue the installation. Figure 9 IT-INST-TC-001 Rev: C August 28, 2006 ©2006 TASER International, Inc. All rights reserved.
TASER CAM User Manual 10. You should now see the following screen (Figure 10) indicating your hardware is installed and ready to be used. Click Finish and follow the TASER CAM Downloading instructions below to continue the TASER CAM download. Figure 10 TASER CAM DOWNLOADING Downloading Video Files from the TASER CAM Note: The proper software must be installed before video/audio recordings and firing logs can be downloaded (see TASER CAM PC Software installation).
TASER CAM User Manual Figure 11 3. Click the Download TASER CAM link. IT-INST-TC-001 Rev: C August 28, 2006 ©2006 TASER International, Inc. All rights reserved.
TASER CAM User Manual 4. The TASER CAM Download Wizard will guide the process (Figure 12). Click Next to continue. Figure 12 IT-INST-TC-001 Rev: C August 28, 2006 ©2006 TASER International, Inc. All rights reserved.
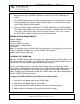
TASER CAM User Manual 5. Select which incidents/video files to download from the TASER CAM (Figure 13). Note: “Incident” refers to TASER CAM activation; when the safety is moved to the up (ARMED) position. The TASER CAM begins a set of video/audio files grouped into 10-second records until the safety is moved to the down (SAFE) position. • The TASER Serial column matches the serial number of the X26 to the incident.
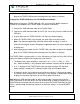
TASER CAM User Manual 6. The progress of the download is indicated by the blue status bar and the incidents remaining to be downloaded are listed below it (Figure 14). Figure 14 IT-INST-TC-001 Rev: C August 28, 2006 ©2006 TASER International, Inc. All rights reserved.
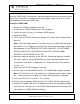
TASER CAM User Manual 7. When the downloading is complete, click Next to continue (Figure 15). Figure 15 IT-INST-TC-001 Rev: C August 28, 2006 ©2006 TASER International, Inc. All rights reserved.
TASER CAM User Manual 8. If a weapon is connected the software will verify that the time on the X26 is correctly set. If it is not correct you will be prompted to change the time (Figure 16). Verify your PC time is correct and click Update Weapon Time to set the time correctly (Figure 17). Figure 16 IT-INST-TC-001 Rev: C August 28, 2006 ©2006 TASER International, Inc. All rights reserved.
TASER CAM User Manual Figure 17 IT-INST-TC-001 Rev: C August 28, 2006 ©2006 TASER International, Inc. All rights reserved.
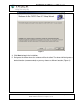
TASER CAM User Manual 9. If a weapon is connected, the firing records will also be downloaded (Figure 18). Figure 18 IT-INST-TC-001 Rev: C August 28, 2006 ©2006 TASER International, Inc. All rights reserved.
TASER CAM User Manual 10. After the incidents and firing records have been downloaded, you can view the data library (lists all the video and firing records that have been downloaded to the PC) or download another TASER CAM and/or X26 (Figure 19). Figure 19 11. Choose an action and click Finish to continue. 12. If Start new TASER CAM Download is selected, the first download wizard screen will appear (Figure 12). IT-INST-TC-001 Rev: C August 28, 2006 ©2006 TASER International, Inc. All rights reserved.
TASER CAM User Manual 13. If View Data Library was selected, a list of downloaded weapons will be listed (Figure 20). Figure 20 a. To view an incident or firing record, select a serial number from the list and click View Records. IT-INST-TC-001 Rev: C August 28, 2006 ©2006 TASER International, Inc. All rights reserved.
TASER CAM User Manual 14. The selected weapon’s firing records and downloaded incidents will be displayed (Figure 21). Figure 21 15. To view an incident, select the file(s) from the Video Data list and click View Selected Videos. IT-INST-TC-001 Rev: C August 28, 2006 ©2006 TASER International, Inc. All rights reserved.
TASER CAM User Manual 16. The selected videos will be added to a Windows Media Player play list and they can be viewed from there (Figure 22). Figure 22 IT-INST-TC-001 Rev: C August 28, 2006 ©2006 TASER International, Inc. All rights reserved.
TASER CAM User Manual 17. To save selected video to an alternate location, click the Export Selected Videos link. 18. You will be prompted for a location to save the selected incidents. Select a location and click OK (Figure 23). Figure 23 IT-INST-TC-001 Rev: C August 28, 2006 ©2006 TASER International, Inc. All rights reserved.
TASER CAM User Manual 19. To generate a report of the firing records for the X26, click the Generate Report link. You will be prompted for a location to save the firing report (Figure 24). Note: The TASER CAM program generates PDF files by itself; it does not need to have other PDF-writing software installed on the computer. Figure 24 IT-INST-TC-001 Rev: C August 28, 2006 ©2006 TASER International, Inc. All rights reserved.
TASER CAM User Manual 20. You may submit video and audio records to TASER International by clicking the Send To TASER link. The TASER CAM software will automatically connect to TASER.com and submit your selected videos. The system will display your progress as the file uploads (Figure 25) and finishes uploading (Figure 26). Figure 25 Figure 26 Note: Files from the TASER CAM should be downloaded to a PC frequently. The TASER CAM records in a “loop.
TASER CAM User Manual 4. The TASER CAM Download Wizard will appear and guide the process. 5. Follow the instructions on the screens. USE AND CARE Storage • Do not store the TASER CAM in extreme cold or heat. • Do not store the TASER CAM where the contacts may become short-circuited. • Keep the TASER CAM dry. Cleaning Lens Clean any debris, fingerprints, dust, etc. from the lens using a soft cloth such as an eyeglass lens cloth. Avoid using any synthetic cleaners.
TASER CAM User Manual TROUBLESHOOTING THE TASER CAM Symptom The TASER CAM will not charge fully or at all, but the charge indicator light is flashing. Cause The battery is defective or there have been too many charge cycles. The TASER CAM The cable/charger is bad. charge indicator light will The wall outlet is not not come on. working. The USB port is not working. Possible Solution Contact TASER International to replace the battery. Use a different cable. Use a different wall outlet/socket.
TASER CAM User Manual Symptom The battery percentage is reading “EE”. The X26 is not working at all with the TASER CAM inserted. Unable to download from the TASER CAM. IT-INST-TC-001 Rev: C Cause The TASER CAM is not making good contact with the X26 because it is not fully inserted. Possible Solution Fully insert the TASER CAM into the X26. The TASER CAM is not making good contact with the X26 because of debris on the gold battery contacts.
TASER CAM User Manual Symptom The video recording is unclear or distorted. Cause There is debris on the TASER CAM lens. Possible Solution Clean the lens using a soft cloth. The lens of the TASER CAM is scratched/damaged. The video file does not play, has a # at the end of the file name. IT-INST-TC-001 Rev: C The TASER CAM is unfocused. Contact TASER International. Firing hi voltage-induced recording error. The camera should continue to record normally.