
User's Manual

35
Models 345, 346, 349, 355 Operating Procedures
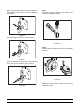
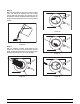
Step 9
Replace the side panels and close the lighted display.
Install the hood in position on top of the freezer.
90 Day Closing Procedure
We recommend that the machine be completely
disassembled and cleaned at least every ninety days
using the following procedures.
ALWAYS FOLLOW LOCAL HEALTH CODES
To disassemble a freezer, the following items will be
needed:
S T wo cleaning pails
S Necessary brushes (provided with freezer)
S Cleaner
S Single service towels
Draining Product From the
Freezing Cylinder
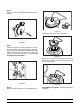
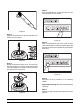
Step 1
Press the BEATER key. This will allow the beater to
operate and CO
2
pressure will be maintained to push
the product from the freezing cylinder. Open the draw
valve and drain the product from the machine until the
CO
2
begins to jet.
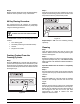
Figure 56
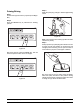
Step 2
When all the product has been drained from the mix
hopper and the freezing cylinder , close the draw valve
and press the OFF key. Discard this product.
Figure 57
Repeat Steps 1 and 2 for the remaining freezing
cylinder(s).
Cleaning
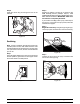
Step 1
Open the lighted display door from the front of the
machine. Remove the hood and side panels to gain
access to the hoppers.
Step 2
Prepare two gallons (7.6 liters) of an approved clean-
ing solution (example: Kay-5
R). USE WARM WATER
AND FOLLOW THE MANUFACTURER’S SPECIFI-
CATIONS.
Important: Make sure the cleaner is completely
dissolved.
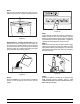
Step 3
Pour the solution into a clean, empty bucket. Place the
syrup line with old syrup connection into the bucket of
sanitizer.
Step 4
Press the PRIME key. This will cause the cleaning
solution to flow through the lines and into the mix
hopper.
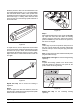
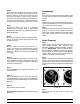
Step 5
Remove the front drip tray. Place a mix pail beneath
the sampling valve located behind the front drip tray.
Slowly open the sampling valve and allow cleaner to
flow through this line and out into the pail. After
approximately 1/2 gallon of cleaner has been
dispensed, close the valve.