P8M/P715/P615 SERIES
Table of Contents Chapter 1: Safety Information Chapter 4: Using more of your TV Precautions ...............................................................3 Warning ...................................................................3 Product ....................................................................3 Power and Plug .......................................................3 Power Cord and Signal Cable .................................3 Use Environment ..............................................
Chapter 1 Precautions Safety Information Read all of the instructions before operating the set. Keep these instructions well for future use. and the cabinet has been damaged. • Where the mains plug or an appliance coupler is used as disconnect device, the disconnect device shall remain readily operable. Warning Power Cord and Signal Cable Never place a television set in an unstable location. A television set may fall, causing serious personal injury or death.
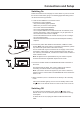
Chapter 2 Connections and Setup TV Buttons - Power button If the batteries in your remote control are run down, you can use the button on your TV set. The model has only one button. It may work just as Power on/Standby button, or as a multi-function controller. You can turn on the TV by pressing the button on the TV set. While the TV is on, press the button to display the multi-function menu. More information about how to use the multi-function menu, please refer to the figure below.
Connections and Setup Sockets Note: the location and names of the sockets on the TV may vary according to TV model, and not all sockets are available on all models. HDMI, HDMI(ARC) or HDMI(SERVICE) socket (input) The HDMI (High-Definition Multimedia Interface) socket can be used to connect a Blu-ray player, PC with a compatible video card installed, certain DVD players or a high-definition compatible digital satellite decoder.
Connections and Setup Remote Control Functions Most of your television's functions are available via the menus that appear on the screen. The remote control supplied with your set can be used to navigate through the menus and to configure all the general settings. Note: figures and illustrations in this operation manual are provided for reference only and may differ from actual product appearance. Certain function may not be available for some models, e.g.
Connections and Setup Exclusive Remote Control Standby / quit standby.. To display the TV settings menu. To access the Smart TV homepage. To display the Option menu. ▲/▼/◄/► OK Navigation direction buttons. The ▲/▼ buttons are also ..used to change channels in TV mode. To confirm an entry or selection. The button is also used to ..display the channel list in TV mode. To return to the previous menu or quit an app. To select input source. Press the Assistant button on your remote to talk to the Google ..
Connections and Setup Network Connection Your TV will require an internet connection to operate all functions. Data usage charges may apply. Please refer to your Internet Service Provider (ISP) for additional information. To access the internet, you must subscribe to high speed broadband internet service from your internet service provider. Your TV can be connected to your home network in two ways: • Wired, using the RJ45 (LAN) connector on the back panel.
Connections and Setup Switching On Follow the instructions on this page on how to switch on your TV set and the remote control before going on to following pages describing how to use the channel set-up procedure. 1. Insert two AAA batteries in the remote control. Precautions on using batteries: - Only use the battery types specified. - Make sure you use the correct polarity. - Do not mix new and used batteries. - Do not use rechargeable batteries.
Chapter 3 Basic TV Operations Accessing Channels - Using the RC802N Remote Control Using the numeric buttons: press the corresponding numeric buttons on the remote control to access the channels. Using the P / buttons: press the P / buttons on the remote control to scroll through the channels. Using the LIST button: press the LIST button to display the channel list and press ▲/▼/◄/► and OK to select channels.
Basic TV Operations 1. Press on the remote control to display the Smart TV homepage. 2. Press ▲/◄/► to move the cursor to (Settings) on the right top of the screen and press OK to enter the system settings. 3. Press ▲/▼ to choose the items and press OK to enter. 4. Press to return to previous interface. 5. Press EXIT to close the menu. Using Instant Power On 1. Press on the remote control to display the Smart TV homepage. 2. Press ▲/▼ to select the Apps, and press OK to enter.
Chapter 4 Installing Channels Using more of your TV This section describes how to search and store channels automatically. This may be done in any of the cases below: - you are prompted that there are no channels in TV mode; - you want to update your channels. 2. Press ▲/▼ to select a subtitle language as your preferred language and press OK to confirm. 3. Press ▲/▼ to select Digital subtitle language 2nd and press OK/► to enter. 4.
Using more of your TV 4. Networked standby is set to On in the Network & Internet menu under homepage by pressing > (Settings) > Network & Internet and use ▼ to select Networked standby and press OK to activate. Using EPG (Electronic Programme Guide) When the TV is in networked standby mode, you can use the app to wake up the TV remotely. Note: the DTV EPG does not require an internet connection.To use the DTV EPG, HbbTV must be set to Off.
Using more of your TV 2. Move to the Remotes & Accessories area, select Add accessory and press OK to enter. The TV will search nearby Bluetooth devices automatically. Quick Access of Time Shift Insert a USB disk, press PAUSE( ) on the remote control, it will access time shift automatically. (Available for RC802N remote control only.) 3. Select an available device, press OK and follow the guides on the screen to connect it. Note: bluetooth technology (if available in your TV) uses 2.
Using more of your TV Freeview Plus Freeview Plus delivers an aggregated TV service that includes an unrivalled 7+ day EPG experience from all the free to air networks in Australia. At the press of a button, Freeview Plus provides users with all the available Catch Up content along with the ability to set reminders and to search for content via genre.
Using more of your TV Reset Shop Allows you to reset the TV to factory default settings. 1. Press on the remote control to display the homepage, Press ▲/◄/► to select (Settings) > Device Preferences > Reset and press OK to enter. 2. Press ▲/▼ to select Factory data reset and press OK to enter. Then select Erase everything and press OK to confirm. 3. Enter 1234 or the PIN according to the on-screen prompt. 4. Select OK and press OK to confirm. 5. The Initial setup wizard appears.
Chapter 5 Other Information Problems & Solutions Note: problems & solutions 1 to 2 are for the TV models which have network functions, so users of non-connected TV models can disregard them. 1. - Fail to link to the network. Check if your TV is connected with the network; Reboot your TV; Consult your internet service provider, to confirm if access of your router is supported. Refer to the operation manual of your router.
Other Information Troubleshooting Most problems you encounter with your TV can be corrected by consulting the following troubleshooting list. No picture, no sound 1. Check if the fuse or circuit breaker is working. 2. Plug another electrical device into the outlet to make sure it is working or turned on. 3. Power plug is in a bad contact with the outlet. 4. Check the signal source. No colour 1. Change the colour system. 2. Adjust the saturation. 3. Try another channel. Black-white programme may be received.
Other Information Legal Statement [Legal Statement] of TCL - manufacturer of this TV set Due to the various capabilities of products featuring the SmartTV - Services, as well as limitations in the available content, certain features, applications, and services may not be available on all devices or in all territories. Some features on SmartTV may also require additional peripheral devices or membership fees that are sold separately.
The terms HDMI, HDMI High-Definition Multimedia Interface, and the HDMI Logo are trademarks or registered trademarks of HDMI Licensing Administrator, Inc. HEVC, or H.265 is the successor to H.264 and strives to deliver video with equivalent quality with bitrate savings of up to 50 percent. HEVC is critical for streaming high-quality video even in congested network environments, and will be a driving factor in the delivery of 4K content to new Ultra HD displays.