0.
V0.2 Attention All other product names or trademarks are the property of their respective owners. Warning Users: 1. Use of excessive fear of damage to eyesight 2. Use 30 minutes to rest 10 minutes 3.
• Increase the separation between the equipment and receiver. • Connect the equipment into an outlet on a circuit different from that to which the receiver is connected. • Consult the dealer or an experienced radio/TV technician for help. To assure continued compliance, any changes or modifications not expressly approved by the party responsible for compliance could void the user's authority to operate this equipment.
WEEE EN 4
Following information is only for EU-member states: The use of the symbol indicates that this product may not be treated as household waste. By ensuring this product is disposed of correctly, you will help prevent potential negative consequences for the environment and human health, which could otherwise be caused by inappropriate waste handling of this product.
1. Advantech website http://support.advantech.com, where you can find the latest information about the product. 2. If you need additional help, please contact your reseller, sales representative or Advantech Customer Service Center for technical Support. Before you call, please prepare the following information: - Product Name and Serial Number - Accessory Description - Software Information(OS type,Version,Application etc.
e. There are obvious signs of breakage in the equipment. Battery Safety Notification 1. If you replace the incorrect battery type, there is a risk of explosion. 2. Do not attempt to disassemble the calculator or its attachments. 3. Only qualified personnel are allowed to replace the battery. 4. Do not place the battery in the fire and check with the local authorities for instructions. DASH/T3 PLUS equipped with standard battery pack only and TCL PR-2770E2N 7,000 mAH Lithium-ion batteries.
TABLE OF CONTENT 1 Product Introduction ............................................................................................. 11 1.1 Common Symbols in the manual................................................................................... 12 1.2 Product Function and Feature ....................................................................................... 12 1.3 Packing Content.............................................................................................................
4.1.2 Android 6.0.1 OS Installation ..................................................... 24 5 Computer Maintenance ......................................................................................... 25 5.1 LCD Monitor Maintenance ............................................................................................ 25 5.2 DASH/T3 PLUS Cleaning................................................................................................. 25 5.3 Trouble Shooting ...............................
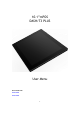
1 Product Introduction Thank you for purchasing DASH/T3 PLUS computer。 DASH/T3 PLUS Series SKU Table DASH10EB DASH10AB 4G/64G Windows 4G/64G Android a/b/g/n/ac a/b/g/n/ac The product combines stylish design, reliable performance and powerful functionality to meet your wide range of working requirements. This user's manual outlines the basic information you need to know to set up and use DASH/T3 Plus.
1.1 Common symbols in the manual Indicates the information that must be adhered to. This may result in personal injury or damage to the product. Represents information that provides assistance that can help you to use this product more smoothly. 1.2 Product Function and Feature •Stylish and functional with only 8.5 mm thickness • Low power consumption Intel® ATOM ™ process for mobile purpose. • Build-in WLAN/Bluetooth function • 10.
1.4 Product SPEC 1.4.1 Technical SPEC Product SKU DASH10EB DASH10AB Processor Intel Cherry Trail Z8350 1.92GHz OS Windows 10 Android6.0 Memory 4GB DDR3L 4GB DDR3L Storage 64GB eMMC Monitor 10.1" 1280x800 IPS;G+G, 10 points Communication Module WiFi 802.11 a/b/g/n/ac WiFi 802.11 a/b/g/n/ac BT4.0 BT4.0 G-Sensor, Gyroscope, Light Sensor Rear 5M(AF) Camera Front 2M(FF) One Power Button Button One Volume up/down Button LED Charging: Orange 1x DC-IN jack 1xAudio jack (3.
1.4.2 Product Outlooking DASH/T3 PLUS series are with the same size. 1.5 DASH/T3 PLUS Interface 1.5.1 Front 1 2 No.
1.5.2 Back 1 No. Component 1 Rear Camera 1.5.3 Right 1 2 3 5 4 No. 6 Component 1 Powerhole 2 Microphone 3 Micro SD 4 Micro USB 5 Micro HDMI 6 USB3.
1.5.4 Left 1.5.5 TOP 1 No. Component 1 Volume Adjustment 2 Power Button 1.5.6 Bottom 2 1 No.
2 Starting 2.1 Charging To recharge the DASH/T3 PLUS 's built-in battery, connect the power supply transformer to the power hole interface on the DASH/T3 PLUS. Power hole Since the battery charge may drop during delivery, please charge at least one hour before starting the first boot. Do not use I/O interface when charging 2.2 Power On Continuous Press the power button for more than 3 seconds to open DASH/T3 PLUS. Power Button 2.
2.4 Computer Operation DASH/T3 PLUS is with 10.1” Capacitive Touch Panel。You can contact the panel directly with your finger to manipulate the computer. Operation Space 2.5 LED Indicator Status One LED indicator on DASH/T3 PLUS: Power LED Indicator DASH/T3 PLUS Power LED indicator is mono color: Orange.
3 Setting Wireless base stations must be purchased prior to use of wireless networks. Please contact your wireless network equipment supplier to install and set up a wireless base station. The screenshot attached to this manual is used for reference. The actual screen may vary depending on your operating system or the version of the preinstalled software. 3.1 Windows 10 IoT Enterprise Setting Windows 10 IoT Enterprise Main Screen 1 2 No.
1 Open Program 2 Battery Status 3 WIFI 4 Volume Adjustment 5 Open Keyboard 3.2 Android 6.0.1 Setting Android 6.0.1 Screen 1 2 No.
Pull out the settings from the top of the screen 5 6 7 8 No.
4 Application Implement 4.1 Application Installation There are several ways to install applications on DASH/T3 Plus, and this section describes the steps for installing applications via micro SD cards. 1. Please confirm your micro SD card has been formatted as FAT32 file system before installation。 2. Copy installation file (Windows : .exe ; Android : .apk) to Micro SD. 3. Open the Micro SD card slot above your computer and put it in the card.
4.1.1 Windows 10 IoT Enterprise OS Installation a) Open the Starup program menu. b) Open File Explorer,the content of SD card will show Secure Digital storage device (D:) c) Click Secure Digital storage device (D:) you can find .exe。 d) Click .
4.1.2 Android 6.0.1 OS Installation a) Open Settings b) Open Storage & USB c) Select SD Card d) Click .
5 Computer Maintenance 5.1 LCD Monitor Maintenance •Do not rub the screen surface with any hard objects。 •Do not spray the liquid directly on the screen, or let excess liquid drip into the device。 •Do not put anything on the screen at any time, such as food and drink, so as not to damage the screen。 •Clean the LCD screen only with a soft cloth with water。 5.2 DASH/T3 PLUS Cleaning •Turn off the device and unplug the power cable. •Wipe the screen and exterior with a soft damp cloth.
•Symptom photos or movies (if any). 5.4 ENERGY STAR An ENERGY STAR qualified computer delivers substantial savings over a conventional computer. Desktop, integrated desktop, and notebook (laptop) computers, workstations, small-scale servers, and thin clients are all eligible to earn the ENERGY STAR, and those that do are now more efficient than ever. It is an honor for Advantech to provide you such products. What is ENERGY STAR? ENERGY STAR is a U.S.
Monitor and enter sleep mode if idle for more than 10 minutes. Lists of default power management systems: Balanced Idle 4 min. closes screen, 10 min. enters sleep mode. (Default) High Never idle and never enters sleep mode. performance Screens used in this manual are for illustrative purposes only. Actual screens may vary depending on your product version.
6 Declaration of the Presence Condition of Restricted Substance Declaration of the Presence Condition of the Restricted Substances Marking 設備名稱: 電腦 型號(型式): DASH/T3 PLUS (詳細型號列於次頁) Equipment name Type designation (Type) 限用物質及其化學符號 Restricted substances and its chemical symbols 單元 Unit 鉛 Lead (Pb) 六價鉻 多溴聯苯 多溴二苯醚 相對應排除項 汞 鎘 Hexavalent Polybrominate Polybrominate 目依據 Mercury Cadmium chromium d biphenyls d diphenyl (Hg) (Cd) (D1~D37) (Cr+6) (PBB) ethers (PBDE) Mother Board - ○ ○ ○ ○ ○ D13,D14,D16
7 DASH/T3 PLUS Docking Installation 1 x 10” DASH/T3 PLUS 1 x Power Supply with power cord 1 x Quick Start Guide To turn on the DASH/T3 PLUS, press and hold the power button for 3 seconds.
Bottom View Top View Side View USB3.
I/O Cover I/O Information RS232 USB 2.0 DC in Jack Installation Lower the tablet onto the base. You should feel a magnetic click once the tablet is seated properly.
Un-installation To easily remove the tablet from the dock, grip the handle and pull up the tablet.