® Portable USB CD-RW Drive CD-W28PU User's manual To ensure the smooth handling of your warranty please write the serial number of your drive into the box. In the case of warranty you are expected to send it together with a copy of your invoice to your nearest TEAC sales representative.
• Changes in specifications and features may be made without notice or obligation. • Copyright © 2001, TEAC Corporation Ltd. All rights reserved. First edition: October 2001 Company and product names provided herein are trademarks of their respective companies. Windows 98 Second Edition, Windows Me, and Windows 2000 are registered trademarks of Microsoft Corporation in the U.S. Just Link is a trademark of Ricoh Co., Ltd.
TO THE USER ................................................................................ 53 PRECAUTIONS .............................................................................. 53 SOFTWARE LICENCE AGREEMENT AND LIMITED WARRANTY ................................................................................... 54 1. BEFORE USING ......................................................................... 1.1 Computers to connect .......................................................... 1.
ENGLISH 7. OPERATION ................................................................................ 7.1 Precautions in handling the media ....................................... 7.2 Connection ........................................................................... 7.3 Disconnection ...................................................................... 7.4 Setting the media ................................................................. 7.5 Ejecting the media ........................................
This equipment has been tested and found to comply with the limits for a Class B digital device, pursuant to VCCI Rules. Although this device is designed to be used in a home environment, it may cause interference if used near a radio or TV receiver. Be sure to handle the device properly in accordance with this instruction manual.
ENGLISH SOFTWARE LICENCE AGREEMENT AND LIMITED WARRANTY DEVICE DRIVER FOR TEAC CD-R/RW UNIT LICENSE AGREEMENT AND LIMITED WARRANTY IMPORTANT: PLEASE CAREFULLY READ THE LICENSE AGREEMENT HEREIN BEFORE USING THE ENCLOSED DEVICE DRIVER SOFTWARE (INCLUDING PROGRAMS AND ALL RELATED MATERIALS, ”SOFTWARE”) FOR THE TEAC CD-R/RW UNIT (”EQUIPMENT”). THE RIGHT TO USE THE SOFTWARE IS GRANTED ONLY ON THE CONDITION THAT YOU AGREE TO THE LICENSE AGREEMENT.
Software Licence Agreement and Limites Warranty 55 ENGLISH file that TEAC marks on the media of the SOFTWARE. Provided, however, that you may permanently transfer all of your rights under this Agreement only in conjunction with a permanent transfer of YOUR EQUIPMENT, SOFTWARE and any copies thereof. 4. TERMINATION.
ENGLISH 1. BEFORE USING Thank you for purchasing TEAC USB Portable CD-R/RW unit CDW28PU. This is a CD-R/RW drive that is used by connecting it to the USB terminal of a personal computer. The drive functions as a device conforming to the USB1.1 when connected to the USB1.1 terminal and as a device conforming to the USB2.0 when connected to the USB2.0 terminal. A floppy disk drive may be required for installing software when using this drive.
1.2 Conforming OSes (as of October in 2001) Any one of the following operating systems is required. • Microsoft® Windows 98 Second Edition • Microsoft® Windows Me • Microsoft® Windows 2000 Professional • Microsoft® Windows XP • The drive does not conform to Windows 95, Windows 98 and MSDOS. 1.3 Checking the USB controller To use the CD-W28PU in your computer, the USB controller incorporated in the computer must be operating normally.
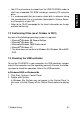
ENGLISH 3. Click the Device Manager tab. Confirm that USB (Universal Serial Bus) Controller exists in the device list. The name of the USB controller depends on the PC used (the figure below represents a USB controller provided by Intel). In Windows 2000 1. Click Start, Settings, Control Panel. 2. Double-click System. 3. Click the Hardware tab. 4. Click the Device Manger (D)... button. 5. Confirm that USB (Universal Serial Bus) Controller exists in the device list. 58 1.
T Writing speed to the media The conforming writing speed is indicated on the package of the CDR/RW media. When writing, write within the scope of the specified writing speed of the media used. T CD-R media and writing speed Data can be appended to the CD-R disc once or up to a maximum of approx. 100 times. The data written cannot be erased, however, it has a wide range of compatibility that allows read by most CD-ROM drives or CD players.
ENGLISH T Certifieded media The write operation of the drive has been checked using the following CD-R and CD-RW media.
2. PRODUCT OUTLINE Features of the CD-W28PU • Easy connection Since this product incorporates the interface conforming to the USB2.0 High Speed, it can be connected or disconnected to or from your computer easily even when the power of the computer is on. Furthermore, since this product conforms to the USB1.1, it can be used with most computers that incorporate the USB interface. * The operation when connected via a USB hub is not supported.
ENGLISH dia. With this function, write to the CD-R/RW media is assured when connected to the USB1.1 as well as the USB2.0. • Top loading This product sports a top loading mechanism that allows easy loading and ejection of a disc. The top cover can be opened manually or by using software that works with the computer. • Ready-to-use software is provided 2.1 Procedure before using the CD-W28PU The procedure outline that must be followed before using the drive is described below.
CD-W28PU drive unit USB interface cable User’s Manual (this document) 2. Product Outline ENGLISH 2.
ENGLISH 3. PRECAUTIONS FOR SETTING AND HANDLING • Place the drive in a stable place without any vibrations or tilt. • Avoid placing the drive in a place subject to considerable temperature change such as in direct sunlight or near a heater. • Avoid placing the drive in a dusty or damp place • Do not place the drive very close to an AV device or a display monitor. 64 3.
• Do not place a container with ENGLISH liquid such as a vase or cup on or near the drive. If liquid gets inside the drive, it may cause fire or electric shock. • Do not apply a strong shock to the drive during moving or transportation. • Do not operate the drive while moving or in a tilted state. This may damage written data or the disc. • Do not touch the pickup mechanism (internal lens). This will cause a malfunction. 3.
4. NAMES AND FUNCTIONS ENGLISH ➀ ➁ ➂ ➃ ➄ ➅ ➆ X Y 66 4.
➁ Disk tray Set the media with the label face upward on this disc tray. ➂ USB connector Insert the plug of the provided dedicated USB cable. ➃ DC-IN connector Connect the provided dedicated AC adapter. W a r n in g Be sure to connect the provided dedicated AC adapter to this connector. NEVER connect other AC adapters. This drive cannot operate with only the bus power of the USB cable. Be sure to provide power by connecting the provided AC adapter.
ENGLISH ➆ Eject button W a r n in g W a r n in g X Line output jack Press this button to open the top cover. An electrical locking mechanism is used in this drive so that an erroneous operation does not open the top cover during write. Make sure that the power is on and the drive is not in operation before pressing the eject button to open the top cover.
Windows Me, Windows 2000 and Windows XP operating systems have the native drivers for USB 1.1 controller and CD-W28PU. Therefore, when this drive is connected, Windows will automatically install the appropriate driver and the drive will be ready to be used. You do not have to perform any special installation or uninstallation. However, it is required that the device driver from the driver disk provided in this product be installed when using Windows 98 Second Edition (Windows 98SE).
ENGLISH 5.2 Driver installation under Windows 98SE C a u tio n If you use any USB 2.0 host adapter with your system, it is required to install the USB 2.0 host adapter and the driver for it before connecting this drive 1. Connect the dedicated AC adapter to the drive, then connect the USB interface cable between the drive and your computer. 2. Add/New Hardware Wizard starts automatically. 3. Select “Search for the best driver for your device(Recommended)” 70 5.
ENGLISH 4. Insert the dedicated driver disk(a floppy disk) to the FDD of your computer, select FDD, then choose Next. 5. When “TEAC USB 2.0 CD-RW Drive” is shown on the Wizard, then choose Next. 6. The driver installation starts. 5.
ENGLISH 7. The setup of the driver is now complete. 8. You can make sure that the drive has been recognized after connection by using Device Manager. “TEAC CD-W28E” at “CD-ROM” “TEAC USB 2.0 CD-RW Drive” at “Hard disk Controller” “TEAC USB 2.0 CD-RW Device” at “Hard disk Controller” 72 5.
You do not have to uninstall (removing the device driver from your computer) the device driver in Windows 98SE under normal conditions. If you want to uninstall the device driver manually, perform the following steps. 1. Disconnect the drive from your computer 2. Open Control Panel, choose Add/Remove Programs Properties, then open Install/Uninstall screen. 3. Select TEAC W28PU Driver, then choose OK 4. Choose OK again on the confirmation screen 5. Setting up the CD-W28PU 73 ENGLISH 5.
ENGLISH 5. Click Finish and restart the system. 6. Un-installation of the device driver is now completed. 74 5.
An appropriate driver will be automatically set when the drive is initially connected in Windows Me. You can make sure that the drive has been recognized after connection by using Device Manager. C a u tio n If you use any USB 2.0 host adapter with your system, it is required to install the USB 2.0 host adapter and the driver for it before connecting this drive “TEAC CD-W28E” at “CD-ROM” “USB Mass-Storage Device” at “Universal Serial Bus Controller” “USB CD-ROM” at “Storage Device” 5.
ENGLISH 5.5 Driver installation Windows 2000 The USB device drive is included in Windows 2000. When this drive is connected, Windows 2000 will automatically install the appropriate driver and the drive will be ready to be used. You do not have to perform any special installation or uninstallation. You can confirm that the drive has been recognized after connection by using Device Manager. C a u tio n If you use any USB 2.0 host adapter with your system, it is required to install the USB 2.
When an abnormality occurs in the computer and reinstallation of the OS is required, the system can be recovered (reinstallation of OS) by using the drive and the provided recovery driver disc. It is highly recommended to make Start Up Disk right now before you have any problem with your computer. 6.1 System recovery of Windows 98SE 1. Open Control Panel of My Computer 2. Open Add/Remove Programs Properties, choose Startup Disk, then click Create Disk... 3.
ENGLISH 7. Open the Config.sys file by using any editing tool like Note Pad of Windows Accessory. 8. Delete all parameters(lines) in [CD] section except the following two parameters. himem.sys /testmem:off oakcdrom.sys /D:mscd001 9. Change the parameter of “oakcdrom.sys / D:mscd001” to “tusb_cd.sys / D:MSCD001” , then save the file. 10.Eject the Startup Disk from the FDD of your computer. 11.Insert the dedicated driver disk into the FDD of your computer. 12.Pick out the “tusb_cd.
C a u tio n C a u tio n Confirm that the drive is directly connected to your computer, and not via either an USB hub or an USB host adapter when implementing the System recovery. When using the recovery driver disc in the USB floppy disk drive, be sure that the drive and the USB floppy disk drive are directly connected to your computer, and not via either an USB hub (two or more USB connectors are required in your computer) or an USB host adapter. 6.2 System recovery of Windows ME 1.
ENGLISH 3. Insert the Windows Disc into a CD-ROM drive or the CD-W28PU of your computer. 4. Insert a blank floppy disk into FDD of your computer. 5. A startup disk is completed. 6. Find out “Config.sys” file in the Startup Disk by using My Computer. 7. Open the Config.sys file by using any editing tool like Note Pad of Windows Accessory. 80 6.
C a u tio n C a u tio n Confirm that the drive is directly connected to your computer, and not via either an USB hub or an USB host adapter when implementing the System recovery. When using the recovery driver disc in the USB floppy disk drive, be sure that the drive and the USB floppy disk drive are directly connected to your computer, and not via either an USB hub (two or more USB connectors are required in your computer) or an USB host adapter. 6. System Recovery Procedure 81 ENGLISH 8.
ENGLISH 6.3 System recovery of Windows 2000 and Windows XP 1. Prepare four formatted floppy disks. 2. Insert Windows CD into the CD-ROM drive or the CD-W28PU of your computer. 3. Run the “Makeboot.exe” file in the “Bootdisk Folder”. 4. MS-DOS prompt appears on tthe screen of your PC. 5. Make the Startup disks according to the instruction of the O/S. 6. Open the “Txtsetup.sif” file in the 1st disk of the Startup disks, then search the parameter of “USB\VID_0644&PID_0000 = “usbstor”.
7.1 Precautions in handling the media Take the following precautions in order to maintain the reliability of data when handing the media. T Hold the disc between the center hole and the outer edge of the disc. Do not touch the surface of the media. T Do not drop or stack the discs on top of each other. Do not place anything heavy on the disc or give a strong shock to it. When an excessive force is applied to the media, the reliability of data may not be maintained.
Store the disc in a protective case when not in use even for a short period of time in order to protect it from being scratched or damaged. T Do not keep the media in places that contain dusts, humidity, high temperature, or are in direct sun light. ENGLISH T C a u tio n 84 Wrong handling of the media may make data unreadable or prevent further writing. 7.
Please refer to “5.1 Cable connection”. T For listening to an audio CD When listening to an audio CD by using the speakers of your computer, insert one end of an audio cable into the line output jack of your computer and the other to the line input jack. Use a ø3.5mm stereo mini plug audio cable (commercially available). 7.
ENGLISH 5. The Remove Hardware confirmation message appears. Click the OK button. 6. Remove the plug of the USB cable from the USB terminal of the computer. C a u tio n T Do not remove and reconnect the drive from or to the computer in rapid succession. The drive may not be recognized. Reconnect the drive approx. 20 seconds after removing. In Windows 2000 1. Exit the program that uses the drive. 2. Confirm that the WRITE indicator of the drive is off. 3. Click the Remove icon on the Taskbar. 4.
The messages indicated may differ depending on the versions of your OS. Refer to the instruction manual, etc. for your computer or OS for details. ENGLISH T 7.4 Setting the media 1. Press the eject button of the drive to open the top cover. 2. Place the media on the tray with the label face upward. Align the center hole of the disc with the clamp at the center of the tray and fit the disc in securely by pressing the outer vicinity of the center hole. 3.
ENGLISH 3. Close the top cover gently until the cover is completely closed. Check that the cover is securely locked. Be careful not to get your fingers caught when closing the top cover. C a u tio n 7.6 Playing back the audio CD Use Windows Media Player 7 or audio CD playback software such as Microsoft CD Player for playing back the audio CD using the drive. The operation method differs depending on the software and versions. Refer to the operation manual of your computer or software for details.
ENGLISH In addition, you will find the Enabling Digital Music CD with this CD-ROM Drive check box on the CD-W28E property on Device Manager (figure on the right indicates the example in Windows 2000). When there is no setting item for the digital playback in your player software, try the above setting. (1) When the digital playback is enabled Sound can be output via the sound card incorporated in a computer. In this case, the signal is not output from the line output jack of the drive.
ENGLISH 7.7 Suspend/resume T T T This drive conforms to the OS-based suspend/resume, however, it may not operate properly depending on your PC environment. In such a case, do not use the suspend (standby/sleep mode/hibernation) function with the drive connected to your computer. Avoid using the suspend function while the drive is in operation. Do not connect or disconnect the drive while the computer is in the suspend mode. 8.
This product has been produced under strict quality control and you can use it worry-free under normal conditions. If you need any repair, contact the representative from whom you purchased the drive or our technical service depots. 9.1 Warranty period The free warranty period of this drive is described in the warranty document. Be sure to include the warranty with the drive when sending it for repair if within the warranty period. Refer to the warranty for details. 9.
ENGLISH 9.3 Technical Service Depots (Europe) TEAC Deutschland GmbH, DSPD (Germany) Technical Support Tel: 0180 5 999 588 (DM 0.24/min (Germany)) Mo-Fr Sa from 8:30 – 20:00 CET from 10:00 – 16:00 CET Technical Support Fax: Online RMA: Internet: +49 (0) 611 7158 666 http://www.teac.de/RMA http://www.teac.de/support TEAC UK LIMITED, DSPD (U.K.) Technical Support Freecall: 0800 08 53 704 (U.K.
ENGLISH 10. SPECIFICATION 10.1 General specification Power consumption Read/write mode 7.
ENGLISH 10.2 Functional specification Applicable disc format Applicable disc type Type Size CD-DA, CD-ROM MODE1 CD-ROM XA MODE2 (FORM1,FORM2) Photo CD multi-session CD-I, Video CD, CD Extra (CD Plus) CD-TEXT Pressed CD CD-ROM, CD-DA CD-R, CD-RW 12cm, 8cm Interface USB1.1 / USB2.0 (High Speed) Data transfer speed USB1.1: 1.5MB/s to 12Mbit/s USB2.
WARRANTY Serial No. ENGLISH Model CD-W28PU Owner’s name Address Dealer’s name Date of purchase Dealer’s address Warranty Period TEAC Corporation, hereinafter called TEAC, warrants this product against any defect in material and workmanship for two (2) years from the date of purchase by the original retail purchaser.
ENGLISH (c) any shipment of the product. Any damage arising of transportation is the liability of the freight company. Any damage arising of transportation and any implicit and explicit risks are the liability of the freigth company.This is expressivly not a liability of TEAC; (d) repair or attempted repair by anyone not authorized by TEAC to repair this product; (e) causes other than product defects, including lack of technical skill, competence or experience of the user.
Limitations of Liability and Exclusion of Implied Warranties Unless considered unenforceable or unlawfull under the applicable national law: 1. TEAC’s liability for any defective product is limited to repair or replacement of the product, at TEAC's option and the option of authorized service stations, authorized dealers and their authorized service stations. No one is authorized to assume any greater liability on TEACs behalf.
ENGLISH TEAC Deutschland GmbH, DSPD: Bahnstraße 12, 65205 Wiesbaden-Erbenheim, Germany Internet: www.teac.de TEAC UK LIMITED DATA STORAGE PRODUCTS DIVISION: 5 Marlin House, Marlin Meadow, Croxely Business Park, Watford, Hertfordshire, WD18 8TE, U.K. TEAC FRANCE S.A.
GARANTIE Modell Name des Eigentümers Seriennummer CD-W28PU Adresse Name des Händlers Kaufdatum Adresse des Händlers Dauer der Gewährleistung TEAC Corporation, nachfolgend TEAC genannt, gewährt dem Erstkäufer für dieses Produkt ab dem Datum des Kaufs zwei (2) Jahre Garantie bezüglich jedes etwaigen Defekts an Material und Herstellung.
TEAC Deutschland GmbH DSPD Bahnstraße 12 65205 Wiesbaden-Erbenheim Germany TEAC Deutschland GmbH, DSPD: Bahnstraße 12, 65205 Wiesbaden-Erbenheim, Germany Internet: www.teac.de TEAC UK LIMITED DATA STORAGE PRODUCTS DIVISION: 5 Marlin House, Marlin Meadow, Croxely Business Park, Watford, Hertfordshire, WD18 8TE, U. K. TEAC FRANCE S.A.