® MP3 Player MP-450 User Manual To ensure the smooth handling of your warranty please write the serial number of your device into the box. In the case of warranty you are expected to send it together with a copy of your invoice to your nearest TEAC sales representative.
Disposing of the Product Your device should not be placed in municipal waste. Please check local regulations for disposal of electronic products. z Changes in specifications and features may be made without notice or obligation. z Copyright © 2007, TEAC Europe GmbH. All rights reserved. Edition: January 2007 z Company and product names provided herein are trademarks of their respective companies.
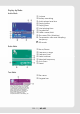
Content Safety Precautions...............................................................................................5 Product Safety..................................................................................................5 User Safety ........................................................................................................5 Charging the Battery .......................................................................................5 Getting Started ...............................
Controls by Mode .......................................................................................... 12 Audio Mode ................................................................................................ 12 Video Mode ................................................................................................ 13 Radio Mode ................................................................................................ 13 Image Mode .........................................................
Safety Precautions Please read the following safety instructions carefully before using the product. Product Safety 1. 2. 3. 4. 5. 6. 7. Do not put or drop metal objects or flammable materials into the product. Do not leave the product under a heavy object. Keep away from high humidity, dust or dirt. Do not expose the product to rain, soda, chemicals or cosmetics. Do not spray water directly onto the product when cleaning. Use a soft cloth for cleaning the product.
Getting Started Product Features 2.0" 262K Full Color TFT LCD Enjoy live music and video with a 2.0" color TFT LCD. Image Viewer View image files on a 2.0" screen. Listen to your favorite music along with your favorite pictures in the background. Video Play Enjoy movie or music video anytime you want. MP-450 brings "Cinema at your finger tips". FM Recording With FM recording feature, you can record your favorite FM program as you listen to it.
USB 2.0 High speed Connectivity Want to download 100 songs plus a movie? Just click Download and experience high speed transfer rates. Support for Language Study (Segment Repetition) Studying a foreign language and having difficulties comprehending some of the sentences because they are too fast? Practice makes perfect and with MP-450’s segment repeat function, the road to perfection just became simpler.
Part Names c MENU i Vol + Switch to Main menu. Switch to Popup menu. Increase volume. Move cursor up. d << j Power Select previous. Move cursor to left. Pull the power button "Power" until the red tag can be seen and press to power on/off. Pull the button to the other side to power off. e >> Select next. Move cursor to right. f Play Power on/off. File playback. Pause. Activate currently selected function. g REC Start/stop recording. Select repeat section/repeat. h Vol – Reduce volume.
Display by Mode.
Recording Screen c Input level d Recording State e Recording time f Available recording time g Memory remaining h Recorded file name i Compression rate and Sampling frequency of recorded file j Input Channel (Mono/Stereo) Connecting/Disconnecting the product Recharging/Connecting to a PC 1. Connect the main body to your PC using the cable provided at the time of purchase. 2. If a connection is made properly, the icon is displayed in the system tray of your PC. 3.
Basic Operations Power On Pull the power slide button to the position, where the red tag can be seen and press key and hold for about 2 seconds to turn the product on. Power Off Pull the power slide button to the opposite side or press and hold for about 3 seconds to turn the product off. key *Notes* If the power does not come on, check the battery for discharge. Volume Control You can use the / button to adjust the volume level during playback.
Controls by Mode If you choose the mode in the Mode screen, the last file you have chosen is played. For user’s convenience, MP-450 provides a popup menu to access frequently used function in each menu. Push the button briefly for popup menu and see the each mode part for details. Audio Mode Choose the Audio mode using the direction keys in the Mode screen. Use the button to play an audio file. Play Switch to Audio mode and press the button to play. To select the file, use the navigation or / button.
Video Mode Choose the VIDEO mode using the direction keys in the Mode screen. This will bring up the Navigation screen which shows the folders and files. Use / , / buttons to quickly locate desired file. Use the button to play a video file. During playback, press and hold the / button to move forward/backward quickly within the current file. During playback, press the button briefly to pause playback. Radio Mode Choose the Radio mode using the direction keys in the Mode screen.
Storing FM radio stations automatically Press the button briefly to display the popup menu. Select "auto" in the popup menu for Radio mode. Press the button and then frequencies will be scanned and stored automatically. Up to 40 channels are stored automatically. Listening to a preset station In the popup menu for Radio mode, select PRESET mode. Press the / button briefly to move to the previous/next channel.
FM Recording 1. While listening to Radio, press and hold key to switch to record mode. 2. Press and hold key to start recording. Pressing button once will pause recording and pressing it again will resume recording. 3. Press and hold key to stop recording. 4. Press and hold the button to switch to Radio mode. Stereo / Mono configuration Press the button briefly to toggle between Stereo / Mono. Image Mode Choose the IMAGE mode using the direction keys in the Mode screen.
Text Mode Choose the Text mode using the direction keys in the Mode screen. You can view text files with this mode. Select Text mode by briefly pressing . You can use Navigation to select a different text file. For more information on Navigation, refer to “Using Navigation” in “Basic operations” on page 17”. Use page. / to move to the previous/next Using Popup menu in Text Mode You can save your location while viewing a text file for loading later. (bookmark) 1.
Game Mode In the Mode screen, select Game mode. Press briefly to play the game provided. To exit the game, press and hold . The game provided is Tetris and controls are as below. button: Start/Pause game. button: Move to right. button: Move down. button: Move down one square at a time. button: Move to left button: Rotate Using Navigation You can use the navigation function in the Audio, Image, Text or Video screen by pressing briefly.
Voice Recording This function is to record voices and FM Radio. Select Record mode in the mode selection screen. Start Recording Press and hold the button to start recording. Pause Recording Press briefly to pause recording. Press recording. briefly again to continue Stop Recording Press briefly to stop recording. The recorded file can be displayed in Navigation function.
Menu settings To configure settings, select SETTING in the menu mode and press . When the Main Menu is displayed, you can use the following buttons to manipulate the settings. Menu settings are largely divided into Music, FM Radio, Record, Display, System, PowerOff Time and Language. button: Selects and moves into the sub menu. Arrow Keys : Change values of a setting / moves the cursor. button: Moves out of a menu.
Equalizer Select (EQ Set) Select from various EQ settings (Normal, 3D, Rock, Pop, Classic, Bass, Jazz, User EQ) to your preference. User Equalizer Setting (User EQ Set) You can customize the output level for each frequency. ID3 Settings You can have the Title and Artist displayed when playing a file with ID3 Tag information. Set as ID3 mode to display such information. Set as Off to display the file name instead. FM Radio Menu You can configure FM radio settings.
Back Light Configuration (Luminance) You can choose from 5 levels of brightness. Back Light Mode (Blight Mode) You can choose from two settings of Backlights: Normal, Power Save. • Normal: After a period of time, the screen goes dark. • Power Save: After a period of time, the screen goes off. System Menu About (System Information) Under the System Information menu, you can check the current firmware version and the memory usage status. The information displayed may vary depending on the product capacity.
Installing and Using the PC Program Installing PC Programs When Installation CD is inserted, will run automatically. Clicking on the Options in the installation screen will start the installation of the Drivers and each of the Programs respectively. * Notes * If installation program fails to launch automatically, run “Install.exe” in the CD manually.
Installing Drivers for Windows 98SE The Driver is required to use the product in Windows 98SE. Click in the installation screen and the Driver will be installed shortly. Reboot the computer to complete installation. * Caution * Be sure to install the Driver BEFORE connecting the product to your PC. 1. Click on in the installation screen to bring up the message box below. 2. Pressing over.
Connecting after installing the driver Connect the product to the PC after driver installation is done. Follow the steps described below to add the new hardware. 1. Click “Next”. 2. Click on the second item and then “Next”. 3. Select “USB Mass Storage Device.”and click “Next”.
4. Click “Next”. 5. Click “Finish” to complete adding new hardware.
Installing and Using the AVI Converter The AVI converter converts file formats frequently used in Desktop PC environment such as AVI, RM, VOB, ASF, WMV, Mpeg-4 into a format playable in the product. 1. System Requirements • Microsoft Windows 98 SE or later • Microsoft DirectX 9.0 or later • Windows Media Player 9.0 or later • Unified Codec * Recomended Codec : K-Lite Mega Codec Pack (www.free-codecs.com or www.k-lite.tk) 2.
2. Select the folder you wish to install in using “Browse”. Click “Install”. 3. Install the program. 4. Click “Finish” to end.
3. Converting 1. Run. AVI Converter initial screen 2. Click and select the input file. At this point, file name will not be changed except for the extension (.AVI). Information on both the Input and the Output file will be displayed in the window. AVI Converter Conversion setting 3. To save the Output File with a different name, type in desired name at “Target File Name”. 4. Click to convert entire file. 5. Click to stop.
4. Multiple Converting You can convert multiple files at once. 1. Using , select multiple files. 2. Files will be converted in the order they are on the list. 3. Use to take files off the list. Multiple Converting 4. will stop converting of the current file. 5. Setup Options Configures options of video and audio. 1. Click to bring up a dialogue for video and audio options. File Add & Options screen 2. Select Resolution tab to configure many aspects of the video options. 3.
4. Video Quality: Configure video quality by selecting desired option in the combo box. Video Quality Options 5. Aspect Ratio: Use this option to fit elongated screens to MP-450’s screen. Video Aspect Ratio Options 6. Movie Player Converted files are supported in most movie player.
Upgrading Firmware Whenever improvements are made or new functions are added, a new firmware version will become available in our web site. You can upgrade your firmware through the below steps. Before Firmware Upgrade, be sure to back up all your files in the product. Firmware Upgrade requires initialization and formatting of the product’s memory and therefore, all the files will be automatically deleted during upgrade. 1.
3. Check the agreement and if you agree, click “Next”. 4. Enter user data and click “Next”. 5. Click “Next”.
6. Click “Install”. 7. End by clicking “Finish”. 2. Upgrading Firmware After installation, the software can be found under “Start Æ All Programs Æ Consumer Update”. Download the new firmware and unzip it into a file with .rfw extension. There are two methods to upgrade your firmware after downloading the firmware upgrade from TEAC website.
Method 1 1. Turn the product OFF. 2. With the button pressed down, connect to PC using the USB cable. 3. Wait till the product displays “USB CONNECTED” 4. Run Firmware Upgrade Initial Screen 5. Click and select Firmware to be upgraded.
6. Click on about 5~6 Minutes. button to start upgrade. Upgrade takes upgrade in progress 7. Once you turn your player on. It will automatically initialize settings. Method 2 1. In the mode selection screen, select Setting and press to enter Setting mode. Now select System Æ Upgrade and press . The screen will look like the below. Fig 1 Fig 2 2. Press and connect to PC using a USB cable when fig 2 is displayed. 3. Follow method 1’s steps 4~7 to complete upgrade.
Upgrading Firmware in Windows 98SE For your first Firmware Upgrade, Driver installation must be performed before upgrading your firmware. * Attn * Click in the installation screen to install necessary tools. Run step 1 ~ 3 for the 1st method above or step 1~2 for the 2nd method above. Connect the product to the PC. Follow the steps described below to add the new hardware. 1. Click “Next”. Fig 1 2. Select the second item and then click “Next”.
3. Click “Next”. Fig 3 4. Click “Have Disk” button and proceed as shown from Fig 4 Æ Fig 5 Æ Fig 6.
5. Click “Next”. Fig 7 6. Click “Next”. Fig 8 7. Your driver installation is complete. Fig 9 Now that your driver is installed, follow either methods described in Upgrading Firmware to complete your firmware upgrade.
Digital Rights Management File (DRM9) Protection This player supports DRM9 file protection (WMA), to play DRM9 protected files: 1. Download songs protected by DRM9 from relevant websites to your PC or notebook. 2. Open the downloaded files using Windows© Media Player. Follow the instructions from Windows© Media Player to play back the files. 3. Connect the player to PC or notebook by USB cable. 4. Copy the DRM9 protected songs to the player using Windows© Media Player.
Specifications Category Audio FM Radio Item Specification Number of channels Stereo (left/right) Frequency range 20Hz ~ 20,000Hz Max output of headphone 10mW + 10mW (@16Ohm) Signal to noise ratio 85dB Frequency range 76MHz ~ 108.0MHz Antenna Headset, Earphone cord Audio (bit rate) MP3 (8~320Kbps, VBR) WMA (32~192Kbps) DRM9 Image JPEG Video file Playback format: AVI (a proprietor format) Convertible format: AVI, RM, VOB, ASF, WMV, MPEG-4 ID3 TAG ID3 V1 Tag, ID3 V2 2.0, ID3 V2 3.
What is Covered and What is Not Covered. Except as specified below, this warranty covers any defects in materials and workmanship of this product. The following are not covered by the warranty: 1. Damage to or deterioration of the external cabinet. 2. Any unit that has been altered or on which the serial number has been defaced, modified, or removed. 3.
Germany 65205 Wiesbaden-Erbenheim TEAC Europe GmbH DSPD Bahnstraße 12 Hotline: +49 1805 55 83 79 TEAC Europe GmbH, DSPD: Bahnstraße 12, 65205 Wiesbaden-Erbenheim, Germany Internet: www.teac.