9A10506200 Z PD-D2610 FRANÇAIS OWNER’S MANUAL MANUEL DU PROPRIÉTAIRE MANUAL DEL USUARIO ENGLISH Compact Disc Changer ESPAÑOL
The lightning flash with arrowhead symbol, within an equilateral triangle, is intended to alert the user to the presence of uninsulated “dangerous voltage” within the product’s enclosure that may be of sufficient magnitude to constitute a risk of electric shock to persons. CAUTION: TO REDUCE THE RISK OF ELECTRIC SHOCK, DO NOT REMOVE COVER (OR BACK). NO USERSERVICEABLE PARTS INSIDE. REFER SERVICING TO QUALIFIED SERVICE PERSONNEL. IMPORTANT SAFETY INSTRUCTIONS CAUTION • Read all of these Instructions.
< Do not expose this apparatus to drips or splashes. < Do not place any objects filled with liquids, such as vases, on the apparatus. < Do not install this apparatus in a confined space such as a book case or similar unit. < The apparatus draws nominal non-operating power from the AC outlet with its POWER switch in the off position. < The apparatus should be located close enough to the AC outlet so that you can easily grasp the power cord plug at any time.
Contents Before Use Thank you for choosing TEAC. Read this manual carefully to get the best performance from this unit. Read this before operation < As the unit may become warm during operation, always leave sufficient space around the unit for ventilation. Important Safety Instructions . . . . . . . . . . . . . . . . . . . . . . . . . . 2 Before Use . . . . . . . . . . . . . . . . . . . . . . . . . . . . . . . . . . . . . . . . 4 Discs . . . . . . . . . . . . . . . . . . . . . . . . . . . . . . . . . .
Discs Discs which can be played on this unit: • Conventional audio CDs bearing the COMPACT DISC DIGITAL AUDIO logo on the label: < Printable CD-R and CD-RW discs aren’t recommended, as the label side might be sticky and damage the unit. < Do not stick papers or protective sheets on the discs and do not use any protective coating spray.
Name and Function B A K J C I H G F D E A POWER Press this button to turn the unit on or off. K L The equipment draws nominal non-operating power from the AC outlet with its POWER switch in the OFF position. O D P B Disc tray Q C OPEN/CLOSE R M N G F T S U E Use this button to open and close the disc tray. D DISC SKIP Use this button to skip discs. E PLAY (y) Use this button to start playback. F PAUSE (J) Use this button to pause playback.
Remote Control Unit K DISC NO. Use these buttons to slect a disc. L TRACK NO. Use these buttons to select a track number. For instance, to select track number 35, press “3” and “5”. M PROGRAM Use this button to enter the program mode. In program mode, use this button to enter selections. N SEARCH (m/,) During playback, use these buttons to search the part you want to listen to.
Connection PD-D2610 A B C OPTICAL COAXIAL DIGITAL IN Digital Audio Device (CD Recorder, etc.) L R CD IN Amplifier CAUTION: < Switch off the power to all equipment before making connections. < Read the instructions of each component you intend to use with this unit. < Be sure to insert each plug securely. To prevent hum and noise, avoid bundling the signal interconnection cables together with the AC power cord or speaker cables.
Playback 1 1 3 4 Press the OPEN/CLOSE button (L) to close the tray. 4 2 5 DISC NO. 5 Press the PLAY button (y) to start playback. 1 Press the POWER button to turn the unit on. ENGLISH The unit starts searching disc. If a disc is found the playback will start. < If you want to select other disc, press the DISC SKIP button or the desired DISC NO. button. 2 Press the OPEN/CLOSE button (L). (Audio CD) disc number and disc mark music calendar 3 Place a disc on a tray with the printed label face up.
Playback 2 D Search for a part of a track/file B E DISC NO. During playback, hold down the . or / button and release it when the part you want to listen to is found. On the remote control use the SEARCH button (m or ,). C A D E To select a disc A To stop playback Press the STOP button (H) to stop playback. Press the DISC SKIP button repeatedly until the desired disc number is displayed, then press the PLAY button (G). Or press the DISC NO. button you want to listen to.
Repeat Playback Shuffle Playback Each time the REPEAT button is pressed, the mode is changed as follows: Shuffle mode turns on/off by pressing the SHUFFLE button. REPEAT ONE (OFF) REPEAT ALL All tracks or files of all discs will be played repeatedly. REPEAT ONE The track/file being played will be played repeatedly. If you select another track/file in REPEAT ONE mode, the track/file selected will be played repeatedly. During shuffle mode, SHUFFLE indicator lights.
Programed Playback 2 3 1 4 < Before you press the numeric buttons, “A” is displayed instead of the track/file number. If you press the PROGRAM button without pressing the numeric buttons, you can program a whole disc. 5 4 Press the PROGRAM button to enter your selection. < Up to 32 tracks can be programed in the desired order. < If the shuffle mode is on, the PROGRAM button does not work. Repeat steps 2 to 4 to program more tracks/files. < If you made a mistake, press the CLEAR button.
Intro Check To add a track/file to the program Intro check mode turns on/off by pressing the INTRO CHECK button In intro check mode, INTRO indicator lights. During playback the first 10seconds of the tracks/files are played. When all tracks/files have been played once, the unit will stop playback. < If “A” is displayed in the middle of the program, it means a whole disc is programed.
Time Display When the disc is MP3: current file number During playback, each time the TIME button is pressed the display changes as follows: current folder number elapsed time of the current file current file number of the current folder When the disc is CD: current disc number current track number elapsed time of the current track folder number - folder name (scrolling) file number - file name (scrolling) remaining time of the current track artist name (scrolling) elapsed time of the disc alb
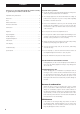
Troubleshooting Specifications If you experience any problems with the unit, please take a moment to look through this chart and see if you can solve the problem yourself before you call your dealer or a TEAC service center. CD Player Pickup . . . . . . . . . . . . . . . . . . . . . . . . . . . . . . . . 3-beam laser D/A converter . . . . . . . . . . . . . . . . . . . . . . . . Dual 1-bit linear Digital filter . . . . . . . . . . . . . . . . . . . . . . 4-times oversampling Frequency Response . . . . . .
Sommaire Avant d’employer l’appareil Nous vous remercions pour l’achat d’un appareil TEAC. Lire ce manuel avec attention pour obtenir les meilleures performances possibles de cet appareil. Lire les consignes suivantes avant toute utilisation < L'appareil pouvant éventuellement dégager de la chaleur lors de son utilisation, veillez à toujours laisser un espace suffisant au-dessus de celui-ci afin de garantir une ventilation correcte.
Disques Disques lisibles par cet appareil: • CD audio conventionnels portant le logo COMPACT DISC DIGITAL AUDIO: • CD-R et CD-RW correctement finalisés • CD de MP3 Note: < Selon la qualité du disque et/ou les conditions de la gravure, certains CD-R/CD-RW peuvent ne pas être lisibles. < Les disques protégés contre la copie et les disques ne se conformant pas au standard CD peuvent ne pas être lus correctement par cet appareil.
Noms de pièces et leurs fonctions B A K J C I H G F D E A POWER Appuyez sur cette touche pour mettre l'appareil en ou hors circuit. K L L’appareil tire de la prise secteur une puissance faible mais non nulle lorsque l’interrupteur POWER est sur la position OFF. O D P Q B Tiroir disque R M N G F T S U E C OPEN/CLOSE Utilisez cette touche pour ouvrir et fermer le tiroir. D DISC SKIP Utilisez cette touche pour sauter des disques.
Boîtier de télécommande J Télécommande Lors de l’utilisation de la télécommander, dirigez-la vers le capteur de télécommande. Le boîtier de télécommande fourni permet la commande à distance defourni permet la commande à distance de l’appareil. Pour l’utilisation du boîtier de télécommande, le diriger vers le détecteur de télécommande du panneau avant de l’appareil. K DISC NO. Utilisez ces touches pour sélectionner des disques. L TRACK NO. Utilisez ces touches pour sélectionner un numéro de plage.
Raccordements PD-D2610 A B C OPTICAL COAXIAL DIGITAL IN Appareil audio numérique (enregistreur CD, etc.) L R CD IN Amplificateur PRÉCAUTION: < Coupez l’alimentation de tous les appareils avant d’effectuer les raccordements. < Lisez les instructions qui accompagnent chaque appareil que vous avez l’intention d’utiliser en association avec cet appareil-ci. < Veillez à ce que chaque fiche soit soigneusement insérée.
Lecture 1 1 3 DISC NO. 4 Appuyez sur la touche OPEN/CLOSE (L) pour fermer le 4 2 tiroir. 5 5 Appuyez sur la touche PLAY (y) pour démarrer la lecture. 1 Appuyez sur la touche POWER pour mettre l’appareil en marche. L'appareil se met à rechercher un disque. La lecture se met en marche quand un disque est trouvé. < Pour sélectionner un autre disque, appuyez sur la touche DISC SKIP ou la touche DISC NO. désirée. 2 Appuyez sur la touche OPEN/CLOSE (L).
Lecture 2 D Recherche d’un passage donné sur une plage ou un B E DISC NO. fichier Pendant la lecture du disque, maintenez pressée la touche . ou / puis relâchez-la quand vous avez atteint le passage que vous souhaitez écouter. Sur la télécommande, appuyez sur la touche m ou ,. C A D E Pour sélectionner un disque A Pour arrêter la lecture Appuyez sur la touche STOP (H) pour arrêter la lecture.
Lecture répétée Lecture aléatoire Chaque fois que vous appuyez sur la touche REPEAT le mode change comme suit: Le mode aléatoire s'active ou se désactive à l'appui sur la touches SHUFFLE. REPEAT ALL REPEAT ONE (Répétition hors service) REPEAT ALL Toutes les plages ou les fichiers sont reproduits répétitivement. < A l'appui sur la touche REPEAT durant la lecture programmée, le contenu programmé est reproduit répétitivement.
Lecture programmée 2 3 1 4 < Avant qu'aucune touche numérique ne soit appuyée, “A” est affiché à la place d'un numéro de plage ou de fichier. A l'appui sur la touche PROGRAM sans avoir appuyé sur aucune touche numérique, le disque tout entier est programmé comme une seule plage. 5 4 Appuyez sur la touche PROGRAM pour mettre en mémoire la plage sélectionné. < Jusqu’à 32 plages peuvent être programmés dans l’ordre désiré. < La touche PROGRAM ne marche pas si le mode aléatoire est activé.
Lecture intro des plages Pour ajouter une plage ou un fichier au programme Pour supprimer une plage ou un fichier du programme Le mode intro des plages s'active ou se désactive à l'appui sur la touche INTRO CHECK. Quand le mode intro des plages est activé, le témoin INTRO s'allume, et les premières 10 secondes des plages ou des fichiers seront reproduites. L'appareil s'arrête quand toutes les plages ou tous les fichiers du disque ont été reproduits une fois.
Affichage du temps Quand un disque MP3 est chargé: Numéro de fichier en cours Lors de la lecture, l’affichage change comme suit chaque fois que vous appuyez sur la touche TIME: Numéro de dossier en cours Temps écoulé du fichier en cours Numéro de fichier en cours du dossier en cours Quand un CD audio est chargé: Numéro de disque en cours Numéro de plage Temps écouté de en cour la plage en cour Numéro de dossier - Nom de dossier (se défilant) Numéro de fichier - Nom de fichier (se défilant) Temps r
Dépannage Spécifications En cas de problème avec l’appareil, prenez le temps de lire ce tableau et de voir si vous pouvez résoudre le problème tout seul avant de faire appel à votre revendeur ou au centre d'assistance TEAC. Lecteur CD Capteur . . . . . . . . . . . . . . . . . . . . . . . . Laser à trois faisceaux Convertisseur D-A . . . . . . . . . . . . . . . . . . 1-bit linéaire double Filtre numérique . . . . . . . . . . . . . . . . . . Suréchantillonage x 4 Réponse en fréquence . . . . . . . . . . .
Indice Antes de utilizar la unidad Enhorabuena por la adquisición de un TEAC. Lea detenidamente este manual a fin de obtener el mejor rendimiento de esta unidad. Léase antes de realizar ninguna operación < La unidad puede calentarse durante su funcionamiento, por lo que habrá que dejar espacio suficiente alrededor para su ventilación. Antes de utilizar la unidad. . . . . . . . . . . . . . . . . . . . . . . . . . . .
Discos Discos utilizables: • CD-Audio convencionales con el logotipo COMPACT DISC DIGITAL AUDIO en la etiqueta: < Los discos CD-R y CD-RW son más sensibles al calor y a los rayos ultravioleta que los CD normales. Convendrá guardarlos en un lugar donde no incida la luz solar directa, y alejados de fuentes de calor (radiadores, etc.) o dispositivos eléctricos que generen calor.
Nombres de los controles B A K J C I H G F D E A POWER Utilice este botón para encender o apagar el equipo. K L El equipo suministra una energía no operativa nominal desde la toma de CA con su interruptor POWER en la posición OFF. O D P B Bandeja de disco Q R M N G F T C OPEN/CLOSE S U E Utilice este botón para abrir y cerrar la bandeja de disco. D DISC SKIP Utilice estos botones para saltar discos. E PLAY (y) Utilice este botón para dar comienzo a la reproducción.
Control remoto K DISC NO. Ulitice estos botones para selectionar los discos. L TRACK NO. Utilice estos botones para seleccionar un número de pista/archivo. Por ejemplo, para seleccionar el número de pista/archivo 35, pulse “3” y “5”. M PROGRAM Utilice este botón para activar el modo de programación. Una vez activado este modo, utilice este botón para introducir sus selecciones. La unidad de control remoto suministrada le permite controlar el aparato a distancia.
Conexión PD-D2610 A B C OPTICAL COAXIAL DIGITAL IN Equipo audio digital (grabador CD, etc.) L R CD IN Amplificador PRECAUCIÓN: < Apague todos los equipos antes de realizar las conexiones. < Lea las instrucciones de cada equipo que intenta utilizar con esta unidad. < Asegúrese de insertar firmemente cada enchufe. Para evitar zumbidos y ruidos, evite poner los cables de conexión de señal en haz con el cable de alimentación de CA o cables de altavoz.
Reproducción 1 1 3 DISC NO. 4 Pulse el botón OPEN/CLOSE (L) para cerrar la bandeja. 4 2 5 5 Pulse el botón PLAY (y ) para dar comienzo a la reproducción. 1 Pulse el botón POWER para encender la unidad. La unidad comienza a buscar un disco. La reproducción comienza cuando se encuentra un disco. < Si desea seleccionar otro disco, pulse el botón DISC SKIP o el botón DISC NO deseado. 2 Pulse el botón OPEN/CLOSE (L).
Reproducción 2 D Búsqueda de un fragmento de la pista o el archivo B E DISC NO. Durante la reproducción, mantenga pulsado SEARCH (m o ,) y libérelo cuando localice la parte que desea oír. También puede utilizar los botones m y , del control remoto. C A D E Para seleccionar discos A Para detener la reproducción Pulse el botón STOP (H) para detener la reproducción. Pulse el botón DISC SKIP repetivamente hasta que se ilumina en la pantalla el número de disco deseado, entonces pulse el botón PLAY (G).
Repetición Reproducción al azar Cada vez que pulse el botón REPEAT, el modo cambiará en el siguiente orden: El modo de reproducción al azar se activa o se desactiva al pulsar el botón SHUFFLE. REPEAT ALL REPEAT ONE (Repetición desactivada) REPEAT ALL Todas las pistas o todos los archivos de todos discos se reproducirán repetidamente. REPEAT ONE La pista o el archivo que esté reproduciéndose se reproducirá repetidamente.
Reproducción programada 2 3 1 4 5 < Se pueden programar hasta 32 pistas/archivos en el orden deseado. < El botón PROGRAM no funciona cuando está activado el modo de reproducción al azar. < Antes de pulsar los botones numéricos, “A” está iluminado en vez de un número de pista o de archivo. Si se pulsa el botón PROGRAM sin primero pulsar los botones numéricos, el disco entero será programado como una sola pista. 4 Pulse el botón PROGRAM para introducir su seleción.
Verificación de introducciones Para agregar una pista o un archivo al programa Si desea agregar una pista o un archivo al final del programa, pulse el botón PROGRAM CHECK repetidamente hasta que “A” se ilumina después del final del programa. Pues utilice los botones numéricos para seleccionar una pista o un archivo y pulse el botón PROGRAM. La pista o el archivo ha sido programado. < Si un disco entero ha sido programado, “A” se ilimina antes de alcanzar el final del programa.
Lectura de tiempo Cuando se coloca un disco MP3: número de archivo actual Cada vez que pulse el botón TIME durante la reproducción, la lectura cambiará en el siguiente orden:: número de carpeta actual tiempo transcurrido de archivo actual número de archivo actual en la carpeta actual Cuando se coloca un CD de audio: número de disco actual número de pista actual tiempo transcurrido de pista actual tiempo restante de pista actual número de carpeta - nombre de carpeta (desplazándose) número de arch
Solución de problemas Especificaciones Si surge algún problema con la unidad, dedique unos instantes a revisar los siguientes puntos por si puede solucionar el problema sin necesidad de acudir al distribuidor o centro de servicio técnico TEAC. Reproductor de CD Captor . . . . . . . . . . . . . . . . . . . . . . . . . . . . . . láser de 3 haces Convertidor D-A . . . . . . . . . . . . . . . . . . . . . . 1 bit linear doble Filtro digital . . . . . . . . . . . . . . . . . . . . . .
Z TEAC CORPORATION 3-7-3, Nakacho, Musashino-shi, Tokyo 180-8550, Japan Phone: (0422) 52-5081 TEAC AMERICA, INC. 7733 Telegraph Road, Montebello, California 90640 Phone: (323) 726-0303 TEAC CANADA LTD. 5939 Wallace Street, Mississauga, Ontario L4Z 1Z8, Canada Phone: (905) 890-8008 TEAC MEXICO, S.A. De C.