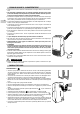
PLEASE, CLICK ON THE TIMER FOR INSTRUCTIONS ! OPERATING INSTRUCTIONS ● ISTRUZIONI D'USO NOTICE D’UTILISATION ● BEDIENUNGSANLEITUNG INSTRUCCIONES DE USO EG I F D MTF 83 MOVABLE AIR CONDITIONER ● CLIMATIZZATORE PORTATILE CLIMATISEUR MOBILE ● MOBILES KLIMAGERÄT ACONDICIONADOR PORTATIL 37.4116.153.
CONTENTS EG PRODUCT IDENTIFICATION........................................................................... 2 CONTROL PANEL ........................................................................................... 2 BEFORE USING THE APPLIANCE ................................................................. 3 OPERATION Cooling ........................................................................................ 3 Dehumidification (dry)................................................................
BEFORE USING THE APPLIANCE ● ● ● ● ● ● ● ● ● ● ● ● ● ● Check that the power supply at the location where the air conditioner is going to be used is 220-240V ~ 50Hz . Do not move the air conditioner without controlling (through the rear discharge tube) the eventually condensate water inside it. Utilise the same tube every time you discharge condensate water, before operation.
DEHUMIDIFICATION (DRY) When the air conditioner is in the dehumidification mode, it doesn’t cool the room. When you use the air conditioner in the dehumidification mode, you don’t have to use the flexible tube. For maximum dehumidification efficiency leave the rear discharge outlet free to discharge directly into the room. ● Remove the flexible tube by grasping it at the attachment point on the air conditioner and twisting it until you release it from the blocking hooks.
PORTHOLE KIT SINGLE GLASS DOUBLE GALSS EG min. min. ø 138 ø 158 ø 138 min. ASSEMBLING 3 ÷ 6 mm ● Make a hole in the window pane. ● Insert the porthole without the plug. ● Remove the terminal pipe fitting of the warm air outlet from the retractile flexible pipe. ● Bring the air conditioner near the window and insert the air outlet in the porthole. NOTE If you want to utilise the air conditioner in several rooms, it is possible to buy varies portholes for air discharge separately.
CARE AND CLEANING WARNING! For safety’s sake, be sure to turn the air conditioner OFF and also disconnect it from the power supply before cleaning it. EG NO! 1. Cleaning of the Air Filter. The air filter must be checked at least once every two weeks operation. Operation with a dirty filter always causes a lower efficiency of the air conditioner and severe product damage.The filter is located at the back of the intake grille and shall be removed from the right side of the unit.
INDICE IL PRODOTTO ................................................................................................. 2 PANNELLO COMANDO E CONTROLLO ........................................................ 2 PRIMA DI USARE IL CLIMATIZZATORE ........................................................ 3 MODALITÀ D'USO Raffreddamento .................................................................................... 3 Deumidificazione (dry) .........................................................................
PRIMA DI USARE IL CLIMATIZZATORE I ● Verificare che la tensione monofase di alimentazione nel luogo di utilizzo sia di 220V-240V~ 50Hz. ● Non movimentate il climatizzatore senza aver controllato visivamente (attraverso il tubo di scarico posto sul retro dell’unità) l’eventuale presenza d’acqua all’interno. Utilizzate lo stesso tubo per scaricare sempre, prima di ogni operazione, la condensa accumulata internamente.
DEUMIDIFICAZIONE (DRY) Il climatizzatore non raffredda l’ambiente quando funziona come deumidificatore. Quando usate l’apparecchio come deumidificatore, non dovete collegare il tubo flessibile. Per ottenere la massima efficienza di deumidificazione lasciate l’attacco di scarico posteriore libero di scaricare direttamente in ambiente. ● Scollegate il tubo flessibile afferrandolo in prossimità del punto di attacco sull’apparecchio e ruotandolo sino a liberarlo dai ganci di bloccaggio.
KIT OBLÓ VETRO SINGOLO MONTAGGIO Togliere il raccordo terminale scarico aria calda dal tubo flessibile retrattile. ● Avvicinare il climatizzatore alla finestra e inserire il tubo scarico aria nell'oblò. min. Inserire l'oblò privo di tappo chiusura. ● ø 158 Praticare un foro sul vetro della finestra. min. ● ø 138 ø 138 min. I DOPPIO VETRO ● 3 ÷ 6 mm NOTA Se si desidera usufruire del climatizzatore in vari locali è possibile acquistare più KIT OBLÓ scarico aria separatamente.
MANUTENZIONE E CURA ATTENZIONE! Prima di procedere a operazioni di pulizia e manutenzione togliere la spina dalla presa di corrente. NO! 1. Pulizia del filtro d'aria Il filtro deve essere controllato almeno una volta ogni due settimane di funzionamento. Il funzionamento con filtro sporco o intasato causa sempre una diminuzione dell’efficienza del climatizzatore e può provocare inconvenienti gravi.
SOMMAIRE F LE PRODUIT .........................................................................................................2 TABLEAU DE COMMANDES ............................................................................... 2 AVANT D’UTILISER LE CLIMATISEUR ............................................................... 3 MODE D’EMPLOI Refroidissement ..........................................................................................3 Déshumidification (dry) ..................................
AVANT D’UTILISER LE CLIMATISEUR ● Vérifiez que la tension du réseau d’alimentation est bien de 220-240V ~ 50Hz. ● Ne pas transporter le climatiseur sans vérifier l’existance de l’eau de condensation à l’interieure de l’unité (par le tube de vidange à l’arrière de l’unité). Utiliser le même tube pour vider, avant chaque operation, l’eau de condensation intérieure.
DESHUMIDIFICATION Quand le climatiseur fonctionne comme déshumidificateur, il ne rafraîchit pas la pièce. Quand vous utilisez l’appareil comme déshumidificateur, le tube flexible ne doit pas être monté sur le climatiseur. F ● Décrochez le tube flexible en saisissant le point d’accrochage sur le climatiseur et faites-le le tourner jusqu’au décrochage. Appuyez sur la touche (A) marche-arrêt pour mettre le climatiseur en marche. ● Sélectionnez le mode déshumidification en appuyant sur la touche (B) .
KIT HUBLOT VITRAGE SIMPLE VITRAGE DOUBLE Enlevez le raccord final de la sortie d’air chaud du tuyau flexible rétractable. ● Approchez le climatiseur de la fenêtre et enchâssez le tuyau de sortie d’air dans le hublot. min. Enchâssez le hublot sans le bouchon. ● ø 158 Pratiquez un trou dans le carreau de la fenêtre. min. ● ø 138 ø 138 min.
ENTRETIEN ET NETTOYAGE ATTENTION! Avant de procéder à des opérations de nettoyage et d’entretien, débranchez l’appareil. F 1. Nettoyage du filtre à air. Le filtre doit être contrôlé au moins une fois toutes les deux semaines (pendant les périodes de fonctionnement). Le fonctionnement avec un filtre sale ou obstrué provoque une diminution de l’efficacité du climatiseur et peut causer de graves problèmes. Le filtre est placé derrière la grille d’aspiration et s’extrait en la soulevant vers le côté droit.
INHALTVERZEICHNIS DAS PRODUKT ................................................................................................... 2 SCHALT- UND KONTROLLPANEL ..................................................................... 2 VOR INBETRIEBNAHME ..................................................................................... 3 ANWENDUNGSHINWEISE Kühlung ......................................................................................................3 Entfeuchtung (dry) .........................
VOR INBETRIEBNAHME ● Überprüfen Sie, daß die einphasige Nennspannung am Anwendungsort 220/240V ~ 50Hz ist. ● Die Bestehung von eventuelle Kondenswasser im Klimagerät kontrollieren (durch den Kondenswasserrohr an der Rückseite der Einheit), immer bevor das Klimagerät zu transportieren. Den gleichen Rohr benutzen, um das innere Kondenswasser immer, bevor dem Betrieb auszulassen.
ENTFEUCHTUNG Wenn das Klimagerät als Entfeuchter benutzt wird, kühlt er den Raum nicht. Wenn das Gerät als Entfeuchter benutzt wird, ist der Anschluß des Abluftschlauches nicht notwendig. Die Schlauchanschlußöffnung auf der Rückseite einfach offen lassen, um eine große Entfeuchter Leistung zu erlangen. ● Den Schlauch abnehmen, indem Sie den auf der Anschluß des Klimagerätes fassen und drehen Sie, um den auszuziehen. Die Ein / Aus Schalter (A) drücken, um das Klimagerät in Betrieb zu setzen.
RUNDES FENSTER KIT EINZELGLAS DOPPELGLAS min. ø 158 ø 138 min. ø 138 min. MONTAGE D 3 ÷ 6 mm ● Das Fensterglas lochen. ● Das runde Fenster ohne Deckel einsetzen. ● Die Ausblasedüse vom Schlauch entfernen. ● Das Klimagerät ans Fenster nähern und das Auslaufrohr in das runde Fenster einsetzen. ANMERKUNG Wenn man das Klimagerät in mehreren Zimmer brauchen will, ist es möglich mehrere runde fenstern für Luftauslassen kaufen.
WARTUNG UND PFLEGE VORSICHT! Vor Beginn der Reinigungs-und Wartungsvorgänge ist das Klimagerät abzuschalten und der Stecker aus der Steckdose zu ziehen. FALSCH! 1. Filterreinigung. Der Luftfilter muß wenigstens einmal alle 2 Betriebswochen überprüft und gereinigt werden. Der Betrieb mit schmutzigen oder verstopften Filter kann die Leistung des Klimagerätes verkleinern. Der Filter ist hinter den Luftansauggrill angebracht und wird nach recht herausgenommen. Zur Staubentfernung einen Staubsauger benutzen.
INDICE EL PRODUCTO .................................................................................................... 2 PANEL DE MANDOS Y CONTROLES ................................................................. 2 ANTES DE USAR EL ACONDICIONADOR ......................................................... 3 COMO USARLO Refrigeración ..............................................................................................3 Deshumidificación (dry) ........................................................
ANTES DE USAR EL ACONDICIONADOR ● ● ● ● ● ● ● ● ● ● ● ● ● ● Comprobar que la tensión eléctrica monofásica nominal de alimentación sea de 220/240 V ~ 50Hz. Antes de transportar el acondicionador, verificar a través del tubo posterior si existe agua de condensación en el interior. En ese caso, vaciar el depósito a través del tubo de evacuación.
DESHUMIDIFICACION Cuando el acondicionador funciona en deshumidificación, no enfría el ambiente. Usando el acondicionador como deshumidificator, no debe conectarse el tubo flexible. Para obtener la máxima eficacia de deshumidificación dejar la expulsión aire posterior libre para descargar directamente en la habitación. ● Quitar el tubo flexible del acondicionador girándolo hasta soltarlo de los ganchos de bloqueo. Pulsar el botón arranque / parada (A) para poner en marcha el aparato.
KIT JUNTA ELASTICA CRISTAL SIMPLE CRISTAL DOBLE Desmontar la boquilla del tubo flexible. ● Acercar el acondicionador a la ventana y embocar el extremo cilíndrico del tubo flexible al agujero. min. Montar la junta elástica sin el cierre en el agujero. ● ø 158 Realizar un agujero en el cristal de la ventana. min. ● ø 138 ø 138 min.
MANTENIMIENTO Y LIMPIEZA ATENCION! Antes de realizar cualquier operación de limpieza y/o de mantenimiento desconectar la clavija de su enchufe. NO! 1. Limpieza del filtro del aire. El filtro debe ser controlado al menos una vez cada dos semanas de funcionamiento. El filtro sucio o obstruido causa una disminución de la eficacia del acondicionador y puede provocar graves inconvenientes. El filtro está situado detrás de la rejlla de aspiración del acondicionador y se extrae por el lado derecho.
WIRING DIAGRAM ● SCHEMA ELETTRICO ● SCHEMA ELECTRIQUE ● SCHALTPLAN ● ESQUEMA ELECTRICO Description of symbols / Descrizione dei simboli / Description des symboles / Bezeichnung der Symbole / Descripción de los símbolos SYMBOL EG I F D E PC CM C1,2,3,4 FMO FMI/FM IND. ASSY ORL CE PR MS ON-OFF SW TH1,2 RA LC RP P CONDENSATE PUMP MOTOR COMPRESSOR MOTOR CAPACITOR OUTDOOR FAN MOTOR INDOOR FAN MOTOR INDICATOR ASSY OVERLOAD RELAY CONTROLLER POWER RELAY SAFETY FLOAT SWIT.
R.D. 28 Reyrieux BP 131 - 01601 Trévoux CEDEX France Tél. 04.74.00.92.92 - Fax 04.74.00.42.00 R.C.S. Bourg-en-Bresse B 759 200 728 S.A.C. - Printed in italy In order to carry on a constant improvement, our products can be modified without prior notice. Per garantire un costante miglioramento dei nostri prodotti, ci riserviamo di modificarli senza preavviso. Par souci d’amélioration constante, nos produits peuvent être modifiés sans préavis.