THOMSON TG121n Wireless USB Adaptor Setup and User Guide
THOMSON TG121n Setup and User Guide
Copyright Copyright ©1999-2008 Thomson. All rights reserved. Distribution and copying of this document, use and communication of its contents is not permitted without written authorization from Thomson. The content of this document is furnished for informational use only, may be subject to change without notice, and should not be construed as a commitment by Thomson. Thomson assumes no responsibility or liability for any errors or inaccuracies that may appear in this document.
Contents About this Setup and User Guide ............................................. 1 1 About your Wireless USB Adaptor ............................................ 3 2 Install the Drivers......................................................................... 5 3 Associate your Wireless USB Adaptor to your Access Point .. 7 3.1 Automatic Association via WPS ..................................................................... 8 3.1.1 Procedure for Thomson Gateways ............................
Contents ii E-DOC-CTC-20080318-0006 v1.
About this Setup and User Guide About this Setup and User Guide Used Symbols A note provides additional information about a topic. A caution warns you about potential problems or specific precautions that need to be taken. Terminology Generally, the THOMSON TG121n will be referred to as Wireless USB Adaptor in this Setup and User Guide. Typographical Conventions Following typographical convention is used throughout this manual: Sample text indicates a hyperlink to a Web site.
About this Setup and User Guide 2 E-DOC-CTC-20080318-0006 v1.
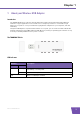
Chapter 1 1 About your Wireless USB Adaptor Introduction The THOMSON TG121n is a wireless network adapter that seamlessly integrates with existing Ethernet networks to support applications such as mobile users or temporary conferences. Just install enough wireless access points to cover your network area, plug wireless adaptors into your computers, and start networking.
Chapter 1 System Requirements To install the Wireless USB Adaptor, your computer must: Have a USB port. To obtain maximum wireless networking speed, a USB 2.0 compatible port is needed. Run one of the following operating systems: Microsoft Windows Vista Microsoft Windows XP SP1 or higher Microsoft Windows 2000 SP4 What do I need to do to before I can use my Wireless USB Adaptor? To connect your Wireless USB Adaptor to your wireless network you have to: 1 Install the Drivers.
Chapter 2 2 Install the Drivers Introduction Before your computer can recognize and use the Wireless USB Adaptor you first need to install the necessary drivers. Do not connect your wireless device to your computer until you are instructed to do so. Procedure Proceed as follows: 1 Insert the Setup CD in your computer’s CD-ROM or DVD-ROM drive. Result: The CD should autostart. If not, click Run on the Start menu and enter the following path: D:\Setup.
Chapter 2 6 E-DOC-CTC-20080318-0006 v1.
Chapter 3 3 Associate your Wireless USB Adaptor to your Access Point Methods There are two ways to associate your Wireless USB Adaptor to your access point: Automatic Association via WPS Manual Association E-DOC-CTC-20080318-0006 v1.
Chapter 3 3.1 Automatic Association via WPS WPS Wi-Fi Protected Setup (WPS) allows you to add new wireless clients to your network in a swift and easy way, without the need to enter all of your wireless settings (SSID, encryption,...).
Chapter 3 3.1.1 Procedure for Thomson Gateways Procedure Proceed as follows: 1 Double-click the Wireless Configuration Utility icon in the notification area. 2 The Wireless Configuration Utility appears. 3 Click WPS. 4 The WiFi Protected Setup wizard appears: 5 Select Push the button on my access point and click Next. 6 Shortly press the association button ( 7 The Wireless Configuration Utility prompts you that the wireless configuration was successful. E-DOC-CTC-20080318-0006 v1.
Chapter 3 3.1.2 Procedure for All Access Points Procedure Proceed as follows: 1 Double-click the Wireless Configuration Utility icon in the notification area. 2 The Wireless Configuration Utility appears. 3 Click WPS. 4 The WiFi Protected Setup wizard appears: Following options are available: Push the button on my access point. If you select this option, you will have to push a button on your access point to start the WPS registration. Enter a PIN into my access point.
Chapter 3 3.2 Manual Association What operating system are you using? If your computer runs: Windows Vista, proceed with “3.2.1 Association on Windows Vista” on page 12. Windows XP, proceed with “3.2.2 Association on Windows XP” on page 13. Windows 2000, proceed with “3.2.3 Association on Other Windows Operating Systems” on page 14. If you are using the Access Control List (ACL) Some access points enable you to allow/deny wireless clients to access your network based on their MAC address.
Chapter 3 3.2.1 Association on Windows Vista Procedure Proceed as follows: 1 On the taskbar, click the Start button, and then click Connect to. 2 A list of the available wireless networks appears. If your wireless access point does not broadcast it’s network name (SSID), it will not be displayed in this list. Click Set up a connection or network and configure your wireless client manually. For more information, consult the Windows help. Double-click your wireless access point.
Chapter 3 3.2.2 Association on Windows XP Procedure Proceed as follows: 1 On the taskbar, click the Start button 2 Point Connect To and click Wireless Network Connection. If you have more than one wireless client, this text will be followed by a number (for example, Wireless Network 2). Choose the one with the highest number. 3 A list of the available wireless networks appears. If your wireless access point does not broadcast its network name (SSID), it will not be displayed in this list.
Chapter 3 3.2.3 Association on Other Windows Operating Systems Procedure Proceed as follows: 1 Double-click the Wireless Configuration Utility icon ( 2 The Wireless Configuration Utility appears: 3 Click the Site Survey tab. ) in the notification area. Result: The Wireless Configuration Utility lists all available wireless access points. 4 Double-click your wireless access point.
Chapter 3 Installation result When the installation is completed, a small icon in your notification area (bottom right corner of most screens) will also appear to indicate the status of your connection. In case the icon is: Icon Description You are successfully connected to a wireless network. You are not connected to a wireless network. The THOMSON TG121n is disabled or unplugged.
Chapter 3 16 E-DOC-CTC-20080318-0006 v1.
Chapter 4 4 Wireless Configuration Utility Introduction The Wireless Configuration Utility allows you to configure your Wireless USB Adaptor. Wireless Configuration Utility window Navigation menu Following menu items are available: Click... To... Link Info View information on your wireless connection. Configuration View/change the configuration of your Wireless USB Adaptor. Site Survey Scans all the wireless devices in range. Profile Manage your wireless profiles.
Chapter 4 4.1 Link Info The Link Info page This section allows you to view the current configuration of your wireless connection. Properties Following properties are displayed: Status: The status of the wireless connection. SSID: The network name of the wireless network. Wireless Mode can have following values: Infrastructure: all traffic passes through an access point. Ad-hoc: traffic is sent from one computer to another. 18 Encryption: The encryption type used to transfer data.
Chapter 4 4.2 Configuration The Configuration page The configuration tab allows you to view/change the configuration of your Wireless USB Adaptor. Your Wireless USB Adaptor must use the same settings in order to connect to your network. Properties Following properties are available for configuration: Profile Name: You can save the current settings to a profile. This allows you to easily switch between configurations.
Chapter 4 4.3 Profile The Profile page This tab allows you to manage your wireless profiles. Use of Profiles If you regularly need to switch between wireless networks (for example if you use your laptop at the office as well as at home), it might be useful to save these settings to a profile. This way you can easily switch between these settings in a few clicks. Working with Profiles Click: 20 Add to add a new profile. Remove to delete an selected profile.
Chapter 4 4.4 WPS The WiFi Protected Setup wizard If you click the WPS button, the WiFi Protected Setup wizard appears. For more information about the WiFi Protected Setup wizard, see “3.1 Automatic Association via WPS” on page 8. E-DOC-CTC-20080318-0006 v1.
Chapter 4 4.5 Site Survey The Site Survey page This section lists all available wireless access points and allows you to connect your computer to one of them. Available Network list Following properties are shown, for each Access Point in the Available Network list: SSID: The network name of the wireless network. MAC (BSSID): The MAC address of the access point. Signal: The signal strength from your wireless adaptor to the listed access point.
Chapter 4 4.6 About The About page This tab shows: Version information of the drivers and wireless utility. Network information of your wireless client. E-DOC-CTC-20080318-0006 v1.
Chapter 4 24 E-DOC-CTC-20080318-0006 v1.
Chapter 5 5 Troubleshooting In this chapter This chapter covers following problems: Topic Page Problems Encountered When Installing the Drivers 26 Problems Encountered When Connecting To Your Wireless Network 27 E-DOC-CTC-20080318-0006 v1.
Chapter 5 5.1 Problems Encountered When Installing the Drivers Errors while installing the drivers If your computer cannot find the THOMSON TG121n or the driver software does not install correctly, check the following: 26 Make sure the THOMSON TG121n is securely connected with the USB port. Check for any hardware problems, such as physical damage to the card’s connector. Try the THOMSON TG121n in another USB port.
Chapter 5 5.2 Problems Encountered When Connecting To Your Wireless Network The Link LED does not light If the Link LED on the THOMSON TG121n does not light, or if you cannot access any network resources from the computer, check the following: Make sure the driver and utility software is installed correctly. If necessary, try uninstalling and then reinstalling the software. Make sure the computer and other network devices are powered on.
Chapter 5 28 E-DOC-CTC-20080318-0006 v1.
THOMSON Telecom Belgium Prins Boudewijnlaan 47 2650 Edegem www.thomson-broadband.com © Thomson 2008. All rights reserved. E-DOC-CTC-20080318-0006 v1.0.