Rear-projection HDTV Monitor 51PW9303 Product Highlights • 46” High-definition display—1080i/480p • High-definition component video/RGB+H/V and DVI inputs • Active Control™ • Eye Fidelity • APAC™ (Automatic Phosphor Aging Compensation) Features • Multipoint digital convergence • Protective screen filter • Virtual Dolby® Surround • Three-line digital comb filter • Picture-in-picture • Slim, upscale styling • Home-cinema universal remote with backlighting 3135 035 21361
Return your Warranty Registration card today to ensure you receive all the benefits you’re entitled to. Once your PHILIPS purchase is registered, you’re eligible to receive all the privileges of owning a PHILIPS product. So complete and return the Warranty Registration Card enclosed with your purchase at once. And take advantage of these important benefits.
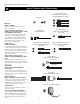
IMPORTANT SAFETY INSTRUCTIONS Read before operating equipment 1. 2. 3. 4. 5. 6. 7. 8. 9. 10. 11. 12. 13. 14. 15. Read these instructions. Keep these instructions. Heed all warnings. Follow all instructions. Do not use this apparatus near water. Clean only with a dry cloth. Do not block any of the ventilation openings. Install in accordance with the manufacturers instructions.
CONTENTS INTRODUCTION FEATURES Welcome/Registration of Your TV . . . . . . . . . . . . . . . . . . . .2 Safety/Precautions . . . . . . . . . . . . . . . . . . . . . . . . . . . . . .2–3 Features . . . . . . . . . . . . . . . . . . . . . . . . . . . . . . . . . . . . . . . .5 The Timer Setting the Clock . . . . . . . . . . . . . . . . . . . . . . . . . . . . . . .39 Displaying the Time . . . . . . . . . . . . . . . . . . . . . . . . . . . .40 Setting the Timer’s Start Time and Stop Time . . . . . . . . .
FEATURES Active Control™ continuously measures and corrects all incoming signals to provide the best picture settings. This feature provides a sharp and virtually noise-free picture any time, from any NTSC source. NTSC is the National Television Standards Committee format devised in the 1940s for TV broadcast analog video signals (525 lines: 30 Hz). Alternate Channel (A/CH) button allows you to switch back and forth between the currently viewed channel and the previously viewed channel.
Connecting Accessory Devices to Your TV JACKS, CABLES, AND CONNECTORS Component Video Jacks Cables Used: Component Video or A/V with RCA-type Phono Plugs DVI Jack Y DVI Pb DVI Jack Cable used: DVI Pr Allows encrypted transmissions of uncompressed HD content. Component Video Input Jacks Cables used: component video or A/V with RCA-type phono plugs Allow you to connect accessory devices such as DVD players. Separating the video into three signals, these inputs provide excellent quality.
Connecting Accessory Devices to Your TV PANEL OVERVIEWS: STANDARD INPUTS AND OUTPUTS Y ou can connect a wide range of video and audio devices to your TV, in various ways. This page and the next one provide an overview of signal compatibilities and the types of devices you can connect to the jacks. Connection examples follow on subsequent pages. See pages 1 and 2 of the Quick Use and Setup Guide that came with your set for examples of basic connections.
Connecting Accessory Devices to Your TV PANEL OVERVIEWS: HIGH-DEFINITION INPUTS Rear of TV T he HD INPUT-AV 4 and HD INPUT-AV 5 jacks allow you to digital equipment with 1080i or 480p signal output. HD INPUT-AV 4 1 G/Y R/Pr ANTENNA IN 75Ω What You Can Connect to the High-definition Input Jacks 1 HD INPUT-AV 4—use to connect digital equipment with a 1080i or a 480p signal output, such as HD receivers (1080i or 480p) or DVD players with progressive-scan capability (480p).
Connecting Accessory Devices to Your TV CONNECTING A VCR T he TV’s audio/video (AV) input jacks provide for direct picture and sound connections between the TV and accessory devices such as VCRs, DVD players, and others that have AV output jacks. This example, which uses the INPUT-AV 1 jacks, shows you one way you can connect a VCR to your TV. Refer to the directions-for-use manual for your VCR for further information on connections.
Connecting Accessory Devices to Your TV CONNECTING A VCR AND CABLE BOX P resented here is a connection example involving a VCR and cable box. Refer to the VCR’s directions-for-use manual for further information on connections.
Connecting Accessory Devices to Your TV CONNECTING AND USING AN AUDIO HI-FI SYSTEM WITH YOUR TV Y ou can use your TV’s AUDIO OUTPUT jacks to connect to an external audio hi-fi system. Follow the simple steps below. To make these connections, you will need two cables for audio connections (standard RCA). NOTE: The cables are not supplied with your TV. You should be able to buy them at most stores that sell electronics. Or you can call our Customer Care Center at 1-800-531-0039.
Connecting Accessory Devices to Your TV CONNECTING A STANDARD DVD PLAYER C omponent video inputs allow the highest possible color and picture resolution in the playback of digital signals, such as those of DVD players. The color difference signals (Pb, Pr) and the luminance (Y) signal are connected and received separately. The result is better color bandwidth information than is possible with composite video (labeled VIDEO on your TV’s jack panel) or S-Video connections.
Connecting Accessory Devices to Your TV CONNECTING A DVD PLAYER WITH PROGRESSIVE-SCAN CAPABILITY T he following instructions explain how to connect a DVD player with progressive-scan capability to the HD INPUT-AV 4 jacks on your TV. To make the connections, you will need: • three cables for video connections (standard RCA connectors) • two cables for audio connections (standard RCA connectors). NOTE: The cables are not supplied with your TV.
Connecting Accessory Devices to Your TV CONNECTING AN S-VIDEO DEVICE Rear of TV T he S(uper)-Video connection on the rear (and side panel) of the TV can give you better picture detail and clarity for the playback of S-VHS VCR tapes or DVDs than the normal antenna (RF signal) or Video (composite) picture connections. The example given connects a DVD/VCR Combi unit to the INPUT-AV 2 jacks on the rear of the TV.
Connecting Accessory Devices to Your TV CONNECTING AN HD RECEIVER TO THE HD INPUT-AV 4 JACKS D igital equipment with a 1080i or 480p output, is compatible with the HD INPUT-AV 4 video jacks. NOTE: This television is designed to be compatible with high-definition signal standards 1080i and 480p as specified by the Electronic Industries Association standard EIA770.3.
Connecting Accessory Devices to Your TV CONNECTING A CAMCORDER T he side panel jacks provide a convenient way for you to connect a camcorder to your TV. The side panel jacks are recognized by your TV as AV3. You can obtain S-VIDEO quality with an S-VHS, Hi-8, or digital camcorder by connecting to the S-VIDEO input instead of the VIDEO (composite) input. To make the connections shown in this example, you will need: • an S-VIDEO cable • two cables for audio connections (standard RCA connectors).
Connecting Accessory Devices to Your TV CONNECTING AND USING HEADPHONES WITH YOUR TV T he TV’s side panel has a headphone jack for personal listening. 1 2 1 Insert the headphone plug into the headphone jack ; in the TV’s side panel. Turn down the TV’s volume or press the Mute button c on the remote control to turn off the TV’s internal speakers. See the section below for information on adjusting headphone volume and balance. NOTE: The headphone impedance must be between 8 and 4,000 ohms.
Using the Remote Control POWER TV VCR SWAP SOUND ACC ACTIVE CONTROL FREEZE PIP CH DN UP PICTURE PROGRAMMING THE TV REMOTE TO WORK ACCESSORY DEVICES Y our TV remote is capable of working not only your TV but also other infrared remote (IR) controlled devices such as VCRs, cable TV converter boxes, satellite receivers, DVD players, and laser-disc players.
Using the Remote Control POWER USING THE CODE-ENTRY METHOD TO PROGRAM YOUR TV REMOTE N ow that you have looked up the fourdigit remote-control Direct-entry Code for your brand of accessory device, you are ready to follow the simple steps shown below to program your TV remote. Please read through all the steps before beginning. 1 2 3 Satellite Receiver Cable Converter Box First, press and hold down the VCR or ACC (for an accessory device other than a VCR) mode button on the TV remote.
Using the Remote Control POWER TV VCR SWAP SOUND ACC ACTIVE CONTROL FREEZE PIP CH DN UP PICTURE USING THE SEARCH METHOD TO PROGRAM YOUR TV REMOTE Y our TV remote can be set to work various accessory devices (VCRs, cable converters, and satellite receivers, for example) by what is called the Search Method. NOTE: The Search Method works only with devices equipped with channel-display indicators on the devices themselves or the ability to show channel numbers on the TV screen.
Using the Remote Control POWER DIRECT-ENTRY CODES FOR A/V ACCESSORY DEVICES TV VCR SWAP SOUND ACC ACTIVE CONTROL FREEZE PIP CH DN UP PICTURE VCR ADMIRAL . . . . . . . . . . . . . . ADVENTURA . . . . . . . . . . . . AIKO . . . . . . . . . . . . . . . . . AIWA . . . . . . . . . . . . . . . . AKAI . . . . . . . . . . . . . . . . . .................... AMERICA ACTION . . . . . . . . AMERICAN HIGH . . . . . . . . . ASHA . . . . . . . . . . . . . . . . AUDIOVOX . . . . . . . . . . . . . BEAUMARK . . .
Using the Remote Control POWER TV VCR SWAP SOUND DIRECT-ENTRY CODES ACC ACTIVE CONTROL FREEZE PIP CH DN UP PICTURE FOR A/V ACCESSORY DEVICES LASER-DISC PLAYER ADS . . . . . . . . . . AIWA . . . . . . . . . CARVER . . . . . . . . DENON . . . . . . . . DISCO VISION . . . . FUNAI . . . . . . . . . HARMAN/KARDON HITACHI . . . . . . . . KENWOOD . . . . . MAGNAVOX . . . . . . . . . . . . . . . . . . . . . . . . . . . . . . . . . . . . . . . . . . . . . . . . . . . . . . . . . . . . . . . . .
Using the Remote Control POWER USING THE TV REMOTE WITH ACCESSORY DEVICES T he Chart below provides you with common accessory-device functions associated with the buttons on your Philips TV remote control. (See pages 18–20 for information on programming your TV remote to operate accessory devices.) NOTES: • Functions can vary according to the manufacturer’s specifications for each accessory device.
Using the Remote Control POWER TV VCR SWAP SOUND ACC ACTIVE CONTROL FREEZE PIP CH DN UP PICTURE USING THE AV AND SOURCE SELECT BUTTONS T he AV button on the remote control and SOURCE SELECT button on the TV allow you to access the TV’s signal-source inputs. With each press of the AV button you can access a different signal-source input. The signal-source input jacks are located on the back and side panels of your TV. (See pages 6 and 7.
Using the Remote Control POWER USING AUTOSOUND™ TV ACC VCR SWAP ACTIVE CONTROL FREEZE PIP CH DN UP SOUND Y ou can use the AutoSound™ options to automatically tailor the TV’s sound for the type of program you are watching. The factory has set the VOICE, MUSIC, and THEATRE options. The settings for the PERSONAL option are the ones you select through the onscreen SOUND submenu. See descriptions of the options below, right.
Using the Remote Control POWER TV VCR SWAP SOUND USING AUTOPICTURE™ ACC ACTIVE CONTROL FREEZE PIP CH DN UP PICTURE Y ou can use an AutoPicture™ option to automatically tailor the TV’s picture for certain types of input signals. The factory has set the MOVIES, SPORTS, WEAK SIGNAL, and MULTIMEDIA options. The settings for the PERSONAL option are the ones you select through the onscreen PICTURE submenu. 1 2 PERSONAL BRIGHTNESS COLOR PICTURE SHARPNESS Press the PICTURE button on the remote control.
Using the Remote Control POWER USING AUTOSURF™ A fter you set up a list of your favorite signal sources in the SURF list, you can press the SURF button to see the list and quickly tune to a favorite signal source. Place up to 10 signal sources in the SURF LIST. TV SOUND 12 SURF ADD? 12 DELETE? SURF LIST EMPTY 1 2 Press the NUMBER buttons, CH(annel) +/– buttons, or the AV button to select a signal source to add to the Surf list.
Using the Remote Control POWER TV VCR SWAP SOUND ACC ACTIVE CONTROL FREEZE PIP CH DN UP PICTURE USING PROGRAM LIST AND ALTERNATE CHANNEL PROGRAM LIST PROGRAM LIST 1 2 3 Press the Program List button on the remote control to display a list of channel numbers and their names (see the “Tuner Mode” “Auto Program,” “Channel Edit,” and “Name” sections on pages 4–6 in the Quick Use and Setup Guide that came with your TV for proper setup).
Using the Remote Control POWER USING THE SLEEP TIMER CONTROL TV SOUND SLEEP OFF SLEEP 15 The Sleep Timer options are 15, 30, 45, 60, 90, 120, 180, or 240 minutes. TV SWITCHING OFF 59 HELPFUL HINTS • To see how many minutes remain before the TV shuts itself off, press the STATUS/EXIT button. • Changing the channel or volume during the last minute of a Sleep Timer will cancel Sleep. During the last minute of a Sleep Timer setting, an onscreen countdown will be displayed.
Using the Onscreen Submenus: Picture ADJUSTING THE PICTURE CONTROLS T o adjust your TV picture controls, select a channel and follow these steps. See descriptions of the picture-adjustment options below. 1 2 3 4 PICTURE SOUND FEATURES INSTALL Press the MENU/SELECT button on the remote control to show the onscreen menu. PICTURE BRIGHTNESS COLOR PICTURE SHARPNESS TINT BRIGHTNESS COLOR PICTURE SHARPNESS TINT Press the CURSOR RING RIGHT.
Using the Onscreen Submenus: Picture SETTING THE EYE FIDELITY CONTROL E ye Fidelity gives you a choice between two different scanning techniques—progressive or interlaced. Progressive scan doubles the number of picture lines, eliminating line flicker and providing a jitter-free picture. Interlaced improves the appearance of onscreen motion. It also helps smooth out jagged lines that are sometimes seen on curved and angled surfaces in the picture.
Using the Onscreen Submenus: Picture SETTING THE DYNAMIC CONTRAST CONTROL T he Dynamic Contrast control allows you to sharpen the picture quality by making dark portions of the picture darker and light portions of the picture more noticeable. Normally, you will probably want to select MED. In certain circumstances, however, you may prefer MIN or MAX.
Using the Onscreen Submenus: Sound ADJUSTING THE TREBLE, BASS, AND BALANCE CONTROLS B esides the normal volume level control, your TV also has individual soundadjustment controls. You can use TREBLE (high frequency), BASS (low frequency), and Speaker BALANCE to further adjust the sound playback of TV programs. 1 2 3 4 5 PICTURE SOUND FEATURES INSTALL TREBLE BASS BALANCE AVL INCR . SURROUND SOUND TREBLE BASS BALANCE AVL INCR .
Using the Onscreen Submenus: Sound USING THE AVL (AUDIO VOLUME LEVELER) CONTROL Y ou may have noticed the peaks and valleys of sound that occur between program changes or at commercial breaks. The volume levels often vary considerably. By turning on the AVL (Audio Volume Leveler) control, you can make your TV produce a more consistent volume level. Follow these steps to turn the AVL control on. 1 2 3 4 Press the MENU/SELECT button on the remote control to show the onscreen menu.
Using the Onscreen Submenus: Sound SELECTING THE SURROUND-SOUND MODES B ased on the signal being received, you can select various surround-sound modes: MONO, SPATIAL, STEREO, INCR. SURROUND, or DOLBY* VIRTUAL (Virtual Dolby Surround). (See descriptions of the options to the right.) Surround-sound Modes In stereo: select STEREO, INCR. SURROUND, or DOLBY VIRTUAL. INCR. (Incredible) SURROUND enhances stereo programs by making the sound broader and fuller.
Using the Onscreen Submenus: Sound SELECTING THE STEREO/MONO SOUND MODE Y ou can enjoy stereo programs on your TV. It has both an amplifier and twin speakers through which stereo sound can be heard. Follow these steps to select the STEREO mode. 1 2 3 4 5 Press the MENU/SELECT button on the remote control to show the onscreen menu. 6 Press the STATUS/EXIT button to exit the menu. PICTURE SOUND FEATURES INSTALL TREBLE BASS BALANCE AVL INCR .
Using the Onscreen Submenus: Sound SELECTING THE SAP (SECOND AUDIO PROGRAM) FEATURE S AP, or Second Audio Program, is an additional part of the stereo broadcast system. Sent as a third audio channel, an SAP can be heard apart from the current TV program sound. TV stations are free to use SAP for any number of purposes, such as the broadcast of a second language or other audio information. If an SAP signal is not present with a selected program, the SAP option cannot be selected.
Using the Onscreen Submenus: Sound USING THE BASS BOOST CONTROL T he BASS BOOST control allows you to increase the low-frequency range of the TV’s sound. This creates a deeper, fuller sound. Follow these steps to turn BASS BOOST ON. 1 2 3 4 5 6 PICTURE SOUND FEATURES INSTALL TREBLE BASS BALANCE AVL INCR . SURROUND Press MENU/SELECT button on the remote control to show the onscreen menu. Press the CURSOR RING DOWN once to highlight SOUND. Press the CURSOR RING RIGHT to enter the SOUND submenu.
Using the Onscreen Submenus: Features SETTING THE CLOCK Y our TV comes with an onscreen clock. You will need to set the clock before you can use the Timer feature. During normal operation, the time appears on the screen when you press the STATUS/EXIT button. You can show the time on screen constantly by turning the TIMER DISPLAY control on (see page 40). For instructions on setting the Timer’s START and STOP times, see page 41.
Using the Onscreen Submenus: Features DISPLAYING THE TIME A fter you have set the TV’s clock, you can use your TV to keep up with the time on screen. You can also set the timer to switch to another channel, and, if you want, turn the TV off. The Timer’s DISPLAY control allows you to show the time constantly in the upper right corner of the screen. 1 2 3 4 5 6 PICTURE SOUND FEATURES INSTALL TIMER AutoLock CLOSED CAP FORMAT Press the MENU/SELECT button on the remote control to show the onscreen menu.
Using the Onscreen Submenus: Features SETTING THE TIMER’S START TIME AND STOP TIME Y ou can set the Timer to switch to a selected channel at a specific time while you are watching another channel, or when the TV is in standby mode. (Standby mode is when the TV is plugged into the wall outlet but turned off.) If you want, you can also set the TV to turn off at some time after the TV switches channels. Follow the steps below to set the Timer’s START TIME and STOP TIME.
Using the Onscreen Submenus: Features SELECTING THE TIMER’S CHANNEL F ollow these steps to select the channel to which the Timer will switch the TV. 1 2 3 4 5 6 Press the MENU/SELECT button on the remote control to show the onscreen menu. FEATURES TIMER AutoLock CLOSED CAP FORMAT PICTURE SOUND FEATURES INSTALL TIMER AutoLock CLOSED CAP FORMAT Press the CURSOR RING DOWN twice to highlight FEATURES.
Using the Onscreen Submenus: Features SETTING THE TIMER’S ACTIVATE CONTROL A fter you have set the TIME, START TIME, STOP TIME, and CHANNEL, you must activate the Timer for it to operate. Your options are to set the Timer to work ONCE or DAILY. Set ACTIVATE to OFF if you don’t want to use the Timer.
Using the Onscreen Submenus: Features UNDERSTANDING AUTOLOCK™ T he AutoLock™ feature can help parents control what their children watch on TV. AutoLock™ does this by using the content advisories sent by broadcasters or other program providers. After you program AutoLock™, it can respond to the content advisories and block programs that contain content that you may consider objectionable—offensive language, violence, or sexual situations.
Using the Onscreen Submenus: Features SETTING UP THE AUTOLOCK™ ACCESS CODE Y our AutoLock™ access code allows you to enter the AutoLock™ submenus to set up or turn off blocking. Your access code is also the “key” that unlocks programs or channels that are being blocked by AutoLock™. 1 2 3 4 5 6 7 8 9 PICTURE SOUND FEATURES INSTALL TIMER AutoLock CLOSED CAP FORMAT Press the MENU/SELECT button on the remote control to show the onscreen menu. Press the CURSOR RING RIGHT to highlight ACCESS CODE.
USING AUTOLOCK™ TO BLOCK CHANNELS A fter you have set up your personal access code (see page 45), you are ready to select the channels or program sources you want to block. 1 2 3 4 5 Press the MENU/SELECT button on the remote control to show the onscreen menu. Press the CURSOR RING DOWN twice to highlight FEATURES. Press the CURSOR RING RIGHT. Then press the CURSOR RING DOWN once to highlight the AutoLock control. Press the CURSOR RING RIGHT again to highlight ACCESS CODE.
Using the Onscreen Submenus: Features USING AUTOLOCK™ TO BLOCK A fter you have set your personal access code (see page 45), you can block programs by specific movie ratings. 1 2 3 4 5 Press the MENU/SELECT button on the remote control to show the onscreen menu. 6 7 8 Press the CURSOR RING DOWN repeatedly until MOVIE RATING is highlighted. 9 Press the STATUS/EXIT button to exit the menu. PICTURE SOUND FEATURES INSTALL Press the CURSOR RING DOWN twice to highlight FEATURES.
Using the Onscreen Submenus: Features USING AUTOLOCK™ TO BLOCK Y BY TV RATING ou also can block programs by specific TV ratings. Follow these simple steps. 1 2 3 4 5 6 7 8 9 10 11 PICTURE SOUND FEATURES INSTALL Press the MENU/SELECT button on the remote control to show the onscreen menu.
Using the Onscreen Submenus: Features TURNING THE AUTOLOCK™ BLOCKING CONTROL T he BLOCKING control can be thought of as the “master switch” for AutoLock™. Use it to turn ON or OFF all of the settings (based on ratings). This control does not affect channel blocks (see page 46). 1 2 3 4 5 6 7 8 9 PICTURE SOUND FEATURES INSTALL TIMER AutoLock CLOSED CAP FORMAT Press the MENU/SELECT button on the remote control to show the onscreen menu. Press the CURSOR RING DOWN twice to highlight FEATURES.
Using the Onscreen Submenus: Features USING AUTOLOCK™ TO BLOCK UNRATED BROADCASTS I n addition to blocking rated programs or channels, you may also choose to block all programming that is unrated. Unrated programming consists of shows that the MPAA (Motion Picture Association of America) or the TV broadcasters have chosen not to rate. 1 2 3 4 5 6 7 8 9 10 Press the MENU/SELECT button on the remote control to show the onscreen menu. Press the CURSOR RING DOWN twice to highlight FEATURES.
Using the Onscreen Submenus: Features USING AUTOLOCK™ TO BLOCK BROADCASTS THAT HAVE NO RATING S ome programs contain no content advisories from the Motion Picture Association of America or the television broadcasters (see page 44). To block programs with no rating, follow these steps.
Using the Onscreen Submenus: Features REVIEWING YOUR CURRENT AUTOLOCK™ SETTINGS A utoLock™ provides a screen that shows the settings you have selected. Here’s how to access the screen. 1 Press the STATUS/EXIT button on the remote control twice. Your AutoLock™ settings will appear on the screen. NOTE: If you have blocked specific subratings, such as V for Violence in the TV-PG category, these blocked subratings will not appear in the review.
Using the Onscreen Submenus: Features USING THE CLOSED CAPTIONING CONTROL C losed Captioning (CC) allows you to read the voice content of television programs on the TV screen. Designed to help the hearing impaired, this feature uses onscreen text boxes to show dialogue and conversations while the TV program is in progress. 1 2 3 4 5 Press the MENU/SELECT button on the remote control to show the onscreen menu. 6 Press the CURSOR RING UP or DOWN to select a CAPTION MODE.
Using the Onscreen Submenus: Features USING THE PICTURE-FORMAT CONTROL Y our TV’s wide screen (16:9 aspect ratio) delivers a home-cinema experience not possible with a conventional (4:3 aspect ratio) set. High-definition (HD) programs originating in 16:9 format and other widescreen-format video sources appear more lifelike, dramatic, and theatrical. Border bars are diminished or eliminated. Most anamorphic-DVD programs will fill the wide screen without border bars.
Using the Onscreen Submenus: Features USING THE PICTURE-FORMAT CONTROL Selecting a picture Format Using the TV Buttons Should your remote control become lost or otherwise unavailable for use, follow the steps below to use the buttons on the front of the TV to access the onscreen menu and select a picture-format control.
Using the Onscreen Submenus: Features USING ACTIVE CONTROL™ A ctive Control™ Measures and corrects all incoming signals to provide the best picture-quality settings. When you choose to turn Active Control™ on, picture sharpness and noise reduction are controlled automatically. Active Control™ adapts picture settings continuously and automatically.
COMPATIBILITY INFORMATION FOR THE TV’S HIGH-DEFINITION INPUTS Y our set’s HD inputs (HD INPUT-AV 4 and HD INPUT-AV 5) are designed to accept high-definition signal standards 480p and 1080i as specified by the Electronic Industries Association. Output standards may vary by manufacturer. Refer to the directions-for-use manual for the digital equipment before connecting.
Appendix Appendix B B MODEL SPECIFICATIONS Product Type Rear-projection HDTV Monitor S-VIDEO INPUT (INPUT-AV 1, INPUT-AV2, side panel) Y-INPUT: 1 Vp-p (includes sync), 75 ohms C-INPUT: 300 mVp-p, 75 ohms INPUT-AV 2 VIDEO (composite): 1 Vp-p, 75 ohms AUDIO: 500 mVrms, 30 kohm HD INPUT-AV 4 Component Video YPrPb/RGB (See page 57.) AUDIO: 500 mVrms, 30 kohm HD INPUT-AV 5 DB15 (See page 57.
SETTING COLOR SPACE C olor space refers to how colors are defined and appear on your TV. Your TV’s default color-space setting for HD INPUT-AV 4 is YPbPr, and for HD INPUT-AV 5 it is RGB. If the picture’s color looks grossly incorrect, try changing the color-space setting on the TV. Or if you’re using an HD receiver, you may try changing its color-space setting. See the receiver’s directions-for-use manual for more information To set the TV’s color space, follow the steps below.
General Information: Care and Cleaning CARE AND CLEANING WARNING Concerning Stationary Images on the TV Screen: Do not leave picture border bars or stationary images on screen for extended periods of time.This can cause uneven picture-tube aging. PLACEMENT OF THE TV • To avoid cabinet warping, cabinet color changes, and increased chance of set failure, do not place the TV where temperatures can become excessively hot; for example, in direct sunlight or near a heating appliance.
General Information:Troubleshooting TROUBLESHOOTING Check This List of Symptoms and Possible Solutions Before Requesting Service You may be able to solve the problem yourself. Charges for TV installation and adjustment of customer controls are not covered under your warranty. If you need to call a customer service representative, please know the model number and serial number of your product before you call. This information is displayed on the back of the product.
General Information:Troubleshooting TROUBLESHOOTING (CONTINUED) Difficulties and Possible Solutions (*Q refers to the Quick Use and Setup Guide that came with your TV.) The picture has no color or colors are not correct • Check to ensure that you have made connections correctly. See pages *Q-1, *Q-2, 6–9, and 11–16. • If you have connected digital equipment to the HD inputs, check/change the color-space setting on the equipment or TV. See page 59.
General Information: Glossary of Television Terms GLOSSARY OF TELEVISION TERMS Active Control™ • Proactive video-control system for NTSC (see definition below) sources. Active Control™ continuously measures and corrects the incoming signals to provide the best picture possible. Alternate Channel • The feature that allows you to toggle between the last two channels viewed by pressing the A/CH button on the remote control.
General Information: Index INDEX A Active Control™, 56, 63 Alternate Channel (A/CH), 28, 63 APAC™, 5 Audio Out Control, 10 Audio/Video Inputs (Definition), 63 AutoChron™ Control, *Q-5 AutoLock™ Control Access code, 45 Blocking channels, 46 Movie ratings, 47 No rating broadcasts, 51 On/off control, 49 Settings review, 52 Setup Code, 45 TV ratings, 48 Understanding AutoLock™, 44 Unrated broadcasts, 50 AutoPicture™, 26 Auto Program, *Q-4, 63 AutoSound™, 25 AutoSurf™, 27 AV Button, 24 AVL Control, 34 B Balanc
Philips Factory Service Locations FACTORY SERVICE LOCATIONS NOTE: If you reside in one of our Philips Factory Service Branch areas (see directory on back), you can contact the nearest Service Branch to obtain efficient and expedient repair for your product. If your product is In-Warranty, you should have proof-of-purchase to ensure No Charge Service. For Out-of-Warranty service, call the location nearest you.
Philips Factory Service Locations FACTORY SERVICE LOCATIONS QUALITY SERVICE IS AS CLOSE AS YOUR TELEPHONE! SIMPLY LOOK OVER THE LIST BELOW FOR THE NUMBER OF A FACTORY SERVICE CENTER NEAR YOU. YOUR PRODUCT WILL RECEIVE EFFICIENT AND EXPEDIENT CARRY-IN, MAIL-IN, OR IN-HOME SERVICE, AND YOU WILL RECEIVE PEACE OF MIND, KNOWING YOUR PRODUCT IS BEING GIVEN THE EXPERT ATTENTION OF PHILIPS’ FACTORY SERVICE.
Limited Warranty LIMITED WARRANTY PROJECTION TELEVISION One Year Free Labor One Year Free Service on Parts Two Years Free Service on Cathode Ray Tube Parts / 30 days Free Service on Projection TV Screen This product can be repaired in-home. WHO IS COVERED? MAKE SURE YOU KEEP... You must have proof of purchase to receive warranty service. A sales receipt or other document showing that you purchased the product is considered proof of purchase.