2_DTH8060_en.qxd 17/08/05 12:21 Page 1 To begin About your device Your DVD recorder is a digital video player and recorder.Thanks to its tuner you can watch and record TV progammes on DVD+R and DVD+RW discs. It can play the majority of 8 cm and 12 cm discs, with the exception of DVD Rom, DVD Ram, and DVD audio. Precautions to take • Ensure that the mains supply in your house complies with that indicated on the identification sticker located at the back of your device.
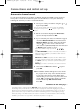
_DTH8060_en.qxd 17/08/05 12:21 Page 2 Contents To begin .........................................................1 The front of your player recorder.............19 About your advice ...........................................................1 Precautions to take .........................................................1 The content in brief... .....................................................1 Access to sockets ..........................................................19 Contents...............
2_DTH8060_en.qxd 17/08/05 12:21 Page 3 Contents Interactive banners ....................................40 Playlist..........................................................57 Disc options.................................................58 In television mode (Operating principle) ...................40 Information on the TV channel being watched..................40 Recording the channel being watched................................40 Autoplay ...........................................................
2_DTH8060_en.qxd 17/08/05 12:21 Page 4 Connections and initial set up Basic connections Your DVD recorder has many connection possibilities to allow it to fit into a setup comprising several devices.We recommend that you follow the connection setup on this page, and then carry out the adjustments shown on the following pages.You will first need to set up the channels as explained in the following pages before the final interconnection of the devices, described on pages 14 to 18.
2_DTH8060_en.qxd 17/08/05 12:21 Page 5 Connections and initial set up Placing the remote control in service Inserting the batteries 1 2 3 EN Using the remote control unit correctly When you use remote control, point the unit at the appliance you want to control (DVD recorder,TV set or satellite receiver). Ensure that there is no obstacle between the remote control unit and the appliance, otherwise the infrared signal carrying the remote control commands will be blocked.
2_DTH8060_en.qxd 17/08/05 12:21 Page 6 Connections and initial set up Automatic channel search In each region,TV stations are broadcast on different channels.Your DVD recorder cannot be factory-set to receive the TV channels of your area.You will have to set up the channels by following the automatic procedure recommended below. 6. Select your country of residence using the or keys, and press OK. Note: the arrows indicate that other countries are available.
2_DTH8060_en.qxd 17/08/05 12:21 Page 7 Connections and initial set up Sorting the channels 11. A window for classifying the channels appears with the images of the selected channel. The automatic channel search has assigned numbers to the channels is a predefined order.These numbers may not be the numbers you would have chosen. Should this be the case, you can change these numbers by following the instructions at the bottom of the screen.
2_DTH8060_en.qxd 17/08/05 12:21 Page 8 Connections and initial set up Add a satellite or cable receiver Your DVD recorder is designed to control either a cable or satellite receiver, this enables you to program the recording of satellite programmes simply by programming your DVD recorder. In this case, the device must be connected to the AV2 and IR SAT/CABL connections of the DVD recorder. Connect cables (5) (not supplied) and cable (6) the G-LINK cable (supplied) as shown below.
2_DTH8060_en.qxd 17/08/05 12:21 Page 9 Connections and initial set up Adjusting the receiver / recorder configuration 1. Switch on your TV set, your DVD recorder, then your satellite or cable receiver. 2. Place the receiver on channel 002. With your DVD recorder’s remote control, carry out the following settings: 3. If the main menu is not displayed, press the MENU key on the remote control. 4. Select the Setup line using the or 5.
2_DTH8060_en.qxd 17/08/05 12:21 Page 10 Connections and initial set up 10. Deactivating the programming of the satellite or cable receiver - Yes is selected to deactivate the programmer. In that case, all your satellite recordings will have to be programmed from your satellite or cable receiver (this is the recommended setting). Leave Yes selected and press OK. 11. IR controller connection - Refer to the diagram on page 8, follow the instructions on the screen and press OK. 12.
2_DTH8060_en.qxd 17/08/05 12:21 Page 11 Connections and initial set up List of satellite or cable receiver codes The list of codes is given as a guide.The codes given are generally those which are recognised by the receivers of the brands quoted. However, they may not correspond to your device if it is an older or more recent model. In such a case, contact your retailer. Satellite receiver codes AKAÏ. . . . . . . . . . . . . . . . . . . . . . . . . . . . . . . . . . 13 ALBA . . . . . . . . . . . . . .
2_DTH8060_en.qxd 17/08/05 12:21 Page 12 Connections and initial set up Adding a channel If you want to set up a new channel, use the manual search procedure which will enable you to add a channel to the ones already set-up on your DVD recorder.The channels already stored will not be deleted. During the initial installation, if you carried out the automatic installation described on page 6, you do not need to carry out the steps shown on 12 and 13. 1.
2_DTH8060_en.qxd 17/08/05 12:21 Page 13 Connections and initial set up Reinstalling channels (updating) If new channels make their way into the audiovisual scene, you will have to update your DVD recorder’s list of channels. In such a case, start a new channel search from the installation menu. This set-up deletes all stored channels and resets all the channels that your DVD recorder can receive. If you only want to set-up a single channel, refer to the manual search on page 12. 1.
2_DTH8060_en.qxd 17/08/05 12:21 Page 14 Connections and initial set up Other recommended connections With a cable or satellite receiver (or a decoder) Carrry out the connection of cable 5 (not supplied). TV set DVD recorder 5 Cable / satellite receiver In grey: connections already carried out (connections from page 4).
2_DTH8060_en.
2_DTH8060_en.qxd 17/08/05 12:21 Page 16 Connections and initial set up Sockets and cables There are several ways in which you can incorporate your DVD player into an Audio-Video system.The simplest of these is described on page 15. This uses Scart-Peritel cables that combine Audio analogue connections for sound, and Video for the RGB image.This connection ensures the optimum image quality (like Y, U,V).
2_DTH8060_en.qxd 17/08/05 12:21 Page 17 Connections and initial set up Other Audio - Video connections If no Peritel connector (Scart) on the television set is available, check if it has other Video connectors (Component, S-Video or Composite) in order to connect it to your player using these corresponding connections.. In this case do not forget to also connect the Audio out socket (AUDIO OUT) to the Audio in socket (AUDIO IN) on your TV set.
2_DTH8060_en.qxd 17/08/05 12:21 Page 18 Connections and initial set up 5 - Composite Video Outputs (Y, Pb/Cb, Pr/Cr) (YUV) Y, Pb/Cb, Pr/Cr sockets deliver an optimum image quality due to the separation of the video signal into three separate components (comparable with RGB separation in a Scart-Peritel cable). RCA sockets and cables for Y, Pb/Cb, Pr/Cr Video signals, also called Component.
2_DTH8060_en.qxd 17/08/05 12:21 Page 19 Connections and initial set up The front of your player recorder Access to sockets The sockets located behind the trapdoor on the facade enable easy connection to view or copy images and sound from a camcorder or a memory card reader.
2_DTH8060_en.qxd 17/08/05 12:21 Page 20 Connections and initial set up The buttons on the front 10 11 1 1 2 3 4 5 6 7 8 ON/STANDBY - To switch your DVD 8 recorder on or off. 2 G REV / FWD F PLAY / PAUSE - To play a disc placed in the disc tray (11) of the DVD recorder. - Pause during playback (audio CD or mp3) or pause on an image (DVD). 4 DVD REC - To record to the DVD+R/+RW disc.
2_DTH8060_en.qxd 17/08/05 12:22 Page 21 Connections and initial set up The messages on the display TV Functions - Main menu of the recorder on the screen (device stopped). No function selected. - Real-time viewing. TV mode activated; channel 1 being watched. - Example of a device connected to the AV1 Péritel socket or AV2 (SAT or CABLE if a satellite installation has been carried out). - Start of recording of TV program on selected channel. - Channel 1 currently being recorded.
2_DTH8060_en.qxd 17/08/05 12:22 Page 22 Connections and initial set up Other indications - Naviclick programmes guide displayed on the screen. - Recording error or programming error - Indicates the Lock function is activated. (page 62). - Indication of the selected source: • AV 2: AUDIO/VIDEO input connector at the rear. • AV 3: AUDIO/VIDEO input sockets on the front. • AV 4: AV/ S-VIDEO or AUDIO/VIDEO input sockets at the rear.
2_DTH8060_en.qxd 17/08/05 12:22 Page 23 Connections and initial set up Remote control The remote control handset supplied with your DVD recorder is a 3 in 1 type remote control. It allows 6 devices to be controlled: your DVD recorder, a television set, a satellite or cable receiver, a video recorder, an amplifier or another device.Thus you have remote control of all these devices by using the 6 modes: DVD,TV or SAT.CABLE that are accessed by 6 corresponding keys.
2_DTH8060_en.qxd 17/08/05 12:22 Page 24 Connections and initial set up Using the remote control with other devices This remote control can be used to control other devices using the programmable keys VCR, DVD, SAT, AMP and AUX. Here is the list of devices you can control with each key: VCR: video recorder, DVD: DVD player, SAT: cable network / satellite receiver, AMP: Hi-Fi system, Home Cinema amplifier, AUX: any type of device.
2_DTH8060_en.qxd 17/08/05 12:22 Page 25 Connections and initial set up Programming the remote control If your remote control does not control your satellite receiver (or cable) or your television set you will need to configure it using one of the two methods proposed: automatic code search or manual programming. Automatic code search This method can be used to automatically find the most appropriate code for your appliance. 1. Switch on the appliance you wish to use the remote control with. 2.
2_DTH8060_en.qxd 17/08/05 12:22 Page 26 Recording functions To watch TV Programmes 1. Turn on your television set. 2. Turn on your DVD recorder using the ON/STANDBY key.The time displayed on your DVD recorder is replaced by the word MENU. • After a few seconds the main menu of the player appears on the television screen. • Watch TV function is already selected. Note: turn off non used devices to avoid problems of selecting sockets or other types.
2_DTH8060_en.qxd 17/08/05 12:22 Page 27 Recording functions Record the current programme Your DVD recorder has recording functions similar to a video recorder. It records programmes on DVD (DVD+R, DVD+RW) type discs. For the same disc, the recording time depends on the quality settings that you can adjust according to the time left on the disc.The recording may be immediate or deferred. Deferred programming is explained on page 29. For immediate recording follow the instructions below.
2_DTH8060_en.qxd 17/08/05 12:22 Page 28 Recording functions Stop recording Press the STOP button twice. • With a DVD+R disc, if you do not have another recording to make, you need to "Finalize" the disc in order that it can be read by other DVD+R compatible players. Closing a DVD+R disc is described in detail below. If you do not close a DVD+R disc, it will still be possible to make other recordings on it later on, providing there is enough disc space.You can therefore safely store it.
2_DTH8060_en.qxd 17/08/05 12:22 Page 29 Recording functions Programming a recording You can record a future programme by programming its recording time. For this you have the choice of manual programming or Naviclick programming, explained on page 31. Open the DVD tray by pressing the OPEN/CLOSE key. Put in a disc with the printed side upwards. Close the tray using the OPEN/CLOSE key. Manual programming in 10 steps 1.
2_DTH8060_en.qxd 17/08/05 12:22 Page 30 Recording functions 6. Start time and stop time Enter the recording start time and then the stop time. To this end, and according to the features of the receivers, you must: - either program the receiver with the same beginning and end times, then switch off the DVD recorder and the receiver, - or leave the satellite receiver switched on, on the channel to record, program the DVD recorder, then switch it off.
2_DTH8060_en.qxd 17/08/05 12:22 Page 31 Recording functions Automatic programming (Naviclick) For certain channels your DVD recorder offers a daily and sometimes following day TV programme guide.The information that it provides come from the Teletext and NexTView services broadcast by certain channels.The updating of Naviclik information is carried out once every 24 hours.
2_DTH8060_en.qxd 17/08/05 12:22 Page 32 Recording functions Recording from a connected device Your DVD recorder allows you to record TV programmes (satellite or cable) or to copy video sequences from a connected device. From a satellite receiver or cable receiver (AV2 socket) 1. Place a DVD+R or DVD+RW disc in the DVD recorder. 2. From the Main Menu and with the Watch TV function selected, press OK.The images of the last channel watched appear.The information banner is displayed for several seconds.
2_DTH8060_en.qxd 17/08/05 12:22 Page 33 Recording functions Recording from a digital camcorder Your DVD recorder enables you to view and/or record sound and images from a digital video camera connected to the DV-IN socket on the front of the machine.With some video cameras, your recorder may control, via this connections, some functions on the video camera. 1. To record to a disc, load a DVD+RW disc in the DVD recorder. 2.
2_DTH8060_en.qxd 17/08/05 12:22 Page 34 Recording functions Library The library function allows you to find a title among those that you have already recorded using your DVD recorder and which is on the various DVD+R or DVD+RW disks in your collection. Your search is made easier by the title, type, date and disk sorting function. With each video recording your DVD recorder places the name of the disk in the library memory as well as its recording parameters (title, date, quality...).
2_DTH8060_en.qxd 17/08/05 12:22 Page 35 Recording functions Scrolling through the title list Scroll through the title lists using the or key. For each title selected, the recording parameters are shown in the window (title, date, type, name of disc, number of disc). Once the title you are seeking is found, load the corresponding disc in the recorder. Note: The number of the disc to load may appear in a superimposed window. To remove the window press the CLEAR or OK key.
2_DTH8060_en.qxd 17/08/05 12:22 Page 36 Recording functions Sorting by Date The Sort by date displays the most recent titles at the top of the list. All discs This function displays the list of all discs in the library so that, for example, you can search for a disc that will allow you to record on it for a given time, this is done using the sort by space function (recording time remaining on the disc).You can also sort by number. Note: Use the keys 36 , and OK to confirm your choice.
2_DTH8060_en.qxd 17/08/05 12:22 Page 37 Recording functions Deleting a disc When the Library is full, or even before if you wish, you may Delete a disc (and all its titles) in order to make space for other recordings.This function allows you to delete in one go all the titles on a disc in the library. Note: If you delete a disc, it is still possible to “reload” the titles of the disc by adding a new recording. Note: Deleting a title or a disc is not immediate, it may take several seconds.
2_DTH8060_en.qxd 17/08/05 12:22 Page 38 Playing a disc Recordable discs DVD+R DVD+Rewritable • DVD+R, DVD+RW - The majority of DVD+R (write once) and DVD+RW (write many) of 4.7 Gb capacity with the following characteristics. Recommended brands and types Certain brands of discs have been “approved” for your player. Other brands can be used but the discs must be good quality to produce successful recordings.
2_DTH8060_en.qxd 17/08/05 12:22 Page 39 Playing a disc Other readable discs • Audio CDs - Audio Compact Discs (8 and 12 cm). • CD-R, CD-RW - Most CD-R (one recording only) and CD-RW discs (rewritable). Compatibility is dependent on which DVD writer, writer software and discs are used. • Video CD (VCD) - CD on which you can record up to 74 min. of VHSquality video associated with still images, audio tracks and interactive menus.
2_DTH8060_en.qxd 17/08/05 12:22 Page 40 Playing a disc Interactive banners In addition to menus, your DVD recorder has interactive information banners with icons representing functions or information. Some banners provide access to disc playback functions (for DVDs, CDs,VCDs, etc.) while others give you information on the channels and related functions. In television mode (Operating principle) 1. Turn on your TV set and your DVD recorder. 2.
2_DTH8060_en.qxd 17/08/05 12:22 Page 41 Playing a disc In disc playing mode (Operating principle) 1. Load a disc and press PLAY to start playback. 2. To display the banner, press the yellow INFO key. 3. Select an icon using the , keys, or enter a number using the number buttons to access a chapter, a title or a track depending on the disc being played (when the corresponding T, C, P icon is selected). 4.
2_DTH8060_en.qxd 17/08/05 12:22 Page 42 Playing a disc Loading and playing a disc Switch on your TV set and DVD recorder. It may be necessary to turn off other appliances. 1. If the player menu is not displayed on TV screen, select the TV set Scart Peritel socket to which you connected your DVD recorder (see page 4). 2. Open the disc tray by pressing OPEN/CLOSE. Place the disc on the tray. Note: the disc label must face upwards (double sided discs have a small label on both sides around the centre).
2_DTH8060_en.qxd 17/08/05 12:22 Page 43 Playing a disc Slow motion (in Pause mode on an image) During playback press PAUSE once to freeze the image. Press FWD or REV to view images in slow motion forward or backward. Press once or several times for higher speeds.To resume normal playback press PLAY. Skipping a chapter or a track (DVD - VCD - CD) During playback you can access the following or previous chapter (or track) by pressing PR and/or PR on the remote control unit.
2_DTH8060_en.qxd 17/08/05 12:22 Page 44 Playing a disc Playing discs – Displaying the information banner To access the information banner, press INFO on your remote control unit during playback. Use arrow keys and on the remote control unit to select the various icons.When an icon is selected it is highlighted.The line under the banner is an information and instruction line.When small arrows appear above and below the selected icon these point to other possible options.
2_DTH8060_en.qxd 17/08/05 12:22 Page 45 Playing a disc Subtitle and dialogue language (DVD) 1. While reading a disc, press the INFO key: the information banner is displayed. 2. Use the Selecting the language of subtitles or keys to select the icon of the subtitles or dialogues as well as the sound format. 3. If available on the disc, select the language of the subtitles or dialogues using the or the banner. Selecting the language of dialogues keys.
2_DTH8060_en.qxd 17/08/05 12:22 Page 46 Playing a disc Camera angles (DVD) Changing camera angles A few DVD discs contain scenes shot from various different angles. If a disc being played back offers different camera angles the icon in the banner will show the number of the angle on the screen.With the disc in playback, press ANGLE on the remote control unit and choose the angle using the same key or the or keys.
2_DTH8060_en.qxd 17/08/05 12:22 Page 47 Playing a disc Edit Menu The edit menu can be accessed from the information banner, while playing a title on a DVD+RW or +R disc. It allows you to edit the recordings made and more particularly to: • Insert chapter bookmarks (DVD+RW) To position marks in order to easily find your favourite passages. Since it is not possible to delete a passage in title, you can use this function to mark the start and end of undesirable sequences (e.g.
2_DTH8060_en.qxd 17/08/05 12:22 Page 48 Playing a disc The edit menu functions Insert a Chapter Bookmark (DVD+RW only) During recording your DVD recorder automatically inserts electronic bookmarks at regular intervals. These bookmarks are invisible. They partition the recording and form chapters. Each chapter has an average length of 6 minutes (from 5 to 8 minutes depending on the disc type and the recording settings).
2_DTH8060_en.qxd 17/08/05 12:22 Page 49 Playing a disc View Chapter Display a previously masked chapter.This function is only available if you have previously masked a chapter by having selected Play Full Title and having masked a selected chapter. Or if you have selected Hide Chapter during the playing of a title, but on condition that the chapter bookmark had not already passed or been created.
2_DTH8060_en.qxd 17/08/05 12:22 Page 50 Playing a disc Playing image and audio (JPEG, mp3, wma) Your player can play JPEG files with a resolution of up to five million pixels. However beyond 400,000 pixels there is no perceptible improvement in the quality of pictures displayed on your TV screen. MP3 or WMA files are a compressed audio format that allow a great quantity of music (files) to be stored on a disc.
2_DTH8060_en.qxd 17/08/05 12:22 Page 51 Playing a disc Image Functions Changing images During the picture sequence change images using the PR or PR keys on the remote control unit. According to the type of image (Ko or Mo) the change may take several seconds. Note: after several seconds the information banner disappears. You can redisplay it using the INFO key on the remote control.
2_DTH8060_en.qxd 17/08/05 12:22 Page 52 Playing a disc To play DivX files Your player is an Official DivX Certified™ product that Plays DivX®5, DivX®4, DivX®3, and DivX®VOD video content, in compliance with DivX Certified™ technical requirements. The correct playing of DivX in your player, depends on the preparation and production of the audio and video files, the codecs used, the type of recording equipment employed and the parameters of your computer.
2_DTH8060_en.qxd 17/08/05 12:22 Page 53 Playing a disc 1. With a disc in the tray but not playing, select System Options from the player menu. 2. In the System Options menu, select DivX.The autorisation number appears on the television screen. 3. Write down this VOD 8 character recording number, in order to complete the form on the web site where you purchase your DivX® VOD files.
2_DTH8060_en.qxd 17/08/05 12:22 Page 54 Menus Disc menu The Disc menu is only accessible if a disc is inserted in your DVD recorder.This menu allows access to the list of titles of the Disc Title Menu or the images menu of the Player Menu for your recorded discs (DVD+R, +RW). With DVD video discs you directly access the disc menu, the selection of the language, chapter, play order and contents varies depending on the disc. Note: if no disc has been inserted the line Disc remains greyed out.
2_DTH8060_en.qxd 17/08/05 12:22 Page 55 Menus Disc menu Ł Disc Title menu (continued) Select from the list using the selected title only.You may: or keys and press OK. The menu displayed concerns the Rename Title, allows you to change the title that your DVD recorder has allocated your recording (e.g. Pr7 14:39 14-May 2005) by accessing the character chart (page 56).
2_DTH8060_en.qxd 17/08/05 12:22 Page 56 Menus Disc menu Ł Disc Title menu (continued) Disc Actions: Rename Disc, allows you to change the name chosen by the DVD recorder (Thomson xx) for a name of your choice selected using a table of alphabetic characters (page 56). Erase Disc, deletes all the titles on the disc. Lock Disc (or Unlock Disc) protects the disc against accidental recording.
2_DTH8060_en.qxd 17/08/05 12:22 Page 57 Menus Disc menu Ł Playlist Rename a disc or a title (DVD+R, DVD+RW) Using a character chart your DVD recorder allows you to change the names of discs or titles allocated when the recording was made. Select Rename Title in the Rename Title or Rename Disc in the Disc menu using the or keys and press the OK key. In the following screen select YES and confirm with OK.The character chart is displayed.
2_DTH8060_en.qxd 17/08/05 12:22 Page 58 Menus Setup menu Ł Disc options Disc options This menu provides 2 functions to optimise the discs that you wish to play. 1. From the main menu select Setup using the 2. Select Recording Options with the keys, then confirm with OK. keys, then confirm with OK. Autoplay • Select Autoplay On, if you want the disc to be played automatically once the DVD recorder tray is closed.
2_DTH8060_en.qxd 17/08/05 12:22 Page 59 Menus Recording Options Menu Your DVD recorder has several practical functions to optimise the recording quality / recording time ratio that is possible when using a DVD+R or DVD+RW disc.This menu also allows the VPS/PDC function to be activated for all your programmed recordings. 1. From the main menu select Setup using the keys, then confirm with OK. 2. Select Recording Options with the keys, then confirm with OK. 3.
2_DTH8060_en.qxd 17/08/05 12:22 Page 60 Menus Selecting Languages (DVD) Your DVD recorder gives you a selection of languages to choose from.You can change the language of the DVD recorder menus, the language of the disc menus, the language of the dialogues and that of the subtitles. In the menu, choose your preferred language for dialogues and subtitles. If it is available on the DVD you will be playing, it will be selected automatically.
2_DTH8060_en.qxd 17/08/05 12:22 Page 61 Menus Selecting the Sub-title language for DVD discs Certain discs propose several languages for subtitles.The default language is the the one you selected during installation (page 6) if this language is also offered on the disc being played.To change the subtitles language, your DVD recorder provides two possibilities: From the menu of the DVD recorder With the keys, select Subtitles and confirm with OK to access the proposed list of languages.
2_DTH8060_en.qxd 17/08/05 12:22 Page 62 Menus Parental control Your DVD recorder has a child lock function which enables you to restrict access to certain DVDs.The discs whose content may be deemed unsuitable for your children will therefore not be visible unless a code that you have previously chosen is entered. 1. From the main menu select the Setup line with the keys, then confirm with OK. 2.
2_DTH8060_en.qxd 17/08/05 12:22 Page 63 Menus Ratings limits This function makes it possible to restrict viewing of certain DVD discs by programming a restriction on your DVD recorder.This function can only be used with DVD discs provided with the function.Your DVD recorder provides ratings limits on a scale of 1 to 8.The Ratings Limit function does not work if the disc being played does not have a rating limit. In Europe ratings limits are as yet uncommon on DVD discs on sale. 1.
2_DTH8060_en.qxd 17/08/05 12:22 Page 64 Menus System Options The System Options menu in the Setup menu offers you settings to configure certain useful functions and optimise the performances of your DVD recorder to match those of the devices connected to it. 1. From the main menu select the Setup line with the 2. Select Options system with the 3. Select a function with the keys, then confirm with OK. keys, then confirm with OK. keys, confirm with OK, adjust and confirm with the keys and OK.
2_DTH8060_en.qxd 17/08/05 12:22 Page 65 Menus Standby mode Your DVD recorder has an Eco Standby to reduce its power consumption when on stand-by. Select On to enable this function. Note: the Eco function does not allow the display of programming warning messages on the display panel. Only the record icon will flash. AV link Allows a television set to control your DVD recorder and download the same channels to the same numbers during installation of channels (page 6).
2_DTH8060_en.qxd 17/08/05 12:22 Page 66 Menus Settings The information relating to the Naviclick TV guide programmes comes from a combination of the TV programmes guide,Teletext and NexTView service transmitted by certain channels.To optimise the Naviclick programmes guide of your DVD recorder, you have the possibility of changing certain settings as shown below.The information from the NexTView service is more reliable than Teletext.
2_DTH8060_en.qxd 17/08/05 12:22 Page 67 Menus NexTView Channels The number of channels offering the NexTView service is constantly increasing. At the time of printing these instructions, the channels diffusing NexTView were as shown below. For your information: there is an Internet web site in English and German that allows you to consult the list of the channels providing NexTView service (http://nxtvepg.sourceforge.net, then consult the link List of NexTView providers).
2_DTH8060_en.qxd 17/08/05 12:22 Page 68 Further information Recommendations and information concerning discs (12 cm) Choice of CD-R / CD-RW discs This player can play most CD-R and CD-RW discs. However, depending on the recorder of your personal computer, the type of disc and recording method used, it may be that some discs cannot be played, or that the performance does not meet the expected standard of quality.
2_DTH8060_en.qxd 17/08/05 12:22 Page 69 Further information Image files and CD-R / CD-RW discs To view your JPEG images on a TV set you do not need to record your photographs with a resolution above 400,000 pixels (which corresponds to an image format of about 720 x 576 dots), for television screens do not allow a higher quality given their limited characteristics.
2_DTH8060_en.qxd 17/08/05 12:22 Page 70 Further information Troubleshooting guide If you encounter difficulties You can contact THOMSON by dialling: 0871 712 1312 (For Great-Britain, all calls will be charged 0,10£ / mn) www.thomson-europe.com Advisors are at your disposal to help you solve your problems at this telephone number. This THOMSON product is designed and manufactured with high quality materials and components which can be recycled and reused.
2_DTH8060_en.qxd 17/08/05 12:22 Page 71 Further information The colours aren’t natural • Check that the scart cables are well pushed into the sockets of the various devices. • Check the settings Output AV1, Input AV2 and Output PAL/NTSC (System Options menu, page 65). The image format doesn’t match the screen format of your TV set • The image format is adjustable. Refer to page 58.With certain discs, the format is pre-set and cannot be changed.
2_DTH8060_en.qxd 17/08/05 12:22 Page 72 Further information The display or reading of digital images in JPEG format is slow • Image display can take a fairly long time, depending on the size of the images. If the images are too “bulky”, your DVD recorder may not be able to display them correctly. Recording problems You cannot record on the disc • If a message is displayed on the screen, press the CLEAR key of the remote control to remove it. • Check that you are using a DVD+R or DVD+RW disc.
2_DTH8060_en.qxd 17/08/05 12:22 Page 73 Further information You can’t access the selected menu, even when you press OK • If the name of the menu appears on a transparent background, it means that the corresponding menu or function is not available.The Disc, Video, Music, Pictures and Card menus are contextual menus: they depend on operations performed beforehand such as: • Disc is only accessible if there is a disc in the disc tray of your DVD recorder.
2_DTH8060_en.qxd 17/08/05 12:22 Page 74 Further information Other important informations For your safety Never open the player or any of its components. It can be dangerous for you or for certain fragile components.You could receive an electric shock or touch the laser beam. Do not place your eyes close to the opening of the disc tray or any other opening to look inside the player.
2_DTH8060_en.qxd 17/08/05 12:22 Page 75 Further information Remote control - Code A-B With certain devices (combined TV/DVD or other DVD player) it may happen that your DVD recorder controls the DVD player of the other device. In this case you can adjust your remote control and the DVD recorder on another code known as code B. Remote control setting on code B Code A Code B No. to key in On display panel 3000 3001 DVD A DVD B Note: the remote control of your DVD recorder is set to code A (3000).