
- Thomson Multimedia Broadcast Solutions Operator's Manual Camcorder LDK 5430

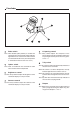
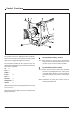


Table Of Contents
- Contents
- About this Manual
- Introduction
- Technology
- Smart Card
- Features
- Important Precautions
- Assembling the Units
- Transport Case
- Lens
- 1.5-inch Viewfinder
- 1.5-inch Viewfinder Accessories
- Other Viewfinders
- Zoom Controls
- Microphone
- Tripod Adapter Plate
- SuperXPander
- Shoulder Pad
- Rain and Off-use Cover
- Script board
- Top Light
- Configurations
- Basic Configurations
- Location of Controls and Functions
- Power Supply
- Security and Access
- Video Functions
- Monitoring Functions
- Viewfinder
- Viewfinder Indicators
- Audio
- Intercom
- Control Functions
- Auxilary Functions
- Shooting
- Using the Camera
- Standard settings
- Colour Bar
- Gain selection
- Optical filter selection
- Colour temperature selection
- Auto-White Balance
- Shooting Screens
- Exposure Time
- Using the Menu System
- Introduction
- Systems Menu
- Appendix
- System Menu Structure
- List of System Menu Functions
- List of Abbreviations
- Introduction
- Assembling the Units
- Configurations
- Location of Controls
- Shooting
- Using the Menu System
- Appendix
4-8 Operator's Manual LDK 200 Triax Location of Controls and Functions
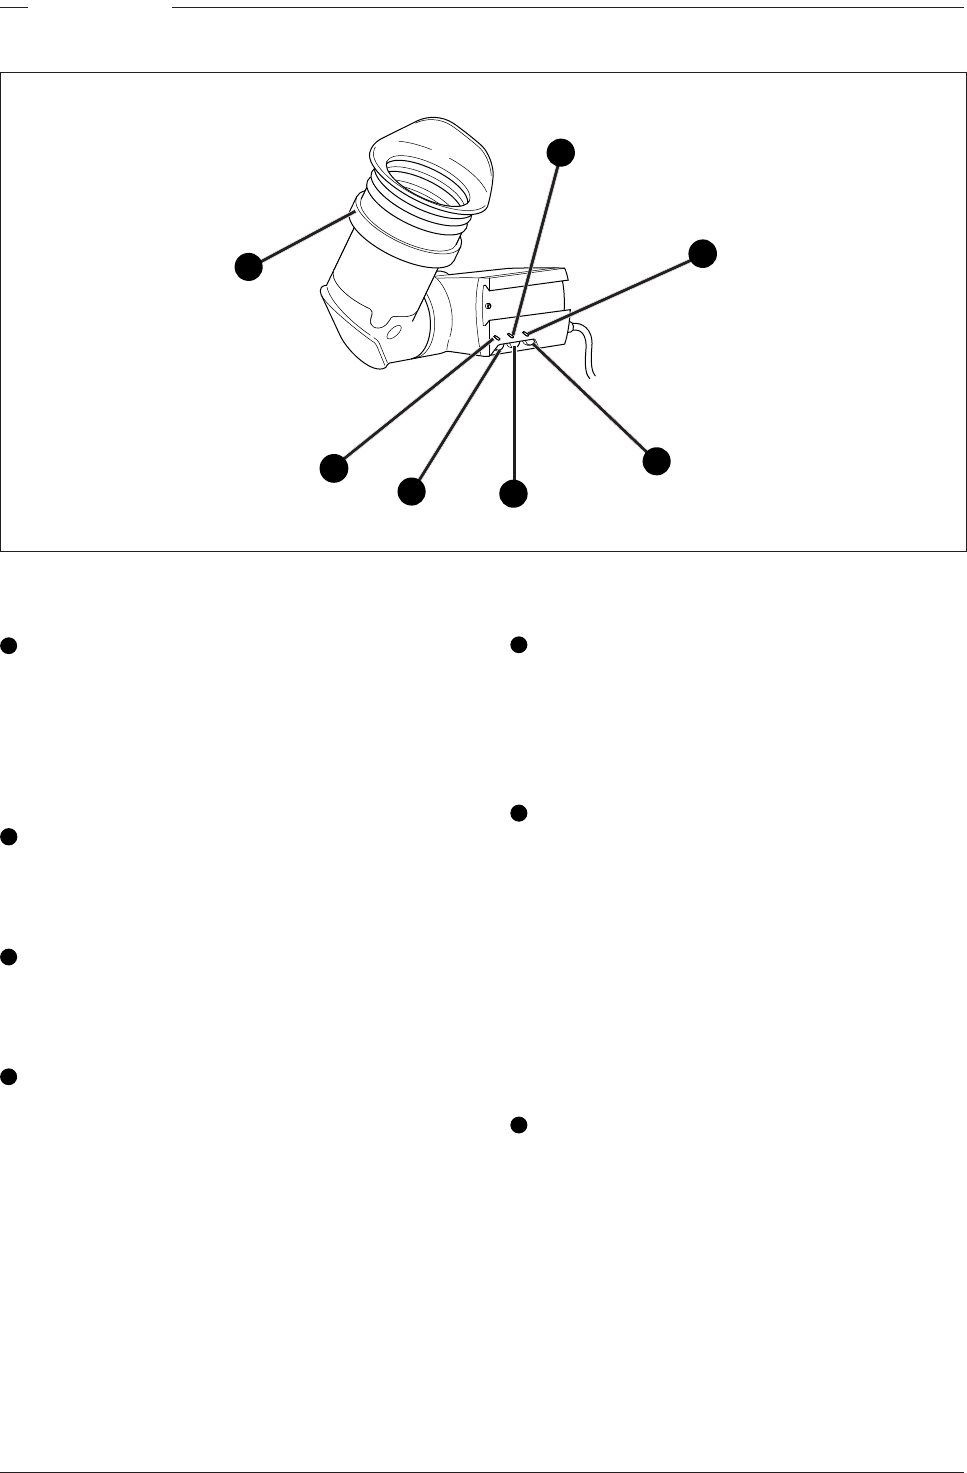
Viewfinder
1
1 Zebra switch
This switch disables (OFF position) or enables the
zebra pattern in the viewfinder which indicates
high video levels. Values for the zebra function
are selected in the VF menu. (The zebra pattern
is switched off when the skin view is on.)
2
2 Option switch
This switch is included on the viewfinder to allow
future features to be incorporated.
3
3 Brightness control
Use this rotary control to adjust the brightness of the
viewfinder display to suit your needs.
4
4 Contrast control
Use this rotary control to adjust the contrast of the
viewfinder display to suit your needs.
5
5 Crispening control
This rotary control adjusts the sharpness of the
picture displayed in the viewfinder. Reduce the
crispening for a better picture when the gain is
set to +++.
6
6 Tally switch
The tally switch is used to control the tally indicator at
the front of the viewfinder.
When this switch is set to the ON position, the tally
indicator light when the camera is on-air.
When this switch is set to the OFF position, the tally
indicator does not light when the camera is on-
air.
The tally swith does not control the tally indicator at
the rear of the carrying handle.
7
7 Dioptre
The dioptre of the viewfinder can be adjusted to suit
your eyesight by turning the dioptre ring. The
range of the dioptre is +1 to -3.
1
2
3
4
5
6
7