VSX_816.book.
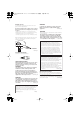
VSX_816.book.fm 2 ページ 2006年2月20日 月曜日 午後2時14分 IMPORTANT CAUTION RISK OF ELECTRIC SHOCK DO NOT OPEN The lightning flash with arrowhead symbol, within an equilateral triangle, is intended to alert the user to the presence of uninsulated "dangerous voltage" within the product's enclosure that may be of sufficient magnitude to constitute a risk of electric shock to persons. CAUTION: TO PREVENT THE RISK OF ELECTRIC SHOCK, DO NOT REMOVE COVER (OR BACK). NO USER-SERVICEABLE PARTS INSIDE.
VSX_816.book.fm 3 ページ 2006年2月20日 月曜日 午後2時14分 Voltage selector WARNING You can find the voltage selector switch on the rear panel of multi-voltage models. The factory setting for the voltage selector is 220 V. Please set it to the correct voltage for your country or region. • Saudi Arabia operates on 127 V and 220 V mains voltage. Please set to the correct voltage before using. • For Taiwan, please set to 110 V before using. • For Mexico, please set to 120 V to 127 V before using.
VSX_816.book.fm 4 ページ 2006年2月20日 月曜日 午後2時14分 Contents 01 Before you start 06 Listening to your system Checking what’s in the box . . . . . . . . . . . . . . . Loading the batteries . . . . . . . . . . . . . . . . . . . Installing the receiver . . . . . . . . . . . . . . . . . . . Ventilation . . . . . . . . . . . . . . . . . . . . . . . . . . . . 6 6 6 6 02 5 minute guide Introduction to home theater . . . . . . . . . . . . . 7 Listening to Surround Sound . . . . . . . . . . . . .
VSX_816.book.fm 5 ページ 2006年2月20日 月曜日 午後2時14分 10 Making recordings Making an audio or a video recording . . . . . 47 11 Controlling the rest of your system 48 English 48 49 49 49 50 50 52 Italiano Operating other Pioneer components . . . . . Setting the remote to control other components . . . . . . . . . . . . . . . . . . . . . . . . Selecting preset codes directly . . . . . . . . . . Erasing all of the remote control presets . . . Direct function . . . . . . . . . . . . . . . . . . . . . .
VSX_816.book.
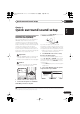
02_5_min_guide.fm 7 ページ 2006年2月21日 火曜日 午後6時36分 5 minute guide 02 Chapter 2: • Be sure to complete all connections before connecting to an AC power source. 1 Connect your DVD player and TV. See Connecting a DVD player and TV on page 13 to do this. For surround sound, you’ll want to hook up using a digital connection from the DVD player to the receiver. 2 Connect your speakers and place them for optimal surround sound. See Connecting the speakers on page 19.
VSX_816.book.fm 8 ページ 2006年2月20日 02 月曜日 午後2時14分 5 minute guide • Check the table below to find the speaker setup that corresponds with your system. Using the Quick Setup You can use the Quick Setup to get your system up and running with just a few button presses. The receiver automatically makes the necessary settings after you have selected your speaker setup, room size and listening position. Use the front panel controls for the steps below.
VSX_816.book.fm 9 ページ 2006年2月20日 月曜日 午後2時14分 Quick surround sound setup 03 Chapter 3: Caution RECEIVER INPUT SELECT SOURCE D.ACCESS CLASS +10 DISC If you have a tripod, use it to place the microphone so that it’s about ear level at your normal listening position. Otherwise, place the microphone at ear level using a table or a chair. • Make sure there are no obstacles between the speakers and the microphone. 3 Press RECEIVER on the remote control, then press the SETUP button.
VSX_816.book.fm 10 ページ 2006年2月20日 03 月曜日 午後2時14分 Quick surround sound setup 5 Make sure ‘Normal (SB)’ is selected then press ENTER. 1 Try to be as quiet as possible after pressing ENTER. The system outputs a series of test tones to establish the ambient noise level. 6 Follow the instructions on-screen. • Make sure the microphone is connected. • If you’re using a subwoofer, it is automatically detected every time you switch on the system. Make sure it is on and the volume is turned up.
VSX_816.book.
VSX_816.book.fm 12 ページ 2006年2月20日 04 月曜日 午後2時14分 Connecting up Chapter 4: Connecting up Video cables Making cable connections Important • Before making or changing connections, switch off the power and disconnect the power cord from the AC outlet. • Make sure not to bend the cables over the top of this unit. If this happens, the magnetic field produced by the transformers in this unit may cause a humming noise from the speakers. • Before unplugging the power cord, switch the power into standby.
VSX_816.book.fm 13 ページ 2006年2月20日 月曜日 午後2時14分 Connecting up 04 English Connecting a DVD player and TV This page shows you how to connect your DVD player and TV to the receiver. 2 Connect the composite video output and the stereo analog audio outputs2 on your DVD player to the DVD/LD inputs on this receiver. Use a standard RCA video cable3 and a stereo RCA phono cable for the connection.
VSX_816.book.fm 14 ページ 2006年2月20日 04 月曜日 午後2時14分 Connecting up Connecting the multichannel analog outputs For DVD Audio and SACD playback, your DVD player may have 5.1 channel analog outputs.In this case, you can connect the multichannel analog outputs to the multichannel inputs of this receiver as shown below.
VSX_816.book.fm 15 ページ 2006年2月20日 月曜日 午後2時14分 Connecting up This receiver DIGITAL OUT IN AUX IN CD IN DVR / VCR OPT The number and kind of connections depends on the kind of component you’re connecting.1 Follow the steps below to connect a CD-R, MD, DAT, tape recorder or other audio component.
VSX_816.book.fm 16 ページ 2006年2月20日 04 月曜日 午後2時14分 Connecting up However, the connected DVD player, set-top box, etc. must be able to output WMA9 Pro format audio signals through a coaxial or optical digital output. 4 If your video component has a digital input, connect it to the digital output on the receiver as shown. Use an optical cable to make this connection.
04_connecting_up.fm 17 ページ 2006年2月21日 火曜日 午後6時38分 Connecting up Using the component video jacks Connecting to the front panel video terminal • Push down on the PUSH OPEN tab to access the front video connections. VIDEO INPUT L AUDIO MCACC SETUP MIC USB R DIGITAL IN PUSH OPEN PROCESSING CD CD-R / TAPE / MD S -VIDEO VIDEO FM VIDEO INPUT L AUDIO AM USB AUX USB R DIGITAL IN MCACC SETUP MIC Video camera (etc.
VSX_816.book.fm 18 ページ 2006年2月20日 04 月曜日 午後2時14分 Connecting up Using external antennas Connecting antennas Connect the AM loop antenna and the FM wire antenna as shown below. To improve reception and sound quality, connect external antennas (see Using external antennas below). fig. a fig. b To improve FM reception Connect an external FM antenna as shown below. fig.
VSX_816.book.fm 19 ページ 2006年2月20日 月曜日 午後2時14分 Connecting up 04 English Connecting the speakers A complete setup of eight speakers (including the subwoofer) is shown here but everyone’s home setup will vary. Simply connect the speakers you have in the manner shown below. 1 The receiver will work with just two stereo speakers (the front speakers in the diagram) but using at least three speakers is recommended, and a complete setup is best.
VSX_816.book.fm 20 ページ 2006年2月20日 04 月曜日 Connecting up Make sure that the speaker cable you’re using is properly prepared with about 10 mm of insulator stripped from each wire, with the exposed wire strands twisted together (fig. A). the TV is switched on. If you do not have magnetically shielded speakers and notice discoloration of the TV picture, move the speakers farther away from the TV. Unscrew the terminal a few turns until there is enough space to insert the exposed wire (fig. B).
VSX_816.book.fm 21 ページ 2006年2月20日 Connecting up 月曜日 午後2時14分 04 Overhead view of speaker setup Front left English You can also refer to the 3-D speaker setup illustration on page 7. Front right Center Deutsch Subwoofer Surround left Surround right Français Listening position Surround back left Surround back right Single surround back speaker . Italiano Nederlands The diagrams below show suggested surround and surround back speaker orientation. The first diagram (fig.
VSX_816.book.
VSX_816.book.fm 23 ページ 2006年2月20日 月曜日 午後2時14分 Controls and displays 05 18 TUNING / STATION Selects the frequency (page 45) and station presets (page 46) when using the tuner. 9 STANDBY/ON Switches the receiver between on and standby. 19 TUNER EDIT Press to memorize and name a station for recall (page 46). 11 USB interface Connect a USB audio device for playback (see Using the USB interface on page 34). 21 QUICK SETUP See Using the Quick Setup on page 8.
VSX_816.book.fm 24 ページ 2006年2月20日 05 月曜日 Controls and displays DIGITAL – Lights when a digital audio signal is detected. 2 DIGITAL – Lights when a Dolby Digital encoded signal is detected. ANALOG – Lights when an analog signal is detected. DTS – Lights when a source with DTS encoded audio signals is detected. 11 Speaker indicators Lights to indicate the current speaker system, A and/or B (page 54). 12 Character display 13 Neo:6 Lights to indicate Neo:6 processing. 14 ADV.SURR.
VSX_816.book.fm 25 ページ 2006年2月20日 月曜日 午後2時14分 Controls and displays 05 10 RECEIVER INPUT SELECT 1 SOURCE 11 12 DVR USB FM AM CD TV CTRL RECEIVER SLEEP SB ch ANALOG ATT SR+ DIMMER MIDNIGHT/ LOUDNESS 13 SLEEP – Press to change the amount of time before the receiver switches into standby (30 min – 60 min – 90 min – Off). You can check the remaining sleep time at any time by pressing SLEEP once. DISC ENTER 4 5 MENU TOP MENU TUNE DTV MENU SETUP ST ST ENTER T.
VSX_816.book.fm 26 ページ 2006年2月20日 05 月曜日 Controls and displays 4 Tuner/component control buttons/SETUP The following button controls (except SETUP) can be accessed after you have selected the corresponding MULTI CONTROL button (DVD, AM, FM, TV, etc.) TOP MENU – Displays the disc ‘top’ menu of a DVD. DTV MENU – Displays menus on a digital TV. 7 Component control buttons The main buttons ( , , etc.) are used to control a component after you have selected it using the MULTI CONTROL buttons.
VSX_816.book.fm 27 ページ 2006年2月20日 月曜日 午後2時14分 Controls and displays 05 14 VOL +/– Use to set the listening volume. DIALOG E – Use to make dialog stand out when watching TV or a movie (page 32). 15 MUTE Mutes the sound or restores the sound if it has been muted (adjusting the volume also restores the sound). S. RETRIEVER – Press to restore CD quality sound to compressed audio sources (page 32). SIGNAL SEL – Use to select an input signal (page 33).
VSX_816.book.fm 28 ページ 2006年2月20日 06 月曜日 午後2時14分 Listening to your system Chapter 6: Listening to your system The following modes provide basic surround sound for stereo and multichannel sources. Important • Certain features explained in this section will not be possible depending on the source (for example, PCM 88.2 kHz / 96 kHz, DTS 96 kHz (24 bit) or WMA 9 Pro sources). Auto playback The simplest, most direct listening option is the Auto Surround feature.
VSX_816.book.fm 29 ページ 2006年2月20日 月曜日 午後2時14分 Listening to your system 06 Setting the effect options • 2 Pro Logic IIx MUSIC – See above When using surround effects, there are a number of settings you can adjust. • Dolby Digital EX – Creates surround back channel sound for 5.1 channel sources and provides pure decoding for 6.1 channel sources (like Dolby Digital Surround EX) Using the Advanced surround effects CH • ADV. MUSIC – Suitable for music sources. • TV SURR.
VSX_816.book.fm 30 ページ 2006年2月20日 06 月曜日 午後2時14分 Listening to your system Setting What it does Options Effect Sets the effect level for the currently selected Advanced Surround mode (each mode can be set separately). 10 to 90 Default: 7-STEREO – 90 / Others – 70 a Only available with 2ch sources in Dolby Pro Logic II(x) Music mode. b Only available with 2ch sources in Neo:6 Music mode.
VSX_816.book.fm 31 ページ 2006年2月20日 月曜日 午後2時14分 Listening to your system 06 Using Virtual Surround Back (VSB) When you’re not using surround back speakers, selecting this mode allows you to hear a virtual surround back channel through your surround speakers. You can choose to listen to sources with no surround back channel information, or if the material sounds better in the format (for example, 5.1) for which it was originally encoded, you can have the receiver only apply this effect to 6.
VSX_816.book.fm 32 ページ 2006年2月20日 06 月曜日 午後2時14分 Listening to your system Type of source Dolby Digital/DTS/WMA9 Pro encoded stereo source; other digital stereo source Analog 2-channel (stereo) sources SBch Processing / Virtual SB mode Standard Multichannel sources Advanced surround Stereo sources 2 Pro Logic IIx 2 Pro Logic Neo:6 ON a,b a AUTO c a ON AUTO c b a Excluding WMA9 Pro format b Only applicable when using the Virtual Surround Back mode.
VSX_816.book.fm 33 ページ 2006年2月20日 月曜日 午後2時14分 Listening to your system 1 Turn on the power of the playback component. 2 Turn on the power of the receiver. 4 Start playback of the component you selected in step 1. If you have connected a decoder or a DVD player with multichannel analog outputs to this receiver (page 14), you must select the analog multichannel inputs for surround sound. 3 1 Make sure you have set the playback source to the proper output setting.
VSX_816.book.fm 34 ページ 2006年2月20日 07 月曜日 午後2時14分 USB playback Chapter 7: USB playback Basic playback controls Using the USB interface It is possible to listen to two-channel audio using the USB interface on the front of this receiver. Connect a USB mass storage device2 as shown below. The following table shows the basic controls on the remote for USB playback. Starts normal playback. 1 1 Press USB (SHIFT+AM). Button What it does Pauses/unpauses playback. 2 Connect your USB device.
VSX_816.book.fm 35 ページ 2006年2月20日 月曜日 午後2時14分 USB playback • Use a dedicated AC adapter (supplied with the device) for USB power. If this doesn’t remedy the problem, it is likely your USB device is incompatible. Apple and iTunes are trademarks of Apple Computer, Inc., registered in the U.S. and other countries. Français Note that although most standard bit/ sampling rate combinations for compressed audio are compatible, some irregularly encoded files may not play back.
VSX_816.book.fm 36 ページ 2006年2月20日 08 月曜日 午後2時14分 The System Setup menu Chapter 8: The System Setup menu Making receiver settings from the System Setup menu The following section shows you how to make detailed settings to specify how you’re using the receiver (for example, if you want to set up two speaker systems in separate rooms), and also explains how to fine-tune individual speaker system settings to your liking. RECEIVER INPUT SELECT SOURCE D.
VSX_816.book.fm 37 ページ 2006年2月20日 月曜日 午後2時14分 The System Setup menu System Setup 08 1.Surround Back System : Exit Surr Back System Normal (SB) ] : Finish 3 When you’re finished, press RETURN. You return to the System Setup menu. You only need to make these settings once (unless you change the placement of your current speaker system or add new speakers).
VSX_816.book.fm 38 ページ 2006年2月20日 08 月曜日 午後2時14分 The System Setup menu Fine Channel Level • Default setting: 0dB (all channels) You can achieve better surround sound by properly adjusting the overall balance of your speaker system. The following setting can help you make detailed adjustments that you may not achieve using the Manual speaker setup on page 41. 1 Select ‘Fine Ch Level’ from the Manual MCACC setup menu. You’ll hear test tones from each speaker in turn.
VSX_816.book.fm 39 ページ 2006年2月20日 月曜日 午後2時14分 The System Setup menu Setting the Acoustic Calibration EQ automatically English Listen to the reference speaker and use it to measure the target channel. From the listening position, face the two speakers with your arms outstretched pointing at each speaker. Try to make the two tones sound as if they are arriving simultaneously at a position slightly in front of you and between your arm span.
VSX_816.book.fm 40 ページ 2006年2月20日 08 月曜日 午後2時14分 The System Setup menu • FRONT ALIGN – All speakers are set in accordance with the front speaker settings (no equalization is applied to the front left and right channels). You return to the Acoustic Cal EQ setup menu after the Acoustic Calibration Equalization is set.
VSX_816.book.fm 41 ページ 2006年2月20日 月曜日 午後2時14分 The System Setup menu 3e.EQ CUSTOM1 Adjust 3.Manual MCACC 3e. EQ CUSTOM1 Adjust Use / to select the channel. • The front speakers can’t be adjusted if you selected FRONT ALIGN. 4 When you're finished, press RETURN. You return to the Manual MCACC setup menu.
VSX_816.book.fm 42 ページ 2006年2月20日 08 月曜日 午後2時14分 The System Setup menu 1 Select ‘Manual SP Setup’ then press ENTER. System Setup 4.Manual SP Setup 1.Surr Back System 2.Auto MCACC 3.Manual MCACC 4.Manual SP Setup 5.Input Assign 6.Other Setup : Exit 1 Select ‘Speaker Setting’ from the Manual SP Setup menu. 4a.Speaker Setting 4.Manual SP Setup a.Speaker Setting b.Crossover Network c.Channel Level d.Speaker Distance :Return 2 Select the setting you want to adjust.
VSX_816.book.fm 43 ページ 2006年2月20日 月曜日 午後2時14分 The System Setup menu 4b.Crossover Network 4.Manual SP Setup a.Speaker Setting b.Crossover Network c.Channel Level d.Speaker Distance :Return Frequency 80Hz :Finish Nederlands 2 Choose the frequency cutoff point. Frequencies below the cutoff point will be sent to the subwoofer (or LARGE speakers). 3 When you’re finished, press RETURN. You return to the Manual SP Setup menu.
VSX_816.book.fm 44 ページ 2006年2月20日 08 月曜日 午後2時14分 The System Setup menu 1 Select ‘Channel Level’ from the Manual SP Setup menu. 4.Manual SP Setup 4c.Channel Level a.Speaker Setting b.Crossover Network c.Channel Level d.Speaker Distance Test Tone :Return 2 5 When you’re finished, press RETURN. You return to the Manual SP Setup menu. ENTER:Next Manual :Cancel Select a setup option. • Manual – Move the test tone manually from speaker to speaker and adjust individual channel levels.
VSX_816.book.fm 45 ページ 2006年2月20日 月曜日 午後2時14分 Using the tuner 09 Chapter 9: English Using the tuner DVR USB FM AM CD TV CTRL TV VOL INPUT SELECT REC DTV ON/OFF SLEEP MUTE REC STOP JUKEBOX MPX MIDNIGHT/ LOUDNESS DIMMER AUDIO SUBTITLE DISP CLASS +10 STANDARD ADV.SURR HDD DVD CH CH STEREO AUTO SURR DISC ENTER DIALOG E S.RETRIEVER ACOUSTIC EQ SIGNAL SEL MENU TOP MENU TUNE DTV MENU SETUP ST SHIFT EFFECT/CH SEL ST ENTER T.
VSX_816.book.fm 46 ページ 2006年2月20日 09 月曜日 Using the tuner • Use the MULTI JOG dial (front panel) or the ST / buttons (remote) to select characters. Saving station presets If you often listen to a particular radio station, it's convenient to have the receiver store the frequency for easy recall whenever you want to listen to that station. This saves the effort of manually tuning in each time. This unit can memorize up to 30 stations, stored in three banks, or classes, (A, B and C) of 10 stations each.
VSX_816.book.fm 47 ページ 2006年2月20日 月曜日 午後2時14分 Making recordings 10 Chapter 10: You can make an audio or a video recording from the built-in tuner, or from an audio or video source connected to the receiver (such as a CD player or TV). 3 Prepare the source you want to record. Tune to the radio station, load the CD, video, DVD etc. TV VOL RECEIVER INPUT SELECT INPUT SELECT TV CH Refer to the instructions that came with the recorder if you are unsure how to do this.
VSX_816.book.fm 48 ページ 2006年2月20日 11 月曜日 午後2時14分 Controlling the rest of your system Chapter 11: Controlling the rest of your system Operating other Pioneer components Setting the remote to control other components Many Pioneer components have SR CONTROL jacks which can be used to link components together so that you can use just the remote sensor of one component. When you use a remote control, the control signal is passed along the chain to the appropriate component.
VSX_816.book.fm 49 ページ 2006年2月20日 月曜日 午後2時14分 Controlling the rest of your system RECEIVER INPUT SELECT SOURCE SR+ MIDNIGHT/ LOUDNESS DIMMER 7 If your component is controlled successfully, press ENTER to confirm. The remote LCD display shows OK. English Selecting preset codes directly 11 8 Press and hold RECEIVER for about two seconds to exit the SETUP.
VSX_816.book.fm 50 ページ 2006年2月20日 11 月曜日 午後2時14分 Controlling the rest of your system 1 While pressing the RECEIVER button, press the SETUP button. The remote LCD display shows SETUP. 2 Use / to select DIRECT F then press ENTER. 3 Press the MULTI CONTROL button for the component you want to control then press ENTER. The LCD on the remote displays the component you want to control. 4 Use / to switch direct function ON or OFF then press ENTER. The LCD shows OK to confirm the setting.
VSX_816.book.fm 51 ページ 2006年2月20日 月曜日 午後2時14分 Controlling the rest of your system Button(s) 11 Use to choose the YELLOW commands on a DTV menu. DTV Use to choose the GREEN commands on a DTV menu. DTV Use to choose the RED commands on a DTV menu. DTV AUDIO Use to switch DTV audio tracks. DTV GUIDE Use as the GUIDE button for navigating. Cable TV/Satellite TV/TV/ DTV DTV RETURN Use to select closed captioning with DTV. DTV Number buttons Use to select a specific TV channel.
VSX_816.book.fm 52 ページ 2006年2月20日 11 月曜日 午後2時14分 Controlling the rest of your system Controls for other components This remote control can control these components after entering the proper codes or teaching the receiver the commands (see Operating other Pioneer components on page 48 for more on this). Use the MULTI CONTROL buttons to select the component. Button (s) Function SOURCE Press to switch the component between standby and on.
VSX_816.book.fm 53 ページ 2006年2月20日 月曜日 午後2時14分 Controlling the rest of your system 11 Components ENTER/ Chooses the disc. Multiple CD player Ejects the disc. MD player Use as the ENTER button. VCR Use as the CLEAR button. DVD Displays the setup screen for DVR players. DVR player Changes sides of the LD. LD player DISC TOP MENU Displays the disc ‘top’ menu of a DVD player. DVD/DVR player Pauses the tape. Cassette deck Stops the tape. Cassette deck ENTER Starts playback.
VSX_816.book.fm 54 ページ 2006年2月20日 12 月曜日 午後2時14分 Other connections Chapter 12: Other connections Caution • Before making or changing the connections, switch off the power and disconnect the power cord from the power outlet. Plugging in components should be the last connection you make with your system. • Do not allow any contact between speaker wires from different terminals.
VSX_816.book.fm 55 ページ 2006年2月20日 月曜日 午後2時14分 Other connections 12 R A LR SURROUND L CENTER R SURROUND BACK L B Lo Since both front and surround back speaker terminals output the same audio, it doesn’t matter which set (front or surround back) is powering which part (Hi or Low) of the speaker. The reasons for bi-wiring are basically the same as bi-amping, but additionally, interference effects within the wire could be reduced, producing better sound.
VSX_816.book.fm 56 ページ 2006年2月20日 12 月曜日 午後2時14分 Other connections Caution • Make sure you use a parallel (not series, which are fairly uncommon) connection when bi-wiring your speakers. • Don't connect different speakers from the same terminal in this way.
VSX_816.book.fm 57 ページ 2006年2月20日 月曜日 午後2時14分 Other connections 12 • On-screen volume display. • On-screen display of listening mode. • Automatic video input switching on the plasma display. • Automatic volume muting on the plasma display.2 See also SR+ Setup for Pioneer plasma displays on page 60 for more on setting up the receiver. RECEIVER INPUT SELECT SOURCE SB ch ANALOG ATT SR+ DIMMER MIDNIGHT/ LOUDNESS Satellite receiver, etc D.
13_other_settings.fm 58 ページ 2006年2月21日 13 火曜日 午後6時40分 Other Settings Chapter 13: Other Settings 5a.Digital Input Setup 5.Input Assign The Input Assign menu a.Digital Input b.Component Input You only need to make settings in the Input Assign menu if you didn’t hook up your digital equipment according to the default settings for the digital inputs, or if you have connected equipment using component video cables. 1 Press RECEIVER on the remote control, then press the SETUP button.
VSX_816.book.fm 59 ページ 2006年2月20日 月曜日 午後2時14分 Other Settings 13 2 Select the number of the component video input to which you’ve connected your video component. The numbers correspond with the numbers beside the inputs on the back of the receiver. The Other Setup menu is where you can make customized settings to reflect how you are using the receiver. 2 • Default setting: OFF This setting specifies the amount of dynamic range adjustment to Dolby Digital and DTS movie soundtracks.
VSX_816.book.fm 60 ページ 2006年2月20日 13 月曜日 午後2時14分 Other Settings Dual Mono Setup • 3 When you're finished, press RETURN. You return to the Other Setup menu. Default setting: CH1 You can specify how dual mono encoded Dolby Digital and DTS soundtracks should be played. Dual mono is not widely used, but is sometimes necessary when two languages need to be sent to separate channels. 1 Select ‘Dual Mono Setup’ from the Other Setup menu.
VSX_816.book.fm 61 ページ 2006年2月20日 月曜日 午後2時14分 Additional information 14 Chapter 14: English Additional information Deutsch Troubleshooting Français Incorrect operations are often mistaken for trouble and malfunctions. If you think that there is something wrong with this component, check the points below. Take a look at the other components and electrical appliances being used, because sometimes the problem may lie there.
VSX_816.book.fm 62 ページ 2006年2月20日 14 月曜日 午後2時14分 Additional information Problem Remedy No sound from surround back speakers. • Refer to Speaker Setting on page 42 to check the surround back speaker settings. • Refer to Channel Level on page 43 to check the speaker levels. • Refer to Using surround back channel processing on page 31 to make sure surround back processing and the sound mode are set for surround back sound. Considerable noise in radio broadcasts.
VSX_816.book.fm 63 ページ 2006年2月20日 月曜日 午後2時14分 Additional information 14 Remedy The SR cable is connected, but the connected components can’t be operated with the remote. • Reinsert the SR cable, making sure it’s connected to the right jack (see Using this receiver with a Pioneer plasma display on page 56). • Make sure an analog connection has been made between the units. • This feature only works with Pioneer products. • Press DIMMER on the control repeatedly to return to the default.
14_additional_info.fm 64 ページ 2006年2月21日 14 火曜日 午後6時45分 Additional information Video Section Specifications • • • Continuous power output (stereo) Front. . . . . . . . 100 W (DIN 1kHz, THD 1.0 %, 8 Ω) • Audio section Frequency response CD, DVR/VCR, CD-R/TAPE/MD, DVD/LD, TV/SAT . . . . . . . . . . . . . . 5 Hz to 100 000 Hz • 0 6 dB Output (Level/Impedance) DVR/VCR REC, CD-R/TAPE/ MD REC . . . . . . . . . . . . . . . . . . . . . .200 mV/2.2 kΩ • Tone control Bass . . . . . . . . . . . .
VSX_816.book.fm 65 ページ 2006年2月20日 月曜日 午後2時14分 Additional information 14 Miscellaneous Microphone (for Auto MCACC setup) . . . . . . . . .1 Dry cell batteries (AA size IEC R6) . . . . . . . . . .2 • When the surface is dirty, wipe with a soft cloth dipped in some neutral cleanser diluted five or six times with water, and wrung out well, and then wipe again with a dry cloth. Do not use furniture wax or cleansers.
VSX_816.book.fm 68 ページ 2006年2月20日 月曜日 午後2時14分 Published by Pioneer Corporation. Copyright © 2006 Pioneer Corporation. All rights reserved. PIONEER CORPORATION 4-1, Meguro 1-Chome, Meguro-ku, Tokyo 153-8654, Japan PIONEER ELECTRONICS (USA) INC. P.O. BOX 1540, Long Beach, California 90810-1540, U.S.A. TEL: (800) 421-1404 PIONEER ELECTRONICS OF CANADA, INC.