AV Control Receiver Operating Instructions Model No. SA-DA20 SA-DA15 SA-DA20 (Black version) Note: “EB” on the packaging indicates the United Kingdom. Before connecting, operating or adjusting this product, please read these instructions completely. Please keep this manual for future reference.
Dear customer Thank you for purchasing this product. For optimum performance and safety, please read these instructions carefully. These operating instructions are applicable to models SA-DA20 and SA-DA15, however, are intended primarily for model SA-DA20. Supplied accessories Please check and identify the supplied accessories. Table of contents Safety precautions .....................................................................3 Caution for AC Mains Lead ..............................................
Safety precautions Enjoying surround sound Placement Pages Connect your equipment 6–9 Set the unit up on an even surface away from direct sunlight, high temperatures, high humidity, and excessive vibration. These conditions can damage the cabinet and other components, thereby shortening the unit’s service life. Do not place heavy items on the unit. Position and connect the speakers Voltage 10, 11 Change the settings 12–14 Do not use high voltage power sources.
Caution for AC Mains Lead (For United Kingdom) (“EB” area code model only) For your safety, please read the following text carefully. This appliance is supplied with a moulded three pin mains plug for your safety and convenience. A 5-ampere fuse is fitted in this plug. Should the fuse need to be replaced please ensure that the replacement fuse has a rating of 5-ampere and that it is approved by ASTA or BSI to BS 1362. Check for the ASTA mark or the BSI mark on the body of the fuse.
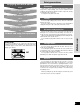
Control reference guide 1 2 3 4 5 6 7 8 9 10 11 VOLUME DIGITAL INPUT SELECTOR SPEAKERS B BI-WIRE BI-AMP MIN TIMER DVD 6CH INPUT VGCA MODE TIME TUNING PHONES PTY SELECTOR BAND PRESET MAX VIA TONE TAPE MONITOR DIGITAL INPUT MEMORY DISPLAY MODE-PTY SEARCH FM MODE ON BASS VCR 2 VCR 3 BALANCE VCR 3 MIN EON TREBLE WAKE DSP SOUND MODE MAX MIN MAX L R RDS VIDEO IN 12 13 14 15 16 17 18 19 20 21 22 23 24 25 26 29 28 30 31 TUNED STEREO RDS WAKE MONO LOW IMP SPEAKERS A B BI-WIR
Connections Stereo phono cable White (L) Red (R) Video connection cable To connect equipment, refer to the appropriate operating instructions. Note ¡Turn off all components before making any connections. ¡Use digital connection to enjoy Dolby Digital or DTS (\ page 18). ¡Use analogue connection to enjoy sources that cannot be decoded on this unit and to record a source (\ pages 16, 19 and 27). Peripheral equipment and cables sold separately unless otherwise indicated.
Connection with 21 pin scart cable a VCR (for play only) AV CD TAPE/MD REC (OUT) OPTICAL 1 (TV) PLAY (IN) R L FRONT R B L A L LOOP ANT HOLDER IN OPTICAL 2 (DVD) R DIGITAL IN AUDIO OUT VCR 2 COAXIAL LF R VCR 1 FM ANT FRONT R OUT IN R L – OUT IN L R GND 75 Ω SUBWOOFER IN SURROUND L SUBWOOFER OUT L LOOP R SURROUND L CENTER SPEAKERS + SURROUND R b 21 pin scart cable IN CENTER DVD/ DVD 6CH VIDEO OUT MONITOR OUT DVD VCR 1 TV S-VIDEO HF BI-WIRE L L IN PHONO
Connections Connecting digital equipment Optical fiber cable Coaxial cable a Satellite receiver, etc. Changing the digital input settings You can change the input settings for the digital terminals if necessary (for example, if your CD player doesn’t have a coaxial output terminal). Note the equipment you have connected to the terminals, then change the settings (\ pages 12, 13).
To connect an outdoor antenna FM outdoor antenna AM outdoor antenna ¡Disconnect the FM indoor antenna. ¡The antenna should be installed by a competent technician. ¡Run a piece of vinyl wire horizontally across a window or other convenient location. ¡Leave the loop antenna connected. ¡Disconnect the antenna when the unit is not in use. Do not use the antenna during an electrical storm.
Speaker connections Placement of speakers Front speakers a Center speaker Place on the left and right of the TV at seated ear height so that there is good coherency between the picture and sound. b Front speaker (left) c Front speaker (right) Center speaker Place underneath or above the center of the TV. Aim the speaker at the seating area. 30° 30° d Subwoofer Surround speakers Place on the side of or slightly behind the seating area, about one meter higher than ear level.
Front speakers (bi-wiring connection) Speaker impedance: BI-WIRE: 6-16 Ω a Front speaker (right) CD OPTICAL PLAY (IN) B R L R c Front speaker (left) A L IN AC OUTLET HF DIGITAL OPTICAL DVD LF BI-WIRE HF R DVD LF R VCR 2 OPTICAL R SUBWOOFER IN IN OUT IN IN OUT IN L LF – d Speaker cables R CENTER R SURROUND L CENTER SPEAKERS + DVD/ When using bi-wiring connection DVD 6CH SURROUND R ¡Use speakers designed for bi-wiring that have a combined impedance of TV 6–16 Ω.
Customizing your receiver Change the settings to suit your speakers and equipment and to suit the environment in which the unit is to be used. Before making any changes, read the following descriptions, note the factory settings and ranges, and refer to the instructions for the speakers and equipment. FRONT CENTER SUB-WFR SURROUND LARGE SMALL FRONT CENTER, SURROUND NONE SMALL LARGE YES SUB-WFR NO The settings remain intact until they are changed, even after the power is turned off.
Customizing your receiver 1 2,5 Basic steps If you allow about 10 seconds to elapse between settings, the procedure is canceled, all settings are returned to how they were, and the previous display is restored. Begin again if this occurs. 1 2 3 3 Press [8]. Press [A] and [B] at the same time. Press [A] to select the item you want to change. 4 Each time you press the button: SIZE / DISTANCE / FILTER / DR COMP / D-INPUT / DIMMER , 1 4 Change the settings (a below).
Customizing your receiver SPEAKERS A, B For front speakers with an impedance under 6 Ω Turn “LOW IMP” on if even one of your speakers has an impedance under 6 Ω. Press and hold [A] or [B] until “LOW IMP” lights up on the display. Press and hold down again to cancel “LOW IMP”. Note that when “LOW IMP” is on, SPEAKERS A and B cannot be used at the same time.
Adjusting speaker output level 1 Adjust the level of the speakers so they are the same apparent level as the front speakers when you are sitting where you would normally enjoy a source. 1 Press [A] or [BI-WIRE] to turn on SPEAKERS A or BI-WIRE. You cannot adjust output level when SPEAKERS B is on. 2 DSP sound mode switches to SURROUND mode.
DSP sound modes DSP SOUND MODE DIGITAL INPUT The digital sound processor (DSP) in this unit can decode Dolby Digital and DTS digital signals. It automatically determines the type of signal, PCM, Dolby Digital, or DTS, and processes it accordingly. The DSP can add surround-like effects to stereo sources (analogue or PCM signals). Choose from the STEREO, SURROUND, or SFC modes. Note ¡PCM with a sampling frequency of 44.1 kHz is the digital signal format normally found on CDs.
DSP sound modes DSP SOUND MODE A SFC modes A Enjoy an enhanced sound experience with greater presence and spread by using these SFC (sound field control) modes with PCM or analogue stereo sources. The SFC modes cannot be used if the input signal is Dolby Digital or DTS. Choose from the following modes. B HALL Imparts the reflection and spread of a large concert hall. CLUB Conveys the exciting and intimate atmosphere of a jazz club.
Enjoying the sounds 1 2 4- 6 1 3 1 Press [8]. 2 Press [A] or [BI-WIRE]. “SURROUND” and “SFC” do not work if you select “B”. A, B and BI-WIRE refer to the speaker terminals on the rear of the unit. 3 DIGITAL INPUT 1 2 3 DVD 6CH 4 5 6 DIGITAL 7 8 9 SFC DISC ENTER/ DECK 1/2 0 ≥10/-/-- DELAY PLAY MODE SETUP CANCEL LEVEL SUB TITLE AUDIO ANGLE GROUP REPEAT MODE A-B REPEAT PAGE DIMMER Turn [INPUT SELECTOR] to select the input source.
Enjoying the sounds SPEAKERS B DVD 6CH INPUT A Using DVD 6CH INPUT You may need to use 6 channel analogue input for DVD, for example when you are playing discs recorded with digital signals this unit cannot decode. These signals include MPEG and high quality, multi-channel linear PCM with sampling frequencies of 96 and 192 kHz. Select “DVD” for any other source to take advantage of this unit’s features. DVD 6CH INPUT only works when either SPEAKERS A or BI-WIRE is on and SPEAKERS B is off.
Enjoying the sounds VGCA INPUT SELECTOR Turning on the VGCA This unit features a state-of-the-art variable gain control amplifier (VGCA). This feature cuts down greatly on noise encountered during normal use. Press [VGCA]. ON VIA TONE The “VIA TONE” indicator goes out and the “ON” indicator lights when “VGCA” is selected. “VGCA ON” is displayed, then “DISPLAY OFF” scrolls across the display. The display then turns off. If TUNER was chosen as the source, the current frequency is shown.
Enjoying the sounds VCR 2 VCR 3 INPUT SELECTOR Adjusting the tone A Turn [BASS] to adjust bass. Turn [TREBLE] to adjust treble. Adjusting the balance B Turn [BALANCE] to adjust the left/right sound balance. TREBLE BALANCE STOP PAUSE PLAY 1 Turn [INPUT SELECTOR] to select “VCR 2” 2 Press [l VCR 2, k VCR 3] to select “FRT-VCR 3”.
The radio 23 A 1 Manual tuning A You can tune radio stations manually by selecting the station’s frequency, or you can preset up to 30 stations into channels to make tuning simpler (\ page 23). FM MODE, EON VGCA 1 1 Turn [INPUT SELECTOR] to select “TUNER”. 2 3 Press [BAND] to select “FM” or “AM”. Press [TUNING, 2, 1, PTY SELECTOR] to select the frequency of the station. “TUNED” lights when tuned. “STEREO” lights during FM stereo broadcasts.
The radio MEMORY, PTY SEARCH A C Preset tuning Choose either automatic presetting, which presets the stations the tuner can receive, or manual presetting, which allows you to select the stations to preset and the order in which they are to be preset. There are 30 channels available for presetting. Remember If a new station is preset into a channel, the old station is erased.
RDS broadcasts 12 A RDS (radio data system) is a multiplex broadcasting system where, along with FM audio signals, stations transmit other signals to help you enjoy radio more and tune into programs easier. This unit can use the following types of signals. Some stations do not have PTY, EON, and RT. ¡PS (Program service): Station name. ¡PTY (Program type): Displays the program type and is used to search for a type of program (a below).
RDS broadcasts 32 1 A A EON tuning EON puts the unit on standby to receive programs that are going to be broadcast on a station that shares RDS signals with the current station. Preset FM stations before proceeding. EON tuning does not work if the unit is not receiving EON signals (“NO EON” is displayed.) 1 2 1 Press [RDS]. While “RDS” is flashing Press [TUNING, 2, 1, PTY SELECTOR] to select the program type. RDS RDS MHz 3 While the PTY display is flashing Press [FM MODE, EON].
Other functions TAPE MONITOR A Muting the volume Press [MUTING]. The message “MUTING ON NOW” runs repeatedly from right to left across the display as long as the muting function is on. To cancel Press [MUTING]. Muting is also canceled when the unit is turned off.
Making a recording 1 A 2 Note ¡You cannot record a source connected through a digital terminal. When recording CD, DVD, or TV, ensure the source is connected through the corresponding analogue terminals ( \ pages 6, 7) and “ANALOG” input is selected (\ page 18). ¡When you select DVD 6CH INPUT mode, only sound from the front left and right channels is recorded.
Remote control Apart from the receiver, this remote control can also operate Panasonic or Technics cassette decks, CD players, MD decks, televisions, video decks and DVD players, provided they have remote control sensors. A 3 + 1 + 4 – 2 – ¡For details on operating other equipment, see the instruction manual provided with the specific unit. ¡Some models cannot be operated by this remote control. ¡Actual operations depend on your equipment and software.
Remote control Button guide VCR DVD TUNER/BAND TAPE CD 1 MD Buttons r, !4, !7 and !8 function in the same way as the controls on the main unit.
Remote control RCVR MD TV VCR DVD TUNER/BAND TAPE CD Operating the receiver Reference pages are given in parentheses.
DISC Operating a DVD/CD player or MD deck To turn the DVD player on/off DVD To display the random play screen or program play screen To turn the CD player on/off CD To clear the program To turn the MD deck on/off MD To change subtitles [5 CD changer only] To start play from a specific disc DIRECT TUNING/ DISC 1 2 4 5 DIRECT TUNING/ DISC [MEGA CD changer only] To start play from a specified disc (When selecting discs, [≥10/-/--] does not respond to touch.
Remote control TV MD TV VCR DVD TUNER/BAND TAPE CD RECEIVER TOP MENU MENU Operating a TV To turn the TV on/off TV To select the television’s input mode TV/AV CHANNEL To change channels sequentially ENTER DISPLAY RETURN SLOW /SEARCH SKIP STOP PAUSE PLAY SOUND MODE CHANNEL VOLUME MUTING SUBWOOFER HELP DIRECT TUNING/ DISC TV VOL 2 3 DVD 6CH 4 5 6 DIGITAL 7 8 9 SFC DISC ENTER/ DECK 1/2 0 ≥10/-/-- DELAY PLAY MODE SETUP CANCEL LEVEL SUB TITLE AUDIO ANGLE GROUP RE
Operating a VCR To turn the VCR on/off TAPE VCR Operating a cassette deck To turn the deck on/off CHANNEL Only when using a double cassette deck To change channels sequentially 2 3 To start play To start play While the tape is stopped 4 5 6 7 8 9 0 ≥10/-/-- PLAY To stop play PLAY While the tape is stopped To fast-forward or rewind With TPS-equipped decks, you can move to the beginning or end of a track by pressing these buttons while the tape is playing.
Remote control To change the remote control codes MD TV VCR DVD TUNER/BAND TAPE CD Change the remote control code: ¡To operate a Panasonic or Technics TV, VCR, or DVD player with a different code. ¡To operate another brand of TV, VCR, or DVD player.
INNO HIT ITT/NOKIA JVC KENDO LOEWE LOEWE OPTA LUXOR MATSUI FISHER FUNAI GOLDSTAR GOODMANS GRUNDIG HITACHI ICE 01, 29, 30, 31 07, 11, 28, 36, 37 05, 11, 12 32 28, 36 26, 41 02, 05, 10, 11, 12, 32, 38 11, 12, 32 32 11, 12 11, 12, 22, 23, 24, 25, 40 37 02, 38 11, 12 11, 12, 25, 32 28, 36 01, 09, 26, 41 21, 39 PANASONIC AKAI ALBA BAIRD BLAUPUNKT BUSH DAEWOO FERGUSON FISHER GOLDSTAR/LG GOODMANS GRUNDIG HCM HITACHI ITT ITT/NOKIA 01, 29, 30 06, 08, 16, 17, 19, 37 02, 06, 23 08, 10, 37 01, 26, 29, 30, 33 02, 09
Timer function There are two timer functions: the sleep timer and the wake timer. ¡ Sleep timer: The unit turns off after a set time. It can be set for 30, 60, or 90 minutes. ¡ Wake timer: The unit can be set to turn on a certain number of hours after it is turned off. It can be set for 5, 7, or 9 hours. 12 3 Setting the timers 1 WAKE 1 2 [Within 5 seconds] Press [TIMER, -MODE, –TIME] and release when the time you require is displayed.
A A VCR DVD TUNER/BAND TAPE CD If you make a mistake in operation or if sound output stops, the HELP function displays information that indicates how you can remedy the situation. If “ERROR” or scrolling characters (“SPEAKER OFF NOW”, for example) appear on the display, do the following. Press [HELP]. RECEIVER TOP MENU MENU The remedy for the situation is displayed. One of the source buttons (TV, VCR , DVD, MD, TUNER/BAND RECEIVER, TAPE, CD) lights to indicate the current remote control mode.
Troubleshooting guide Before requesting service, make the below checks. If you can’t fix the system as described below, or if something not listed here occurs, refer to the enclosed directory to locate an Authorized Service Center convenient to you or contact your dealer. Common problems ¡Ensure the AC mains lead is connected. No sound. ¡Turn the volume up. ¡Turn muting off. ¡Check connections to speakers and other equipment. ¡Turn on the speakers. ¡Turn off the tape monitor. ¡Select the correct source.
Specifications (DIN 45 500) ■ AMPLIFIER SECTION ■ FM TUNER SECTION Power output (at 230 V for Continental Europe) (at 240 V for the United Kingdom) DIN 1 kHz (T.H.D. 1 %) 2 x 100 W (6 Ω) 20 Hz–20 kHz continuous power output both channels driven 2 x 80 W (6 Ω) Total harmonic distortion rated power at 20 Hz–20 kHz 0.05 % (6 Ω) half power at 1 kHz 0.03 % (6 Ω) DVD 6CH power output DIN 1 kHz (T.H.D.
SUOMI WARNING: VAROITUS: TO REDUCE THE RISK OF FIRE, ELECTRIC SHOCK OR PRODUCT DAMAGE, DO NOT EXPOSE THIS APPARATUS TO RAIN, MOISTURE, DRIPPING OR SPLASHING AND THAT NO OBJECTS FILLED WITH LIQUIDS, SUCH AS VASES, SHALL BE PLACED ON THE APPARATUS. TULIPALO-, SÄHKÖISKUVAARAN TAI TUOTETTA KOHTAAVAN MUUN VAHINGON VÄHENTÄMISEKSI EI LAITETTA SAA ALTISTAA SATEELLE, KOSTEUDELLE, VESIPISAROILLE TAI ROISKEELLE, EIKÄ NESTETTÄ SISÄLTÄVIÄ ESINEITÄ, KUTEN ESIMERKIKSI MALJAKOITA, SAA ASETTAA LAITTEEN PÄÄLLE.