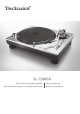
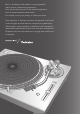
SL-1200GR Direct Drive Turntable System Platine tourne-disque à entraînement direct Owner's Manual Manuel d’utilisation
Music is borderless and timeless, touching people’s hearts across cultures and generations. Each day the discovery of a truly emotive experience from an unencountered sound awaits. Let us take you on your journey to rediscover music. Sans frontières, la musique est aussi intemporelle, touchant le coeur des gens en traversant les cultures et les générations. Tous les jours, nous attendons la révélation d’une expérience émotionnelle authentique à partir d’un son venu de nulle part.
Delivering the Ultimate Emotive Musical Experience to All At Technics we understand that the listening experience is not purely about technology but the magical and emotional relationship between people and music. We want people to experience music as it was originally intended and enable them to feel the emotional impact that enthuses and delights them. Through delivering this experience we want to support the development and enjoyment of the world’s many musical cultures. This is our philosophy.
Introduction Thank you for purchasing this product. Please read these instructions carefully before using this product, and save this manual for future use. zz About descriptions in these operating instructions - Pages to be referred to are indicated as “( 00)”. - The illustrations shown may differ from your unit. If you have any questions, visit: U.S.A.: http://shop.panasonic.com/support Canada: www.panasonic.ca/english/support Register online at http://shop.panasonic.com/support (U.S.
Table of contents IMPORTANT SAFETY INSTRUCTIONS................................... 06 Accessories.......................................................................... 09 Parts Name.......................................................................... 10 Putting the player together.................................................. 12 zz Connecting to the PHONO terminals and AC IN terminal........................................................ 12 zz Attaching the cartridge........................
IMPORTANT SAFETY INSTRUCTIONS Read these operating instructions carefully before using the unit. Follow the safety instructions on the unit and the applicable safety instructions listed below. Keep these operating instructions handy for future reference. 1 Read these instructions. 2 Keep these instructions. 3 Heed all warnings. 4 Follow all instructions. 5 Do not use this apparatus near water. 6 Clean only with dry cloth. 7 Do not block any ventilation openings.
51分 NSTRUCTIONS The following mark and symbols are located on THE FOLLOWING APPLIES ONLY IN THE U.S.A. bottom of the unit. FCC Note: TO REDUCE THE RISK OF ELECTRIC SHOCK, DO NOT REMOVE SCREWS. NO USER-SERVICEABLE PARTS INSIDE. REFER SERVICING TO QUALIFIED SERVICE PERSONNEL.
08 (08) English
Accessories In order to prevent damage during shipping some of the equipment has been disassembled. Please check and identify the supplied accessories. Turntable mat (1 pc.) (RGS0008) Dust cover (1 pc.) (TTPA0683) EP record adaptor (1 pc.) (TEKX077) Balance weight (1 pc.) (TYL0056) Auxiliary weight (1 pc.) (TKKH51441) Head shell (1 pc.) (TPBGA003) Overhang gauge (1 pc.) (RMR2210-W) Screw set for cartridge (1 set) (TTV0022) (2 pc.) Nuts (2 pc.) Screws-short (2 pc.) Screws-long (2 pc.
Parts Name Numbers such as ( 20) indicate reference pages.
Before use Back Dust cover fitting part ( 17) AC ( ) input terminal ( 16) PHONO earth terminal ( 16) PHONO output terminal ( 16) 11 English (11)
Putting the player together Connecting to the PHONO terminals and AC IN terminal Make connection to the PHONO terminals and AC IN terminal before setting up or installing the player. 1 Take out the player from the package, attach the “FRONT styrofoam” and place the player with its front side down so that you can make connection to the PHONO terminals and AC IN terminal on the back side. 2 Connect the supplied PHONO cable, PHONO earth lead, and AC power supply cord.
Attaching the cartridge 1 Attach a cartridge (store-bought) tentatively. Follow the cartridge’s instructions to correctly attach it to the head shell, and tighten the screws lightly. Adjust the overhang. Use the included overhang gauge. Fit the overhang gauge to the head shell. Head shell zz When playing SP records, use a cartridge for SP records. zz Use a commercially available mini flat screwdriver (4 mm [5/32”]). zz Be careful not to touch the stylus tip.
Putting the player together (continued) In order to prevent damage during shipping, some of the equipment has been disassembled. Put the player together in the following order. Attention zz Do not connect the AC mains lead until set up is complete. zz When fitting the turntable, prevent foreign material from getting in between the main unit and turntable. zz Do not touch or scratch the board. 3 Turntable mat Handle carefully as this is heavy.
Before fitting the turntable 1 Remove the magnet cover from the turntable. Fitting the turntable mat 3 zz There is a magnet and its cover on the back side of the turntable. Remove the magnet cover before fitting to the main unit. Magnet cover Magnet Attaching the head shell 4 Fit the head shell with the cartridge into the tone arm. Keep the head shell horizontal and tighten the locking nut. zz Be careful not to touch the stylus tip.
Connections and installation z Turn off all units and disconnect the AC power supply cord from the outlet before making any connections. z Connect the AC power supply cord only after all other connections are completed. z Be sure to connect the PHONO earth lead. Otherwise mains hum may occur. z Refer also to the instruction manual of the connected device. 1 Connect the PHONO cable and PHONO earth lead to the PHONO input terminals of the connected equipment.
Installation Install the unit on a horizontal surface protected from vibrations. Keep this unit as far as possible from speakers. Adjusting the height to make the unit horizontal Reduces the height Raise the main unit to turn the insulators and adjust the height. z Clockwise: Reduces the height. z Anti-clockwise: Increases the height. Attention z Do not turn the insulators too far. Doing so may cause them to come off or damage them.
Adjustment Horizontal balance Preparation Stylus pressure Preparation zz First, remove the dust cover. zz Remove the stylus cover, taking care not to damage the stylus, then release the arm clamp. zz Lower the cue lever. zz Turn the anti-skating control to “0”. zz First, remove the dust cover. zz Return the tone arm to the arm rest and fix it with the arm clamp. 1 1 Free the tone arm from the arm rest and adjust horizontal balance by turning the balance weight.
Anti-skating Turn the balance weight to adjust to the appropriate stylus pressure for the cartridge. 1 Turn the anti-skating control to adjust it to the same value as the stylus pressure control. Getting started zz The stylus pressure control will turn together with the balance weight. zz Turn until the center line points to the appropriate stylus pressure.
Adjustment (continued) Tone arm height Make this adjustment only if the cartridge you are using makes it necessary. Preparation Release the arm lock. Arm lock After arm height adjustment is finished, lock the tone arm by turning the arm lock knob. zz Be sure to turn the arm lock knob to the end as shown in the figure below. You may need to apply some force to do so. zz Put a record on the turntable. (Released) KATING TI-S AN Adjust the height with the armheight control ring.
Adjusting the turntable startup/ brake speed Make an adjustment according to your cartridge if necessary. Preparation 1 Check the armlift height (distance between the stylus tip and record surface). If adjustment is needed, go to step 2 . The armlift height is factory-adjusted to 8 to 13 mm (5/16” to 33/64”). Torque button L (Low) H (High) KE BRA F S L H TORQUE Press the center of the button lightly.
Playing records Preparation 1 Put a record (not included) on the turntable. 2 Take off the stylus cover and release the arm clamp. 1 2 Turn [ON/OFF] to turn the unit on. The strobe light comes on. 33-1/3 rpm is automatically selected and the indicator [33] lights. ・+6.4 ・ 3.3 0 ・- 3.3 % The turntable starts revolving. START・STOP 78 33 Press [START-STOP]. 45 33 Indicator Strobe light Attention Do not press [START-STOP] when the turntable is removed.
When play finishes Lift the cue lever, return the tone arm to the arm rest and lower the cue lever. 3 Press [RESET] to light the pitch control blue LED lamp. The unit plays at a preset pitch (33-1/3, 45 or 78 rpm) regardless of the [PITCH ADJ] position. Blue LED indicator zz Fine adjustment to pitch ( 24) The electronic brake gently stops the turntable. Turn [ON/OFF] to turn the unit off. Clamp the tone arm with the arm clamp. Put the stylus cover back on (to protect the stylus tip).
Pitch control (fine adjustment to pitch) 1 Press [RESET] to turn off the blue LED light. 2 Press the pitch range select button to select the pitch range. zz [×2] light on: ±16 % zz [×2] light off: ±8 % 3 While the turntable is revolving Slide [PITCH ADJ]. zz Pitch can be adjusted between approx. –8 % and +8 % or approx. –16 % and +16 % according to your selection. zz The numbers represent approximate percentages for your adjustment.
Maintenance Moving the unit Care of the parts Thoroughly clean dust off the stylus and record. zz Take off the head shell with the cartridge and clean the stylus using a soft brush. Brush from the base to the tip. zz Use a record cleaner to keep your records clean. Head shell terminals Wipe the head shell terminals occasionally. Wipe the head shell terminals with a soft cloth and fit the head shell to the tone arm. Repackage the unit in the packaging it came in.
Troubleshooting guide Before requesting service, make the below checks. If you are in doubt about some of the check points, or if the remedies indicated in the chart do not solve the problem, contact your dealer. No power. zz Is the AC power supply cord plugged in? ¨Plug the mains lead in firmly. ( 16) There is power but no sound. Sound is weak. zz Are connections to the amplifier/receiver’s PHONO terminals correct? ¨Connect the PHONO cables to the amplifier’s PHONO input terminals.
Specifications General Tone arm section Power supply AC 120V, 60 Hz Type Static Balance Power consumption 11 W (Power ON) 0.2 W (Power OFF) Effective length 230 mm (9-1/16“) Dimensions (W×H×D) 453 x 173 x 372 mm (17-27/32“ × 6-13/16“ × 14-21/32“) Overhang 15 mm (19/32“) Tracking error angle Mass Approx. 11.5 kg (25.
Others Others Others Limited Warranty (ONLY FOR U.S.A.) Limited Warranty (ONLY FOR U.S.A.) Limited Warranty (ONLY FOR U.S.A.) Limited Warranty (ONLY FOR U.S.A.) Limited Warranty (ONLY FOR U.S.A.) Others Limited Warranty (ONLY FOR U.S.A.) Limited Warranty (ONLY FOR U.S.A.) Others Limited Warranty (ONLY FOR U.S.A.) Limited Warranty (ONLY FOR U.S.A.) Others Limited Warranty (ONLY FOR U.S.A.
Limited Warranty (ONLY FOR CANADA) Limited Warranty (ONLY FOR CANADA) Limited Warranty (ONLY FOR CANADA) Panasonic Canada Inc. Panasonic Canada Inc. 5770 Ambler Drive, Mississauga, Ontario L4W 2T3 5770 Ambler Drive, Mississauga, Ontario L4W 2T3 Panasonic Canada Inc.
Introduction Nous vous remercions d’avoir arrêté votre choix sur cet appareil. Veuillez lire attentivement ces instructions avant d'utiliser ce produit et conservez ce manuel pour une utilisation future. zz À propos des descriptions dans ce mode d'emploi - Les pages auxquelles se reporter sont indiquées comme suit « ( 00) ». - Les illustrations présentées peuvent différer de votre tourne-disque.
Table des matières IMPORTANTES MISES EN GARDE......................................... 06 Accessoires.......................................................................... 09 Nom des pièces.................................................................... 10 Assemblage du tourne-disque.............................................. 12 zz Raccordement aux bornes PHONO et au connecteur d'entrée c.a. .................................... 12 zz Fixation de la cellule......................................
IMPORTANTES MISES EN GARDE Avant d’utiliser l’appareil, lire attentivement les instructions qui suivent. Se conformer tout particulièrement aux avertissements inscrits sur l’appareil et aux consignes de sécurité indiquées ci-dessous. Conserver le présent manuel pour consultation ultérieure. 1 Lire attentivement ces instructions. 2 Conserver ces instructions. 3 Lire toutes les mises en garde. 4 Suivre toutes les instructions. 5 Ne pas utiliser cet appareil près d’une source d’eau.
0時17分 EN GARDE La marque et le symbole suivants sont situés CE QUI SUIT NE S’APPLIQUE QU’AU CANADA. sous le fond l’appareil. CAN ICES-3(B)/NMB-3(B) Information sur la mise au rebut dans les pays n’appartenant pas à l’Union européenne RISQUE DE CHOC ÉLECTRIQUE NE PAS OUVRIR Le symbole de l’éclair dans un triangle équilatéral indique la présence d’une tension suffisamment élevée pour engendrer un risque de chocs électriques.
08 (34) Français (Canada)
Accessoires Dans le but de prévenir tout risque de dommages pendant l’expédition, le tourne-disque a été démonté. Vérifier la présence et l’état des pièces et accessoires suivants. Tapis du plateau (1 pc.) (RGS0008) Couvercle (1 pc.) (TTPA0683) Adaptateur pour 45 tours prolongé (1 pc.) (TEKX077) Contrepoids (1 pc.) (TYL0056) Contrepoids supplémentaire (1 pc.) (TKKH51441) Coquille (1 pc.) (TPBGA003) Jauge du porte-à-faux (1 pc.) (RMR2210-W) Jeu de vis pour cellule de lecture (1 jeu) (TTV0022) (2 pc.
Nom des pièces Agrafe du bras ( 18) Reposoir ( 18) Levier de positionnement du bras ( 18) Les numéros tels que ( 20) indiquent les pages de référence.
Avant toute utilisation Arrière Pièces de fixation du couvercle ( 17) Connecteur d'entrée c.a.
Assemblage du tourne-disque Raccordement aux bornes PHONO et au connecteur d'entrée c.a. Réaliser la connexion aux bornes PHONO et au connecteur d'entrée c.a. avant de configurer ou d'installer le lecteur. 1 Sortir le lecteur de l'emballage, fixer le rembourrage identifié « FRONT » et placer le lecteur côté avant vers le bas pour faciliter la connexion aux bornes PHONO et au connecteur d'entrée c.a. sur le côté arrière.
Fixation de la cellule 1 Fixer provisoirement une cellule (achetée en magasin). zz Veiller à ne pas toucher l'extrémité de la pointe de lecture. Réglage du porte-à-faux. Utiliser la jauge du porte-à-faux incluse. Fixer la jauge à la coquille. Coquille Démarrage Suivre les instructions d'installation de la cellule pour la fixer correctement à la coquille, et serrer légèrement les vis. zz Si des vis de fixation sont incluses avec la cellule, les utiliser.
Assemblage du tourne-disque (suite) Dans le but de prévenir tout risque de dommages pendant l’expédition, le tourne-disque a été démonté. Assembler le tourne-disque dans l’ordre suivant. Attention zz Ne pas brancher le cordon d’alimentation avant d’avoir terminé l’assemblage. zz Lors du montage du plateau, empêcher tout matériau étranger de pénétrer entre l'unité principale et le plateau. zz Ne pas toucher ou gratter la table. 3 Tapis du plateau Manipuler avec précaution car il est lourd.
Avant de fixer le plateau 1 Retirer le couvercle aimanté du plateau. Mise en place du tapis du plateau 3 zz L'aimant et son couvercle se trouvent à l'arrière du plateau. Retirer le couvercle aimanté avant de le fixer à l'unité principale. Couvercle aimanté Aimant Fixation de la coquille 4 Fixer la coquille avec la cartouche dans le bras de lecture. Maintenir la coquille horizontale et serrer l'écrou de blocage. zz Veiller à ne pas toucher l'extrémité de la pointe de lecture.
Raccordements et installation z Mettre tous les appareils hors marche et débrancher le cordon d'alimentation de la prise avant d'effectuer tout branchement. z Ne brancher les cordons d’alimentation qu’après avoir terminé tous les autres raccordements. z Veiller à connecter le fil de terre PHONO. Sinon des ronflements peuvent se produire. z Se reporter également au mode d'emploi de l'appareil connecté.
Installation Installer le tourne-disque sur une surface de niveau, à l’abri de toute vibration. Éloigner le tourne-disque le plus loin possible des enceintes. Réglage de la hauteur pour mettre le tourne-disque au niveau Réduit la hauteur Soulever le tourne-disque pour tourner les isolateurs et régler la hauteur. z Dans le sens des aiguilles d'une montre : Réduit la hauteur. z Dans le sens inverse des aiguilles d'une montre : Augmente la hauteur. Attention z Ne pas tourner trop loin les isolateurs.
Réglage Équilibrage horizontal Préparatifs Préparatifs zz Tout d'abord, retirer le couvercle. zz Retirer le couvercle de la pointe de lecture, en prenant bien soin de ne pas l’abîmer, puis dégager l’agrafe du bras. zz Abaisser le levier de positionnement du bras. zz Mettre la commande d’antipatinage sur « 0 ». 1 Force d’appui de la pointe de lecture Libérer le bras de lecture du reposoir et régler l'équilibre horizontal en tournant le contrepoids.
Antipatinage Tourner le contrepoids de manière à régler la force d'appui de la pointe de lecture appropriée pour la cellule. Tourner la commande antipatinage pour la régler sur la même valeur que celle de la commande de la force d'appui de la pointe de lecture. Démarrage zz La commande de la force d'appui de la pointe de lecture tourne conjointement avec le contrepoids. zz Tourner jusqu'à ce que la ligne centrale pointe vers la force d'appui de la pointe de lecture appropriée.
Réglage (suite) Hauteur du bras de lecture Ne faire ce réglage que si la cellule utilisée le rend nécessaire. Préparatifs zz Mettre un disque en place sur le plateau. Dégager le bras de son agrafe. Verrou du bras Après le réglage de la hauteur du bras, verrouiller le bras de lecture en tournant le verrou du bras. zz S'assurer de tourner le bouton de verrouillage du bras jusqu'au bout, comme indiqué sur la figure ci-dessous. Il faudra peut-être appliquer une certaine force pour y parvenir.
Procéder à un ajustement en fonction de votre cellule, si nécessaire. Préparatifs 1 Vérifier la hauteur du lève-bras (distance entre l'extrémité de la pointe de lecture et la surface du disque). Si un réglage est nécessaire, passer à l'étape 2 . La hauteur du lève-bras est réglée par défaut de 8 à 13 mm (5/16 à 33/64 po). Bouton FREIN KE BRA F S (lent) S F (Rapide) Témoin de confirmation Bouton de couple L (Bas) H (Élevé) L H TORQUE Appuyer légèrement au centre du bouton.
Lecture de disques Préparatifs 1 Mettre un disque (non inclus) en place sur le plateau. 2 Retirer le couvercle de la pointe de lecture et dégager l’agrafe. 1 2 Tourner [ON/OFF] pour mettre l'appareil en marche. Appuyer sur [START-STOP]. La rotation du plateau s’amorce. La lumière stroboscopique s'allume. 33-1/3 tours/min est automatiquement sélectionné et l’indicateur [33] s’allume. START・STOP 78 33 ・+6.4 ・ 3.3 0 ・- 3.
Après la fin de la lecture Lever le levier de positionnement du bras, 3 Appuyer sur [RESET] pour allumer la diode bleue de commande de hauteur tonale. L'appareil lit à une vitesse de rotation prédéfinie (33-1/3, 45 ou 78 tr/min) indépendamment de la position [pitch adj].
Commande de hauteur tonale (réglage précis de la vitesse de rotation) 1 Appuyer sur [RESET] pour éteindre la diode bleue. 2 Appuyer sur le sélecteur de plage de la vitesse de rotation pour choisir la plage de vitesse de rotation. zz [×2] allumé : ±16 % zz [×2] éteint : ±8 % 3 Pendant que le plateau tourne Faire glisser [PITCH ADJ]. zz La hauteur tonale peut être réglée entre environ –8 % et +8 % ou entre environ –16 % et +16 % en fonction de votre sélection.
Entretien Entretien des pièces Transport du tourne-disque Enlever toute poussière sur la pointe de lecture et sur le disque. zz Enlever la coquille avec la cellule et nettoyer la pointe de lecture à l'aide d'un pinceau doux. Brosser depuis la base jusqu’à la pointe. zz Utiliser un nettoyant pour disque pour garder vos disques propres. Remettre l’appareil dans son emballage d’origine. Conserver les matériaux d'emballage après avoir sorti les marchandises.
Guide de dépannage Avant de faire appel au service, procédez aux vérifications ci-dessous. Si vous avez un doute concernant certains des points de vérification, ou si les solutions proposées dans le tableau ne résolvent pas le problème, communiquez avec votre revendeur. Pas d’alimentation. zz Le cordon d'alimentation est-il branché? ¨Brancher le cordon en prenant soin d’introduire la fiche à fond dans la prise. ( 16) Aucun son n’est entendu. Le volume est faible.
Spécifications Divers Section bras de lecture Alimentation 120 V c.a.
ST-G30-SQT1222_mst.book 32 ページ 2016年2月22日 月曜日 午後5時52分 ST-G30-SQT1222_mst.book 32 ページ 2016年2月22日 月曜日 午後5時52分 Autres Autres Certificat de dede garantie limitée (SEULEMENT (SEULEMENT POUR LE LE CANADA) CANADA)POUR LE CANADA) Certificat garantie limitée (SEULEMENT Certificat garantie limitée POUR Autres Certificat de garantie limitée (SEULEMENT POUR LE CANADA) Panasonic Canada Inc. Panasonic Canada Inc. Panasonic Canada Inc.
Entretien 29 Français (Canada) (55)
Panasonic Corporation of North America Panasonic Canada Inc. Two Riverfront Plaza, Newark, NJ 07102-5490 http://www.panasonic.com 5770 Ambler Drive, Mississauga, Ontario, L4W 2T3 www.panasonic.