
Instruction manual


EN. 4
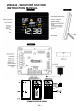
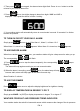
DCF SIGNAL RECEPTION AND SIGNAL INDICATOR
After your weather station is powered up, it starts to receive DCF signal. The icon flashes.
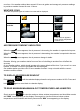
Weak or no DCF signal (only icon flashing)
Receiving strong DCF signal ( icon flashing)
Successful Reception ( icon becomes static)
Failed Reception ( icon disappear)
Remark: when your weather station is receiving the radio controlled time signal, all buttons except the
snooze / light button do not function.
DCF TIME SIGNAL RECEPTION
Your weather station will automatically update itself to the exact time after receipt of the DCF time
code. The weather station will automatically attempt to receive the DCF signal every night at 1:00 am,
2:00 am, 3:00 am, 4:00 am and onwards. If it receives DCF signal at 3:00 am it will stop receiving
until 1:00 am next day.
To start DCF reception manually, press WAVE / – (°C/°F) button for 2 seconds. To stop DCF
reception, press and hold WAVE / – (°C/°F) for 2 seconds.
TO SET YOUR WEATHER STATION MANUALLY
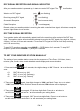
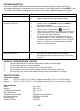
The setting of your weather station comes into the sequence of Time Zone, 12/24 hour, hours,
minutes, year, month, date, month-date/date-month display and snooze duration.
1. Press and hold for 2 seconds, time digits change to “00”. Press c / d to set the time
zone:
-01 GMT 00 hour (e.g. UK)
00 GMT +1 hour (e.g. Germany)
01 GMT +2 hour (e.g. Finland)
2. Then press again, time digits change to “24Hr“ and flash. Press c or d to select
“12 Hr” time format. When 12Hr time format is selected, PM indicator will be displayed.
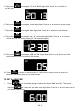
3. Then press once again, “0” the hour digits flash. Press c or d button to
set the hours. Press and hold c / d will accelerate your setting faster.
4. Then press once again, “00”” the minute digits flash. Press c or d button to
set the minutes. Press and hold c / d will accelerate your setting faster.