WT475 - INSTRUCTION MANUAL LED ALARM CLOCK WITH TEMPERATURE P.
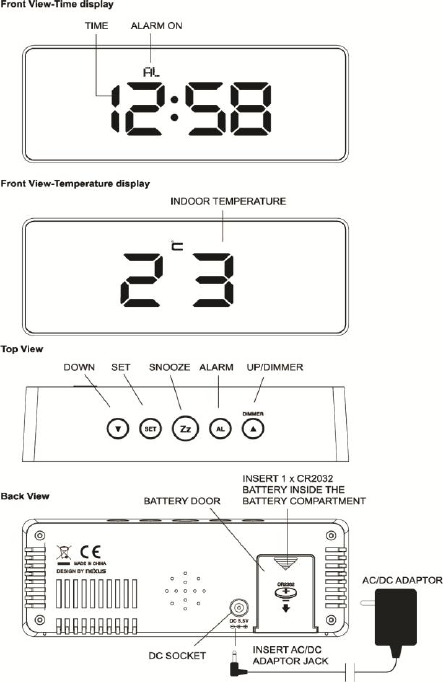
Words in the figure: Figure 1: ENGLISH Front View-Time display TIME ALARM ON Front View-Temperature display INDOOR TEMPERATURE Top View DOWN SET SNOOZE ALARM UP/DIMMER Back View BATTERY DOOR INSERT 1 x CR2032 BATTERY INSIDE THE BATTERY COMPARTMENT AC/DC ADAPTOR INSERT AC/DC ADAPTOR JACK DC SOCKET P.
QUICK SETUP Step 1 Slide open the battery cover at the back of your clock, then insert 1 x CR2032 Lithium battery to the battery compartment. Make sure +/- polarity of the battery are facing in the right directions. Then replace the battery cover. Step 2 Insert the AC/DC adaptor to any 230 AC household outlet. Then insert the DC jack to the back case of your unit. Your clock is ready to work for you. Note: The battery is for back-up only and just helps to save your settings in cases of missing power.
TO DISPLAY INDOOR TEMPERATURE Simply press SNOOZE once, the time display will change to temperature display. Press SNOOZE once to return to time display. Press and hold SNOOZE for 2 seconds, your clock gives a short beep and will display time for 10 seconds and then display temperature for 5 seconds alternately. Press and hold SNOOZE will cancel this and return to normal time display mode.