Snagit on Windows® 11 Snagit Enterprise Installation Version 11.1.
Snagit on Windows Snagit Enterprise Installation All rights reserved This manual, as well as the software described in it, is furnished under license and may be used or copied only in accordance with the terms of such license. The content of this manual is furnished for informational use only, is subject to change without notice and should not be construed as a commitment by TechSmith Corporation.
Snagit on Windows Snagit Enterprise Installation Overview of an Enterprise Installation Welcome to the Snagit Enterprise Installation Guide. This document will help you customize and deploy Snagit on a large scale. Snagit has become an indispensable utility for organizations of all types and sizes. Just like an email or word processing program, every user can benefit from Snagit’s capabilities to capture and share information.
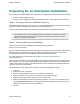
Snagit on Windows Snagit Enterprise Installation Preparing for an Enterprise Installation Before starting the enterprise installation of Snagit across your organization, you first need to do the following: 1. Create a central installation directory. 2. Create the custom installation using basic customizations and, if needed, advanced customizations. Step 1: Creating a Central Installation Directory A central installation directory on a network share (e.g.
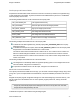
Snagit on Windows Snagit Enterprise Installation The Property and Feature Tables Properties are associated with values that the user can enter in text boxes (for instance, the registration key) or with checkboxes in the installer. In general, checkboxes are enabled when they are set to 1 and disabled when the property does not exist. The following installer behaviors can be customized in the Property table: TSC_SOFTWARE_KEY The registered software key.
Snagit on Windows Snagit Enterprise Installation 1. First make any desired changes in an installation of Snagit. For example, you may wish to create custom capture profiles to be used throughout your organization. 2. From the File menu, choose Exit to close Snagit completely. It is important that you completely exit both Snagit and the Snagit Editor or your settings are not saved properly. Make sure Snagit has not been minimized to the system tray. 3.
Snagit on Windows Snagit Enterprise Installation To disable prompting for Snagit Printer installation: Set NoPrinterInstallationSupport to dword:00000001 To disable automatic update prompting and checking for new versions: Set NoAutoUpdateSupport to dword:00000001 To disable “Register Snagit” online dialog: Set NoRegistrationDialogSupport to dword:00000001 www.techsmith.
Snagit on Windows Snagit Enterprise Installation Installation You can complete enterprise installation of Snagit across your organization using one of the following procedures: A managed installation across the organization (recommended method). Manual installations on each machine in the organization. When upgrading from 9.0.0 to 9.x.x or higher, a dialog prompts users to keep or delete their existing Library files. If the user is not available to make the choice, the installation fails.
Snagit on Windows Snagit Enterprise Installation 1. Place the installer, the Snagit.reg file (if needed), and the transform in the same directory on the central file share. The installer searches for a file named Snagit.reg in the same directory as the original .MSI file and, if present, automatically installs it into the main Snagit installation directory. 2. The package and customizations can now be installed manually on the client machines using msiexec. 3. Any transforms (.