4-Cycle Engine OPERATOR’S MANUAL Horizontal Crankshaft • Air-Cooled LH195SA/LH195SP (HSSK40-55) LH318SA/LH358SA (HMSK80-110) OH195SA/OH195SP (OHSK50-75) OH318SA/OH358SA (OHSK80-130) For your convenience, enter your engine model, spec and DOM numbers here. ENGINE MODEL: SPEC: DOM: Visit our website at www.TecumsehPower.
Table of Contents Safety Definitions ..............................................................................ii General Safety Precautions ............................................................. 1 How to Get Service .......................................................................... 3 Oil and Fuel Specifications............................................................... 4 Before Starting Your Engine............................................................. 4 Starting Your Engine ..
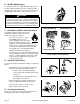
I. General Safety Precautions • NEVER fill fuel tank indoors. Fill fuel tank outdoors in a well-ventilated area. • DO NOT smoke while refueling tank. ! WARNING Read equipment manufacturer’s manual and this material thoroughly before using this engine. Failure to do so can result in serious injury or death. Consult your local Authorized TecumsehPower Servicing Dealer, call 1-800-558-5402, or go to www.TecumsehPower.com for additional information. A.
E. DO NOT Modify Engine To avoid serious injury or death, DO NOT modify engine in any way. Tampering with the governor setting can lead to a runaway engine and cause it to operate at unsafe speeds. NEVER tamper with factory setting of engine governor. ! WARNING Use of this engine on fun-carts, go-karts, or mini-bikes can result in serious injury or death. TecumsehPower Company manufactures the Power Sport line of engines for use in such applications.
II. How to Get Service 2083 For engine adjustments, repairs or warranty service NOT covered in this manual, contact your nearest Authorized TecumsehPower Servicing Dealer. Find them on our website at www.TecumsehPower.com or call TecumsehPower Company at 1-800-558-5402 for additional information. Visit our web site at TECUMSEHPOWER COMPANY THIS ENGINE MEETS 1995-2005 CALIF & US EPA PHI APPLICABLE EMISSION REGULATIONS FOR SI SORE ENGINES EM LV195EA 361540D 4TPXS.1951BB www.TecumsehPower.
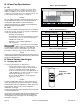
III. Oil and Fuel Specifications Table 1. Recommended Oil A. Oil To operate your engine you need to use a clean, high quality, detergent oil. For recommended engine oil, see Table 1. In addition, you need to be sure the oil sump contains the correct amount of oil to operate properly. For recommended oil sump capacity, see Table 2. NOTES Be sure original container is marked A.P.I. Service “SL/SJ”. Using multigrade oil above 32°F (0°C) will increase oil consumption. SAE 10W40 is NOT recommended.
B. Filling Oil Sump I. Oil Fill Cap/Dipstick OH318SA/OH358SA OH195SA/OH195SP LH195SA/LH195SP LH318SA/LH358SA If your engine has an oil fill cap/dipstick go to step 1. If your engine does NOT have an oil fill cap/dipstick, see "II. Oil Fill Cap/Plug" instructions below. 1. Be sure engine is upright and level. 2. Unscrew oil fill cap/dipstick from oil filler tube and wipe dipstick clean. See Figures 8 and 9. 3. Screw oil fill cap/dipstick back into oil filler tube. Tighten securely. 4.
C. Check the Following Items NOTE Be sure equipment is in neutral before attempting to start (see equipment manufacturer’s instructions). 1. Be sure ignition switch on engine or equipment is in “ON”, “RUN” or “START” position. See Figures 10, 11 and 12. Or Figure 10. Ignition Key Insert ignition key, if present (see equipment manufacturer’s instructions) into ignition key slot in carburetor cover. DO NOT turn ignition key. Be sure ignition key snaps into place. See Figures 10 and 11. 2.
6 7 9 8 6 8 7 9 10 12 10 5 5 13 12 4 13 3 2 3 1 1 4 2 OH318SA/OH358SA 6 8 OH195SA/OH195SP 6 9 7 8 7 10 9 10 11 11 12 5 5 12 3 4 13 3 4 13 1 1 2 2 LH195SA/LH195SP LH318SA/LH358SA Figure 14.
E. Filling Fuel Tank An adult should fuel this engine. NEVER allow children to refuel this engine. Gasoline (fuel) vapors are highly flammable and can explode. Fuel vapors can spread and be ignited by a spark or flame many feet away from engine. To prevent injury or death from fuel fires, follow these instructions: Front View 1. Stop engine and allow it to cool before refueling. Bottom View WARNING 2. Be sure engine is outdoors and in a well-ventilated area. 3.
V. Starting Your Engine To avoid serious injury or death, an adult should start this engine. Only allow children to start engine if an adult has determined they are experienced and capable of such operation. WARNING If you are unable to start this engine after following instructions in this manual, contact your Authorized TecumsehPower Servicing Dealer. To avoid serious burn injuries or damage to your engine, DO NOT attempt to start or troubleshoot this engine in any other way.
A. Engines with Electric Starters If you have a recoil starter, see “B. Engines with Recoil Starters” instructions on page 13. Fuel Tank Some electric starters are equipped with a 120V AC Three-Wire Power Cord and Plug designed to operate on a 120V AC household current. It must be properly grounded at all times to avoid the possibility of injury or death from electrical shock. WARNING Turn Valve Clockwise To “OFF” Position Fuel Valve “OPEN” Position Shown a.
5. Move engine speed control to “FAST” position. See Figures 21 and 22. 6. Set choke control to “FULL CHOKE” position (see equipment manufacturer’s instructions). See Figure 24 on page 12. Afterward, continue reading instructions below. STOP STOP 7. Hold the primer bulb in for one full second each time you press it. See Figure 23. SLOW RUN FAST CHOKE PRIMER Figure 21. Typical Engine Symbols • Make sure you cover vent hole with your thumb. • Repeat twice for a total of three primes.
1 LH195SA/LH195SP 2 3 1 2 STOP STOP 3 STOP STOP OH318SA/OH358SA STOP STOP 1 2 P STO 3 STOP OH195SA/OH195SP 1 STO P STOP STOP 2 STO 3 P STOP STOP STOP LH318SA/LH358SA 1. “NO CHOKE” Position 2. “1/2 CHOKE” Position 3. “FULL CHOKE” Position Figure 24.
B. Engines with Recoil Starters If you have an electric starter, see “A. Engines with Electric Starters” instructions on page 10. CAUTION Fuel Tank DO NOT pull starter rope with engine running. Doing so may VOID YOUR Turn Valve Clockwise To “OFF” Position WARRANTY. 1. To avoid carbon monoxide poisoning, be sure engine is outdoors in a well-ventilated area. Fuel Valve “OPEN” Position Shown 2. Be sure fuel valve, if present (see equipment manufacturer’s instructions) is open and all switches are on.
When pulling starter rope, the rope can unexpectedly jerk back toward engine causing serious injury. To avoid this risk, carefully follow these instructions: WARNING 7. Grasp starter cord handle. See Figure 29. a. Pull rope out slowly until you feel drag. b. Without allowing the rope to retract, continue pulling rope with one rapid full arm stroke. c. Return rope slowly to original position. NOTES Following the instructions listed in the steps above avoids potential damage to the recoil mechanism.
VI. Stopping Your Engine and Short-Term Storage Stop engine according to equipment manufacturer’s instructions. To avoid unsupervised operation of an engine, especially by children, NEVER leave it unattended when it is running. Always turn off the engine after use and remove ignition key, if provided. Failure to do so may lead to serious injury or death. WARNING Figure 30.
B. After Engine is Stopped To prevent possible freeze-up of engine controls, follow instructions with engine STOPPED, listed below. CAUTION 5 1. Wipe all snow and moisture from engine control lever and choke areas. 4 2. Move equipment control, if present (see manufacturer’s instructions), engine control lever or ignition switch back and forth several times and leave control in “STOP” or “OFF” position. See Figure 33. 3 3.
VII. Maintenance To avoid serious injury or death, an adult should perform maintenance on this engine. Only allow children to perform maintenance if an adult has determined they are experienced and capable of such operation. WARNING WARNING To prevent accidental starting when working on equipment, always: • Carefully disconnect spark plug wire and keep it away from spark plug. See Figures 35 and 36. • Keep the disconnected spark plug wire securely away from metal parts where arcing could occur.
I. Oil Fill Cap/Dipstick If your engine has an oil fill cap/dipstick go to step 1. If your engine does NOT have an oil fill cap/dipstick, see "II. Oil Fill Cap/Plug" instructions on page 20. 1. Carefully disconnect spark plug wire and keep it away from spark plug. See Figures 38 and 39. See “G. Avoid Accidental Starts” instructions on page 2. Afterward, continue reading instructions below. • Keep the disconnected spark plug wire securely away from metal parts where arcing could occur. Figure 38.
5. Place approved recyclable oil container under oil drain plug, if present. See Figure 41 on page 18. Afterward, continue reading instructions below. OH318SA/OH358SA OH195SA/OH195SP LH195SA/LH195SP LH318SA/LH358SA 6. Remove oil drain plug, if present. 7. Tip engine to position the oil flow, so it will drain from the lowest point on the engine (see equipment manufacturer’s instructions). 8. Drain oil into an approved recyclable oil container.
II. Oil Fill Cap/Plug If your engine does NOT have an oil fill cap/dipstick, go to step 1. If your engine has an oil fill cap/dipstick, see "I. Oil Fill Cap/Dipstick" instructions on page 18. Figure 44. Disconnecting/Connecting Spark Plug 1. Carefully disconnect spark plug wire and keep it away from spark plug. See Figures 44 and 45. See "G. Avoid Accidental Starts" instructions on page 2. Afterward, continue reading instructions below.
5. Place approved recyclable oil container under oil drain plug. See Figures 47 and 48 starting on page 20. Afterward, continue reading instructions below. 6. Tip engine to position the oil drain plug at the lowest point on the engine (see equipment manufacturer’s instructions). 1 2 7. Remove oil drain plug and drain oil into an approved recyclable oil container. NOTE Used oil must be disposed of at a proper collection center. 8. Install oil drain plug and tighten securely. See Figure 48. 1.
D. Carburetor VIII. Transporting Your Engine If you think your carburetor needs adjusting, see your nearest Authorized TecumsehPower Servicing Dealer. Engine performance should not be affected at altitudes up to 7,000 feet (2,134 meters). For operation at higher elevations, contact an Authorized TecumsehPower Servicing Dealer. NEVER transport this engine inside another vehicle or in any enclosed space if there is any gasoline in the tank.
1 5 2 1 5 2 4 3 4 3 OH318SA/OH358SA 5 1 OH195SA/OH195SP 5 2 4 1 4 3 3 LH195SA/LH195SP 1. 2. 3. 4. 5. 2 LH318SA/LH358SA Oil Fill Cap/Dipstick Fuel Fill Cap Areas Recoil Starter/Flywheel Guard Areas Linkage Areas Spark Plug Connection Figure 52.
IX. Storing Your Engine III. Fuel System A. Short-Term/Seasonal Storage To avoid stale gas and carburetor problems, treat the fuel system in the following method below: I. NOTES TecumsehPower Company recommends using ULTRA-FRESH™ Gasoline Stabilizer as an acceptable method of minimizing formation of fuel gum deposits during storage. This product is available from your Authorized TecumsehPower Servicing Dealer. Clean Engine Before servicing the engine remove the carburetor cover and/or blower housing.
II. Oil Cylinder Bore When lubricating cylinder bore, fuel may spray from spark plug hole. To prevent serious injury from fuel fires, follow these instructions: CAUTION 1. Carefully disconnect spark plug wire and keep it away from spark plug. See Figures 53 and 54. • Keep the disconnected spark plug wire securely away from metal parts where arcing could occur. • Carefully attach the spark plug wire to the grounding post, if provided.
X. Preventing Forest, Brush and Grass Fires Local, state and federal laws may require use of a spark arrester to prevent fires. For example, it is a violation of California Public Resources Code (section 4442) to use or operate engine on any forest-covered, brush-covered or unimproved grass-covered land unless engine is equipped with a spark arrester. Spark arrester must be maintained in effective working order by owner and/or operator.
Every 100 Hours or Seasonally Every 5 Hours or Before Each Use 1. Check Spark Plug 1. Check Oil Level 2.
CALIFORNIA & US EPA EMISSION CONTROL WARRANTY STATEMENT The U. S. Environmental Protection Agency (“EPA”), the California Air Resources Board (“CARB”) and TecumsehPower Company are pleased to explain the Federal and California Emission Control Systems Warranty on your new small off-road engine. In California, new 1995 and later small off-road engines must be designed, built and equipped to meet the State’s stringent anti-smog standards.
EMISSION CONTROL SYSTEM WARRANTY Emission Control System Warranty (“ECS Warranty”) for 1995 and later model year California small off-road engines (for other states, 1997 and later model year engines): A. APPLICABILITY: This warranty shall apply to 1995 and later model year California small off-road engines (for other states, 1997 and later model year engines).
XII.