User Manual Phaser® 560 Color Laser Printer First printing February 1998 070-9698-01
Copyright © Tektronix, Inc. Printed in the United States of America. Unpublished rights reserved under the copyright laws of the United States. Contents of this publication may not be reproduced in any form without permission of Tektronix, Inc. This instrument, in whole or in part, may be protected by one or more U.S. or foreign patents or patent applications. Information provided upon request from Tektronix, Inc., P.O. Box 1000, Wilsonville, Oregon 97070-1000.
Phaser® 560 Color Laser Printer Warranty Tektronix warrants that the Phaser 560 Color Laser Printer will be free from defects in materials and workmanship for a period of one (1) year from the date of shipment and that Customer-Replaceable Components (CRCs)* in this product will be free from defects in materials and workmanship for a period of ninety (90) days from the date of shipment or six months where longer periods are required by law.
Users safety summary Terms in manual: CAUTION WARNING Conditions that can result in damage to the product. Conditions that can result in personal injury or loss of life. Power source: Do not apply more than 250 volts RMS between the supply conductors or between either supply conductor or ground. Use only the specified power cord and connector. Refer to a qualified service technician for changes to the cord or connector.
This product is certified under IEC 825 as a Class 1 Laser Product: WARNING: For your protection, do not defeat any interlocks. CAUTION: This product utilizes a laser. Use of control or adjustments or performance of procedures other than those specified herein may result in hazardous radiation exposure. Do not open covers and do not repair yourself. Refer servicing to qualified personnel. When you operate this equipment, the socket outlet should be near the equipment and be easily accessible.
FOR USERS IN NORWAY VARNING! OM APPARATEN ANVANDS PÅ ANNAT SÄTT ÄN I DENNA BRUKSANVISNING SPECIFICERATS, KAN ANVÄNDAREN UTSÄTTAS FOR OSYNLIG LASERSTRÅLING, SOM ÖVERSKRIDER GRÄNSEN FOR LASERKLASS 1. Tekniska specifikationer för lasern Uteffekt: 5 mW max. Våglångd: 780 nm Effektgrad för stråining:Kontinuerlig KLASS 1 LASER APPARAT Apparaten skall anslutas till jordat uttag när den ansluts till ett Nätverk.
Contents 1 Introduction 2 Getting Set Up At a glance 2-1 Setting up the printer 2-2 What you get with your printer 2-2 Registering your printer 2-5 Removing the packing material 2-6 Installing the optional Lower Tray Assembly 2-7 Installing the toner cartridges 2-8 Preparing the imaging unit 2-10 Setting up the output tray 2-11 Insert the Quick Reference Guide 2-11 Adding paper or transparencies 2-12 Connecting the printer 2-18 Printer ports 2-18 Turning on the printer 2-20 Selecting a language for the f
4 Printing Basics Printing from a PC 4-1 Using the AdobePS 4 driver with Windows 95 4-4 Using the Windows NT 4.0 PostScript driver 4-6 Using the Windows NT 3.5 and 3.51 PostScript driver 4-8 Using the Tektronix printer driver for Windows 3.1 4-9 Using the Adobe PostScript driver for Windows 3.
5 Printing: Beyond the Basics Special printing features 5-2 Controlling color density 5-2 Using the Quick Collate option 5-8 Previewing with Check Print 5-11 Image Smoothing 5-14 Automatic tray switching 5-14 Getting job information 5-15 Working with color 5-16 Color corrections — making the best selection 5-17 Deciding which color correction to use 5-18 Color correction descriptions 5-20 Special considerations 5-24 Printing and using the color sampler charts 5-25 6 Caring for Your Printer Overview 6-1 U
7 Troubleshooting If you need help 7-1 Receiving email update notices 7-2 Using the automated fax systems 7-3 Symptoms and solutions 7-4 Diagnostic tools 7-4 Maintaining print quality 7-6 Printing hints 7-21 Improving print speed 7-22 PostScript printing errors 7-26 Printed colors are not what you expected 7-29 Selecting page sizes in Windows applications 7-33 Fonts printing incorrectly from Windows 7-35 Sharing the printer on a network 7-36 Startup page prints even though it is disabled 7-37 Media hints a
9 Supplies, Accessories, and Expanding Your Printing System Tektronix Printer and Tektronix supplies: Made For Each Other® 9-1 Customizing your printer 9-1 Supplies and accessories 9-2 Interface cables and adapters 9-4 Expanding your printing system 9-5 Upgrade kits 9-5 Extended Features upgrade 9-6 Memory upgrade 9-7 PhaserShare network cards 9-8 Phaser Copystation accessory 9-9 Lower Tray Assembly 9-9 PhaserPrint for UNIX 9-10 SCSI hard disk 9-10 10 Regulatory Information and Specifications Canadian EM
Chapter 1 Introduction Features The Phaser® 560 Color Laser Printer provides fast, high-quality color printing on plain paper and specialty media, plus the ease of operation and high performance you expect from a color laser printer. Some of its features include: Feature Description High quality Crisp 600 dots-per-inch (dpi) printing with high-definition screening produces bright colors and clean text suited for nearly any application.
1 Introduction Feature Description Job Collation feature * Generates multiple copies of a multiple-page job in collated order. Check Print capability * Allows you to preview a large print job before running the entire job. Phaser Copystation † This optional accessory enables your printer to be used as a color copier.
1 Introduction Feature Description Easy to connect Bi-directional parallel port with plug-and-play support; PhaserShare™ cards provide optional network interfaces for Ethernet (Novell NetWare, EtherTalk, and TCP/IP), Token Ring (Novell NetWare, TokenTalk, and TCP/IP), as well as LocalTalk (LocalTalk and RS-232).
1 Introduction Information roadmap Phaser 560 Color Laser Printer User Manual Includes information on setting up, using, and caring for the printer: U M se r an ua l ■ ■ ■ 9698-105 ■ ■ Hardware and software set up Selecting print features Caring for your printer (when and how to replace consumables; cleaning) Troubleshooting Upgrade and ordering information Quick Reference Guide D en s ity ■ ■ C ol or Q u ic P kR h as ef er er 56 en 0 ce R S am pl es Designed for handy access to the informatio
1 Introduction CD-ROM A Se uth rv or ic iz F e ed o Su S W rM pp er co ind ac or vic m o in t e pu ws to C P D ro N te ba sh -R v e rs. se a N tsc O ide d nd a M r an vig ap e d a A to do r be v2.
Chapter 2 Getting Set Up At a glance Installation of your printer involves these tasks: 1. Setting up the printer Putting all the pieces together: unpacking the printer and accessories, installing the optional Lower Tray Assembly or the optional Phaser Copystation, loading the media tray(s), and installing the toner cartridges. 2. Connecting power and interface cables 3. Selecting a language for the front panel 4.
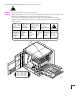
2 Getting Set Up Setting up the printer What you get with your printer The printer and its accessories are shipped in a single box. If you ordered an optional Lower Tray Assembly or Phaser Copystation, each is shipped separately. The following items are shipped with the printer: 1. Quick-Start Installation Instructions 2. Phaser 560 Color Laser Printer User Manual 3. Phaser 560 printer CD-ROM and diskettes 4. Registration card and license agreement 5.
re ha rS se ha P 8 10 Su pp l ie s 7 a 5 M M ed e ia di 4 Sa lo m rD pl e es ns it y 2 U M ser an ua l Q In uic st kal S la ta ti rt on 1 Q R u ic ef k er en ce C o R L egi A ice str gr ns at ee e i o n m en t Getting Set Up User Manual 2 3 6 9 11 9698-02 2-3
2 Getting Set Up Optional accessories 1. Lower Tray Assembly, PAPER tray and TRANSPARENCY tray 2. Phaser Copystation 3.
2 Getting Set Up Registering your printer By registering your printer with Tektronix, you are validating the product warranty and ensuring that you will be sent information about upgrades, service, and accessories as it becomes available. Register your printer using one of these methods: tr at io n At power-up, the printer automatically produces a Registration Page (if Letter-size paper is loaded and the printer’s page count is 6, 7, or 8). is 1.
2 Getting Set Up Removing the packing material 1. Remove the plastic bag from the printer. 2. Remove any adhesive tape that holds the printer’s doors shut. Note 2-6 Save all packing material in case moving or subsequent shipment is necessary.
2 Getting Set Up Installing the optional Lower Tray Assembly An optional Lower Tray Assembly is available with the printer; it provides two additional media trays (in addition to the standard media tray and the multi-purpose feeder). Follow these steps to install the Lower Tray Assembly. Warning The printer weighs about 43 kg. (94 lbs.) and the Lower Tray Assembly weighs about 14 kg (31 lbs.). Observe standard precautions for lifting heavy objects.
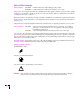
2 Getting Set Up Installing the toner cartridges Note 1. The toner cartridges that are shipped with the printer are starter cartridges. They are installed the same as High-Capacity cartridges; the only difference is that starter cartridges have less toner. Remove each toner cartridge from its packaging. Note 2. Instructions for loading each toner cartridge are the same except for the slot into which you insert each cartridge. Remove the shipping cover from each cartridge. 9698-05 3.
Getting Set Up 4. 2 Insert each toner cartridge in the slot labeled for its color. Bla ck n a Cy nta Cy an Ma ge nta ge Ma w llo Ye 9698-06 From top to bottom, the order of the color toner cartridges is Black, Cyan, Magenta, Yellow.
2 Getting Set Up Preparing the imaging unit Before operating the printer, you must perform these steps to prepare the imaging unit for printing: 1. Open the printer’s front door. 9698-08 2. Turn the upper lever 90˚ clockwise to align the lever’s triangle with the triangle on the surface of the imaging unit. 9698-09 3. 2-10 Close the printer’s front door.
Getting Set Up 2 Setting up the output tray Remove the adhesive tape that holds the output tray against the printer; gently lower it to its operating position. 9698-10 Insert the Quick Reference Guide Remove the Phaser 560 Color Laser Printer Quick Reference Guide from the accessories box and insert it into the document holder on the side of the printer.
2 Getting Set Up Adding paper or transparencies The printer is shipped with a PAPER tray (either A/Letter-size or A4-size) installed. Remove the PAPER tray 1. Pull the tray out of the printer’s right side. r pe Pa A4 9698-11 2. 2-12 Remove all the packaging materials from inside the tray; refer to the instruction sheet attached to the tray.
Getting Set Up 2 Types and sizes of media trays The printer uses five unique media trays, as well as the multi-purpose feeder for any media type: Tray Media Type Size A/Letter Paper standard A/Letter Transparency optional A4 Paper optional A4 Transparency optional Legal Paper optional 8.5 x 11 in. 210 x 297 mm 8.5 x 14 in. 216 x 356 mm Multi-Purpose Feeder Paper Transparency standard 3.5 x 10 in. to 8.5 x 14 in. 8.5 x 11 in. 210 x 297 mm Specialty media 3.5 x 10 in. to 8.5 x 14 in.
2 Getting Set Up Loading media If you ordered additional media trays, or if you ordered a Lower Tray Assembly (which includes a TRANSPARENCY tray and PAPER tray), each tray arrives in its own shipping box. Unpack each tray from its box and remove all packaging material from inside the tray(s); refer to the instruction sheet inside each tray. Follow these steps to load media in any of the trays.
Getting Set Up 2. 2 Fan the paper or transparencies, but be careful not to leave fingerprints, which can result in a smudged print. 9014-36 3. Place paper or transparencies in the tray under the hooks. 4. If loading transparencies, load them so that the notched corner (4) is placed closest to the media level label (5). Refer to “Loading transparencies” on page 4-38 for more details. 5. You can load approximately 250 sheets of paper or 100 sheets of transparency film.
2 Getting Set Up 6. If you have a single media tray Slide the PAPER tray completely into the slot.
Getting Set Up 2 If you have a Lower Tray Assembly Install a media tray into each of the three slots. Note A PAPER tray can be installed in any of the three tray slots (A, B, and C); however, for best results, the TRANSPARENCY tray should only be inserted in the upper (A) and middle (B) tray slots.
2 Getting Set Up Connecting the printer Printer ports The printer is shipped with a SCSI port and parallel port on the printer’s rear panel. Additionally, the printer can support one optional PhaserShare™ network card. All ports and network protocols are simultaneously active. The printer accepts print jobs on a first-come, first-served basis. Note See “Printer interface cables and adapters” on page 9-4 about ordering cables for connecting the printer.
Getting Set Up 2. 2 Parallel (standard) The printer supports a standard (uni-directional) parallel port. The port can also be set for bi-directional communications using downloadable utility files, available on the printer’s CD-ROM, diskettes, or from the Tektronix World Wide Web site (http://www.tek.com/Color_Printers/ ).
2 Getting Set Up 3 Turning on the printer After you have connected all the interface cables, you are ready to connect the power cord and turn on the printer. Caution To protect your printer from a power surge, make sure that the power switch on the printer is in the off position before plugging in the cord. 1 1. Plug the power cord into the printer and into a grounded outlet. 2. Turn on the power to any peripherals you have connected (i.e., a SCSI disk or Phaser Copystation). 3.
Getting Set Up 2 What happens at power-up ■ Both status indicators (power and error ) on the printer’s front panel light briefly. Messages appear in the Liquid Crystal Display panel (LCD). The printer goes through a series of self-tests. The printer takes about 3 minutes to warm up and complete the self-tests (depending on the amount of memory installed).
2 Getting Set Up Selecting a language for the front panel By default, the front panel is set to display messages in English. If the Kanji font SIMM is installed, front panel messages display, by default, in Japanese. Use the printer’s front panel to change the default to any of these languages: Spanish, French, German, Italian, English, or Japanese. 1. When the printer is on and the Ready message appears, press the Menu button.
Getting Set Up 2 Making a demonstration print You can print a Demonstration Page to check that your printer is set up and operating correctly. 1. When the printer is on and the Ready message appears, press the Menu button. You see this message: Help Pages <-----> 2. Menu Press the Menu button. You see this message: Consumables Page <-----> Print 3. Using the left (<--) or right (---> ) arrow buttons, scroll through the selections until you see this message: Demonstration Page <-----> Print 4.
2 Getting Set Up Setting the Energy Star Timeout When the printer is idle for a predetermined amount of time, it enters Energy Star mode, which reduces the power consumption and displays Standby on the printer’s front panel. The printer resumes normal power when it receives a signal, either from the front panel or a file being sent. By default, the Energy Star mode is enabled and its timeout is set to 1 hour. For normal office environments, it is recommended that you set the timeout to 3 hours.
Chapter 3 Installing Printer Software Packaged with your printer are a CD-ROM and a set of diskettes that contain the software you need to use the printer. Included are automatic installer applications, drivers, printer description files (PPDs), color sampler charts, utility files, and user documentation. ■ For PC platforms, turn to page 3-1. ■ For Macintosh platforms, turn to page 3-16. ■ For workstations, turn to page 3-22.
3 Installing Printer Software Installing printer software for Windows 95 Note If you are installing from floppy diskettes, you may need more than one diskette depending on your Windows system. Keep all of the printer’s diskettes handy during the installation, and insert each diskette when you are prompted by the installation program. 1. Insert either the printer’s CD-ROM or the Windows Disk 1 into the appropriate drive on your computer. 2. Click the Start icon in the taskbar, and select Run. 3.
3 Installing Printer Software 6. The Finish Installation dialog box contains instructions for completing the printer software setup; click Next. The Add Printer Wizard program is automatically launched. 7. In the Add Printer Wizard, click Next in the opening dialog box. 8. Select your printer’s connection, either Local Printer or Network Printer, and click Next. 9. In the Manufacturers/Printers dialog box, click Have Disk. 10. Type in the drive for the CD-ROM or diskette, and click OK. 11.
3 Installing Printer Software Installing printer software for Windows NT 4.0 Note If you are installing from floppy diskettes, you may need more than one diskette depending on your Windows system. Keep all of the printer’s diskettes handy during the installation, and insert each diskette when you are prompted by the installation program. 1. Insert either the printer’s CD-ROM or the Windows Disk 1 into the appropriate drive on your computer. 2. Click the Start icon in the taskbar, and select Run. 3.
3 Installing Printer Software 6. The Finish Installation dialog box contains instructions for completing the printer software setup; click Next. The Add Printer Wizard program is automatically launched. 7. In the Add Printer Wizard, click Next in the opening dialog box. 8. Select printer management, either My computer or Network printer server, and click Next. 9. Select the port your printer is connected to, and click Next. 10. In the Manufacturers/Printers dialog box, click Have Disk. 11.
3 Installing Printer Software Installing printer software for Windows NT 3.51 Note If you are installing from floppy diskettes, you may need more than one diskette depending on your Windows system. Keep all of the printer’s diskettes handy during the installation, and insert each diskette when you are prompted by the installation program. 1. Insert either the printer’s CD-ROM or the Windows Disk 1 into the appropriate drive on your computer. 2. Select Run from the File menu. 3.
3 Installing Printer Software 6. The Finish Installation dialog box contains instructions for completing the printer software setup; click Next. The Print Manager opens automatically. 7. From the Printer menu select Create Printer. 8. In the Create Printer dialog box, under Driver, select Other. 9. Type in the drive for the printer’s CD-ROM or diskette, click OK. 10.
3 Installing Printer Software Installing printer software for Windows 3.1 Note If you are installing from floppy diskettes, you may need more than one diskette depending on your Windows system. Keep all of the printer’s diskettes handy during the installation, and insert each diskette when you are prompted by the installation program. The Tektronix driver is available on both CD-ROM and diskette; the AdobePS3 driver is available on CD-ROM only. 1.
3 Installing Printer Software Custom Installation 1. In the Driver Installation dialog box, select from the following options: ■ Drivers/PPDs (installs driver files and printer description files) ■ QuarkXPress PDF (installs an application-specific printer description file) 2. Click Next. 3. If you selected Drivers/PPDs in the previous window, the Custom Install: Select Drivers dialog box appears. Select one of the following drivers and click Next: ■ Adobe Printer Driver for Windows 3.
3 Installing Printer Software Tektronix Driver for Windows 3.1: Setup instructions If you selected Easy Installation, or if you selected the Tektronix Driver for Windows 3.1 in the Custom Installation, continue with the following instructions: 1. Open the Windows Control Panel. 2. Open the Printers dialog box. 3.
Installing Printer Software 3 AdobePS 3 Driver for Windows 3.1: Setup instructions If you selected the AdobePS 3 Driver for Windows 3.1 in the Custom Installation, continue with the following instructions: 1. In the Adobe installer, click Read or Skip in the README.WRI dialog box to start the installation. 2. Click Continue in the PostScript Printer Driver Setup dialog box. Files are copied to your computer. 3. Click the Restart Windows button in the dialog box that appears. 4.
3 Installing Printer Software Setting up the printer on a network (Windows NT 3.5 and 3.51) TCP/IP connection Note Windows NT 3.5 and 3.51 include network software called Services for Macintosh (AppleTalk) and TCP/IP print services (for TCP/IP; lpr print services). Refer to your Windows NT manual for instructions on installing this network software. After this software is loaded, follow these steps: 1. Select Create a new printer in the Print Manager; select the appropriate printer driver. 2.
Installing Printer Software 3 AppleTalk connection Note Windows NT 3.5 and 3.51 include network software called Services for Macintosh (AppleTalk) and TCP/IP print services (for TCP/IP; lpr print services). Refer to your Windows NT manual for instructions on installing this network software. After this software is loaded, follow these steps: 1. Select Create a new printer in the Print Manager; select the appropriate printer driver. 2.
3 Installing Printer Software Setting up the printer on a network (Windows NT 4.0) To add or update the driver on a Windows NT 4.0 Server or Workstation Note You will need the printer’s IP address for this procedure; it may be available on the printer’s Configuration Page. If not, ask your network administrator. 1. Log-in as Administrator or a user with administrator access privileges. 2. Click on the Start button. Select Settings, then select Printer from the submenu. 3.
Installing Printer Software 7. In the box marked Name of printer or print queue on that server, enter PS (for PostScript) in uppercase, then click OK. 8. Click Close in the Printer Ports box. 9. In the Add Printer Wizard dialog box, click the box next to this new port; then click Next. 3 10. In the Add Printer Wizard dialog box, click Have Disk to add a new Tektronix driver. 11. Type in the path name (CD-ROM or diskette) to the driver files, then click OK. 12.
3 Installing Printer Software Macintosh software Overview for Mac™OS platforms These are the basic steps and information necessary for software installation. Make a note of this information and refer to it during the on-screen installation procedure. 1. What is your printer’s configuration? Look on the printer’s Startup Page: Extended Features: No Extended Features: Yes 2. Decide which drivers you want to install: ❏ ❏ ❏ 3.
Installing Printer Software 3 Custom Install or Easy Install? Installer options Custom Install Easy Install Software Description Installed folder LaserWriter 8 Driver Driver for use with all (non-GX) Macintosh systems. System Folder:Extensions Phaser 560 Driver Custom driver based on the LaserWriter 7.1.2 printer driver. System Folder: Extensions Phaser 560 GX Driver Driver for use with QuickDraw GX. System Folder: Extensions Printer Descriptions PPDs for use with drivers and applications.
3 Installing Printer Software Installing printer software for Macintosh Use the installer application on the printer’s CD-ROM or diskettes to install the printer’s standard software. Then, continue with driver-specific setup instructions for the driver you are using. 1. Insert either the printer’s CD-ROM or the first Macintosh diskette into the appropriate drive on your computer. 2. Double-click the Phaser 560 Installer icon. Click Continue until the Easy Install window appears. 3.
Installing Printer Software 3 Setting up the Phaser 560 printer driver Use with System Software 6.0.7, or 7.0 and later. 1. Select Chooser from the Apple menu after installing the printer’s software (page 3-18). 2. Click on the icon of the Phaser 560 printer driver (on the left side of the Chooser). 3. Click on the Zone for your printer. See your network administrator if you have questions. 4. Select your printer from the list of printers on the right side of the Chooser.
3 Installing Printer Software Setting up the Apple LaserWriter 8 printer driver 1. Select Chooser from the Apple menu after installing the printer’s software (page 3-18). 2. Click on the icon of the LaserWriter 8 printer driver (on the left side of the Chooser). 3. Click on the Zone for your printer. See your network administrator if you have questions. 4. Select your printer from the list of printers on the right side of the Chooser.
Installing Printer Software 3 Setting up the Phaser 560 GX printer driver Refer to the on-line manual on the printer’s CD-ROM. 1. Select Chooser from the Apple menu after installing the printer’s software (page 3-18). 2. Click on the icon of the Phaser 560 GX printer driver (on the left side of the Chooser). 3. Click on the Zone for your printer. See your network administrator if you have questions. 4. Select your printer from the list of printers on the right side of the Chooser.
3 Installing Printer Software Workstation software Downloadable printer utility files Note Refer to the on-line manuals on the printer’s CD-ROM for more information on printing from a workstation.
Chapter 4 Printing Basics You can print to your printer from Windows-based PCs (personal computers), Macintosh computers, and workstations. Make sure that your printer is set up with the appropriate interface port; refer to “Connecting the printer” on page 2-18. If you haven’t already installed the printer’s software, refer to “Installing Printer Software” on page 3-1 for instructions before continuing.
4 Printing Basics Print features quick reference: Windows printer drivers Operating System Windows 3.
4 Printing Basics Print features quick reference: Windows printer drivers (cont'd.) Operating System Windows 3.
4 Printing Basics Using the AdobePS 4 driver with Windows 95 To select printing options in the AdobePS 4 driver, follow these steps: 1. In the Printers window, click the Phaser 560 printer icon with the right mouse button, then select Properties from the menu. 2. Click the following tabs to see printing options; refer to your Windows 95 documentation for more information on tabs and options. Details ■ For timeout settings and other options Set the Timeout settings.
Printing Basics PostScript Note ■ 4 For PostScript-related options The PostScript header contains important PostScript information that must accompany each print job; it is not a banner page printed with each job. If an option is not selected, an error message is displayed on your computer screen and your job does not print. Click one of the following in the PostScript header field: ■ Download header with each print job This option downloads PostScript header information with each print job.
4 Printing Basics Using the Windows NT 4.0 PostScript driver When using Microsoft Windows NT 4.0, make sure that you have first installed and set up a driver for a Phaser 560 printer (refer to page 3-4). Then, select printer features (such as TekColor color corrections) from the Windows NT driver. Selecting printer options from the Control Panel Note Document properties set from an application always override document defaults set in the printer’s Properties sheets.
Printing Basics 4 Page Setup options in an application Note If changing the Printer Driver settings through Page Setup causes problems with the application you are using, then change the Printer Driver settings through Print under the File menu, described in the previous topic. 1. Select Page Setup from the File menu; the Page Setup dialog box appears. 2. Select Paper Size and Source. 3. Click on the Printer button; another Page Setup dialog box appears. You can select a different printer here. 4.
4 Printing Basics Using the Windows NT 3.5 and 3.51 PostScript driver If you are using Microsoft Windows NT, follow the instructions on page 3-6 to set up a Windows NT PostScript driver with a Phaser 560 printer. You can select printer page sizes in the driver for Windows NT applications, however, TekColor color corrections and other PostScript Level 2 features are not supported by the Windows NT driver.
4 Printing Basics Using the Tektronix printer driver for Windows 3.1 To select printing options, follow these steps: 1. From the Control Panel, double-click the Printers icon. 2. In the Printers dialog box, choose your printer from the list of installed printers, then click the Setup button. A dialog box appears with the name of the printer you selected across the top. 3. 4. From the Setup dialog box, click the Options button to see the Options dialog box.
4 Printing Basics Using the Adobe PostScript driver for Windows 3.1 To select printing options, follow these steps: 1. From the Control Panel, double-click the Printers icon. 2. In the Printers dialog box, choose the Tektronix Phaser 560 printer, then click Setup. A dialog box appears with the printer’s name across the top. 3. Click the following tabs to see printing options; refer to your Windows documentation for more information on tabs and options.
Printing Basics 4 Setting the timeouts Each driver provides the ability to change default timeout settings. Refer to the documentation for your computer’s operating system for information accessing these settings. To access the timeout settings Windows 95 1. In the Printers window, click the Phaser 560 printer icon. 2. Select Properties from the menu. 3. Click the Details tab. 4. Set the Timeout settings. Windows 3.1 1. From the Control Panel, double-click Printers. 2.
4 Printing Basics Printing from a Macintosh To print from a Macintosh, you need a printer driver. Installing one of the supported drivers allows you to select printing features right from your computer. Refer to page 4-13 for a reference table of printing features and to page 4-20 for detailed information. Supported Macintosh printer drivers To select printer-specific features, print from one of the following provided drivers.
Printing Basics 4 Print features quick reference: Macintosh printer drivers Driver name Feature Page # Media size page 4-30 Page Setup ➥ Paper Page Setup ➥ Paper Page Setup ➥ Paper page 4-33, page 4-35 Print Print ➥ Paper Source Printing ➥ Printer Driver Defaults ➥ Tray Selection page 4-33, page 4-40 Print ➥ TekColor Options ➥ MP Manual Feed Media Print ➥ Options ➥ MP Manual Feed Media Printing ➥Printer Driver Defaults ➥ MP Manual Feed Media page 4-23 Print Print ➥ Options ➥ Print Qualit
4 Printing Basics Print features quick reference: Macintosh printer drivers (cont'd.
Printing Basics 4 Using the Phaser 560 printer driver Select media size 1. From the File menu, open the Page Setup dialog box. 2. Use the Paper pop-up menu to select the printer’s supported paper sizes. Select printer-specific options 1. From the File menu, open the Print dialog box. 2. Click the TekColor button in the Print dialog box to see the TekColor Options dialog box. 3.
4 Printing Basics Using the Apple LaserWriter 8 printer driver Select media size 1. From the File menu, open the Page Setup dialog box. 2. Use the Paper pop-up menu to select the printer’s supported paper sizes. Select printer-specific options 1. From the File menu, open the Print dialog box. 2. Select the media tray* by location or type in the Paper Source field. 3. Click the Options button to see the Print Options dialog box. 4.
Printing Basics 4 Using the Phaser 560 GX printer driver Note Refer to the on-line manuals on the printer’s CD-ROM for details on using the Phaser 560 GX printer driver. Printing with a desktop printer If you are using QuickDraw GX applications, do one of the following: ■ Select any desktop printer in the Print dialog box. ■ Drag a document onto a desktop printer icon. The application corresponding to the document opens, prints the document, and then quits.
4 Printing Basics Printing from a workstation Overview You can print from a UNIX or VMS workstation through Ethernet, Token Ring, parallel, or serial interfaces. Workstation users can print from any application that generates color PostScript, or directly from the screen with the PhaserPrint software. For instructions and examples on creating print queues for your specific platform, see the Tektronix World Wide Web site: http://www.tek.
Printing Basics 4 PhaserPrint for UNIX software is available for these workstations: Workstation Operating System Sun SunOS 4.1.3, Solaris 2.X SGI IRIX 5.2, 5.3, 6.X HP 9000 700/800 HPUX 9.0.5, 10.X IBM RS/6000 AIX 3.2, 4.X DECstation Ultrix 4.0, 4.4 DEC Alpha OSF/1 3.0 and 3.
4 Printing Basics Printing from specific applications For printing from most applications, follow the instructions in “Installing Printer Software” on page 3-1 to install drivers and printer software. Some applications require additional configuration or page description files, which may have been installed with the driver.
Printing Basics 4 This table provides an overview of selecting print features in the printer’s front panel.
4 Printing Basics Print features quick reference: Printer’s front panel (cont'd.) Feature Feature descriptions Front Panel Startup Page ■ Enabled * See page 8-10 Printer Defaults Menu ■ Startup Mode ■ Enabled* ■ ■ Enabled Disabled* Image Smoothing ■ ■ ■ Printer Defaults Menu ➥ Output See page 5-14 Printer Defaults Menu ➥ PS Error Handler Menu ➥ Image See page 2-24 Smoothing Menu Printer Defaults Menu ➥ Energy See page 2-24 Print‡ Star Menu Enabled Disabled* See page 5-11 5 Min.
Printing Basics 4 Print-quality modes Mode Resolution (dots per inch) Fast Monochrome 600 x 600 dpi Fast Color Presentation 600 x 600 dpi 600 x 600 dpi Printing speed (pages per minute) 14 ppm 5 ppm Color 4 ppm Description ■ Fastest grayscale printing. ■ Recommended for documents containing large amounts of black text. ■ Fastest full-color output. ■ When printing raster image data or color graphics, this mode provides excellent output using CMY toners.
4 Printing Basics Color corrections The printer provides TekColor Dynamic Correction, which consists of the following color correction modes: Color correction mode Front panel selection Driver selection Automatic Automatic Description Default setting. Automatically selects the optimum color correction for speed, vividness, and saturation. Text and filled areas use Vivid Color on opaque media. RGB bit-mapped images use Simulate Display. CMYK bit-mapped images use Commercial Press.
Printing Basics 4 Output Order This option lets you specify whether your document prints face up or face down in the printer’s output tray. You can select it either in one of the supported drivers (Output Order option, Output Face Up option) or in the printer’s front panel (Output Order in the Printer Defaults menu). Output Order: Face Up ■ Pages are output so that the first page is on the bottom.
4 Printing Basics Fonts Note For general information on fonts, request a document catalog from HAL or EuroHAL, the Tektronix automated fax systems. Refer to page 7-3 for information on using these systems. Resident typefaces (PostScript) The printer accepts Adobe Type 1 and Type 3 downloadable fonts, TrueType fonts, PCL5, and a variety of user-defined fonts. To extend font capability, the printer supports a SCSI-connected external hard disk for storage of additional fonts.
Printing Basics 4 Additional fonts can be added to a Phaser 560 printer. The Extended Features option includes these 39 fonts. Refer to “Upgrade kits” on page 9-5 for ordering information.
4 Printing Basics Resident typefaces (PCL5) For PCL5 (Printer Command Language) printing (HP Laserjet III emulation), the printer supports Courier, Times, and Universe typefaces in medium, bold, italic medium, and italic bold. Downloading fonts The printer accepts PostScript Type 1, Type 3, and TrueType downloadable fonts. If you have an external hard disk connected to a Phaser 560 printer, you can store the downloadable fonts on it. You can use utilities on the CD-ROM to download fonts to the printer.
Printing Basics 4 Printer languages: PostScript, HP-GL, PCL5 The printer supports PostScript Level 1 and Level 2 and HP-GL (Hewlett-Packard Graphics Language) printer languages. Additionally, the printer supports monochrome PCL5 (Printer Command Language). Refer to the topics on the printer’s CD-ROM or the Tektronix World Wide Web page for details. The default language for the parallel port is PostScript.
4 Printing Basics All about media Media sizes This printer supports three sizes of media trays: Media Type Size Paper Transparency A/Letter 8.5 x 11 in. ✓ ✓ A4 210 x 297 mm ✓ ✓ Legal 8.5 x 14 in. ✓ 216 x 356 mm In addition to using the media trays, you can load specialty media in the Multi-Purpose Feeder, which accommodates media ranging in size from 89 x 254 mm to 216 x 356 mm (3.5 x 10 in. to 8.5 x 14 in.).
Printing Basics 4 Margins and print area When the printer places an image on media, the image (print area) is a bit smaller than the media size. You may need to adjust the page margins in your application software to match the print area. Note To assure the correct page margins, use the drivers supplied on the printer’s CD-ROM and diskettes. The following table and illustration show the page sizes, the largest print areas, and the margins for the media sizes supported on this printer.
4 Printing Basics Media types This printer accommodates several types of media in various sizes. Paper and transparencies can be loaded in either the Multi-Purpose Feeder or any of the media trays. Multi-Purpose Feeder cy aren sp Paper A4 Tran r tte Leper A/Pa Letter A4 Legal l ga Le per Pa Media Trays Tektronix® Transparency Letter A4 9698-92a Caution 4-32 Do not use any media designed for inkjet printers, especially inkjet coated paper and inkjet transparencies.
Printing Basics 4 Specialty media can only be printed from the Multi-Purpose Feeder. Multi-Purpose Feeder 3.5 x 10 in. – 8.5 x 11 in. cy aren sp A4 Tran r tte Leper A/Pa l ga Le per Pa Tektronix® Card Stock Coated Paper Labels Media Trays 2 in. (50.8 mm) Tektronix® Fabric Transfer 8.5 x 11 in. Envelopes #10 or larger Minimum label size 9698-93 Selecting a media type You can select a media type in the printer’s front panel or in a supported printer driver.
4 Printing Basics Media trays The printer is shipped with a PAPER tray, either Letter Paper (U.S.) or A4 Paper (Metric), depending on the order option.
Printing Basics 4 Hints ▼ For the best print quality, load only paper in the PAPER tray and transparencies in the TRANSPARENCY tray. ▼ If you have the Lower Tray Assembly installed, insert the TRANSPARENCY tray only into the upper (A) or middle (B) tray slots for the most reliable media-picking. ▼ When printing a large number of sheets of paper or transparency, use the media-specific trays for best reliability. ▼ When using specialty media, always use the Multi-Purpose Feeder (D).
4 Printing Basics Loading plain paper 1. Push down on the PAPER tray’s metal plate until it clicks, locking it in place. R PE PA A4 9008-13 2. Fan the paper, but be careful not to leave fingerprints, which can result in a smudged print. 3. Place paper in the tray under the hooks. 4. You can load approximately 250 sheets of paper, depending on the thickness. Use the label on the inside of the tray as a reference for the proper amount of media. 3 4 R PE PAA4 9698-95 5.
Printing Basics 4 Loading letterhead paper 1. Push down on the PAPER tray’s metal plate until it clicks, locking it in place. R PE PA A4 9008-13 2. Fan the letterhead paper, but be careful not to leave fingerprints, which can result in a smudged print. 3. Load the letterhead paper in the tray so that the side to be printed is face down and the top of the page is placed under the hooks. 4. You can load up to 250 sheets of paper, depending on its thickness.
4 Printing Basics Loading transparencies 1. Push down on the TRANSPARENCY tray’s metal plate until it clicks, locking it in place. CY EN AR SPA4 AN TR 9698-96 2. Fan the transparencies, but be careful not to leave fingerprints, which can result in a smudged print. 3. 4. Place transparencies in the tray under the hooks. 5. You can load approximately 100 sheets of transparency film. Use the label on the inside of the tray as a reference for the proper amount of media. 6.
Printing Basics 4 Hints for making transparencies Follow these guidelines when you make transparencies: ▼ Use only Tektronix transparencies. ▼ For the best printing reliability, use the TRANSPARENCY tray for printing multiple sheets of transparency.
4 Printing Basics Using the Multi-Purpose Feeder The Multi-Purpose Feeder serves as another tray for loading any type of media that ranges in size from 89 x 254 mm to 216 x 356 mm (3.5 x 10 in. to 8.5 x 14 in.). You can use it to load a single sheet or a stack of media, depending on the media’s type and thickness.
Printing Basics 4 Setting media thickness Because the printer accommodates varying media weights in the Multi-Purpose Feeder, you can manually select a media thickness for the most reliable paper-picking. The Media Thickness switch is only applicable for the Multi-Purpose Feeder. Follow these steps to adjust the media thickness: 1. Open the left side door. The blue Media Thickness switch is located on the paper feeder and has three settings: a. Thin b. Medium c. Thick Thin a 2.
4 Printing Basics Inserting the media For instructions on loading specific types of media, refer to “Loading specialty media in the Multi-Purpose Feeder” on page 4-44. 1. Adjust the guides to the width of the media you are using. 9698-23 2. Insert the media with the side to be printed up and the top of the page entering the printer first. 3. Take care not to overfill the Multi-Purpose Feeder: keep the media to just below the limit indicator.
Printing Basics 4 Selecting the Multi-Purpose Feeder Select the Multi-Purpose Feeder in one of these two ways: ■ Driver selection 1. In the Print dialog box (under Tray Selection or Paper Source, depending on the driver), select one of the following: ■ Multi-Purpose Tray (automatically selects the media type defined in the front panel). ■ Multi-Purpose Manual Feed (see Step 2). 2.
4 Printing Basics Loading specialty media in the Multi-Purpose Feeder Transparencies 1. Set the Media Thickness switch to Medium. 2. Adjust the guides for the width of your transparencies. 3. Insert the side with the notched end into the printer last, with the notched corner closest to the back of the printer. 4. Fill the Multi-Purpose Feeder to the level indicator on the guide (maximum capacity is 50 sheets). 4 3 9698-19 5.
Printing Basics 4 Letterhead 1. For the thickness setting, treat letterhead media as you would laser paper. If your letterhead paper has a weight of 105 g/m2 (28 lb.) or lighter, adjust the printer’s Media Thickness switch to Thin; if its weight is 109 - 150 g/m2 (29 - 40 lb.), adjust the printer’s Media Thickness switch to Medium; if its weight is heavier than 150 g/m2 (40 lb.), adjust the printer’s Media Thickness switch to Thick. 2. Adjust the media guides for the width of your paper. 3.
4 Printing Basics Glossy Coated Paper and Card stock Caution 1. Do not use any media designed for inkjet printers, especially inkjet coated paper and inkjet transparencies. Inkjet media are coated with a substance that will damage the fuser; Tektronix does not furnish service for damage or malfunction caused by the use of non-Tektronix supplies or consumables. Always use Tektronix-brand coated paper and transparencies that have been specially designed for use with Tektronix Color Laser Printers.
Printing Basics 4. Fill the Multi-Purpose Feeder up to the level indicator on the guide (maximum capacity is 50 sheets). 5. Use your printer driver or the front panel menu to select the Multi-Purpose Feeder and the media type (either Coated Paper or Card or Envelope). 6. If the media is a non-standard size, you must position the image correctly in the application. 4 a. Select a printer page size that is larger than your media. b.
4 Printing Basics Envelopes 1. Prepare each envelope in the following manner: ■ Tri-fold a letter-sized piece of paper and insert it into the envelope. ■ Tuck the envelope flap inside the envelope. 2. Adjust the printer’s Media Thickness switch to Thick. 3. Adjust the printer’s media guides for the width of your envelopes. 4. Insert the envelopes with the short end entering the printer first and the side to be printed facing up; the edge where you place the stamp enters the printer first.
Printing Basics 7. 8. 4 In a supported printer driver. Make the following selections.: ■ Paper Size Letter ■ Orientation Portrait ■ Paper Source Multi-Purpose Feeder ■ Media Type Card or Envelope Send the job to the printer. Hints ▼ Many applications include a tool for creating an envelope document. For example, Microsoft Word includes an Envelopes and Labels feature under the Tools menu.
4 Printing Basics Labels 1. Adjust the Media Thickness switch to Thick. 2. Adjust the media guides for the width of your label sheets. 3. Insert the label sheets with the side to be printed up, with the top of the sheet entering the printing first. 2 in. (50.
Printing Basics 4. Fill the Multi-Purpose Feeder to the level indicator on the guide (maximum capacity is 30 label sheets). 5. Use your printer driver or the front panel menu to select the Multi-Purpose Feeder and the media type (Label).
4 Printing Basics Tektronix Fabric Transfer Media 1. Set the Media Thickness switch to Thick. 2. Adjust the media guides for the width of your Fabric Transfer media. 3. Insert only one sheet of media at a time, with the side to be printed up (logo side down) and the top of the media entering the printer first.
Printing Basics 4. 4 In the application, reverse the image horizontally (the image must print backward to transfer correctly). Flip Horizontal 9698-111 5. Use your printer driver or the front panel menu to select the Multi-Purpose Feeder and the media type (Fabric Transfer). Caution Note To avoid media jams and damage to the printer components, make sure that you follow these guidelines: ■ For best print quality and reliability, use only Tektronix-brand Fabric Transfer media.
4 Printing Basics Duplex printing This printer allows you to print double-sided on laser paper, from the PAPER trays and the Multi-Purpose Feeder. Caution Use laser bond paper for duplexing; two-sided printing on specialty media can shorten component life. For opacity and feed reliability, use laser paper that is at least 100 g/m2 (28 lb. bond). For best results, do not use heavy toner coverage on Side 1. Also, increase the top margin on Side 1 for better feed reliability. 2. 6 5 4 3 2 1 SIDE 1 1.
6 5 4 3 2 4 5 6 7 1 2 3 R PE PAA4 1 SIDE 2 1. Place the paper in the PAPER tray with the side to be printed face down (the side that has already been printed is now face up); the top of the page is under the paper tray’s hooks. 4 7 Printing Basics 32564-09a Insert the PAPER tray into the printer. If you have a Lower Tray Assembly, you can use any of the printer’s media tray slots: Upper, Middle, or Lower; for these instructions, use Upper.
4 Printing Basics Double-sided printing from the Multi-Purpose Feeder Caution Use laser bond paper for duplexing; two-sided printing on specialty media can shorten component life. For opacity and feed reliability, use laser paper that is at least 100 g/m2 (28 lb. bond). For best results, do not use heavy toner coverage on Side 1. SIDE 1 1. Place the paper in the Multi-Purpose Feeder with the side to be printed face up. This example show letterhead paper. 2.
Printing Basics 4 SIDE 2 Caution 1. When printing Side 2 for duplex printing (using the Multi-Purpose Manual Feed), always choose Paper 2nd Side as the media type. This selection is specially formulated for this purpose; choosing any other media type can reduce component life. Place the paper in the Multi-Purpose Feeder in this way: ■ ■ The blank side is face up (the side that has already been printed is now face down). 1234567 The top of the page enters the printer first. 32564-07 2. Note 3.
Chapter 5 Printing: Beyond the Basics Beyond the basics of printing are the printer’s special features that set it apart from other printers, as well as more in-depth information on using color and getting the best results: ■ Special printing features: ■ Controlling color density ■ Using the Quick Collate option ■ Previewing with Check Print ■ Image Smoothing ■ Automatic tray switching ■ Getting job information ■ Working with color ■ TekColor corrections — making the best selection ■ Pri
5 Printing: Beyond the Basics Special printing features Controlling color density The printer’s front panel provides an interface to adjust the density of the toner applied to the media. This feature compensates for the changes in color intensity that can occur as toner cartridges or the imaging unit age. Follow these steps to adjust the color density: 1. Press the Menu button on the front panel. The display reads: Help Pages <--------> Menu Exit 9008-43 2.
Printing: Beyond the Basics 5 The current density setting for each color is indicated by the dashed line enclosure and the numeric value (–10 to +10) next to each color. The page also shows the ranges that you can select in the front panel. In the example on the next page, the density setting for each color is the default, 0.
5 Printing: Beyond the Basics 7. pl es Compare the printer’s current density settings on the Color Reference Page with the samples on the Color Density Samples card (found inside the back cover pocket of the Quick Reference Guide). C ol or D en si ty S R am ce en fer 560 e R r ick ase Qu Ph 9698-79 a. Place the Color Reference Page on at least two sheets of clean white paper in a well-lighted area. b.
Printing: Beyond the Basics 8. 5 Use the Calibrate Colors menu in the printer’s front panel to adjust the density according to the numbers you recorded in Step 7. ■ In this example, the current setting for cyan, indicated by an asterisk, is +1. ■ To change the setting, press the left arrow button to decrease the color adjustment and the right arrow button to increase the color adjustment. Refer to the table on page 5-7 for information on these settings.
5 Printing: Beyond the Basics 9. After changing the density setting for any or all of the colors, reprint the Color Reference Page, which shows the following: ■ The dashed line enclosure reflects the changes you made to the settings. ■ In this example, the density for each color is set to a different value.
5 Printing: Beyond the Basics The following table shows the selections available in the Calibrate Colors menu, along with a brief explanation of each function. Calibrate Colors menu selections Menu item* Adjust light/dark <-------> Menu Lighter/Darker:+0 * <-------> OK What it does How it works Lightens or darkens all toner colors. ■ Press the Menu button. Lightens or darkens all toner colors.
5 Printing: Beyond the Basics Using the Quick Collate option The Quick Collate option in the supported drivers performs document collation in the printer. This is faster than the Collate option that exists in some applications because applications send each page to the printer in sequence, as many times as necessary to provide the requested number of copies. With the printer’s Quick Collate option, the job is sent only once, and then multiple collated sets are produced by the printer.
Printing: Beyond the Basics 5 The number of pages that can be collated at one time depends on these factors: ■ Printer’s memory configuration. ■ Presence and size of a hard disk attached to the printer. ■ Complexity of the pages to be collated. According to these factors, the printer collates in sequential sets as many pages as will fit in the available memory. For example, you have a 6-page job and you request 4 copies.
5 Printing: Beyond the Basics Collation hints and tips Output order Make sure that you select Output Face Down or uncheck the Output Face Up box, depending on the driver you are using. Increasing the collation capacity To increase the number of pages that the printer can collate at one time, consider one or more of the following changes: ■ Increase the printer’s memory. ZMA16 16-Mbyte SIMM (Option 16) ZMA32 32-Mbyte SIMM (Option 32) ■ Attach a hard disk to the printer’s SCSI port.
Printing: Beyond the Basics 5 Previewing with Check Print This feature is available only with the printer’s Extended Features configuration. When sending a multiple-page file to the printer through the driver, you can select Check Print to preview the first page of the job and determine if the print is to your liking before proceeding with the remainder of the job. This is especially useful when printing a large job.
5 Printing: Beyond the Basics 3. Press the Menu button. The following message appears: Check Print:enabled* <--------> OK Exit 9008-43 The asterisk (*) indicates the current setting. By default, Check Print is enabled. Pressing an arrow button toggles the selection between enabled and disabled. Pressing the OK button activates the new selection. 4.
Printing: Beyond the Basics 6. 7. 5 Select Check Print in a supported driver. ■ LaserWriter 8 driver: Select the Check Print option in the Options dialog box available by clicking the Options button in the Print dialog box. ■ Phaser 560 driver: Select the Check Print option in the TekColor dialog box by clicking the TekColor button in the Print dialog box.
5 Printing: Beyond the Basics Image Smoothing Image Smoothing is selected from the printer’s front panel (in the PrinterDefaultsmenu) as well as in supported printer drivers. Image Smoothing blends adjacent colors in an image so that color transitions are less noticeable. This feature is typically used when the image being printed is at a lower resolution than the printer’s output resolution. For example, printing an image downloaded from the World Wide Web at 72 dpi using the printer’s 600 or 1200 dpi.
Printing: Beyond the Basics 5 Getting job information The printer’s front panel includes an Infobuttonthat provides the following information for a particular print job: ■ Printer Name ■ User Name ■ Print Server ■ IP Address of your printer ■ Job Name To access this information, follow these steps: 1. Press the Infobutton on the front panel. The printer displays the first message. 2. Press More to view each of the subsequent messages.
5 Printing: Beyond the Basics Working with color Whether you are producing color reports, memos, graphs, charts, overhead transparencies for presentations, color handouts, or design comps, there are a few things to keep in mind when using color. ■ A large area of color looks more saturated (brighter) than a small area of the same color. ■ A color looks brighter against a dark background than it does against a white background.
Printing: Beyond the Basics 5 Color corrections — making the best selection TekColor corrections The printer’s TekColor color correction options provide simulations of different color devices. Follow these basic guidelines so that the printer accurately reproduces the colors you want on your prints. ■ For general-purpose printing, select the Automatic color correction, which adjusts the color quality for the best reproduction and print speed of each page in a document.
5 Printing: Beyond the Basics Deciding which color correction to use Color printers and computer display screens produce color differently. Printers use the subtractive primaries CMYK (cyan, magenta, yellow, and black), and produce color when light is reflected off the paper. Computers use the additive primaries RGB (red, green, blue) with a light-emitting CRT screen. The printer and the computer screen each have a different range of possible colors they can produce, with some overlap between them.
Printing: Beyond the Basics 5 Color correction solutions Printing objective or problem Color correction to use General-purpose printing Automatic Turn off all color corrections None Using PANTONE Colors Brightest, most vibrant colors Overhead transparency presentations Vivid Color Blue colors are printing too purple Colors are washed out or faded Colors should match computer display screen* Simulate Display Colors are too dark Colors should match a printing press standard SWOP Press Euroscale Press C
5 Printing: Beyond the Basics Color correction descriptions General all-purpose printing The Automatic option is the best choice for typical office printing. This option automatically adjusts the color correction used for each page, according to which elements (for example images, graphics) are included on that page.
Printing: Beyond the Basics 5 Printing the brightest colors and a truer blue The Vivid Color option makes printed blue appear less purple by reducing the amount of magenta used to print blue colors. Other colors in the cyan-blue-purple- magenta range in the image are also adjusted to compensate for the adjusted blue. Colors in the red-orange-yellow-green range are not affected.
5 Printing: Beyond the Basics Closely match printing press colors There are three printing press color correction options. Each press option conforms to a different printing standard. Use a press option if you are previewing work for a four-color job to be printed on a printing press. These options simulate a four-color commercial printing press, not solid spot colors, such as PANTONE PMS Colors.
Printing: Beyond the Basics 5 Using the printer’s current color defaults The Use Printer Setting option is available only in the supported drivers. This option sends no color correction information to the printer. It uses the current default in the printer to process colors for printing. The factory default color correction is Automatic. The printer’s default can be one of the following: ■ Any option selected in the TekColor Corrections menu on the printer’s front panel.
5 Printing: Beyond the Basics Special considerations If your Phaser 560 printer is shared on a network Another user may use the downloadable color correction utility files, or the printer’s front panel, to change the printer’s default color correction setting. If this situation occurs, the prints you make through a non-supported driver may not print as expected.
Printing: Beyond the Basics 5 Printing and using the color sampler charts You can print color sampler charts from your printer to see how the colors, as specified from within an application, will look when printed. Having a pre-printed sample of each color can help you save time in selecting the right color for your use.
5 Printing: Beyond the Basics The color chart you print and use depends on how the application you are using selects color. Refer to the application’s documentation for information on color selection, then print one or more of the color charts listed in the table below. Color sampler chart files Color sampler chart Number of printed pages Macintosh file name PC file name CMYK colors 18 CMYK Sampler CMYK.PS RGB colors 12 RGB Sampler RGB.PS HSB colors 12 HSB Sampler HSB.
Chapter 6 Caring for Your Printer Overview To ensure the best print quality and the most reliable printer operation, follow these simple guidelines: ■ Always use high-quality paper and only Tektronix-brand Transparencies, Glossy Coated paper, and Fabric Transfer media. ■ To maintain print quality, use the troubleshooting information in this book and the Quick Reference Guide, as well as the Consumables Page and Service Print 1 in the front panel’s Help Pages menu.
6 Caring for Your Printer User-replaceable components This printer is designed modularly so that it is easy to maintain: several of the components are replaceable. Cleaning is only necessary if you experience frequent media jams (see “Cleaning the paper-pick and paper-feed rollers” on page 6-12). These are the replaceable components for the printer: 1. Transfer Kit (transfer roller/waste bin) 2. Imaging Kit (Imaging Unit and filter) 3. Fuser Roll 4. Fuser 5. Toner Cartridges 6.
6 Caring for Your Printer When to replace components When the printer’s front panel indicates that a component needs to be replaced, make sure that you have replacements on hand. The printer may continue to print until the component is completely used up; for the toner and Fuser Roll, the printer stops until you replace them. The Imaging Unit and Fuser continue to print. Printer component TONER CARTRIDGES Front panel message Stopped: Replace: Change the color toner now.
6 Caring for Your Printer Consumable life information This printer provides several convenient methods for accessing the information you need on the life of the user-replaceable components. Resource Consumables Page Consumables Page Information provided How to access % Remaining gauge for each of the following: To Print: Black Cyan Magenta ■ Toner (each color has its own gauge) ■ Imaging Unit ■ Transfer Kit ■ Fuser ■ Fuser Roll Yellow 1. Press the Menu button on the front panel. 2.
6 Caring for Your Printer Replacing the components This section describes the basic steps for removing and installing the replaceable components. Detailed, illustrated instructions are shipped with each of the replaceable components. Toner cartridges Front panel messages Diagnosing print quality Replacing a toner cartridge : low ■ Replace the designated color toner cartridge soon.
6 Caring for Your Printer Imaging unit Front panel messages Diagnosing print quality Imaging Unit:replace Replace the Imaging Unit soon. After the message appears, the unit may still yield about 1,500 color pages, depending on the complexity of your prints. Imaging Unit expired Replace the unit now; it is used up and print quality is affected. ■ Dark, vertical streaks on the print. ■ Dark color spots and streaks in all colors. ■ A wide, light, horizontal band in one place on the page.
6 Caring for Your Printer Fuser Front panel messages Diagnosing print quality Replacing the Fuser Fuser:replace Replace the Fuser soon. After the message appears, the Fuser may still yield about 3,000 pages, depending on the complexity of your prints. Fuser expired Replace the Fuser now; it is used up and print quality is affected. ■ Vertical scratches on the print. ■ Dark vertical scratches on the unprinted portion of the page.
6 Caring for Your Printer Fuser Roll Front panel messages Diagnosing print quality Fuser Roll:replace Replace the Fuser Roll soon. After the message appears, the Fuser Roll may still yield about 500 pages. Stopped: Fuser Roll:replace Replace the Fuser Roll now; the printer stops until you replace the Fuser Roll. ■ ■ ■ Replacing the Fuser Roll A piece of the printed image is missing and reappears out of place. A piece of the printed image appears faded. If media frequently wraps around the Fuser.
6 Caring for Your Printer Transfer kit Front panel messages Diagnosing print quality Replacing the Transfer Kit Transfer kit:replace ■ ■ Toner spots appear on the back side of the media. Repeated light spots. Replace the Transfer Kit (roller/waste bin) soon. ■ Print the Consumables Page from the front panel. ■ Check the % Remaining gauge. ■ Print the Configuration Page from the front panel or access the front panel System Counts menu.
6 Caring for Your Printer Main Charge Grid Each Imaging Unit includes a Main Charge Grid already installed as a component. Although the Main Charge Grid is not considered a consumable (because it typically does not wear out before replacing the entire Imaging Unit), you may need to replace it occasionally. It is recommended that you keep one on hand (order number 118-9070-02). Illustrated instructions are shipped with each Main Charge Grid.
Caring for Your Printer 6 Occasional cleaning Regularly scheduled cleaning is not necessary for this printer. However, if your printer experiences frequent media jams, clean the paper-pick rollers (a) and the paper-feed rollers (b) on the Lower Tray Assembly. a b 9698-25 Caution When using isopropyl alcohol with a lint-free cloth, make sure that the alcohol is at least 90% pure, obtainable from your local pharmacy. (Never use rubbing alcohol; it can damage the printer.
6 Caring for Your Printer Cleaning the paper-pick and paper-feed rollers Note If you have a Lower Tray Assembly, you may also need to clean the rollers for the middle and lower media trays, which are accessed by the lower left side door. Refer to the procedure on page 6-14. 1. Slide the media tray(s) out (you do not have to remove them) to allow access to the paper-pick and paper-feed rollers. 9698-61 2.
Caring for Your Printer 3. 6 Use the blue handles to pull out the paper feeder. 9698-26 4. Gently rotate the paper-pick rollers 180° (the paper-pick rollers are D-shaped) and wipe them with a lint-free cloth that has been moistened with isopropyl alcohol.
6 Caring for Your Printer 5. Close the paper feeder and the left side door. 9698-29 6. Insert the media tray (if you have the Lower Tray Assembly, insert the upper media tray). If you have a Lower Tray Assembly 1. Open the lower left side door.
Caring for Your Printer 2. 6 Gently rotate the D-shaped paper-pick rollers 180°; wipe them with an alcohol-moistened lint-free cloth. 9698-58 3. Clean the paper-feed rollers for the middle and lower media slots. Rotate each roller to clean its entire surface. 9698-59 4. Close the lower left side door. 5. Insert the middle and lower media trays.
6 Caring for Your Printer Cleaning other rollers When you clean any of the other rollers in the printer, always use a lint-free cloth. Caution Do not clean the transfer roller; alcohol and pressing on the roller can damage the roller and cause print-quality problems. Cleaning the sensor If your printer’s front panel displays Printer Error 30 , clean the sensor inside the printer. 1. Turn the printer off and open the printer’s front door. 2. Remove the Imaging Unit: a.
Caring for Your Printer 3. 6 Use a dry, lint-free cloth to wipe the sensor (inside the slot). 9698-64 4. Re-insert the Imaging Unit. 5. Close the printer’s front door and power up the printer. You must cycle the power to clear the front panel’s error message.
6 Caring for Your Printer Repacking the printer Power off Turn off the printer; remove the power cord and all interface cables. Prepare the media tray(s) 1. Remove the media tray(s) (A, B, C) from the printer; remove the media from the tray(s). D A cy aren B sp A4 Tran C r tte Leper A/Pa l ga Le per Pa 9698-13 2. Press down on the media tray’s metal plate. 3. Insert the cardboard packing material into the media tray.
Caring for Your Printer 4. Re-insert the media tray into the printer. 5. If you have other media trays, repack them for shipping or storage in their original shipping boxes. 6 Remove and discard the Transfer Kit 1. Open the printer’s left side door; use the blue handles to pull out the paper feeder. 2. Lift the cover of the paper feeder. Remove the transfer roller/waste bin; place it on a piece of paper on a flat surface. 3. Lock the roller onto the waste bin: a.
6 Caring for Your Printer Prepare the Imaging Unit 1. Open the printer’s front door. 2. On the Imaging Unit, turn the upper lever 90˚counterclockwise; this is necessary to protect the Imaging Unit during shipment. 3. The two thumbscrews on the Imaging Unit should already be tightened; if they are not, turn them clockwise until they are tight.
Caring for Your Printer 6 Remove the toner cartridges 1. Open the right side door and remove the four toner cartridges. 2. Wipe off any loose toner in and around the printer. Caution 3. Make sure that you leave the side door open for a minimum amount of time; light exposure can damage the Imaging Unit. Replace the protective cover for each toner cartridge; repack them for shipping or storage in their original shipping boxes. Secure the doors and output tray 1.
6 Caring for Your Printer If you have a Lower Tray Assembly 1. Lift the printer up and away from the Lower Tray Assembly. Warning 2. The printer weighs about 43 kg. (94 lbs.) without the toner cartridges; the Lower Tray Assembly weighs 14 kg (31 lbs.). Observe standard precautions for lifting heavy objects. Repack the Lower Tray Assembly in its original shipping box.
Caring for Your Printer 6 Repack the printer 1. Repack the accessories in the original Tektronix accessories box. 2. Repack the printer and the accessories box in the original Tektronix shipping box. Call Tektronix at 1-800-835-6100 or call your nearest Tektronix dealer if you need a replacement packaging kit (order number 065-0566-00). Caution Make sure that you keep the printer level when moving it.
Chapter 7 Troubleshooting If you need help If you need assistance, contact your local Tektronix dealer or sales representative or any of these listed resources: Type of service How to access Details Customer Support Centers Printer support and service U. S.
7 Troubleshooting Type of service (cont'd.) How to access (cont'd.) Details (cont'd.) Tektronix Bulletin Board Service (BBS) (503) 685-4504 24 hours per day, 7 days per week Online services Technical support: www.tek.com/Color_Printers/support/colcare.html World Wide Web: www.tek.com/Color_Printers/ Current software: www.tek.com/Color_Printers/support/software.html Anonymous ftp server: ftp.tek.com/Color_Printers HAL automated fax system (503) 682-7450 direct outside U. S.
7 Troubleshooting Using the automated fax systems As an alternative to other resources, and to provide up-to-date information quickly, Tektronix has set up HAL (Highly Automated Library) and EuroHAL, two interactive, automated fax systems. These automated fax systems provide Macintosh, PC, and workstation users with the latest technical hints and tips (like color adjustments), solutions to common technical problems, and application notes for software problems (such as CorelDRAW! and QuarkXPress).
7 Troubleshooting Symptoms and solutions Diagnostic tools The printer provides several tools for diagnosing and solving various types of problems; these tools include the following: Found in the Help Pages menu (accessed from the front panel); these help you diagnose print quality problems, for example, if a user-replaceable component, such as a toner cartridge, needs to be replaced.
7 Troubleshooting Describes printing problems by symptom (including an example), then lists the possible causes and solutions. Especially useful for determining when the consumables need to be replaced. See page 7-7. Troubleshooting / print quality quick reference table Quick Reference Guide s ple am R ce en fer 0 Re r 56 ick ase Qu Ph Provides easy access to troubleshooting information on media jams and maintaining print quality (including color examples of print quality symptoms).
7 Troubleshooting Maintaining print quality If you notice a problem with the quality of your prints, the probable solution is replacing one of the consumable components (toner cartridges, Imaging Unit, Fuser, Fuser Roll or Transfer Kit). ■ Make sure that you are using the recommended media. Refer to “Media hints and tips” on page 7-38 and “All about media” on page 4-30. ■ Check if the printer’s front panel message indicates replacing one or more consumables and replace it if necessary.
7 Troubleshooting Troubleshooting and print quality quick reference Symptom Possible Causes Solution Power indicator is blinking The printer is receiving, processing or printing a job. Wait for the job to be completed or cancel the job. You have entered the menu in the front panel. Exit the menu. Power indicator is off The printer is not ready, is disabled, or has detected an error. Read the front panel message to determine the printer’s status.
7 Troubleshooting Troubleshooting and print quality quick reference (cont'd.) Symptom Possible Causes Solution Front panel reports: Waiting for The media installed is not what the printer is expecting. ■ ■ ■ ■ Front panel reports: Multi-Purpose Feeder: Load Insert the appropriate media tray. Change the default media tray to match the desired media type; restart the printer. Cancel the job and check for the appropriate driver selection.
7 Troubleshooting Troubleshooting and print quality quick reference (cont'd.) Symptom Possible Causes Solution Consumables Page appears faded in a single color. The color density is set incorrectly in the front panel. Check the density setting by printing the Color Reference Page in the Calibrate Colorsmenu in the front panel. Compare the settings to the examples on the Color Density Samples and, if necessary, adjust the density in the front panel. Refer to “Controlling color density” on page 5-2.
7 Troubleshooting Troubleshooting and print quality quick reference (cont'd.) Symptom Possible Causes Solution A single color shows a light, repeating horizontal line. The roller in the toner cartridge has a slight impression after long storage. To fix the problem: ■ Run 20-30 prints. The impression will disappear with continued time and use.
Troubleshooting 7 Troubleshooting and print quality quick reference (cont'd.) Symptom Possible Causes Solution On the Consumables Page, each color “bleeds” into the color band below it (the most visible is magenta in the yellow band). The Imaging Unit’s internal waste toner box is full. Replace the Imaging Unit. A single white spot appears in approximately the same vertical place on the page. The Imaging Unit is damaged. Replace the Imaging Unit.
7 Troubleshooting Troubleshooting and print quality quick reference (cont'd.) Symptom Possible Causes Solution Large light spot(s) appear randomly in the Consumables Page, approximately on the same horizontal and vertical place or they move vertically from one print to another. Fingerprint(s): someone has touched the underside of the Imaging Unit. Print several pages until the artifacts fade. A smear in the image repeats at the same location on the page .
Troubleshooting 7 Troubleshooting and print quality quick reference (cont'd.) Symptom Possible Causes Solution Front panel reports: Fuser:replace The Fuser is wearing out. Replace the Fuser soon. Front panel reports: Fuser expired The Fuser is worn out. Replace the Fuser now; although it continues to function, the print quality is affected. A piece of the printed image is missing and reappears out of place, approximately 129 mm (5 in.) down the page.
7 Troubleshooting Troubleshooting and print quality quick reference (cont'd.) Symptom Possible Causes Solution Dark and wavy vertical streaks appear in all colors (most easily visible in yellow). The Main Charge Grid is dirty. Replace the Main Charge Grid. Complete instructions are packaged with the Main Charge Grid. Refer to “Supplies and accessories” on page 9-2 for ordering information. The entire page prints in black, including the borders.
Troubleshooting 7 Troubleshooting and print quality quick reference (cont'd.) Symptom Possible Causes Solution The page prints in black in the image area only (the borders are clear). Either the image processor board or engine control board is not functioning properly. Turn the printer off and back on again. If the problem persists, call Service. See page 7-1. The page is completely blank.
7 Troubleshooting If you can’t make a print Symptom Solution Printer not operating Make sure that you plugged in the printer and turned it on. Make sure that you connected the interface cable(s) properly. Print the Consumables Page from the front panel to verify that the controller board is functional. Verify that your print engine is functional by pressing the Test Print button (the blue pushbutton in the center of the back of the printer), and holding it down for 3 seconds.
Troubleshooting 7 If you can’t make a print (cont'd.) Symptom Solution Power indicator blinks and stops, but the file does not print This is probably the result of a PostScript error. Enable the PostScript error handler in the printer’s front panel. For more information on using the PostScript error handler, refer to the topics on the printer’s CD-ROM or the Tektronix World Wide Web site. Printer will not power up to Ready This may be the result of an unterminated network connection.
7 Troubleshooting Media problems (cont'd.) Symptom Solution Frequent media jams Make sure that you use a high-quality laser paper: 75-105 g/m2 (20-28 lb.) paper in the media trays and 75-120 g/m2 (20-32 lb.) paper in the Multi-Purpose Feeder. Refer to “Media hints and tips” on page 7-38 for more information. Make sure that the Media Thickness switch is set correctly for the media installed in the Multi-Purpose Feeder.
Troubleshooting 7 Print quality problems Symptom Solution Prints have dull, faded colors ■ ■ If you are using a media tray, make sure that you have loaded the correct media in the PAPER tray or TRANSPARENCY tray. If you are using the Multi-Purpose Feeder, make sure that you have selected the correct media type in the printer’s front panel or in the printer driver. Print the Color Reference Page from the Calibrate Colors menu in the front panel.
7 Troubleshooting Print quality problems (cont'd.) Symptom Solution Streaks or spots Most spots are caused by fingerprints or dust introduced into the printer while installing the Imaging Unit or loading media. Make sure that the surface where you unpack the Imaging Unit, paper, and transparencies is free of dust. Keep supplies in a covered area or a closed box. Make sure that the Imaging Unit stays covered until immediately before installing it in the printer.
Troubleshooting 7 Printing hints Application hints For information about using specific software applications with your printer, contact Tektronix’ HAL or EuroHAL information systems. In the U.S., call 1-800-835-6100 or (503) 682-7450; for EuroHAL telephone numbers, refer to “If you need help” on page 7-1. For a complete listing of available topics, request a catalog. Tektronix supplies and software Always use Tektronix supplies to ensure the highest quality prints and printer performance.
7 Troubleshooting Improving print speed There are different ways to improve print speed, such as by upgrading to EtherTalk on a Macintosh, to Novell NetWare on a PC, or to TCP/IP on a workstation. For more information, request a document catalog from HAL or EuroHAL, the Tektronix automated fax systems. Refer to page 7-3 for instructions on using these systems. Relative port speed Ethernet and Token Ring are the fastest ports, followed by the parallel port, the LocalTalk port, then the serial port.
Troubleshooting 7 The printer’s optimum image processing throughput via a dedicated Ethernet connection is faster than the other ports. Actual throughput will generally be somewhat affected by network traffic, image complexity, color correction, and memory configuration. For details on the printer’s paper-marking speed, see “Specifications” on page 10-7. If you tried to print a document with bitmapped images, but are dissatisfied with the speed of the output, here are some suggestions.
7 Troubleshooting Windows 3.1 users (using the Tektronix driver) 7-24 1. From the Control Panel, double-click Printers. 2. Select the Tektronix Phaser 560 printer in the Printers dialog box. 3. Disable Use Print Manager in the Printers dialog box. Printing via the Print Manager is slower, but turning it off ties up the PC longer. 4. From the Printers dialog box, click Setup. 5. From the Setup dialog box, click Options. 6. From the Options dialog box, click Advanced. 7.
Troubleshooting 7 Windows 95 users 1. Click the Start icon in the taskbar on your screen; a menu appears. 2. Move the cursor over Settings; another menu appears. 3. In the menu, click Printers; the Printers window appears. 4. In the Printers window, select the Phaser 560 printer icon, then select Properties from the File menu. 5. Click the PostScript tab, then click the Advanced button. 6. Select Use PostScript Level 2 features. 7. Click OK when finished. 8. Try printing the document again.
7 Troubleshooting PostScript printing errors Note For information on specific applications, request a document catalog from HAL or EuroHAL, the Tektronix automated fax systems. Refer to page 7-3 for instructions on using these systems. If your printer reports a PostScript error when printing from Adobe PageMaker, Adobe FreeHand, QuarkXPress, or Canvas, you may be using an older or incorrect version of the Printer Description File (PPD).
Troubleshooting 7 Using a PostScript error handler The error handling utility, enabled in the Printer Defaults menu of the printer’s front panel, is useful for diagnosing problems when a job doesn’t print. It provides a PostScript error-handling function to help determine the cause of some PostScript printing problems. PostScript errors are printed on a page with other status information when an error occurs. This utility can be useful to programmers and technical support for debugging PostScript code.
7 Troubleshooting Fixing timeout problems in Windows Try one of the following procedures to correct Windows timeout problems. If a Windows procedure doesn’t work for you, try the DOS procedure (refer to the on-line manual on the printer’s CD-ROM or at Tektronix’ World Wide Web site). From Windows 3.1 1. Open the Control Panel from the Main menu. 2. Double-click the Printers icon to open the Printers dialog box. 3. Click the Connect button to open the Connect dialog box. 4.
Troubleshooting 7 Printed colors are not what you expected In general ■ Select another Color Correction option in a supported driver and print your image again; refer to page 4-24 for more information on color correction. ■ If you are not using a supported driver and are sharing the printer with other users on a network, another user may have changed the printer’s color adjustment setting. Refer to page 7-36 for more information on sharing a network printer.
7 Troubleshooting Printing PANTONE Colors If Phaser 560 printer-specific PANTONE Colors are not printing as expected, make sure that you are printing without any color corrections selected. Refer to “Printing and using the color sampler charts” on page 5-25 for more information. If you have questions about PANTONE Color Matching, refer to the HAL article on PANTONE Colors. Refer to page 7-3 for information on using the HAL and EuroHAL fax systems.
Troubleshooting 7 Macintosh users Note If you are using QuickDraw GX and System Software 7.5, you can download printer utilities from the Tektronix Phaser 560 GX printer driver; refer to topics on the printer’s CD-ROM or the Tektronix World Wide Web site for instructions. 1. Follow the instructions starting on page 3-16 to install the utility files from either the printer’s CD-ROM or the Printer Software for Macintosh diskette. 2. Select the appropriate printer in the Chooser. 3.
7 Troubleshooting PC and workstation users 1. Follow the instructions starting on page 3-1 to install the utility files from either the printer’s CD-ROM or the software diskettes. 2. Locate the installed files in the PHSR560 subdirectory, inside the PHSRTOOL directory on your computer’s hard disk. 3. Use one of the following files: 4. 7-32 ■ Select SCREENON.PS to enable setscreen operations. ■ Select SCRENOFF.PS to disable setscreen operations.
Troubleshooting 7 Selecting page sizes in Windows applications In some Windows applications, you can select printer page sizes in a Print Setup dialog box accessed from the File menu. If you use a Print Setup dialog box to select the Phaser 560 printer from your application, some page sizes may not be visible in the list. If the Phaser 560 printer page size you want to use is not visible in the list, do the following: Windows 3.1 1.
7 Troubleshooting Windows 95 1. Click the Start icon in the taskbar on your screen; a menu appears. 7-34 2. Move the cursor over Settings; another menu appears. 3. In the menu, click Printers; the Printers window appears. 4. In the Printers window, select the Phaser 560 printer icon, then select Properties from the File menu. 5. Click the Paper tab. 6. Choose a page size, and click OK. 7. Return to your application.
Troubleshooting 7 Fonts printing incorrectly from Windows If fonts are printing incorrectly from Windows, make sure that you installed the correct printer with the supported driver. ■ If you have the standard printer configuration, you should have installed Tektronix Phaser 560. ■ If you have the printer’s Extended Features option with the additional fonts, you should have installed Tektronix Phaser 560 with Extended Features so that Windows recognizes and uses all the printer’s 39 fonts.
7 Troubleshooting Sharing the printer on a network Driver, utility files, and front panel interactions If your printer is shared by other users on a network, you can affect prints made by other users when you use the downloadable utility files or the printer’s front panel to change the printer’s default color correction setting.
Troubleshooting 7 Startup page prints even though it is disabled The printer’s power-up self-test can detect problems that do not necessarily make the printer completely inoperable. Examples of these non-fatal errors include faulty printer ports and some memory failures. If the printer detects a non-fatal error at power-up, the startup page prints, even if you have disabled it. In this case, the page contains one or more of the error messages listed in the following table.
7 Troubleshooting Media hints and tips Use high-grade media. For best reliability and image-quality, always use Tektronix media. Tektronix printers and Tektronix supplies are Made For Each Other®. Refer to “Phaser 560 Printer Supplies” on page 9-2 for ordering information. Do not use media designed for inkjet printers; they will damage the fuser. Media handling Make sure that the media is dust-free. Dust and dirt can result in ■ poor print quality.
Troubleshooting 7 Clearing a media jam If the printer has frequent media jams, make sure that you follow these guidelines: ■ Always use high-quality laser paper and Tektronix-brand transparencies, glossy paper, and fabric transfer media. ■ Make sure that you load specialty media only in the Multi-Purpose Feeder and that you set the Media Thickness switch to the correct setting for the media used. .
7 Troubleshooting Jam at A Solution 1 Solution 2 1. Open the left side door (if your printer has a Lower Tray Assembly installed, open the Upper left side door). 1. Remove the media tray (if your printer has a Lower Tray Assembly installed, remove the Upper media tray). R A4 PE PA 1 9698-61 2. Remove the complete piece of jammed media. 2. Remove the complete piece of jammed media from inside the printer.
Troubleshooting 7 Jam at B Solution 1 Solution 2 1. Open the lower left side door. 1. Remove the selected media tray (Middle or Lower media tray). r tte Leper A/Pa r tte Leper A/Pa 1 l ga Le per Pa r tte Leper A/Pa 9698-57 2. Remove the complete piece of jammed media. 2. Remove the complete 1 piece of jammed media from inside the printer.
7 Troubleshooting Jam at C Caution The Fuser is hot; to avoid personal injury, wait 10 minutes for the Fuser to cool before touching it. 1. Remove the Fuser: a. Open the printer’s front door. b. Turn the small blue thumbscrew counterclockwise to unlock the Fuser. c. Slide the Fuser out of the printer. a b c 9698-35 2. Remove the Fuser Roll: a. Press out on the two tabs to unlock the Fuser Roll. b. Lift the Fuser Roll out of the Fuser and set it aside.
Troubleshooting 7 Jam at C (cont'd.) 3. Turn the Fuser’s large blue knob clockwise or counterclockwise to release the jammed media. 4. Remove the complete piece of jammed media from the Fuser. 3 4 9698-36 5. Re-insert the Fuser Roll into the Fuser (press firmly to snap it into place); re-install the Fuser. Note The Fuser must be removed and re-inserted to clear the front panel error message.
7 Troubleshooting Jam at D Solution 1 Caution The Fuser is hot. To avoid personal injury, open the front door and allow the Fuser to cool for 10 minutes before touching it. Warning First check the exit opening for media that has jammed and folded like an accordion. It is especially difficult to see if the media is transparency film. 1. Open the front door to access the Fuser. 2. Pull open the access door (above the plastic output tray); the media is visible. 3.
Troubleshooting 7 Jam at D (cont'd.) Solution 2 Caution The Fuser is hot. To avoid personal injury, open the front door and allow the Fuser to cool for 10 minutes before touching it. 1. Open the front door and the right side door. 2. Turn the Fuser’s large blue knob counterclockwise to release the jammed media. 3. Remove the jammed media from the right side of the printer.
7 Troubleshooting Jam at E Solution 1 Solution 2 Remove the jammed media from the output tray. Pull open the access door (above the plastic output tray) and remove the media. R A4 PE PA R A4 9698-39 PE PA 9698-40 Jam at Multi-Purpose Feeder 1. Remove all media in the Multi-Purpose Feeder. 2. Remove the complete piece of jammed media from the Multi-Purpose Feeder. 2 3. Make sure that you set the Media Thickness switch for the media that you are using. 4.
Chapter 8 Using the Front Panel Front panel The front panel provides a display of two lines of 24 characters each for messages, button labels, and user-adjustable parameter settings. Front panel indicators The front panel includes two indicator lights: 1. Power (green LED) 2. Error (red/amber LED) 1 2 Exit 9008-34 Indicator On Blinking Off 1. Power The printer is on and ready for operation. The printer is processing or printing an image. The printer is not ready, or there is an error.
8 Using the Front Panel Front panel buttons The front panel buttons function according to which of these states (modes) the printer is in: Exit 1 2 3 Mode 9698-115 Front Panel Buttons 1 Ready / Printing 2 3 Info Provides printer information when pressed. Refer to page 8-5 for detailed information. Idle mode or Normal operating mode Printing Processing 4 Menu Accesses the front panel menu. Cancel Cancels a job that is printing. Printing mode Menu Accesses the front panel menu.
Using the Front Panel Mode Front Panel Buttons 1 Check Print Driver selection Diagnostics Printer detects an error and stops 8 2 Reprint Reprints the first page of the print job. Refer to page 5-11 for detailed information. 3 Cancel Cancels the current print job. 4 Continue Completes the current print job. Info Provides printer information when pressed. Refer to page 8-5 for detailed information. More Displays more information about the nature of the error.
8 Using the Front Panel Two-line display The two lines of the display have the following functions: Line a Displays status messages such as Ready and Printing. ■ Displays operation errors and warnings such as :low . ■ Displays the names of menus and parameters you can set. ■ Line b Displays button labels such as <---for previous and ---> for next ■ (for moving through selections in a given menu), Menu for access to a menu of selections, and Printand OK to make selections.
Using the Front Panel 8 Printer information The second button on the front panel (2) allows you to access the following information from the printer’s current settings; this information appears on the upper line of the front panel display (a); the second line of the display (b) provides the More label for the second button. a b Name:Phaser 560 More Menu Exit 1 2 3 4 9698-56 The type of information varies, depending on what the current mode is.
8 Using the Front Panel Protected mode for the front panel menu System administrators may choose to limit user access to front panel menus by downloading a utility file to the printer. The “lock” utility file prevents most menu items from being displayed on the front panel. The capability of limiting menu access is often useful when a system administrator needs to retain control of the printer’s settings.
Using the Front Panel Front panel menu map 8 Phaser 560 Menu Map Press <--- scrolls backward through available selections ---> scrolls forward through available selections Menu enters the next sub-menu Menu Exit exits without making a change OK accepts the displayed value as the new setting Help Pages Menu Exit Calibrate Colors Consumables Page Demonstration Page Startup Page Configuration Page Service Print 1 Service Print 2 RGB Sampler Prints CMYK Sampler Prints Menu Map Adjust Light/D
8 Using the Front Panel Printing Help Pages The printer has several Help Pagesthat you can print to learn more about the printer. Consumables Page * Provides a test pattern to diagnose and correct print-quality problems. Includes a gauge for each consumable showing % Remaining. Demonstration Page: Provides a colorful way of learning more about the printer while demonstrating its printing quality. Prints in the currently selected print quality and color correction modes.
Using the Front Panel 8 To print any of the front panel’s Help Pages, follow these steps: 1. While the Ready message is displayed, press the Menu button. The printer displays the first item in the menu: Help Pages <--------> Menu Exit 9008-43 2. Press the Menu button to enter the Help Pagesmenu. 3. Press the left (<--) or right arrow (---> ) button until the printer displays the name of the page you want to print.
8 Using the Front Panel Enabling and disabling the Startup Page You can enable and disable printing of the Startup Page in three ways: ■ On a PC, send a PostScript language utility file to the printer. For more information, refer to the topics on the printer’s CD-ROM or the Tektronix World Wide Web site. ■ On a Macintosh, use the LaserWriter utility to download a utility file. ■ Through the printer’s front panel, according to the following instructions: 1.
Using the Front Panel 8 ) or right arrow (---> ) buttons, scroll 4. Using the left arrow (<--through the selections until the following message appears: Startup Page <--------> Menu Exit 9008-43 5. Press the Menu button to access the Startup Page settings. ) button once for the following 6. Press the right arrow (---> message: Startup Page:disabled <--------> OK Exit 9008-43 7. Press the OK button to disable printing of the Startup Page.
Chapter 9 Supplies, Accessories, and Expanding Your Printing System Tektronix Printer and Tektronix supplies: Made For Each Other® Tektronix supplies are developed and tested as a total system: printer, user-replaceable components, and media. These system components work together to produce consistent, high-quality color images. Always order Tektronix supplies for your Phaser 560 printer to guarantee the best print quality, media feed reliability, and trouble-free printer performance.
9 Supplies, Accessories, and Expanding Your Printing System Supplies and accessories Phaser 560 Printer Supplies Order number Description 016-1536-00 Black 016-1537-00 Cyan 016-1538-00 Magenta 016-1539-00 Yellow 016-1534-00 110 volt 016-1535-00 220 volt Supplies High Capacity Toner cartridges Fuser Fuser Roll 016-1556-00 Imaging Kit 016-1523-00 Transfer Kit 016-1533-00 Main Charge Grid 118-9070-02 Media Laser paper 016-1368-00 A/Letter (U.S.
9 Supplies, Accessories, and Expanding Your Printing System Phaser 560 Accessories Accessories Manuals Printer software Cleaning supplies Order Number Description 436-0282-01 A/Letter paper tray 436-0283-01 A4 paper tray 436-0284-01 A/Letter transparency tray 436-0285-01 A4 transparency tray 436-0314-00 Legal paper tray 118-9536-00 Output tray 4676FTA Lower Tray Assembly (includes one A/Letter paper tray and one A/Letter transparency tray; order Option 01 for metric trays) 352-1066-00
9 Supplies, Accessories, and Expanding Your Printing System Interface cables and adapters The following cables and adapters are available through Tektronix or your dealer. Contact your dealer for other cables and adapters. Printer interface cables and adapters Order number Description Connectors and cable length 012-1468-00 Parallel cable 36-pin high-density plug to 25-pin DSUB plug; 3 meters (9.84 feet) Connects the printer’s parallel port to a PC or workstation parallel port.
9 Supplies, Accessories, and Expanding Your Printing System Expanding your printing system Upgrade kits Order number ZMA16 Description 16-Mbyte SIMM for adding memory (Option 16); see “Advantages of adding memory” on page 9-7. ZMA32 32-Mbyte SIMM for adding memory (Option 32); see “Advantages of adding memory” on page 9-7. Z560FX Extended Features SIMM for 22 additional fonts, Premium print-quality mode, Quick Collate and Check Print features, 1200 dpi support, and Copystation support.
9 Supplies, Accessories, and Expanding Your Printing System Extended Features upgrade In its standard configuration, the Phaser 560 printer offers 8 Mbytes of RAM memory (expandable to 72 Mbytes), 17 fonts, and PhaserLink™ software, Tektronix’ online control of printer features and access to printer information through a standard web browser.
9 Supplies, Accessories, and Expanding Your Printing System Memory upgrade The Phaser 560 printer has 8 Mbytes of standard memory. You can upgrade the printer’s memory with one or two 16- and 32-Mbyte SIMMs (for a total of 24, 40, 56, or 72 Mbytes). Note If you are not sure which printer configuration or how much memory is installed in your printer, print the startup page from the Help Pages menu in the front panel; look for the entry for RAM Memory.
9 Supplies, Accessories, and Expanding Your Printing System PhaserShare network cards Tektronix PhaserShare™ network cards offer high-performance network connectivity for your color printer. PhaserShare network cards can be easily installed in your printer. Order number Description Z350FP1 Adds Ethernet interface; includes support for Novell NetWare, EtherTalk, TCP/IP, Telnet and FTP. (Same as Option P1.) Z350FP3 Adds LocalTalk/Serial interface. (Same as Option P3.
9 Supplies, Accessories, and Expanding Your Printing System Phaser Copystation accessory The Phaser Copystation accessory adds easy-to-use, walk-up color copying capability to the Phaser 560 Color Laser Printer. The Copystation’s front-panel controls let you specify the number of copies and select among color, gray scale and black-and-white copying modes. You can choose to make copies reduced to 25% or enlarged to 200% of the original’s size, and you can adjust copies for color balance and lightness.
9 Supplies, Accessories, and Expanding Your Printing System PhaserPrint for UNIX For printing in UNIX environments, Tektronix offers PhaserPrint™ for UNIX software which provides fast raster file and screen copy printing to Tektronix color printers. PhaserPrint for UNIX software also provides a graphical user interface for push-button control of Tektronix printer features.
Chapter 10 Regulatory Information and Specifications Canadian EMC (Electromagnetic Compatibility) regulatory standards ■ This digital apparatus does not exceed the Class B limits for radio noise emissions from digital apparatus set out in the Radio Interference Regulations of the Canadian Department of Communications.
10 Regulatory Information and Specifications Declaration of conformity (for 220-230 VAC equipment) Tektronix, Inc. Color Printing and Imaging Division P.O. Box 1000 Wilsonville, Oregon 97070-1000 U.S.A.
Regulatory Information and Specifications 10 FCC Class B device (for 100-120 VAC equipment) The equipment described in this manual generates and uses radio frequency energy. If it is not installed and used properly in strict accordance with Tektronix’ instructions, it may cause interference with radio and television reception. This equipment has been tested and verified to comply with the limits for a Class B digital device, pursuant to Part 15 of the FCC Rules.
10 Regulatory Information and Specifications Material Safety Data Sheets Proper management of environmental resources protects the well-being of our employees, customers, shareholders, and the communities we are a part of worldwide. Tektronix establishes and maintains sound environmental management practices to accomplish this goal and to assure compliance with the laws, regulations, and orders of the responsible governmental authorities wherever Tektronix and its subsidiaries operate.
Regulatory Information and Specifications 10 MSDS for Toner Section 1 – Product Identification Trade NamesTektronix Part Number: Black Toner Cartridge Cyan Toner Cartridge Magenta Toner Cartridge Yellow Toner Cartridge 016-1536-00 016-1537-00 016-1538-00 016-1539-00 Product Use: Tektronix Phaser® 560 printers Section 2 – Information On Ingredients Ingredients Toners are a proprietary blend of pigments and resins, encased in a sturdy housing.
10 Regulatory Information and Specifications Section 8 – Exposure Control – Personal Protection No special protection indicated when used as intended. TLV/PEL: Black toner contains carbon black, which has an OSHA Permissible Exposure Limit (PEL) of 3.5 mg/m3 (milligrams per cubic meter of air), as an eight-hour time-weighted average. The ACGIH Threshold Limit Value (TLV) is also 3.5 mg/m3. Section 9 – Physical And Chemical Properties Appearance: Black, blue, red, or yellow powders. Odor: None.
Regulatory Information and Specifications 10 Specifications Temperature o o o o Operating: 10 C to 32.5 C (50 F to 90.
10 Regulatory Information and Specifications Dimensions with Lower Tray Assembly Height: 678 mm (26.7 in.) Depth: 492 mm (19.4 in.) Width: 507 mm (20* in.) *782 mm (30.8 in.) with the output tray Weight of standard unit with all consumables (without Lower Tray Assembly) 47.5 kg (104.6 lbs.) Weight of Lower Tray Assembly 14.3 kg (31.6 lbs.
Index A A/Letter media trays 4-34 ordering 9-3 A/Letter media, dimensions 4-30 A4 media trays 4-34 ordering 9-3 A4 media, dimensions 4-30 accessories, ordering 9-3 adapters, ordering 9-4 additional memory 9-7 adjusting color density 5-2 adjusting printed colors 5-17 Adobe Photoshop plug-in 3-17 Adobe PostScript driver 4-10 advantages of networking PhaserShare cards 9-8 Apple LaserWriter 8 driver setting up 3-20 using 4-16 applications, color adjusting 5-24 automated fax systems (HAL/EuroHAL) printing hints
color correction (cont’d.
errors, PostScript 7-26 Ethernet ordering 9-5 PhaserShare card and protocols 2-18 problems, troubleshooting 7-16 EuroHAL, automated fax system 7-3 Euroscale Press color correction, description 5-22 Extended Features fonts 4-27 PCL5 4-28 upgrade, ordering 9-6 external hard disk ordering 9-10 SCSI ID 2-19 F fabric transfer media loading 4-52 ordering 9-2 Fast Color print mode 4-23 Fast Monochrome print mode 4-23 fastest printing available 7-23 features descriptions 4-20 front panel selections 4-21 selecting
G general-purpose printing 5-20 getting help online services 7-2 phone numbers 7-1 getting the best results 7-30 glossy paper loading Multi-Purpose Feeder 4-46 ordering 9-2 H HAL, automated fax system 7-3 telephone number and instructions 7-3 halftone screens 7-30 hard disk turning on the power 2-20 hard disk, SCSI ID 2-19 Help Pages Consumables Page 7-4 menu map 8-7 printing 8-8 service prints 8-8 startup page 2-21 HP-GL, using 4-29 HSB color sampler chart, printing 5-25 HSB utility file 5-26 I idle mode
loading 2-12 media thickness switch 4-41 trays 4-34 weights 4-41 Legal-size media dimensions 4-30 print area 4-31 Legal-size media tray description 4-34 ordering 9-3 letterhead media loading the Multi-Purpose Feeder 4-45 loading the tray 4-37 Letter-size media trays ordering 9-3 loading media 2-12 duplex printing 4-54 initial setup 2-12 Multi-Purpose Feeder 4-44 trays 2-15 loading the paper tray, capacity 4-36 loading the transparency tray, capacity 4-38 loading transparencies 4-39 LocalTalk ordering 9-5 pr
media trays description 4-34 loading 2-12 ordering 9-3 memory advantages of upgrading 9-7 order numbers 9-7 menu map 8-7 Microsoft Windows NT PostScript printer driver, updating 4-8 moving the printer 6-18 MSDS, toner 10-5 multiple copies, collating 5-8 Multi-Purpose Feeder card stock, loading 4-46 double-sided printing 4-56 envelopes 4-48 fabric transfer 4-52 glossy coated paper, loading 4-46 labels 4-50 letterhead 4-45 limit indicator 4-42 loading media 2-13 setting media thickness 4-41 specialty media 4-
PC utility files CMYK.PS 5-26 HSB.PS 5-26 RGB.
print quality quick reference table 7-7 print speed hints 7-23 improving 7-22 printer configuration information 7-35 printer control PhaserLink 1-3 selecting features 4-20 printer drivers, using Adobe PostScript driver Windows 3.1 4-10 Windows 95 4-4 AdobePS 3 (Windows 3.1) 4-10 PostScript driver for Windows NT 3.5 4-8 PostScript driver for Windows NT 4.0 4-6 Tektronix driver for Windows 3.1 4-9 printer languages 4-29 printer weight installing 2-7 repacking 6-22 specifications 10-8 PRINTER.
S SCSI devices, connecting 2-19 devices, ordering 9-10 ID numbers 2-19 selecting page sizes in Windows applications 7-33 self-tests 2-21 service print 7-6 Setscreen 7-30 setting up the printer 2-2 simple color conversions, CMYK and RGB 5-23 Simulate Display color correction description 5-21 software, drivers installation 3-1 setup on a network, Windows NT 3.
troubleshooting black and white prints instead of color 7-20 bleeding colors 7-11 clearing media jams 7-39 cut off images 7-18 dark, vertical line 7-12 fine-line detail missing 7-10 fingerprints 7-12 frequent paper-picking errors 7-17 image shifts (Macintosh) 7-18 image size and position 7-18 light spots 7-12 light vertical line 7-10 margins incorrect (Macintosh) 7-18 media jams 7-18 off-set images 7-18 paper-picking errors 7-17 power light blinks, but file doesn't print 7-17 print job does not finish 7-17
V Vivid Color color correction description 5-21 W Windows 3.1 driver PostScript Header 4-10 PostScript tab 4-10 problems with printer fonts 7-35 problems with setting page sizes 7-33 timeout problems 7-28 using the Adobe PostScript driver 4-10 using the Tektronix driver 4-9 Windows 95 driver Device Options tab 4-4 Graphics tab 4-4 Paper tab 4-10 PostScript Header 4-5 PostScript tab 4-5 problems with printer fonts 7-35 timeout problems 7-28 timeouts, setting 4-10 using 4-10 Windows NT 3.5 and 3.