Operator's Manual HDO6000 High Definition Oscilloscopes
HDO6000 High Definition Oscilloscope Operator's Manual © 2013 Teledyne LeCroy, Inc. All rights reserved. Unauthorized duplication of Teledyne LeCroy documentation materials other than for internal sales and distribution purposes is strictly prohibited. However, clients are encouraged to distribute and duplicate Teledyne LeCroy documentation for their own internal educational purposes. HDO6000 and Teledyne LeCroy are trademarks of Teledyne LeCroy, Inc.
Operator's Manual Contents Welcome v Safety Instructions Symbols Precautions Operating Environment Cooling Power 1 1 1 2 2 2 Start Up Setting Up the Oscilloscope Powering On/Off Software Activation 3 3 5 5 Inputs/Outputs Front Input/Output Panel Side Input/Output Panel Back Input/Output Panel Analog Inputs Probes Digital Inputs 6 6 6 7 7 7 8 Touch Screen Menu Bar Signal Display Grid Descriptor Boxes Dialogs Shortcut Toolbar Control Application Window Enter/Select Data Annotate Traces Print Screen S
HDO6000 High Definition Oscilloscope Turn off Zoom Quick Zoom Multi-Zoom Zoom Controls Rescale Memory or Math Function Traces Multi-Zoom 24 24 24 24 26 26 Vertical Vertical Settings Pre-Processing Settings Probe Dialog Deskew Channels 28 28 29 29 30 Digital (Mixed Signal) Digital Traces Activity Indicators Digital Group Set Up Digital Display Set Up Renaming Digital Lines 31 31 31 32 32 33 Timebase Timebase Settings Sampling Modes Clock Source Settings Auto Setup Restore Default Setup 34 34 35 39 40
Operator's Manual Help Markers Qualified Parameters Math on Parameters Calculating Measurements 62 63 64 66 Math Single vs.
HDO6000 High Definition Oscilloscope Manage Notebook Entries Manage Notebooks Print to NoteBook Entry Flashback Recall Customize Report Configure LabNotebook Preferences 117 119 120 120 120 121 Maintenance Cleaning Calibration Touch Screen Calibration Language Selection Add Software Option X-Stream Firmware Update HDO System Recovery Technical Support Returning a Product for Service 122 122 122 122 122 123 124 125 127 128 Contact Teledyne LeCroy 129 Certifications EMC Compliance Safety Compliance Envi
Operator's Manual Welcome Thank you for purchasing a Teledyne LeCroy High Definition Oscilloscope. We're certain you'll be pleased with the detailed features so unique to our instruments. The manual is arranged in the following manner: Safety contains important precautions and information relating to power and cooling. The sections from Start Up through Maintenance cover everything you need to know about the operation and care of the oscilloscope.
HDO6000 High Definition Oscilloscope vi 922499 Rev B
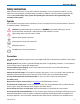
Operator's Manual Safety Instructions Observe these instructions to keep the instrument operating in a correct and safe condition. You are required to follow generally accepted safety procedures in addition to the precautions specified in this section. The overall safety of any system incorporating this instrument is the responsibility of the assembler of the system.
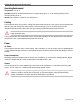
HDO6000 High Definition Oscilloscope Operating Environment Temperature: 5 to 40° C. Humidity: Maximum relative humidity 90 % for temperatures up to 31° C, decreasing linearly to 50% relative humidity at 40° C. Altitude: Up to 3,048 m (10,000 ft) at or below 30° C. Cooling The instrument relies on forced air cooling with internal fans and vents. Take care to avoid restricting the airflow to any part.
Operator's Manual Start Up Setting Up the Oscilloscope Checking Shipment Verify that all items on the materials list below have been shipped to you: l 1 oscilloscope l 4 passive probes (one for each channel) l 1 AC line (power) cord rated for country of use l 1 protective front cover l 1 Getting Started Guide l 1 Oscilloscope Security Certificate l 1 Oscilloscope Registration Card l 1 Calibration Document Mixed-signal (-MS) model oscilloscopes also ship with: l 1 digital leadset l 5 flyi
HDO6000 High Definition Oscilloscope Positioning the Feet The HDO is equipped with rotating, tilting feet to allow four different viewing positions. To tilt the body back slightly for bench top viewing, pull the small flaps on the bottom of the feet away from the body of the oscilloscope. To tilt the body forward, rotate both feet to the back. This position is useful when placing the oscilloscope on a high shelf. Pulling out the flaps in this position increases the angle of the tilt.
Operator's Manual EXTERNAL CONTROLLER Connect a USB-A/B cable from the USBTMC port on the back of the instrument to the controller. Go to Utilities > Preference Setup > Remote to configure remote control. OTHER INSTRUMENT (FOR REFERENCE CLOCK) Connect a BNC cable from Ref In/Out on the back of the oscilloscope to the other instrument. Go to Timebase > Horizontal Setup > Reference Clock to configure the clock.
HDO6000 High Definition Oscilloscope Inputs/Outputs Front Input/Output Panel A. The Power button turns on/off the oscilloscope. B. BNC connectors for analog input on Channels 1–4 (or 1–2 depending on model), and EXT for connecting an external trigger device. C. Mixed signal interface for digital inputs. D. Ground and calibration output terminals are used to compensate passive probes. E.
Operator's Manual Back Input/Output Panel A. Aux Out connector sends device trigger enabled, trigger out, or pass/fail output to another device. B. Ref In/Out connector allows you to input an external Reference Clock, or to output a Reference Clock to another instrument. C. USBTMC Port enables remote control of the oscilloscope. D. AC Power Inlet connects the AC line cord. See the general set up instructions for more information about configuring connections to other devices.
HDO6000 High Definition Oscilloscope Digital Inputs Standard with all HDO6000-MS model oscilloscopes, the digital leadset enables input of up-to-16 lines of digital data. Lines can be organized into four logical groups and can be named appropriately. The digital leadset features two digital banks with separate threshold and hysteresis controls, making it possible to simultaneously view data from different logic families.
Operator's Manual Touch Screen The touch screen is the principal viewing and control center of the oscilloscope. The entire display area is active: use your finger or the stylus to touch, double-touch, touch-and-drag, touch-and-hold (right click) or draw a selection box. Many controls that display information also work as “buttons” to access other functions.
HDO6000 High Definition Oscilloscope Signal Display Grid The grid area displays the waveform traces. It is sectioned into 10 Horizontal (Time) divisions and 8 Vertical (Voltage) divisions. Multiple Grid Display You can divide the display to simultaneously view multiple traces in different grids. By default, the oscilloscope has Auto Grid enabled. This divides the display into additional grids each time a new trace is opened, up to 16 grids for simultaneous viewing.
Operator's Manual Pre/Post-trigger Delay - A small arrow to the bottom left or right of the grid indicates that a preor post-trigger Delay has shifted the Trigger Position indicator to a point in time not displayed on the grid. All trigger Delay values are shown on the Timebase Descriptor Box. Trigger Level - This small triangle at the right edge of the grid tracks the trigger voltage level.
HDO6000 High Definition Oscilloscope Preprocessing Symbols on Descriptor Boxes Pre-Processing Type Long Form Short Form Sin X Interpolation SINX S Averaging AVG A Inversion INV I Deskew DSQ DQ Coupling DC50, DC1M or AC1M D50, D1M, or A1 Ground GND G Bandwidth Limiting BWL B Similar descriptor boxes appear for zoom (Zx), math (Fx), and memory (Mx) traces. These descriptor boxes show any Horizontal scaling that differs from the signal Timebase.
Operator's Manual Dialogs Dialogs appear at the bottom of the display for entering setup data. The top dialog will be the main entry point for the selected setup option. For convenience, related dialogs appear as a series of tabs behind the main dialog. Touch the tab to open the dialog. Dialogs may also display right-hand dialogs (sub-tabs) or pop-up dialogs. These often change depending on the other selections made on the left-hand dialog.
HDO6000 High Definition Oscilloscope To restart Windows (reboot the oscilloscope), choose File > Shutdown. Wait 10 seconds then press the Power button on the front of the oscilloscope. Enter/Select Data Touch & Type Touching once activates a control. In some cases, you’ll immediately see a pop-up menu of options. Touch one to select it. In other cases, data entry fields appear highlighted on the display.
Operator's Manual Touch & Swipe Touch and swipe the screen in an up or down direction to scroll long lists of values. You can also use scroll bars or Up/Down arrow keys to navigate to the desired value. Stylus Use the stylus when you want a more precise selection tool than your finger. It is especially helpful for selecting exact areas of the grid or values that lie close together on pop-up menus.
HDO6000 High Definition Oscilloscope Annotate Traces The Label function gives you the ability to add custom annotations to traces that are shown on the display. Labels are numbered sequentially in the order they were created. Once placed, labels can be moved to new positions and turned on/off. Create Label 1. Touch the trace, then choose Set label... from the pop-up menu. OR Touch the trace descriptor box twice, then touch the Label shortcut button on the setup dialog. 2.
Operator's Manual Print Screen Print captures an image of the display and outputs it according to your Hardcopy settings, which may be to send it to a network printer, e-mail it, save it to a file, or copy it to the clip-board to paste into another application. There are three ways to print: l Touch the Front Panel Print button. l Choose File > Print. l Choose Utilities > Utilities Setup > Hardcopy tab and touch the Print button to the far right of the dialog.
HDO6000 High Definition Oscilloscope Front Panel Most Front Panel controls duplicate functionality available through the touch screen display and are described on the following pages. Shortcut buttons arranged across the top of the Front Panel give quick access to commonly used functions. Other shortcut buttons arranged across the bottom open special applications. All the knobs on the Front Panel function one way if turned and another if pushed like a button.
Operator's Manual Front Panel Trigger Controls Level knob- Changes the trigger threshold level (V). The number is shown on the Trigger descriptor box. Pushing the knob sets the trigger level to the 50% point of the input signal. READY and TRIG'D Indicators - The READY indicator is lit when the trigger is armed. TRIG'D is lit momentarily when a trigger occurs. A fast trigger rate causes the light to stay lit continuously. Setup - CCorresponds to the menu selection Trigger → Trigger Setup.
HDO6000 High Definition Oscilloscope Front Panel Vertical Controls Channel buttons- Turn on a channel that is off, or activate a channel that is already on. When the channel is active, pushing its channel button turns it off. A lit button shows the active channel (here, C2 is lit). Offset knob - Adjusts the zero level of the trace (this makes it appear to move up or down relative to the center axis of the grid). The value appears on the trace descriptor box. Push it to reset Offset to zero.
Operator's Manual Intensity 40% (left) dims samples that occur ≤ 40% of the time to highlight the more frequent samples, vs. intensity 100% (right) which shows all samples at the same intensity. Miscellaneous Front Panel Controls Top Row Auto Setup - Performs an Auto Setup. After the first press, you will be prompted for a confirmation. Press the button again or use the touch screen to confirm. Default Setup - Resets the oscilloscope to the factory default configuration.
HDO6000 High Definition Oscilloscope Turn On/Off Traces Analog Traces From the display, choose Vertical > Channel <#> Setup to turn on the trace. To turn it off, clear the Trace On checkbox on the corresponding Channel dialog, or right-click on the descriptor box and choose Off. From the Front Panel, press the Channel button (1-4) to turn on the trace; press again to turn it off. NOTE: The default is to display each trace in its own grid . Use the Display menu to change how traces are arranged.
Operator's Manual Zooming Waveforms The Zoom function magnifies a selected region of a trace. On HDO6000 model oscilloscopes, you can display up to eight zoom traces (Z1 - Z8) taken from any channel, math, or memory trace. You can also use the Multi-Zoom Math function to create time-locked zoom traces for selected waveforms. For more information, refer to Multi-Zoom). Create Zoom To create a zoom, touch -and-drag to draw a selection box around any part of the source waveform. Selected portion of trace.
HDO6000 High Definition Oscilloscope New zooms are turned on and visible by default. However, you can turn off a particular zoom if the display becomes too crowded, and the zoom settings are saved in its location, ready to be turned on again when desired. The zoom's Vertical and Horizontal units will differ from the source trace, as seen from a comparison of the trace descriptor boxes, because the zoom is showing a scale, not a measured level. Channel descriptor box and its Zoom descriptor box.
Operator's Manual To access it the Zoom dialog, double-touch any zoom trace descriptor box, or choose Math > Zoom Setup from the menu bar. The main Zoom dialog contains selection boxes for turning on/off zoom traces. There are also options to: l l l Reset All - returns all zooms to x1 magnification. Quick Zoom - creates a corresponding zoom trace for each open channel trace, same as the Front Panel Zoom button. MultiZoom Behind the main Zoom dialog is a separate tab for each potential zoom trace (Z1-Z8).
HDO6000 High Definition Oscilloscope Horizontal Scale/div- sets the amount of time represented by each horizontal division of the grid. It is the equivalent of Time/div, only unlike the Timebase setting, it may be set differently for each zoom, math function, or memory trace. Vertical Scale/div - sets the voltage level represented by each vertical division of the grid; it's the equivalent of V/div used for channel settings.
Operator's Manual Scroll Waveforms The Auto-Scroll controls appear at the right of the Multi-Zoom dialog. They work similarly to A/V controls to allow you to continuously scroll all the selected zoom traces together in time-locked steps from the beginning to the end of the acquisition.
HDO6000 High Definition Oscilloscope Vertical Vertical, also called Channel, settings usually relate to voltage level and control the trace along the Y axis. NOTE: While Digital settings can be accessed through the Vertical menu on -MS model oscilloscopes, they are handled quite differently. See Digital Overview. The amount of voltage displayed by one vertical division of the grid, or Vertical Scale (V/div), is most quickly adjusted by using the Front Panel Vertical knob.
Operator's Manual Pre-Processing Settings Averaging - performs continuous averaging or the repeated addition, with unequal weight, of successive source waveforms. It is particularly useful for reducing noise on signals drifting very slowly in time or amplitude. The most recently acquired waveform has more weight than all the previously acquired ones: the continuous average is dominated by the statistical fluctuations of the most recently acquired waveform.
HDO6000 High Definition Oscilloscope When using third-party probes, the Probe Attenuation and Deskew values may be entered manually on the Channel dialog. Probe Information on Probe Dialog This additional tab contains specific information on the connected probe. Default values for the probes coupling and attenuation are automatically downloaded from the probe, and these settings along with other attributes are shown on the dialog.
Operator's Manual Digital (Mixed Signal) The digital leadset (standard with -MS model oscilloscopes) inputs up-to-16 lines of digital data. Leads are organized into two banks of eight leads each, and you assign each bank a standard Logic Family or a custom Threshold and Hysteresis to capture the digital signals. The Digital set up dialog has four tabs each corresponding to one of four possible digital groups, labeled Digital1 to Digital4.
HDO6000 High Definition Oscilloscope Digital Group Set Up 1. From the menu bar, choose Vertical > Digital <#> Setup, or press the Front Panel Dig button and select the desired Digital<#> tab. 2. On the Digital<#> set up dialog, check the boxes for lines D0 through D15 that comprise the group. Touch the Display D0-D7 and Display D8-D15 buttons to quickly turn on the entire digital bank, or touch the Right and Left Arrow buttons to switch between each digital bank as you make line selections.
Operator's Manual 3. In Vertical Position, enter the number of divisions (positive or negative) relative to the zero line of the grid where the display begins.The top of the first trace appears at this position. In the example above, the first Line trace (D0) starts at positive 4.0 divisions off the zero line, or at the very top of the eight vertical division grid. 4. In Group Height, enter the total number of grid divisions the entire display should occupy.
HDO6000 High Definition Oscilloscope Timebase Timebase, also known as Horizontal, settings control the trace along the X axis. These settings are shared by all channel traces. The time represented by each horizontal division of the grid, or Time/Division, is most easily adjusted using the Front Panel Horizontal knob.
Operator's Manual Sampling Modes Real Time Sampling Mode Real Time sampling mode is a series of digitized voltage values sampled on the input signal at a uniform rate. These samples are displayed as a series of measured data values associated with a single trigger event. By default, the waveform is horizontally positioned so that the trigger event is time zero on the grid.
HDO6000 High Definition Oscilloscope ps (125 GS/s) apart. The process of acquiring these bins and satisfying the time constraint is a random one. The relative time between ADC sampling instants and the event trigger provides the necessary variation. The instrument requires multiple triggers to complete an acquisition. The number depends on the sample rate: the higher the sample rate, the more triggers are required.
Operator's Manual SEQUENCE DISPLAY MODES The instrument gives you a choice of five ways to display your segments: l Adjacent l Waterfall (cascaded) l Mosaic (tiled) l Overlay l Perspective NOTE: some display modes have limitations on the number of segments that can be shown at one time.
HDO6000 High Definition Oscilloscope SET UP SEQUENCE MODE When setting up Sequence Mode, you define the number of fixed-size segments acquired in single-shot mode (see the instrument specifications for the limits). The oscilloscope uses the sequence timebase setting to determine the capture duration of each segment.
Operator's Manual VIEW SEGMENT AS MATH FUNCTION Besides using the Zoom feature, you can also create a Math (Fx) trace to display individual segments. 1. From the menu bar, choose Math → Math Setup... 2. Touch a Function (Fx) tab to display its corresponding dialog. 3. On the dialog, touch Operator1 and select the Segment button from the pop-up menu. 4. Touch the Select right-hand dialog tab. 5. Touch First Selected and choose the first segment to display. 6.
HDO6000 High Definition Oscilloscope External Reference Clock vs. External Sample Clock An external reference clock is used to synchronize the oscilloscope's internal timebase to an external frequency source. This allows multiple instruments to lock their timebases to a common source. An external sampling clock, applied via the Ext input, replaces the oscilloscope's internal timebase as the sampling clock.
Operator's Manual Trigger While the oscilloscope is continuously sampling signal when it is turned on, it can only display up to its maximum memory in data samples. Triggers select an exact event/time in the waveform to display on the oscilloscope screen so that memory is not wasted on insignificant periods of the signal.
HDO6000 High Definition Oscilloscope Trigger Types These are the trigger types available for selection. If the trigger is part of a subgroup (e.g., Smart), first choose the subgroup from among the basic types to display all the trigger options. Basic Triggers Edge triggers upon a achieving a certain voltage level in the positive or negative slope of the wave. Width triggers upon finding a positive- or negative-going pulse width when measured at the specified voltage level.
Operator's Manual MultiStage Triggers A type of MultiStage trigger, Cascaded triggers when a succession of criteria in Stages A-D are met. Each stage can result in different trigger actions, such as arm only, trigger only, or trigger and rearm. QualFirst arms the oscilloscope on the A event, then triggers on all subsequent B events. NOTE: This button is enabled when using the sequence sampling mode.
HDO6000 High Definition Oscilloscope Type - see Trigger Types for details. This selection drives the remainder of the trigger setup. The default selection is Edge. Source - the channel signal upon which to base the trigger. If a trigger is designed to work with multiple inputs, like a Pattern trigger, you do not have to choose a single source, but will be given controls for setting the conditions on each source. Coupling - the type of signal coupling at the input.
Operator's Manual Edge trigger with holdoff by time. Hold Off by Events For purposes of Hold Off, Events refers to the number of times the trigger conditions have been met, counted either from the beginning of the acquisition or since the last trigger. For example, if the hold-off number of Events is 2 counted from the beginning of the acquisition, the trigger fires on the third event. In the figure below, the bold edges on the trigger source indicate that a positive slope has been selected.
HDO6000 High Definition Oscilloscope Holdoff Settings To access the Trigger Holdoff dialog, choose Triggers > Trigger Setup from the menu bar or press the Front Panel Trigger Setup button, then touch the Holdoff tab. Holdoff by - type of holdoff to use with trigger: None, Time (clock), or Event. Time - if using Holdoff by Time, the time in S to wait before triggering. Events - if using Holdoff by Events, the number of events to count before triggering.
Operator's Manual TriggerScan TriggerScan is a debugging tool (available for any trigger type) that helps you quickly find rare waveform glitches and anomalies. With TriggerScan, you can build a list of trigger setups to look for rare events and automatically sequence through each one. TriggerScan can use any type of trigger setup available including edge, width, and qualify as well as Smart Triggers (such as, glitch and runt triggers).
HDO6000 High Definition Oscilloscope l l l To replace a Trigger List setup with the setup on the Trigger dialog, highlight the setup in the Trigger List and touch the Update Selected button. To use a trigger from the Trigger List, highlight its corresponding row on the list, and then touch the Load Selected button. To delete a trigger setup, highlight the setup in the Trigger List and touch the Delete Selected button.
Operator's Manual Display Display settings affect the number and style of grids that appear on screen and some of the visual characteristics of traces, such as persistence. See Utilities for settings related to screen resolution, color, and screen savers. Display Setup Follow this procedure to adjust how traces appear on the touch screen display. 1. From the menu bar, choose Display → Display Setup... 2.
HDO6000 High Definition Oscilloscope Drag-and-Drop Descriptor Box You can also move a trace from one grid to another by dragging its descriptor box to the desired grid. This is a convenient way to quickly re-arrange traces on the display. XY Displays XY displays plot the phase shift between otherwise identical signals. They can be used to display either voltage or frequency on both axes, each axis now corresponding to a different signal input, rather than a different parameter.
Operator's Manual COLOR MODE Color mode persistence works on the same principle as Analog persistence, but instead uses the entire color spectrum to map signal intensity: violet for minimum population, red for maximum population. In this mode, all traces use all colors, which is helpful for comparing amplitudes by seeking like colors among the traces. 3D MODE 3d persistence creates a topographical view of your waveform from a selection of shadings, textures, and hues.
HDO6000 High Definition Oscilloscope Persistence Setup This procedure explains how to set up the persistence display on traces. Persistence can be quickly added to all traces or applied individually. TURN ON PERSISTENCE 1. Access the Persistence dialog by choosing Display > Persistence Setupand touching the Persistence tab. 2. Check Persistence On. 3. To set up all traces together, touch All Locked. To set up traces individually, touch Per Trace. 4.
Operator's Manual Cursors Cursors are markers (lines, cross-hairs, or arrows) that identify specific voltage and time values on the waveform. Use cursors to make fast, accurate measurements of specific points in the waveform. There are five, standard cursor types available. The cursor measurement values can be read on the descriptor box for the trace. The Show buttons let you change which set of values are shown on the descriptor box. The available selections depend on the type of cursor.
HDO6000 High Definition Oscilloscope of function traces open; for example, if there is an FFT trace, there is an option for Hz. The cursor lines are placed on the traces that normally display X-axis values in the selected units. Cursor Settings Display Cursors Use either of the following methods to quickly turn on/off cursors: l l From the menu bar, choose Cursors then select the desired from the drop-down list.
Operator's Manual Measure Measurement parameters are tools that give you access to a wide range of waveform properties. Use them to analyze many attributes of your waveform like rise-time, rms voltage, and peak-to-peak voltage, for example.
HDO6000 High Definition Oscilloscope Set Up Measurement Parameter To configure custom measurements to add to the table of parameter readouts: 1. From the menu bar, choose Measure > Measure Setup. 2. Choose Measure Mode My Measure. 3. Touch the Pxtab or button of an unused location (or one that you want to change). 4. Select a Type: l l l Measure On Waveforms- measures directly on the waveform selected as Source1.
Operator's Manual List of Standard Parameters Standard measurement parameters are listed below alphabetically. NOTE: There may be additional parameters available depending on the software options installed on the oscilloscope. Parameter Description Amplitude (ampl) Measures the difference between upper and lower levels in two-level signals. Differs from pkpk in that noise, overshoot, undershoot, and ringing do not affect the measurement. Amplitude is calculated by using the formula Top – Base.
HDO6000 High Definition Oscilloscope Parameter Description Threshold arguments specify two vertical values on each edge used to compute fall time. Formulas for upper and lower values: lower = lower thresh. x amp/100 + base upper = upper thresh. x amp/100 + base First Indicates value of horizontal axis at left cursor. Frequency (freq) Period of cyclic signal measured as time between every other pair of 50% crossings. Starting with first transition after left measurement gate.
Operator's Manual Parameter Description (pkpk) has two levels. Peak to peak is calculated using the formula maximum – minimum. Percentile (pctl) Horizontal data value that divides a histogram so the population to the left is xx% of the total. Period The time between every other pair of 50% crossings. Starting with first transition after left measurement gate, period is measured for each transition pair, with values averaged to give final result.
HDO6000 High Definition Oscilloscope Parameter Description TIE@level (tie@lv) Difference between the measured times of crossing a given slope and level and the ideal expected time. For Slope you can choose positive, negative, or both. For output units you can choose time or unit interval (UI). A unit interval equals one clock period. The Virtual Clock setup gives you a choice of Standard (1.544 MHz) or Custom reference clocks.
Operator's Manual Table of measurements open beneath grid. Far left cell opens the Measure dialog. To quickly access the Measure Setup dialog if it is closed, touch the far left cell of the readout table labeled Measure. View Statistics You can add the statistical measures value(last), mean, min., max., sdev, and num(ber of measurements computed) to the measurement parameter readout table. To turn on statistics, access the Measure dialog and check Statistics On.
HDO6000 High Definition Oscilloscope Help Markers Help Markers clarify measurements by displaying cursor lines and labels marking the points being measured. For at-level parameters, markers make it easier to see where your waveform intersects the chosen level. This feature also displays any hysteresis band that you have set about that level. You can choose to use Simple markers, which are only the lines, or Detailed markers, which include the measurement point labels.
Operator's Manual Turn On Markers 1. From the menu bar, choose Measure > Measure Setup. 2. Select a Measure Mode: Std Vertical, Std Horizontal, or My Measure. 3. Touch the Show All button to display Help Markers for each enabled parameter. The type of markers last selected appear on the display. NOTE: If you choose My Measure but have not yet set up or enabled any parameters, you will not see any markers, either. 4.
HDO6000 High Definition Oscilloscope Waveform Gated Parameters 1. From the menu bar, choose Measure → Measure Setup. 2. Touch any Px tab to open the setup dialog. 3. Touch Source and select a source from the pop-up menu. 4. Touch Measure and select a parameter from the pop-up menu. 5. Touch the Acceptrigh-hand dialog tab, then check the Values Based on Waveform State box. 6. Touch When Wform and select the gating source. 7. Touch State Is and select High or Low from the pop-up menu.
Operator's Manual l delta clock-to-data near (DC2D) l delta clock-to-data next (DC2DPOS) l delta clock-to-data previous (DC2DNEG) l delta delay (DDLY) l delta time at level (DTLEV) l phase (PHASE) l resolution (RES) l mTnTmT shift (BEES) l mTnTmT shift sigma (BEESS) l mTnTmT shift sigma – list (BEESS) Set Up Math on Parameters 1. Touch Measure → Measure Setup... on the menu bar. 2. Choose Measure Mode My Measure. 3. Touch output Px tab or button to display the parameter setup dialog. 4.
HDO6000 High Definition Oscilloscope SET UP MATH ON PARAMETERS USING SCRIPT 1. Touch Measure → My Measure... on the menu bar. 2. Touch the output Px tab or button to display the parameter setup dialog. 3. Touch the Math on Parameters button. 4. Touch Source1 and Source2 and select the input parameters (P1 to P8). If you are applying math to a single parameter (for example, invert), just select it in Source1. 5. Touch Math Operator and choose P Script from the Select Measurement menu. 6.
Operator's Manual Determining Rise and Fall Times Once top and base are estimated, calculation of the rise and fall times is easily done (see figure). The appropriate threshold levels are automatically determined by the instrument, using the amplitude (ampl) parameter. Threshold levels for rise or fall time can also be selected using absolute or relative settings (r@level, f@level) if these parameters are included in your oscilloscope.
HDO6000 High Definition Oscilloscope Determining Differential Time Measurements The instrument enables accurate differential time measurements between two traces: for example, propagation, setup and hold delays (see figure). If included in your oscilloscope, parameters such as Delta c2d± require the transition polarity of the clock and data signals to be specified.
Operator's Manual Math Teledyne LeCroy offers a deep and always growing toolset of math functions. Math functions can be applied to any channel (Cx), zoom (Zx), memory (Mx), or even other math traces (Fx), allowing you to chain operations. For example, trace F2 can show the average of C1, while trace F3 provides the integral of F2.
HDO6000 High Definition Oscilloscope Set Up Math Function This procedure explains how to set up single or dual operator math function (Fx) traces. Function traces take as input one or more channel, zoom, memory or math traces and output a new math trace. For more information about creating math traces that plot the results of applied measurements, see View Trend, View Track, and View Histogram. 1. From the menu bar, choose Math > Math Setup.
Operator's Manual 8. Check Trace On to display the new math trace. Enable/Disable Math Function Once a math function has been created and saved in one of the Fx locations, just use the main Math dialog to quickly enable/disable it. Touch the Front Panel Math button, or from the menu bar, choose Math > Math Setup, then check the On box next to each function you wish to display. Clear the On box to disable the function and close the trace.
HDO6000 High Definition Oscilloscope Function Definition DigitalAND AND function between two digital waveforms (-MS models only). DigitalFlipFlop Input1 is clocked in a hold when a rising edge of input2 occurs (-MS models only). DigitalNAND NAND function between two digital waveforms (-MS models only). DigitalNOR NOR function between two digital waveforms (-MS models only). DigitalNOT NOT function (inverter) of a digital waveform (-MS models only).
Operator's Manual Function Definition Ratio For every point in the waveform, the value of Source1 is divided by the value of Source2. Source1 and Source2 must have the same horizontal units and scale. Reciprocal For every point in the waveform the inverse is calculated using the formula: 1 / (sample value) Rescale For every point in the waveform the sample value is multiplied by the specified multiplier and then add to with the specified adder. See Rescaling and Assigning Units.
HDO6000 High Definition Oscilloscope Sparser Function The Sparse math function allows you to thin out an incoming waveform by skipping points at regular intervals, and by starting acquisition at a particular offset (point). The Sparsing factor specifies the number of sample points to reduce the input waveform by. A sparsing factor of 4, for example, tells the oscilloscope to retain only one out of every 4 samples.
Operator's Manual Abbreviated Units of Measure Abbreviation Measure Abbreviation Measure (blank) No units N Newton A Ampere OHM Ohm C Coulomb PAL Pascal CYCLE Cycles PCT Percent DB Decibel POISE Poise DBC Decibel referred to carrier PPM Parts per million DBM Decibel Milliwatt RAD Radian DBV Decibel Volts DEG Degree (of arc) DBUZ Decibel Microamp MNT Minute (of arc) DEC Decade SAMPLE Sample DIV Divisions SWEEP Sweeps Event Events SEC Second (of arc) F Far
HDO6000 High Definition Oscilloscope Enhanced Resolution ERes (Enhanced Resolution) filtering increases vertical resolution, allowing you to distinguish closely spaced voltage levels. The instrument's ERes function is similar to smoothing the signal with a simple, moving-average filter. However, it is more efficient concerning bandwidth and pass-band filtering. Use ERes: l On single-shot acquisitions, or where the data record is slowly repetitive (cases where you cannot use averaging).
Operator's Manual The improvement in SNR corresponds to the improvement in resolution if the noise in the signal is white (evenly distributed across the frequency spectrum). If the noise power is biased towards high frequencies, the SNR improvement will be better than the resolution improvement. The opposite may be true if the noise is mostly at lower frequencies.
HDO6000 High Definition Oscilloscope Graph Function To reduce noise: The example at left shows enhanced resolution of a noisy signal. The original trace (left top) has been processed by a 2-bit enhanced resolution filter. The result (left bottom) shows a smooth trace, where most of the noise has been eliminated. NOTE: While enhanced resolution can only improve the resolution of a trace, it cannot improve the accuracy or linearity of the original quantization.
Operator's Manual amplitude. The most recently acquired waveform has more weight than all the previously acquired ones: the continuous average is dominated by the statistical fluctuations of the most recently acquired waveform. The weight of ‘old' waveforms in the continuous average gradually tends to zero (following an exponential rule) at a rate that decreases as the weight increases. You determine the importance of new data vs. old data by assigning a weighting factor.
HDO6000 High Definition Oscilloscope FFT For a large class of signals, you can gain greater insight by looking at spectral representation rather than time description. Signals encountered in the frequency response of amplifiers, oscillator phase noise and those in mechanical vibration analysis, for example, are easier to observe in the frequency domain.
Operator's Manual l l Least Prime (default) - a least primes algorithm that computes FFTs on transform sizes having lengths that can be expressed as factors of 2N*5K. This is very compatible with the record lengths encountered in the oscilloscope, which are often multiples of 1, 2, 4, 5, or 10. Power of 2 - a power of 2 algorithm where the record lengths are in the form of 2N. The power of 2 algorithm generally runs faster than the least primes algorithm.
HDO6000 High Definition Oscilloscope FFT Window Filter Parameters Window Type Highest Side Lobe (dB) Scallop Loss (dB) ENBW (bins) Coherent Gain (dB) Rectangular -13 3.92 1.0 0.0 Von Hann -32 1.42 1.5 -6.02 Hamming -43 1.78 1.37 -5.35 Flat Top -44 0.01 3.43 -11.05 Blackman-Harris -67 1.13 1.71 -7.53 Copy Function The Copy math function saves a copy of your present waveform in its unprocessed state to the first available memory location.
Operator's Manual Analysis Most Teledyne LeCroy oscilloscopes calculate measurements for all instances in the acquisition, enabling you to rapidly and thoroughly analyze a long memory acquisition of thousands or millions of parameter values to find anomalous measurements, or to apply a variety of mathematical functions to the waveform trace. These measurements and manipulations of the original input signal can be viewed in several graphical formats to facilitate your analysis.
HDO6000 High Definition Oscilloscope 6. Enter the maximum #Valuesin one bin of the histogram. This determines the number of samples that are represented by the bar at full height. 7. Touch #Bins and enter the number of bins that comprise the histogram. This determines how many bars appear in the histogram. 8. To let the oscilloscope determine the range of values represented by each bin/bar, check Enable Auto Find, then touch the Find Center and Width button.
Operator's Manual Track and Trend Both Track and Trend are tools that can be used to plot measurement data and observe variations with respect to time. Differences between Track and Trend are summarized in the following table: Characteristic Track Trend Representation Parameter value vs. time Parameter value vs. event Behavior Non-cumulative (resets after every acquisition).
HDO6000 High Definition Oscilloscope l On the Track right-hand dialog, uncheck Auto Find Scale and enter a new Center and Height/div. View Trend This procedure explains how to view the trend of a measurement parameter. A trend is a waveform composed of a series of parameter measurements in the order the measurements were taken. The vertical units are those of the source parameter, the horizontal unit is measurement number. The trend contains a single value for each measurement.
Operator's Manual WaveScan The WaveScan® Search and Find tool enables you to search for unusual events in a single capture, or to scan for a particular event in many acquisitions over a long period of time. Each Scan Mode is optimized to find a different type of event. The results are time stamped, tabulated, and can be selected for individual viewing. There are two principal approaches to using WaveScan.
HDO6000 High Definition Oscilloscope Scan Modes The scan mode determines the type of search to be performed. Select the Mode along with the Source trace to be searched on the main WaveScan dialog. For each mode, different controls appear on the WaveScan dialog, providing additional inputs to the search criteria. Make the appropriate entries in these fields before starting the search. EDGE MODE Edge Mode is used for detecting the occurrence of edges.
Operator's Manual MEASUREMENT MODE Measurement Mode is used for applying filters to measurements to find those that meet your defined criteria, helping to isolate particular events within many samples. Markers appear over the source trace to indicate the location of measurement, while the table displays values for the selected parameter that meet the criteria. Additional Settings for Measurement Mode are: l l l Measurement -- choose the measurement parameter you wish to search.
HDO6000 High Definition Oscilloscope SCAN OVERLAY Scan Overlay view plots the location of captured events in a new trace. To apply monochromatic persistence to the scan overlay: 1. Check Persistence On. 2. Enter a Saturation value. This controls... 3. Choose a Persistence Time. The higher the time, the more static the persistence display. To rescale the scan overlay to effectively "zoom" in or out: touch the In/Out buttons, or touch Scale and Delay and enter new values. Check Var.
Operator's Manual Set Up WaveScan This procedure explains how to set up WaveScan to search an acquisition for events of interest. Set up your source channel and triggers before setting up the scan. 1. Press the Front Panel Stop button to stop acquisition. 2. Choose Analysis > WaveScan. 3. Check Enable. 4. Choose the Source waveform. 5. Choose the Scan Mode and enter values for any additional settings that appear at the right of the dialog based on your selection. 6.
HDO6000 High Definition Oscilloscope History Mode History Mode allows you to review any acquisition saved in the oscilloscope's history buffer, which automatically stores all acquisition records until full. Not only can individual acquisitions be restored to the grid, you can "scroll" backward and forward through the history at varying speeds to capture individual details or changes in the waveforms over time.
Operator's Manual Pass/Fail Testing Pass/Fail testing is a type of mask testing that is particularly useful for comparing newly acquired signals to a previously acquired "golden standard" waveform. A mask defines an area of the grid against which a source Channel, Zoom, or Math trace is compared. Test conditions are associated with the mask, defining how the waveform is to be compared to the masked area (e.g.
HDO6000 High Definition Oscilloscope Load Mask Use this procedure in lieu of Make Mask if you have a pre-defined mask file, or wish to recall a mask you previously created and saved. 1. Touch the Load Mask tab to display the dialog. 2. To use a saved .msk file, touch File and select the mask. OR To use an industry standard mask, touch Standard and select the mask from the pop-up. 3. Check View Mask to display the mask over the trace.
Operator's Manual Define Test 1. Touch the Test tab to display the dialog. 2. Select one of the conditions that, when True (yes), result in a Pass. 3. Optionally, turn Off/On markers. Markers visually indicate where on the waveform mask violations have occurred. Removing a Mask from the Display 1. Access theQx dialog where the mask is set. 2. On the Load Mask right-hand dialog, click the Delete button.
HDO6000 High Definition Oscilloscope View Configurations All oscilloscope settings can be viewed through the various Status dialogs. These show all existing acquisition, trigger, channel, math function, measurement and parameter configurations, as well as which are currently active. Access the Status dialogs by choosing the Status option from the Vertical, Timebase, Math, or Analysis menus (e.g. Channel Status, Acquisition Status).
Operator's Manual Utilities Utilities Settings Utilities settings primarily control the instrument's interaction with other devices/systems. Preferences, on the other hand, tend to control the appearance and performance of the oscilloscope application. To access the Utilities dialog, choose Utilities → Utilities Setup... from the menu bar. HardCopy Setup, Date/Time Setup, and System Status buttons open their corresponding dialogs, as do the tabs.
HDO6000 High Definition Oscilloscope System Status The Utilities Status dialog displays information about your instrument including model number, serial number, firmware version, and installed hardware and software options. To view status, choose Utilities > Utilities Setup from the menu bar, then touch the Status tab. OR Choose Support > About from the menu bar. The Utilities Status is not the same as the Status feature accessed through various menus.
Operator's Manual Set Up Remote Control Contact your Network Administrator to connect the oscilloscope to your LAN. Use a USB cable to connect the oscilloscope directly to a PC. 1. From the menu bar, choose Utilities > Utilities Setup, then touch the Remote tab. 2. On the Remote dialog, make a Control From selection. 3. If you are using TCPIP or LXI, touch the Net Connections button. The Windows Network Connections window opens for you to select a network. 4.
HDO6000 High Definition Oscilloscope Print (Hardcopy) Settings Hardcopy settings control how the oscilloscope Print function behaves. Print captures an image of the oscilloscope display, but there are several options as to what it does with the image next: l Send to a hardcopy printer l "Print" to a file that can be saved to an internal or external drive l Send to E-Mail l Copy to the Windows clipboard for you to paste elsewhere Each option is set up on the Utilities Hardcopy dialog.
Operator's Manual Print to File Follow this procedure to print screen captures to a file. The default save directory can be set to any folder on the oscilloscope hard drive, or an external drive connected via USB port. 1. Choose Utilities → Utilities Setup... from the menu bar, then touch the Hardcopy tab. 2. On the Hardcopy dialog, choose File. 3. Choose the output File Format. 4. Enter a File Name. This will form the basis of all print filenames, until you change it.
HDO6000 High Definition Oscilloscope Choose Print Color Scheme To change the color of your print output, touch the Color button on the Hardcopy dialog and choose from: l Standard(default) - prints objects on a black background, as they appear on the display. l Print - prints objects on a white background using your chosen colors. This option saves ink. l Black & White - prints objects in grayscale.
Operator's Manual Configure Calibration Output A calibration signal can be output from the Cal Out hook on the front of the oscilloscope. Choose one of the following under Use Calibration Output For: Square - sends a square wave signal. With this selection, also enter the wave Frequency and Amplitude into 1 MΩ. The Set to 1 kHz, 1 V Square Wave button does exactly that. DC Level - sends a reference level. Enter an Amplitude into 1 MΩ. Off - disables calibration output.
HDO6000 High Definition Oscilloscope Disk Utilities Use the Disk Utilities dialog to arrange the file/folder structure on your instrument's hard drive. You can delete files, folders, or create new folders. NOTE: All Disk Utilities can also be accomplished using the standard Microsoft Windows file management tools. Access the Disk Utilities dialog by selecting Utilities → Disk Utilities from the menu bar. Delete a Single File 1. Touch the Delete button. 2.
Operator's Manual Preferences Settings Preference settings have mostly to do with the appearance and performance of the oscilloscope itself, rather than the oscilloscope's interaction with other devices/systems. Access the Preferences dialog by choosing Utilities → Preference Setup... from the menu bar. Audible Feedback controls the instrument's audio output. Select this box to hear a beep each time you touch a screen or front panel control.
HDO6000 High Definition Oscilloscope Calibration Settings To ensure the instrument maintains specified performance, it is factory set to perform a calibration during warm-up. We recommend that you warm up the oscilloscope for at least 20 minutes prior to use to give the instrument time to complete calibration procedures. Manually calibrate the oscilloscope when: l It is used in temperatures that differ from the previous calibration temperature by more than 5° C.
Operator's Manual Acquisition Settings The Preferences Acquisition settings determine how traces behave on screen as gain or timebase changes. Make a selection in each area. Offset Setting constant in: l l Volts moves the vertical offset level indicator with the actual voltage level. Div(isions) keeps the vertical offset level indicator stationary. The waveform remains on the grid as you increase the gain; whereas, if Volts is selected, the waveform could move off the grid.
HDO6000 High Definition Oscilloscope Color Settings Preferences Color settings assign the colors used for channel, math, and memory traces. All dialogs, tables, and trace descriptor boxes will match the color of the trace assigned here. You can choose different colors to be used on the instrument and in print. For convenience, you can Preview print colors to see how the settings will appear in print output.
Operator's Manual Miscellaneous Settings These other Preference settings are located on the Miscellaneous dialog. Hardcopy: You can add the Teledyne LeCroy logo to print output by checking Print LeCroy Logo When Printing Grid Area Only. This identifies the instrument as the source of the image. Zoom: You can adjust zoom behavior as follows: l l Dimming darkens/shades those areas of the source waveform that are not part of the Zoom trace.
HDO6000 High Definition Oscilloscope Save/Recall Overview The Save/Recall features allow for storage and retrieval of Waveforms, Table Data, and Instrument Setups. There are also Disk Utilities for arranging the file/folder structure on your instrument's hard drive. Directly access the Save Waveform, Save Table, Save Setups, and Disk Utilities dialogs from the File menu. A main Save/Recall dialog is shown providing buttons to access the aforementioned dialogs for specific Save/Recall functions.
Operator's Manual SAVE SETUP TO FILE 1. Touch Save Panel to File and enter the full path to the file, or touch Browse to navigate to the file folder. 2. Enter a filename, or choose a existing file to overwrite. 3. Touch Save Now! Recalling Oscilloscope Setups Access the Recall Setup... dialog by either selecting File → Recall Setup... from the menu bar or clicking the Recall Instrument Setup button on the main Save/Recall dialog.
HDO6000 High Definition Oscilloscope SAVE WAVEFORM TO MEMORY 1. Touch Memory. NOTE: When Memory is selected, only Source and Destination controls are shown on the Save Waveform dialog. When File is selected, many more controls are available. 2. Choose the Source trace you are saving. 3. Choose the Destination location. 4. Optionally, touch Trace Title to change the default name of your waveforms. CAUTION.
Operator's Manual l l Time and Amplitude - Specifies the output file include both time and amplitude data for each sample. With Header - Specifies to include a header with scaling information. 5. If you selected ASCII file format, also touch the Delimiter control and select a delimiter character from the pop-up menu. Choose from comma, space, semicolon, or tab delimiters. 6. Touch Save Now! AUTOSAVE The Auto Save feature automatically saves a waveform to disk after each new trigger.
HDO6000 High Definition Oscilloscope Save Table Data The Save Table function saves tabular measurement data displayed on screen to an Excel or ASCII file. Access the Save Table dialog by choosing File → Save Table from the menu bar. 1. Leave the default Source selection All Displayed. 2. Optionally touch Trace Title and enter a new base filename. This name with a sequence number appended to it will be used for all filenames until you change it. CAUTION.
Operator's Manual LabNotebook Teledyne LeCroy's LabNotebook feature extends the documentation capabilities of your oscilloscope. It allows you to create and save Notebook Entries containing all displayed waveforms, the oscilloscope setup under which they were taken, and custom annotations. Notebook Entries can then be output to a hardcopy report format—.pdf, .rtf, or .html—and printed or e-mailed.
HDO6000 High Definition Oscilloscope LabNotebook Drawing Toolbar The basic Notebook Entry is a screen capture of the display showing the grids as they were at the time it was taken. When an entry is first captured, it is immediately displayed in the Drawing window for you to annotate. A variety of markup tools are available from the toolbar along the top of the window. To use any tool, touch the icon, then touch the point on the image where you wish to draw or add text.
Operator's Manual Manage Notebook Entries The LabNotebook dialog is the principal notebook management tool where you can filter, select, view, edit, print, email, save, export/import, or recall Notebook Entries created in the course of your work. To access the LabNotebook dialog, choose File → LabNotebook from the menu bar. NOTE: If an external monitor is connected, LabNotebook automatically opens on the external monitor.
HDO6000 High Definition Oscilloscope Edit Notebook Entries 1. Select the notebook from the My Notebooks list. 2. Select the entry from the My Notebook Entries list. 3. Go to the second tab labeled with the entry name. 4. Modify the Title or Description. 5. To add markup to the entry, touch the Scribble button and use the Drawing Toolbar. Email Notebook Entries Choose E-Mail to send selected Notebook Entries to the default address specified in the oscilloscope Preferences.
Operator's Manual Manage Notebooks LabNotebook stores Notebook Entries in a .zip archive on the instrument hard drive. Each .zip file is one Notebook comprised of everything shown in the My Notebook Entries list when it is selected. New Notebooks can be created for different individuals or projects, or an existing Notebook backed up for storage. NOTE: The default Notebook is D:\Xport\MyLabNotebook.zip.
HDO6000 High Definition Oscilloscope Print to NoteBook Entry The Front Panel Print button can be configured to capture the display and create a new Notebook Entry. This is a convenient way to create new Notebook Entries as you work. NOTE: The File menu Print option will continue to use whatever method you have set on the Utillities Hardcopy tab when invoked. Go to Utilities > Utilities Preferences > Hardcopy to make that selection.
Operator's Manual Configure LabNotebook Preferences To configure the behavior of the LabNotebook tool, on the menu bar, choose File → Lab Notebook, then touch the Preferences tab. Select/deselect the following options: Prompt for Report Title Before Saving opens the LabNotebook dialog when a new entry is created. You can elect to name notebook entries using only the date/timestamp by leaving this box unchecked.
HDO6000 High Definition Oscilloscope Maintenance Cleaning Clean only the exterior of the oscilloscope and probes using a soft cloth moistened with water. If required, use an aqueous solution of 75% isopropyl alcohol for more efficient cleaning. Exercise care to avoid scratching the display. Unplug the power cord from the AC outlet before cleaning. CAUTION. Do not attempt to clean internal parts. Avoid getting moisture inside the unit during external cleaning.
Operator's Manual Add Software Option Many optional software packages are available to extend the Analysis functions of the oscilloscope. See the product page at teledynelecroy.com for a list of options compatible with your model. Contact your local Teledyne LeCroy representative or national distributor to purchase an option. You will receive a Key Code by email that enables the new functionality. To install the key and activate the software: 1.
HDO6000 High Definition Oscilloscope X-Stream Firmware Update Teledyne LeCroy frequently releases firmware updates for X-Stream model oscilloscopes containing new product features and bug fixes. The X-Stream installer updates multiple components including the oscilloscope application, required DLLs, drivers, and low-level microcode for integrated circuits on the oscilloscope.
Operator's Manual HDO System Recovery Using Acronis True Image Home Your HDO oscilloscope is designed to operate reliably for many years. The application software operating the instrument runs on a Microsoft Windows® 7 Professional for Embedded Systems platform. The loading or incomplete removal of additional Windows applications can cause problems in the stability of the operating system. Severe cases may require you to reload the base operating system and oscilloscope application.
HDO6000 High Definition Oscilloscope NOTE: Recovery takes approximately 4 to 15 minutes depending on the version of operating system that is being restored. The progress is displayed on the screen. 11. When recovery is complete, you will see the message "Recover operation succeeded." Click OK. 12. Click the close button to exit the Acronis window. The oscilloscope will restart and begin installing the required software. NOTE: If prompted to restart Windows, select Restart Later.
Operator's Manual Technical Support Phone Registered users can contact their local Teledyne LeCroy service center at the number listed in this manual to make Technical Support requests by phone or email. Web You can also submit Technical Support requests via the website at: teledynelecroy.com/support/techhelp. Teledyne LeCroy publishes a free Technical Library on its website.
HDO6000 High Definition Oscilloscope Returning a Product for Service Contact your local Teledyne LeCroy service center for calibration or other service. If the product cannot be serviced on location, the service center will give you a Return Material Authorization (RMA) code and instruct you where to ship the product. All products returned to the factory must have an RMA. Return shipments must be prepaid. Teledyne LeCroy cannot accept COD or Collect shipments. We recommend air-freighting.
HDO6000 High Definition Oscilloscope Contact Teledyne LeCroy United States and Canada - World Wide Corporate Office Teledyne LeCroy Corporation 700 Chestnut Ridge Road Chestnut Ridge, NY, 10977-6499, USA Ph: 800-553-2769 / 845-425-2000 FAX: 845-578-5985 teledynelecroy.com Support: contact.corp@teledynelecroy.com Sales: customersupport@teledynelecroy.com United States Protocol Solutions Group Teledyne LeCroy Corporation 3385 Scott Boulevard Santa Clara, CA, 95054, USA FAX: 408-727-0800 teledynelecroy.
HDO6000 High Definition Oscilloscope Certifications This section certifies the instrument’s Electromagnetic Compatibility (EMC), Safety and Environmental compliances. EMC Compliance EC Declaration of Conformity- EMC The oscilloscope meets intent of EC Directive 2004/108/EC for Electromagnetic Compatibility.
Operator's Manual Australia & New Zealand Declaration of Conformity– EMC Oscilloscope complies with the EMC provision of the Radio Communications Act per the following standards, in accordance with requirements imposed by Australian Communication and Media Authority (ACMA): CISPR 11:2003 Radiated and Conducted Emissions, Group 1, Class A, in accordance with EN61326-1:2006 and EN61326-2-1:2006. AUSTRALIA / NEW ZEALAND CONTACTS: Vicom Australia Ltd.
HDO6000 High Definition Oscilloscope Canadian Certification The oscilloscope has been certified by Underwriters Laboratories (UL) to conform to the following safety standard and bears cUL Listing Mark: CAN/CSA-C22.2 No. 61010-1-12. Safety requirements for electrical equipment for measurement, control and laboratory use.
Operator's Manual of non-Teledyne LeCroy supplies. Furthermore, Teledyne LeCroy shall not be obligated to service a product that has been modified or integrated where the modification or integration increases the task duration or difficulty of servicing the oscilloscope. Spare and replacement parts, and repairs, all have a 90-day warranty. Products not made by Teledyne LeCroy are covered solely by the warranty of the original equipment manufacturer.