TeleNav Maps v2.0 Instruction Manual for: Windows Mobile HTC 8525, HTC 8925 (Tilt), Samsung BlackJack 2 Available on the AT&T Wireless Network® User’s Guide © 2003-2007 TeleNav, Inc. All rights reserved. TeleNav and TeleNav GPS Navigator are trademarks of TeleNav, Inc. The Trēo smartphone and Palm families of related marks, images and symbols are the exclusive properties and trademarks or registered trademarks of Palm, Inc.
Table of Contents 1. Welcome...............................................................................................................................................................5 2. Safety and Legal Notices...................................................................................................................................5 3. Data Service Options .........................................................................................................................................
Initial Driving Directions................................................................................................................................27 Driving Direction Views ................................................................................................................................27 Turn Maps .............................................................................................................................................28 Map Summary...................................
14. Change your PIN number................................................................................................................................52 15. Exit TeleNav Maps ............................................................................................................................................53 16. Upgrading to TeleNav GPS Navigator ..........................................................................................................53 17. The TeleNav Website ..................
1. Welcome This manual provides instructions for using the TeleNav Maps v2.0 application. If you have already paid for a subscription and will be using the full TeleNav GPS Navigator application, please refer to the TeleNav GPS Navigator v.52 User’s Guide, available at www.telenav.com. For more information on how to upgrade to the full TeleNav GPS Navigator application, please see page 53.
WARNING: Install the equipment safely. If you are using a device mounting kit, make sure that it does not obstruct your vision. You may wish to charge the device while using TeleNav Maps. If so, make sure that the charging cable does not interfere with any of the vehicle’s controls. WARNING: Drive safely and use common sense. The vehicle operator’s personal judgment, traffic regulations, and common sense must always take precedence over the instructions provided by TeleNav, Inc.
HTC 8525 The 8525 device features a pull-out keyboard for easy typing. If the keyboard is pulled out, the screen will change to landscape mode. If not, the screen is in portrait mode. TeleNav GPS Navigator can be used in either mode. Power/End button OK key Menu key ALT Key Volume buttons HTC 8925 The controls on the HTC 8925 are similar to the 8525. The 8925 features a screen that can tilt and an internal Bluetooth GPS receiver. Menu key OK key Power/End button © TELENAV, INC.
Samsung BlackJack 2 Icons on the Blackjack 2 screen are laid out differently, so the screenshots throughout the document are slightly different than what’s on the actual device. Application functions are still the same. Menu key OK key Power/End button Function key 5. Installing TeleNav Maps Before installing TeleNav Maps, be sure you have a data plan from your carrier. To set up a data plan, call your carrier’s Customer Support. See the “Customer Support” section on Page 56 for contact information.
6. Launching TeleNav Maps To launch TeleNav, find the TeleNav icon on the device’s Program menu and select it. After starting TeleNav, the splash screen appears for a few seconds. Login The next screen will collect your login information. Your phone number is automatically generated. Your phone number MUST be the same as your carrier phone number beginning with area code so that when you call the Voice Address Input System, you will not need to type it in. Correct the number if it is not accurate.
If you already have a TeleNav account set up, the application will ask you for a password. Please type in the 4-digit code that was sent to you through SMS or email. When the device reaches the TeleNav servers with a valid phone number, the device will be registered to use TeleNav and will only present the splash screen and Warning screens in the future. Visiting www.telenav.com and changing the PIN will require you to repeat the above registration process.
You will next come to the TeleNav Maps Main Menu. 7. Using TeleNav Maps You can use TeleNav Maps for many business and personal functions, including: • Finding businesses, churches, schools, government offices, police and fire stations, etc. • Getting static driving directions to virtually anywhere in the United States. • Making reservations at restaurants, motels, and hotels. • Sharing an address with friends so that they can get directions to that address. • As a replacement for paper maps.
• Change driving direction views such as Turn Maps, Map Summary, or Route Summary (see page 27). • Enter a Drive To address by typing (see page 22). • Save locations to your My Favorites list so you can find them later (see page 39). • Delete locations from your My Favorites list (see page 20). • Select recent locations from your Recent Places list (see page 21).
Drive To Menu Use Drive To and select from a variety of ways to navigate to a chosen address. The Drive To Menu options are: • My Favorites - Places that you have found and saved in the past so you can quickly access them. • Recent - TeleNav Maps automatically saves all of the places that you: 1.) Found in a Directory (Business) search, 2.) Viewed as a map, or 3.) Located using a street address, intersection, city, or airport.
Search Menu The Search menu provides you with a few different ways to find the addresses and phone numbers of businesses such as restaurants, motels, gas stations, churches, schools, government offices, and police and fire stations. You have the following options in the Search menu: • Spell Name – Type in a keyword for the search. • Recent – Access a list of the businesses you have recently viewed. • Food/Coffee – Search from a variety of categorized restaurants.
Maps Menu You can use the Maps menu to view a map for one of the following: • A Favorite Place • A Recent Place • A Business (this is the same as the Search menu option) • An Address • An Intersection • An Airport See page 34 for full details on these features. Tools/Extras Menu The Tools/Extras menu gives you options for setting your preferences and other features. See page 35 for full details on these features. © TELENAV, INC.
The Tools/Extras Menu options are: • Share Address – Share an address with friends on their mobile device. • My Favorites – Manage your Favorites list by renaming or deleting the items. • Manage Contacts – Manage your contacts by organizing them into categories or editing contact information. • Refer a Friend – Invite another person to try the TeleNav Maps service. • Preferences – Set your preferred options for the TeleNav Maps application.
1. Select the Drive To option from the TeleNav Maps Main Menu. Then select one of the Drive To menu options shown below. 2. Select Search from the TeleNav Maps Main Menu, search for a location, and select Drive To (see page 30). 3. Select Maps from the TeleNav Maps Main Menu. When the map is displayed, select “Menu >> Go To Cursor” or Drive To. © TELENAV, INC.
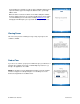
To use the Drive To menu, do the following steps: 1. Select Drive To on the TeleNav Maps Main Menu. 2. Select one of the following options from the Drive To menu as shown in the illustration to the right and discussed below. © TELENAV, INC.
My Favorites Favorite are places that you have found and saved in the past so you can find them quickly. Your Favorites list can grow to an unlimited length. If your list gets too long, you can enter one or more alphanumeric characters in the Search field. The Favorites that match your search are automatically displayed. Highlight a Favorite in the list and click Menu to access a variety of options.
Delete a Location from My Favorites To delete a location from your My Favorites list, go to Tools/Extras >> My Favorites. Then do one of the following: 1. Highlight the Favorite in the list and choose Menu >> Delete. 2. Click on the Favorite and choose Delete on the next screen. © TELENAV, INC.
Recent Places TeleNav Maps automatically keeps a list of all of the places that you have found when using any of the Drive To functions. You can access the Recent Places list from the Drive To menu or the Maps menu. Your Recent Places list can grow to an unlimited length. If your list gets too long, you can enter one or more alphanumeric characters in the Search field. The Recent Places that match your search are automatically displayed.
After you select a business, you are taken to the Search Near screen so you can choose a search origin. For more information on this feature, see “Search Menu” on Page 30. Address – Type It Enter a street address by typing in the appropriate fields as shown. Partial entry (5 or more letters) is okay for the street name. You can leave the Address field blank and type in a city name to get directions to the center of the city.
TeleNav Maps checks to see if the address that you entered can be found. TeleNav Maps prompts you to modify the address if the address is too new to be found in the mapping database or if the street number cannot be found for some other reason (i.e., if the street number does not exist). After you make a selection, you will be taken to the Trip Confirmation screen (see page 24). Intersection Enter an intersection by typing as shown.
Airports Quickly find airports by airport code search or city search. The airport is automatically saved to your Recent Places list. Type the three-letter abbreviation of the airport (i.e., SFO) or type the whole name of the airport (San Francisco International). Then press Done. The Airport field has an auto-fill feature. If a drop-down menu appears with the name of the airport, you may be able to save time and keystrokes by selecting the desired airport in the drop-down list.
Select an origin on the Drive From screen. The Trip Confirmation screen appears with your selected Origin and Destination. A countdown begins before your route is generated.
Route Style You can modify the Route Style for your trip by selecting one of the following options: • Fastest - This default Route Style finds the fastest driving route. • Shortest - This Route Style may or may not take more time to drive, but it shows you the shortest distance. • Prefer Streets - Use streets instead of highways if possible. • Prefer Highway - Use highways instead of streets if possible. • Pedestrian - Find walking directions.
Initial Driving Directions Within a few seconds after you click Go on the Trip Confirmation screen, TeleNav Maps calculates what it believes to be an optimal route to your destination. Your origin is shown by a green flag. • Click the Forward or Back arrows at the bottom of the screen to scroll through the step-by-step instructions. • If you happen to deviate from the current route, you will have to manually reroute yourself by re-entering an origin and destination to create a new route.
Turn Maps A 2-dimensional map with turn icons (default view). You can zoom in and out of this map by pressing the “Q” and “P” keys, respectively. You can also pan the map by dragging the map with the stylus. Depending on what view you are in, the contents you find may vary. Below are the contents for the Turn Maps view. Click to Zoom In Click to Zoom Out Distance and Direction of next turn Indicates upcoming directions Click to go back a screen © TELENAV, INC.
Map Summary The entire route from your starting location to your destination is drawn on a map. The route is displayed as a blue line connecting the Start and Finish flags. Use the zoom bar to zoom in and out of the map. Drag the map with the stylus to pan. Route Summary View a text listing of every turn for this route from your starting location to your destination, along with mini turn icons. Click on a route segment to view the directional turn for that segment.
10. Search Menu You can use the Directory to find businesses, churches, schools, government offices, police and fire stations, and so on. To use the directory, do the following steps: 1. Select Search on the TeleNav Maps Main Menu. 2. Select a search option. For more information on each search category, see “Search Menu” on page 14. 3. Choose a search origin in the Search Near screen. 4. Confirm the category and search origin on the Search screen. Click Back to modify your entry or Search to continue.
5. The Search Results screen lists locations in order of proximity to your search origin. Make a selection to view details. 6. When you find the place that you are looking for, you can: • Drive To - Get driving directions. • Map It - View a map of the location. • Share - Share this address with another person. 7. Click the Back or Forward arrows at the top of the screen to scroll through the other search results. © TELENAV, INC.
Map Results When you perform a category search, you can view the category’s points of interest plotted on a map. From the Map Results screen, you can also click on a corresponding number to view more details about a particular point of interest. You can view the Map Results screen in two ways: 1. From the Search option in the TeleNav Maps Main Menu, choose a category >> choose “Search” >> click Menu >> choose “Map Results.” © TELENAV, INC.
2. In the Details screen for a search result, choose “Map It.” On the Map Results screen, use the device’s keypad and press 1-9 to center on a certain location. Press the 0 key to view more results. Points of interest are ordered based on proximity to the search origin. If you are viewing the Map Results screen from the Address Details screen (Option #2 above), the search result number for that point of interest is highlighted by default.
Click Menu for additional options: • Go To Cursor – Get driving directions to the cursor position. Clicking this option will take you to the Trip Confirmation screen. • Save Location – Save the location to your My Favorites list. 11. Maps Menu You can view map information for a selected location in a variety of ways: 1. From the Maps option in the TeleNav Main Menu. 2. From the Map Summary option for any location that you have found in the Drive To menu. © TELENAV, INC.
3. From the “Map It” option for any location that you have found using the Search directory. For example, from the TeleNav Maps Main Menu, select Search. Search the Directory for your desired location and then select the “Map It” option for the location that you found. This map displays the location by proximity to your search origin. NOTE: In some screens, the Search Directory may be called Business or Businesses. 12.
Share Address You can share various addresses with contacts that you create or have saved in your Contacts List. You may select an unlimited amount of contacts or groups to send the address to. • My Favorites - Share an address from your Favorites list. • Recent - Share an address that you have recently viewed or visited. • Business - Share an address of a business you have found in the Search category tree. • Address - Share an address that you type in.
4. On the next screen, assign a label to the address, or accept the default. Then choose Continue. 5. Verify that your selections are listed in the Confirm screen and click Send Now. NOTE: To add or remove contacts, simply go Back to the Select Contacts screen. 6. If you select “Send Now,” a confirmation pop-up appears. The recipients you selected will receive a text message with the address you have chosen. NOTE: If the recipients are also TeleNav Maps or TeleNav GPS Navigator v5.
My Favorites Your Favorites list can consist of the following: • Folders - You can organize your Favorites into categories. • Individual Favorites - Individual Favorites are represented by the heart icon and may be listed under several categories. • Received Addresses - This folder is present by default and stores addresses that you have received from other TeleNav users (see section below for more information).
Save to Favorites On the Save to Favorites screen, choose from the following options: • Save Favorite – Save any changes you have made to the Favorite (such as to the Label). • Add To Category - Add another category folder. You will be taken to the Select Categories screen. • Delete (a red “X” followed by the name of the folder you are currently in) - Delete this location from the folder. This option is shown when you are viewing a Favorite that is currently part of a folder.
Create New Category This option allows you to add a new category folder to your My Favorites list. 1. On the details screen for a Favorite, choose Edit. 2. On the Save to Favorites screen, choose “Add to Category.” 3. On the Select Categories screen, choose “Create New Category.” 4. On the next screen, enter a category name and choose Save. 5. After you have added a category, proceed with the Save to Favorites steps, or click Cancel to go back to the Tools/Extras menu.
2. Highlight the category that you want to delete. 3. Click Menu >> Delete and choose OK in the confirmation pop-up. 4. If you have chosen to delete a category folder, you will be presented with the following options: • Delete Category Only - Delete just the category. All favorites will be moved out of it and appear on the Favorites screen. • Delete Category & Favorites - Delete the category and all favorites in it. This deletes the favorites in this category only.
Received Addresses A default category called “Received Addresses” is provided. If other TeleNav Maps users share any addresses with you, the address will automatically be stored in this folder. You can delete favorites from this category, but the category itself may not be deleted or renamed. Manage Contacts © TELENAV, INC.
Create New 1. In the Contacts list, choose “Create New” to create a new contact or group. 2. In the pop-up choose either Contact (to add an individual member) or Group (to add a new group; see section below). © TELENAV, INC.
Manage Groups You can use groups to organize your contacts (i.e., “Friends,” “Co-workers,” etc.). Groups are also helpful when you need to share an address with multiple people at once. Groups are indicated by the icon of two figures next to each other. At least one member is required per group. To create a new group, do the following: 1. On the Contacts page, choose “Create New.” On the pop-up, choose “Group.” 2. Enter a Group name and choose Add Members. 3. Choose the members to add to your group.
5. When you are done selecting members, click Save. Add or Delete Groups or Contacts You can edit or delete contacts or groups by highlighting a selection in the Contacts list and clicking Menu >> Edit or Delete. © TELENAV, INC.
Copy Contacts from Phone Choose “Copy Contacts from Phone” to import the contacts you have saved in your device’s directory/phone book to your TeleNav Maps Contacts list. This feature provides you with a convenient way to sync your contacts and allows you to easily share your location or selected addresses with them. When contacts are imported into the TeleNav Maps application, there can only be one phone number stored with each contact.
When you select “Refer a Friend,” an invitation to use TeleNav Maps will be sent to the contact or group that you select (though only the group name is shown on the referral confirmation screen, the invitation is sent to each member in the group). You can select an unlimited amount of contacts or groups to whom you can refer. Groups and contacts that have been selected are noted with a checkmark on the Select Contacts page.
You can set the following personal preferences in the Preferences menu. After you select your new preference, choose Save. • My Name - Edit your name here. This name will be displayed to users when you share addresses with them. • Route Style - Fastest, Shortest, Prefer Streets, Prefer Highway, or Pedestrian. You can choose “Ask me each trip” if you would like a prompt to choose a Route Style each time you get driving directions. • Distance Units - Miles/feet or kilometers/meters.
The About screen allows you to view information such as your TeleNav Maps version number, the TeleNav Support phone number, your PIN number (used to login to the website), etc. See below for more details on each feature. © TELENAV, INC.
About TeleNav This menu option displays a screen similar to the illustration on the right. It shows the exact version of TeleNav Maps that is on your device. Knowing the exact version of your software may be helpful if you ever have to call TeleNav Technical Support. Product Tour Choose “Product Tour” to go through a brief tour of TeleNav Maps’ key features. Product Tour pages are read-only. Choose the NEXT or BACK softkey to navigate through the pages.
My Account Info This screen gives information about your phone number and PIN, which can be used to log on to the TeleNav website. Give Feedback The Feedback menu gives you the following options so you can provide TeleNav with feedback on how TeleNav Maps is working for you.
13. Phone Calls Making a Phone Call from TeleNav Maps You can call a location that you have found in the Directory such as a restaurant, a hotel, or a church. When you are in the Details screen, click Menu >> Call It. When you are done with the call, you will automatically be taken back to the screen that you were on. Taking an Incoming Call When you are using TeleNav Maps and your phone receives an incoming call, your phone rings and displays a screen that gives you the option to take or ignore the call.
NOTE: You can find your current PIN number by selecting Tools/Extras >> About >> My Account Info: 15. Exit TeleNav Maps To exit TeleNav Maps, simply choose Exit on the Main Menu and click Yes on the Confirmation screen. 16. Upgrading to TeleNav GPS Navigator Now that you have experience TeleNav Maps, you may want to upgrade your account to TeleNav GPS Navigator.
• The option of rating a business or reading reviews others have posted. The most popular locations are classified with stars. You can even submit your own rating for a business or search the Directory by popularity. • Maps of the area around your current location. You will not have to type in your current location, as it will be precisely detected by GPS. You can even start navigation from your current location without having to type it in, or record your current location as a Favorite.
• Share addresses with TeleNav or non-TeleNav users. • Create and manage favorites and favorite categories. All favorites and favorite categories created on the device automatically synch with the TeleNav website. You will need to choose “Refresh” on the Favorites screen of the device to prompt the syncing from the website to the device. • Create groups or contacts. All groups and contacts created on the device automatically synch with the TeleNav website, and vice versa.
Unable to generate a route TeleNav Maps could not generate a route between the two endpoints of the route. This may be due to errors in the map data in the area around the destination. Unable to login Someone may be fraudulently using your account. Change your PIN (see page 52) and attempt to log in again. 19.
21. TeleNav Services Warranty The content and Java application services provided by TeleNav is provided “as is” and “as available” without warranties of any kind, either expressed or implied, including but not limited to any warranties of merchantability or fitness for particular use, or non-infringement. You acknowledge that your use of the TeleNav service is at your sole risk and you agree that the service and the information provided are without warranty of any kind by TeleNav.