Operators & Service Manual DN3600C Version 3.
CONTENTS DECLARATION OF CONFORMITY 3 INTRODUCTION INSTALLATION INSTRUMENT FAMILIARISATION GETTING STARTED Q SWITCHING MEMORY OPERATION AUTO EQ AUTO GAIN MASTER/SLAVE OPERATION 7 8 9 10 12 13 14 17 18 REFERENCE SECTION: DETAILS OF OPERATION DEFAULT/START UP FADER ADJUSTMENT GAIN ADJUSTMENT CURVE/FADER MORE EQ A : B : LINK UTILITIES BYPASS AND RESET MORE EQ MENU AND DISPLAY FILTERS A : B : LINK IN/OUT EXIT FILTER ADJUST NOTCH1/2 20 20 20 20 20 21 21 21 21 22 22 22 22 22 23 23 23 24 24 24 24 24 24 25 25 2
MEMORY/LOCKOUT MENU RECALL SAVE LOCK FULL PARTIAL EXIT MORE... MENU SLAVES STAND ALONE ALL SLAVES 1 TO 64 MIDI CHAN ADJ.
DECLARATION OF CONFORMITY The Directive Covered by this Conformity 89/336/EEC Electromagnetic Compatibility Directive, amended by 92/31/EEC & 93/68/EEC. 73/23/EEC Low Voltage Directive, amended by 93/68/EEC.
Attention! Cables: This product should only be used with high quality, screened twisted pair audio cables, terminated with metal bodied 3-pin XLR connectors. The cable should be connected to pin 1. Any other cable type or configuration for the audio signals may result in degraded performance due to electromagnetic interference.
THANK YOU FOR USING THIS KLARK TEKNIK PRODUCT To obtain maximum performance from this precision electronic product, please study these instructions carefully. Installation and operating the DN3600 is not complicated, but the flexibility provided by its operating features merits familiarisation with it's controls and connections. This unit has been prepared to comply with the power requirements that exist in your location.
After you have unpacked the unit Save all the packing materials - they will prove valuable should it become necessary to transport or ship this product. Please inspect this unit carefully for any signs of damage incurred during transportation. It has undergone stringent quality control inspection and tests prior to packing and left the factory in perfect condition. If, however, the unit shows any signs of damage, notify the transportation company without delay.
INTRODUCTION Designed to meet and exceed the needs of the recording, broadcast, installation and live sound industries, the Klark Teknik DN3600 Programmable Graphic Equaliser is an extremely high quality, digitally controlled, two-channel, third-octave equaliser that combines state-of-the-art audio performance with unprecedented ease of use. The two channels may either be used independently or linked for stereo use.
In order to make the DN3600 as straightforward to use as a conventional graphic equaliser, the backlit LCD window provides a ‘virtual’ representation of a conventional graphic equaliser as well as the settings of the shelving high and low-pass filters and the notch filters.
Instrument Familiarisation Front panel functions DISPLAY SCREEN: This is a large, backlit "Supertwist"-type LCD which shows white/green legend on a blue background. Menu options are listed down the left hand end. Various status information is shown along the top edge. In normal operating mode, the largest part of the screen displays the "Virtual" graphic equaliser faders for one channel. LCD contrast is adjusted via a menu option. See the Adj. LCD section for more details.
GAIN: This button selects the Gain fader for adjustment. The Gain fader is highlighted and can be adjusted in 0.5dB steps from +6 to -18dB. One step below the -18dB point mutes the selected channel. To deselect the Gain fader press GAIN a second time. The Gain control on the DN3600 scales the actual frequency bands. This achieves optimization of signal to noise ratio from one simple control and avoids the disadvantages of conventional pre EQ or post EQ gain controls.
GETTING STARTED WITH THE DN3600 The operation of the virtual faders is much like that of a conventional graphic equaliser in that a ‘fader’ is selected and then moved. Faders may be selected directly by pressing any one of the Frequency buttons or the bands may be ‘scanned’ through using the FREQ rotary control. The selected fader is then adjusted by use of the LEVEL rotary control.
Q SWITCHING Over the last 15 years, Klark Teknik's graphic equalisers have become "industry standards" with audio professionals around the world - some preferring the smooth, averaging quality of the DN360 - others, the sharper, tighter Q character of the DN27. To satisfy these individual preferences, the DN3600 incorporates two "Q" options - 360 and 27. The DN3600 utilises 30 "combining" 1/3 octave filters.
MEMORY OPERATION Equalisation programs may be created from scratch or existing programs may be called up and modified. To start from scratch, switch OUT the More EQ and reset the unit by pressing and holding the Bypass key for more than 5 seconds. RECALLING A MEMORY Select Utilities, Memory and Recall in turn on the soft keys. Then use the FREQ rotary control to select the required memory by number (shown in the NUMBER window) or name (shown, together with the fader positions, on the LCD screen).
AUTO EQUALISATION - THE DN3600/DN60 CONNECTION The DN3600 can be interfaced with the Klark Teknik model DN60 Real Time Spectrum Analyser. The combination can then be used to perform an Automatic Equalisation function, to compensate for the sound system frequency response. To do this, proceed as follows: 1. Make certain that both units are switched OFF. Connect the DN60 to the DN3600. The interconnection is made using the pin-to-pin 16-way cable supplied with the DN3600.
Equalising to a Preferred Curve Whilst the Auto EQ function tries to equalise to flat (as measured by the DN60) it is possible to perform an approximate Auto EQ to a preferred house curve by making use of the Bypass setting of the DN3600. To do this set up the house curve on the DN3600, or Recall the desired curve from memory (the memory itself will not be modified by the Auto EQ function). Connect the DN60 and DN3600 as defined in 1. above. Inject pink noise into the system as defined in 2. above.
AUTO EQUALISATION - THE DN3600/DN6000 CONNECTION The DN3600 can be interfaced to the Klark Teknik model DN6000 Audio Analyser or DN60 Real Time Spectrum Analyser. The combination can then be used to perform an Automatic Equalisation function to compensate for the room or system frequency response. To do this with the DN6000 proceed as follows: 1. 2. 3. 4. 5. 6. 7. 8. Connect the DN6000 to the DN3600. The interconnection is made using the pin-to-pin 16 way cable supplied with the DN3600.
Equalising to a Preferred Curve Whilst the Auto EQ function tries to equalise to a flat response (as measured by the DN6000), it is possible to perform an approximate Auto EQ to a preffered house curve by making use of the Bypass setting of the DN3600. To do this set up the house curve on the DN3600 faders, or Recall the desired curve from memory (the memory itself will not be modified by the Auto EQ function). Connect and set up the DN6000 and DN3600 as defined above.
MASTER/SLAVE OPERATION The Klark Teknik Pro MIDI Master/Slave system allows up to 65 DN3600 and DN3601 units to be operated, either individually or together, from the front panel of one DN3600. The system is simple to connect, simple to operate and protects itself from the dangers of unreliable power supply and damaged connections. Once programmed, the equaliser program memories resident in the slaves may be selected via ordinary MIDI program change commands without the need for a DN3600 master unit.
Any DN3600 in the loop can be designated as the Master by entering the Slaves sub menu (press Utilities, More..., Slaves). The other DN3600 and DN3601 units in the loop will automatically configure themselves as slaves, with the first being number 1, the second being number 2 and so on. A maximum of 64 slaves may be connected in this way (65 units including the Master). To address an individual slave unit, enter the Slaves sub-menu of the Master.
DETAILS OF OPERATION Initial, Default Display Soft key options: More EQ A : B : Link Utilities Bypass Fader adjustment The ‘Virtual’ Graphic Equaliser faders are selected either by pressing the appropriate frequency key or by rotation of the FREQ rotary control. There are several ways to select a range of adjacent faders. 1. Hold a single Frequency key until it starts to flash. This sets one end of the range.
More EQ Soft key 1 is accompanied by the text More EQ. Pressing this key selects the More EQ menu and the Filter Adjust display. See below. The More EQ menu text will be highlighted if the More EQ filters for the selected channel are in circuit. A : B : Link Soft key 2 is accompanied by the text A : B : Link. Pressing this key toggles between addressing channels A and B. If the key is held for more than 1 second, the Link mode is selected. In Link mode, all fader adjustments affect both channels.
More EQ Menu and Display. Accessed by pressing the More EQ key from the Start-up menu. Soft key options: Filters A : B : Link In/Out Exit More EQ Display In More EQ mode, the display shows the frequency response curve calculated from the Notch filter and High Pass and Low Pass filter settings. CURVE/FADER When the CURVE/FADER key is pressed, the display incorporates the Graphic fader positions into the calculated frequency response curve. Filters Soft key 1 is accompanied by the text Filters.
Filter Adjust Menu and Display. Access by pressing the More EQ key followed by the Filters key. Soft key options: Notch 1 Notch 2 Back Display In Filter adjust mode, the display shows the frequency response curve calculated from the Notch filter and High Pass and Low Pass filter settings. CURVE/FADER When the CURVE/FADER key is pressed, the display incorporates the graphic fader positions into the calculated frequency response curve. Notch 1 Soft key 1 is accompanied by the text Notch 1.
displayed channel is copied to the alternate channel during adjustment. High and Low pass filter frequencies are shown as text at the top of the screen. Back Soft key 4 is accompanied by the text Back. When pressed, this key returns the unit to the More EQ menu. Utilities menu. Accessed by pressing the Utilities key from the Start-up menu. Soft key options: Auto/Q Memory More. . . Exit Curve/Fader The Curve/Fader key toggles the screen between Curve and Fader displays.
Auto/Q menu. Accessed by pressing the Utilities key followed by the Auto/Q key. Soft key options: Auto Gain Auto EQ 'Q' type Exit Curve/Fader The Curve/Fader key toggles the screen between Curve and Fader displays. While the Fader display shows the positions of the 30 Graphic faders for the addressed channel, Curve display calculates the actual frequency response of the unit, taking into account fader positions, filter Q and interaction, low pass and high pass filters, notches and gain.
Memory/Lockout menu Accessed by pressing the Utilities key followed by the Memory key. Soft key options: Recall Save Lock Exit Curve/Fader The Curve/Fader key toggles the screen between Curve and Fader displays. While the Fader display shows the positions of the 30 Graphic faders for the addressed channel, Curve display calculates the actual frequency response of the unit, taking into account fader positions, filter Q and interaction, low pass and high pass filters, notches and gain.
Lock Soft key 3 is accompanied by the text Lock. This key allows access to the two lock modes. When the key is pressed, the menu options change to: Full Partial Exit Full Full lock prevents access to all controls. After Full Lock has been set, the only action possible is to press the Unlock key and type in a password. If the correct password is typed in, the Full Lock is defeated. To set Full Lock: 1. Type in the desired password of up to 8 letters, using the frequency keys. 2.
More. . . Utilities menu Accessed by pressing the Utilities key followed by the More. . . key. Soft key options: Slaves MIDI Chan Adj. LCD Exit Curve/Fader The Curve/Fader key toggles the screen between Curve and Fader displays. While the Fader display shows the positions of the 30 Graphic faders for the addressed channel, Curve display calculates the actual frequency response of the unit, taking into account fader positions, filter Q and interaction, low pass and high pass filters, notches and gain.
MIDI Chan Soft key 2 is accompanied by the text MIDI Chan. Pressing this switch enables the selection of MIDI send and receive channels. By use of the FREQ or LEVEL rotary control, select either OMNI ON mode (receive all channels, send on channel 1) or OMNI OFF mode and one of MIDI channels 1 to 16. The procedure may be aborted at any time by pressing the Exit key. To complete the selection, press the MIDI Chan key a second time. The unit updates its MIDI channel number and returns to the start up screen.
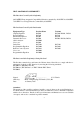
TECHNICAL SPECIFICATION INPUTS Type Impedence (ohm) Balanced Unbalanced Max. level TWO Balanced (electronically) OUTPUTS Type Min. load impedence Source impedence Max.
DN3600C SOFTWARE V3.0C MENU STRUCTURE MORE EQ FILTERS A : B : LINK A : B IN/OUT UTILITIES BYPASS EXIT NOTCH 1 NOTCH 2 BACK AUTO/Q MEMORY AUTO GAIN AUTO EQ Q TYPE EXIT MORE MIDI CHAN EXIT SLAVES ADJ.
32
Service Information 33
SERVICE INFORMATION Caution: These servicing instructions are for use by qualified personnel only. To reduce the risk of electric shock, do not perform any servicing other than that contained in the Operating Instructions unless you are qualified to do so. Refer all servicing to qualified service personnel. Klark Teknik PLC accepts no liability for damage or injury arising from incorrect servicing.