Software Version 3.02 Telex Communications (UK) Limited, Klark Teknik Building, Walter Nash Road, Kidderminster. Worcestershire. DY11 7HJ. England. Tel:+44 (0) 1562 741515 Fax:+44 (0) 1562 745371 Email: sales@ktgplc.com Website: www.klarkteknik.com DN9848 Loudspeaker Processor Operators Manual DOC02-DN9848 Issue 2.0 - January 2005 (c) Telex Communications (UK) Limited. In line with the company’s policy of continual improvement, specifications and function may be subject to change without notice.
IMPORTANT SAFETY INSTRUCTIONS WARNING: TO REDUCE THE RISK OF FIRE OR ELECTRIC SHOCK, DO NOT EXPOSE THIS APPLIANCE TO RAIN OR MOISTURE AVIS: RISQUE DE CHOC ELECTRIQUE. NE PAS OUVRIR These symbols are internationally accepted symbols that warn of potential hazards with electrical products.
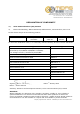
Telex Communications (UK) Limited, Klark Teknik Building, Walter Nash Road, Kidderminster. Worcs. DY11 7HJ. England. Tel: +44 1562 741515 Fax: +44 1562 745371 www.midasconsoles.com www.klarkteknik.com DECLARATION OF CONFORMITY We, Telex Communications (UK) Limited of, Klark Teknik Building, Walter Nash Road, Kidderminster, Worcestershire, DY11 7HJ.
Thank You For Using This Klark Teknik Product Our engineers have designed this product with uncompromising dedication to providing the superb audio performance, ease of use and rugged reliability that meets the demands of live sound engineering. Please take time to complete and return the Klark Teknik three-year warranty registration card and, to obtain maximum performance with minimum effort, refer to this operators manual.
6.2.9 Output Limiter ................................................................................................... 17 6.3. Monitoring the Output Signal...................................................................................... 17 6.4. Output Gain and Mute - Front Panel Control ................................................................. 18 7. DN9848 SET UP OPTIONS .........................................................................19 7.1. General..........................
ATTENTION! Please ensure that you read and follow the IMPORTANT SAFETY INSTRUCTIONS at the front of this manual and the SAFETY WARNINGS and INSTALLATION CONSIDERATIONS given below. Safety Warning To prevent shock or fire hazard, do not expose the unit to rain or moisture. To avoid electrical shock do not remove covers. Refer servicing to qualified personnel only. This unit is fitted with a standard fused IEC mains power socket.
DN9848 Key Features 1. INTRODUCING THE DN9848 The DN9848 is a highly configurable, digital electronic cross-over/loudspeaker management system comprising four balanced analogue input channels and eight balanced analogue output channels. Its unrivalled routing flexibility enables each output to be sourced from a single input, a pair of inputs, or all four inputs.
Controls, Connectors, Indicators 2. FRONT PANEL 1 2 6 1 3 5 4 7 8 9 Input channels A-D Menu Access Buttons A-D Press to access and step through the menu pages for the respective input. The available pages depend on the current security setting. The button is lit when active. Signal Level Meters A - D 9-segment signal meters for monitoring signal level (compressor headroom and gain reduction) and clip on the respective channels.
Controls, Connectors, Indicators 3. REAR PANEL 1 2 3 4 1 IEC fused mains inlet socket For mains power connection. Accepts input voltages from 100-240V AC 50/60Hz. 2 COMMS In and Out Communications input and output for remote control using XLR cabling.
DN9848 Menu System 4. PROGRAMMING SETTINGS 4.1. The DN9848 Programming Panel All the parameters for input and output signal processing and routing are defined via function specific menu pages that are displayed and edited at the programming panel shown below. As described in the illustration, each menu page uses a standard layout that relates the displayed parameters to the three DATA ENTRY encoder knobs, which are used to adjust the parameter values. The adjustable parameters are named on the top line.
DN9848 Menu System If you prefer to program each parameter in turn across all the input/output channels, you can also skip across from the current channel to the same page on another input/output channel by pressing the MENU ACCESS button of the other channel. If you want to jump to the first page of a different channel, press the HOME button and then the required channel button. 4.2.
DN9848 Menu Map 8
Input Channels 5. INPUT CHANNELS 5.1. Brief Technical Overview Referring to the illustration below, each input channel of the DN9848 processes the audio signal through delay and gain stages, followed by 12 bands of parametric equalisation, and a full-band compressor. All key stages are monitored for signal clipping which, if detected, lights the top red segment at the top of the input signal meter; thus clipping of the signal during processing is not inadvertently missed.
Input Channels 5.2.3 Gain and Delay (Page 1) Gain and delay are also set in the first page of the channel’s menu, providing easy access for quick adjustment during set up or performance. Note that the delay can be specified in terms of time or distance, as preferred. The unit of measurement is changed in the Set Up menu (see Section 7.6). Delays can be set in seconds, metres, or feet.
Input Channels 5.2.5 Compression (Page 14) Each input has an independent full-range compressor to improve the dynamics of the incoming signal levels. The compressors are variable ratio and can be set to a hard knee characteristic for a sharp gain reduction response at the compression threshold, or soft knee for a more ‘musical’ response.
Output Channels 6. OUTPUT CHANNELS 6.1. Brief Technical Overview The output channels are slightly more complex than the input channels in that they are responsible for the signal routing as well as output signal processing. At the input of each output channel is a routing block that can source the output signal from a single input, a pair of inputs, or all four inputs. In addition, as shown below, the paired inputs can be weighted (default 50:50).
Output Channels 6.2. Setting Output Parameters Signal processing for each output channel is programmed independently via the separate Output menu associated with each channel. The signal processing parameters are described below in menu order. To access the Output menu pages for a particular channel Press its yellow MENU ACCESS button (1 – 8) to switch to its menu. Press the button repeatedly to step through the pages in turn.
Output Channels 6.2.4 Signal Invert, Delay and Output Level (Page 3) Each output can be phase inverted by 180º (separate to the phase-alignment for cross-over), delayed for system alignment and the level attenuated or boosted. Delay can be specified in terms of time or distance, as preferred. The unit of measurement is changed in the Set Up menu (see Section 7.6).
Output Channels To apply a 1st order phase adjustment in relation to a chosen frequency 1 Step to the All-Pass page shown right. 2 Turn the right-hand knob to enable a 1st (90º) order shift. 3 Turn the left-hand knob to the required frequency. To apply a ‘shaped’ phase transition at a chosen frequency 1 Step to the All-Pass page. 2 Turn the right-hand knob to enable a 2nd (180º) order shift. 3 Turn the centre knob to select the Q (slope) and the left-hand knob to select the frequency. 6.2.
Output Channels 6.2.7 Parametric Equalisation (Pages 2 to 13) The DN9848 provides six parametric equalisation stages on each output channel, for equalising the output signal in respect of loudspeaker and/or system characteristics. The first and last of these PEQ sections can be alternatively be configured for lower and upper shelving equalisation. All the PEQ sections can be used across the full range from 20Hz to 20kHz and are set independently via their own menu page.
Output Channels 3 Turn the left-hand knob clockwise to access the second sub-menu page. Use the centre knob to set the compressor attack time (range of 40 s – 1ms in 20 s steps or 1ms to 100ms in 1ms steps). Use the right-hand knob to set the release time (10ms to 2s in 10ms steps). To switch the compressor out of the circuit Set the bypass state on the second page to ‘Yes’. The other settings will be retained for future use. 6.2.
Output Channels 1 The meter uses a downward relative scale where the 0 segment represents the limiter threshold. For example, if the limiter threshold is set to +5dB in the output menu page, then the signal meter 0 segment represents 5dBu true value, the –3 segment becomes 2dBu down, - 6 becomes -1dBu down and so on. The compressor threshold is also marked, relative to the limiter threshold, by a single steadily lit segment.
Security and other Set Up Options 7. DN9848 SET UP OPTIONS 7.1. General The DN9848 provides various set up options for adapting the operation of the unit to best suit your operational requirements and preferences, as follows: Comms channel setting for remote control Security features Display lighting Unit and memory naming Delay units of measurement Power up settings These options are programmed in the Set Up menu and are described below in menu order.
Security and other Set Up Options To set a Panel Lock 1 Step through the Set Up menu to the Panel Lock menu page. 2 Use the left and centre knobs to set a password of 12 characters, including blank spaces, made up of letters, numbers and/or symbols. Important! Note that preliminary and subsequent blank spaces are recorded as part of the 12-character password; therefore if you use a short password, the characters must be reentered in exactly the same position to unlock the panel.
Security and other Set Up Options To switch System Protect on 1 Step through the Set Up menu to the System Protect menu page. 2 Use the left and centre knobs to set a password of 12 characters (including blank spaces) made up of letters, numbers and a limited number of symbols.
Security and other Set Up Options Names can also be allocated to individual input and output channels via their associated menus (see Sections 5.2.2 and 6.2.2). All names are stored with User and System memory settings. The Store function will assume the working memory name as the default memory name, prompting you to edit it if required (see Section 8 Storing and Recalling Settings). 7.6.
Using the DN9848 Memories 8. STORING AND RECALLING SETTINGS The DN9848 Loudspeaker Processor is provided with the following memory facilities: 32 lockable System memories, designated as S01 to S32, for storing standard set ups in battery-backed-up SRAM. 5 free access User memories, designated as U01 to U05, for storing a series of set ups for the current show. 99 Preset (flash) memory locations, designated P01 –P99, for secure storage of essential settings against overwriting or battery failure.
Using the DN9848 Memories To recall stored settings from memory 1 Press the black RECALL button to access the Recall menu. 2 Select a User, System or Preset memory using the left, centre or right-hand knob. 3 Press RECALL to confirm the action and return to the DN9848 Home page. The selected memory settings are recalled to the working memory.
Remote Control Setup 9. DN9848 REMOTE CONTROL SETUP Up to 32 DN9848 Loudspeaker processors can be linked together in a daisy-chain RS-485 network for remote control from a computer running the commercially available Stardraw or Smaart software. Further details of these applications are available from the Klark Teknik website at www.klarkteknik.com. This section specifically covers how to connect and configure the DN9848 units for remote operation.
Remote Control Setup DN9848 Connection RS-232 input to front panel PC PORT for short cable run RS-485 input to rear panel COMMS In XLR connector for long cable run Laptop/PC Connection Cable /Converter Required D9 COM port Host cable USB port KK systems USB/232 converter plus host cable D9 COM port RS-232/485 converter, e.g.
Application Notes 10. APPLICATION NOTES 10.1. The Advantage of DN9848 Look-Ahead Limiters The limiter in a loudspeaker processor is the last line of defence in protecting the speaker drivers from damage, and as such it has a very specific and critical job to do.
Application Notes DN9848 is caused by the use of sigma-delta converters for both analogue-to-digital and digital-to analogue conversion (the competitor unit uses a different method of digital-to-analogue conversion), which allows the DN9848 to achieve its superior dynamic range.
Application Notes 10.2. Phase-adjustment with the DN9848 To meet the demands of a wide range of situations, the Klark Teknik DN9848 provides two all-pass filters with complementary control parameters for fine-tuning the phase response on each output. Although some cross-over filter designs, e.g. Linkwitz-Riley types, are inherently phase-aligned at cross-over, others such as Butterworth or Bessel responses may require manual phase alignment.
Application Notes Audio Precision 1st order allpass @ 300, 1K, 10K 01/19/01 16:00:02 +150 +150 +100 +100 +50 d e g +50 +0 +0 -50 -50 -100 -100 -150 -150 20 50 100 200 500 1k 2k 5k 10k d e g 20k Hz C olor Lin e Style Th ick D ata Axis Gree n Ye llo w Ye llo w Solid Solid Solid 1 1 1 An lr.Pha s e An lr.Pha s e An lr.Pha s e Left R igh t Left ph as e.
Technical Specification 11. TECHNICAL SPECIFICATION Audio Inputs (four) Type Electronically balanced (Pin 2 Hot) Impedance (Ω) Balanced 20k, Unbalanced 10k Common Mode Rejection >80dB @ 1kHz Maximum level + 21dBu Audio Outputs (eight) Type Electronically Balanced (Pin 2 Hot) Minimum load impedance 56Ω /20nF Source impedance 56Ω Maximum level + 21dBu into > 2kΩ Performance (20Hz to 20kHz) Frequency response +/- 0.3dB with all filters and EQ flat Distortion @ +8dBu <0.
Technical Specification High pass filter Types available Freq. Range: Peaking Filter Boost: Butterworth (6dB/Oct, 12dB/Oct, 18dB/Oct, 24dB/Oct, 36dB/Oct, 48dB/Oct) Linkwitz-Riley (12dB/Oct, 24dB/Oct) Bessel (12dB/Oct, 18dB/Oct, 24dB/Oct, 36dB/Oct, 48dB/Oct) 12dB/Oct Peaking 24dB/Oct Peaking 20Hz to 15kHz in 21 steps/octave 0dB to +6dB in 0.1dB steps. Low pass filter Types available Freq.
Technical Specification Factory Presets for X-Array Series Memory Identification In P01 A XW15 – 4MIX R1-3 4 x EV XW15 15” Bi-amped (8 outputs used) Out 1 2 LF HF B 3 4 LF HF C 5 6 LF HF D P02 XN/XB/2XF R21 x EV XN + EV XB + 2 x EV XF (8 outputs used) A 7 8 LF HF Xn LF Xn MB Xn HF Xb LF Xf MB Xf HF Xf MF Xf HF Xcb LF Xcn MB Xcn HF Xb LF Xf MB Xf HF Xf MF Xf HF Xb LF Xf MB Xf HF Xf LF Xf MB Xf HF LF HF Xcb LF Xcn MB Xcn MF Xn LF Xn MB Xn HF B C D P03 X
Technical Specification Factory Presets for X-Array Install (Xi) Series Memory Identification In P08 A XI1122/85 4MIX R1-2 4 x EV XI1122/85 12” Biamped (8 outputs used) Out 1 2 LF HF B 3 4 LF HF C 5 6 LF HF D P09 P10 XI1122/85 & 1191 R1-2 2 x EV XI1122/85 12” plus EV 1191 Sub triamped (6 outputs used) XI1152/64 4-MIX R1-2 4 x EV XI1152/64 15”Biamped (8 ouputs used) A 1191 SUB 1122 LF 1122 HF B 1191 SUB 1122 LF P12 XI1152/94 4-MIX R1-2 4 x EV XI1152/94 15” Biamped (8 outputs use
Technical Specification Memory Identification P18 In A XI2153/64 R1-2 2 x EV XI2153/64 15” Tri-amped (6 ouputs used) Out 1 2 3 4 LF MB HF FULL B 5 6 7 8 LF MB HF FULL 1191 SUB 2153 LF 2153 MB 2153 HF LF MB HF FULL 1191 SUB 1123 LF 1123 MF 1123 HF LF MB HF FULL 1191 SUB 2123 LF 2123 MB 2123 HF C D P19 A XI2153/64 & 1191 R1-2 2 x EV XI2153/64 15” plus EV 1191 Sub Quad-amped (8 outputs used) 1191 SUB 2153 LF 2153 MB 2153 HF B C D P20 A XI1123/106 R1-2 2 x EV X