
User Guide

| 25
3
Basic Conguration
3.1 Step-by-Step
Here is a step-by-step guide to basic Nx12 configuration for a new installation:
Enter TCP/IP addresses, if used, for Web interface, remote control, and Livewire audio
♦
networking. See Section 5.3.
Set Input Source for Analog, AES3, or Livewire. See Section 5.8 if you will be using
♦
Livewire.
If you are using Livewire, configure it using the Web interface.
♦
Connect your mixing console mix-minus(es) to the Nx12’s inputs, and the Nx12’s outputs ♦
to console inputs.
If you have analog Telco lines, configure for your region. See Sections 3.3 and 5.5.
♦
If you have ISDN Telco service, ♦
Are you familiar with ISDN? If not, read Section 2.2. ♦
Configure ISDN. See Section 3.4. ♦
Confirm ISDN is working. ♦
Read-up on Desktop Director Operation. See Section 4. ♦
Configure the various audio options for processing, etc. See Section 5.4. ♦
If you will split the Nx12 between two studios, see Section 5.7. ♦
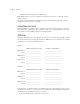
You may use either the Web interface or the front panel LCD/button interface for most
configuration operations. e Web may be more convenient since you have a PC’s rich interface
at your service and you can work by remote.
Some configuration can only be done by Web, such as setting ISDN Directory Numbers and
SPIDs and making Livewire channel assignments. See Section 5.3 for detailed information on
using these interfaces.
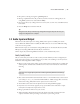
3.2 Conguration for Telephone Lines
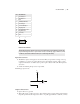
e Nx12 has two Telco interface positions, designated A and B. ere are three module types,
and you can determine which you have by noting the connectors:
Analog POTS. ere will be 6 RJ-11 jacks.
♦
ISDN U-interface. ere will be 3 RJ-11 jacks. ♦