PHONECELL® SX3e AMPS FIXED WIRELESS TERMINAL U S E R M ANUAL Total communications freedom at your fingertips...voice/fax/data. 06/25/01 Part No.
Introduction Phone(s) Fax Machine ● Computer Modem Battery Back-Up Power Supply (optional) ● ● AC Power Thank you for choosing the Phonecell SX3 Fixed Wireless Terminal from Telular. This innovative product lets you connect up to five pieces of standard telephone equipment into a cellular network for total communications flexibility. Please follow this guide to unpack, set up and operate your new Phonecell safely and properly. Telular is proud to welcome you as a valued customer.
Table of Contents Introduction...............................................................................................2 Technical Support ...................................................................................2 Getting Started Unpacking the Phonecell SX3e..............................................................4 Pre-Installation Checklist ........................................................................4 Installation Summary ....................................................
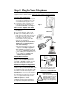
Getting Started... Un-Packing Your Phonecell SX3e ➌ ➋ ➊ The Phonecell SX3e comes with the following: ➊ ➋ ➌ Phonecell SX3e Fixed Wireless Terminal (FWT) Mounting Bracket with Two Screws Four Rubber Feet for Desktop/Tabletop Use* (*Do not attach feet if wall-mounting the Phonecell.) Carefully remove the unit from the shipping carton and check for evidence of shipping damage. If damage is found, contact your Authorized Telular Distributor or shipping agent immediately.
Installation Summary There are four steps to installing the Phonecell SX3e FWT properly. These steps are summarized below and explained in detail in the remainder of this manual. Step 1. Choose an Antenna Location (pg. 6-7) • Choose a location. • Next, connect power to the FWT and turn the unit ON. • Then, connect the antenna (not supplied). • Check the cellular signal strength and move the antenna until you achieve the best signal possible. Step 2.
Step 1. Choose an Antenna Location Your Phonecell SX3 receives operating commands from the cellular network and relies upon signal strength for proper operation. Therefore, finding an antenna location with good signal strength is critical for call quality. ANTENNA LOCATION TIPS: • Locate the antenna above ground and as close to windows (or exterior walls) as possible – see Fig. 1. • Try to install the antenna in an uninhabited area (i.e. closets, attics, etc.
Antenna Location & Setup – Continued How to Connect the Antenna: 1) Connect the Power Supply to the Fig. 3 DC “PWR” port on the back of the Phonecell – see Figure 3. 2) Connect the AC line cord from the power supply to the AC power source. After approximately 10 seconds, the LED indicator on the front of the FWT should turn RED – see Figure 4 Optional Power Supply 3) Connect an antenna to the TNC antenna connector on top of the FWT – see Figure 5.
Step 2. Plug In Your Telephone The Phonecell SX3 lets you connect up to 5 pieces of standard telephone equipment into a cellular network. Follow the steps below for quick installation. Connect Your Telephone: 1) Locate the modular (RJ-11) line port on your phone and plug in one end of a standard (RJ-11) phone cord. 2) Connect the other end of the cord to the RJ-11 port on the back of your Phonecell SX3e – see Fig. 6. Fig.
Step 3. NAM/Phone Number Setup IMPORTANT! ! If your Phonecell was NOT pre-programmed for NAM (Number Assignment Module/Phone Number) information, follow the steps below. Otherwise, continue to STEP 4 – pages 12–13. You can program the Phonecell SX3 with an ordinary tone-dial (DTMF) telephone, which is sometimes referred to as a POTS (Plain Old Telephone Service) phone. NOTE: this programming mode is not accessible while you're in a call.
NAM/Phone Number Setup – Override Commands NOTE: The following NAM Parameters are automatically set by the SID value in Step #4 on the previous page. These steps (5–7) are only needed if you want to override the standard AMPS settings listed on the previous page. Otherwise, continue to Step 4 – Wall-Mount or Desktop Installation, pages 12–13. Step #5a - How to Override the Initial Dedicated Control Channel and First Paging Channel.
NAM/Phone Number Setup – Override Commands Step #6 - How to Override the Number of Dedicated Control Channels. Press: * 26 * _ _ # # The spaces represent your 2-digit range of Dedicated Control Channels. When you first turn on the Phonecell, it automatically scans up to 21 control channels looking for your cellular provider. Then, it locks onto the strongest signal. NOTE: the factory default setting is 21 channels.
Step 4. Install Your Phonecell After you’ve selected a location and made all the necessary connections, your Phonecell SX3 is ready for wall-mounting or desktop installation. PRE-INSTALLATION TIPS: • Make sure the location is dry, away from overhead water pipes, and protected from weather conditions. • The area should be free of airborne contaminants. Fig. 8 • The Phonecell should be located within 2 meters (6 feet) of an AC power outlet. Fig. 9 4a.
Phonecell Installation – Continued 4b. Desktop/Tabletop Installation After all connections are made, turn your Phonecell SX3 face-down and attach the four rubber feet to the bottom–see Figure 13. Your Phonecell SX3 is now ready for use on a desktop, tabletop or other flat surface*. *NOTE: Do not attach the rubber feet if the unit is to be wall-mounted. Fig. 13 IMPORTANT! ! Your Phonecell SX3 must be placed or mounted on a flat, level surface to allow proper ventilation.
Phonecell Operation Once your Phonecell SX3 is installed and tested, it’s ready for operation. How to Use the LED Status Indicator 1) Plug in the AC power supply . 2) Wait approximately 10 seconds for the unit to initialize. 3) Then, the LED indicator on the front of your Phonecell will turn ON. The LED Status Table below describes the modes and operation of this 3-color indicator.
Phonecell Operation – Continued Important Tones and Alerts No-Service Tone – When cellular service is not available, the receiver emits a No-Service (fast-beeping) tone instead of the normal (steady) dial tone. ROH (Receiver Off-Hook) Tone – If the telephone equipment remains off-hook (off its cradle) with no dialing activity for 45 seconds, the receiver emits an ROH tone for 60 seconds. Incoming Call Alert – If you’re dialing a number and an incoming call occurs, the receiver will emit an audible ring.
Phonecell Operation – Continued Variable Dial Time (Auto SEND Delay) Option When you place a call, your Phonecell SX3 automatically sends the phone number over the cellular network after you dial the last digit – just like a landline phone. However, to make sure you have enough time to dial the last digit, a 3second Auto SEND Delay is programmed into the unit. This delay also affects Special Functions such as Call Forwarding (see Special Cellular Services below).
Phonecell Operation – Continued Three-Way Conference Calls - For three-way conference calls, the Out-of-Band Signaling option must be enabled. Pressing the HOOKFLASH function transmits the SEND command. Please see the Data After SEND option below. Voice Mail – Out-of-Band Signaling may need to be disabled to interact with remote voice mail systems to prevent double-pulsing. See the Data After SEND option below.
Phonecell SX3 Troubleshooting Telephone Service is Not Working If the telephone service is not working, first check the operation of the telephone equipment and wiring connected to your Phonecell SX3. Test the equipment on a different service or piece of equipment to ensure proper operation, or connect a known good telephone device to the RJ-11 port on the Phonecell SX3 unit.
Safety Information ! IMPORTANT! To ensure safe and efficient operation, please read the following information and observe these guidelines whenever using your Phonecell SX3 FWT. Your Phonecell SX3 FWT (Fixed Wireless Terminal) functions as both a radio transmitter and receiver. When it is ON, the FWT receives and sends out radio frequency (RF) energy. The unit may operate in frequency ranges between 824 MHz and 894 MHz. The FWT employs commonly used frequency modulation (FM) techniques.
Safety Information – Continued Driving Check the laws and regulations on the use of cellular products in the areas where you drive. Some jurisdictions prohibit your using a cellular device while driving a vehicle. Even if your jurisdiction does not have such a law, we strongly suggest that, for safety reasons, the driver use extreme caution when operating the cellular device while the vehicle is in motion. Always obey the law. Electronic Devices Most modern electronic equipment is shielded from RF energy.
Safety Information – Continued Potentially Explosive Atmospheres Turn your Phonecell SX3 OFF when in any area with a potentially explosive atmosphere. It is rare, but your Phonecell SX3 or its accessories could generate sparks. Sparks in such areas could cause an explosion or fire resulting in bodily injury or even death. Areas with a potentially explosive atmosphere are often, but not always, clearly marked.
AMPS Technician Programming IMPORTANT! ! The following commands may be used by a trained service technician to change the configuration of the Phonecell SX3. WARNING: these commands are intended for use by trained service technicians only. Untrained users could damage the Phonecell, violate local regulations and breach the service agreement with the cellular provider. For further assistance, please contact your Authorized Telular Representative.
Technician Programming Commands – Continued How to Set the Access Overload Class (ACCOLC) Use the following key sequence to set the ACCOLC: Press: # *2* < ACCOLC > # The < > brackets represent the 2-digit ACCOLC. You must enter a 2-digit value between 00 and 15, otherwise the FWT will not update or store this value; the existing stored parameter will remain. (For example, to program the FWT for ACCOLC 8, enter: # * 2 * 08 #.
Technician Programming Commands – Continued How to Set the Post-Receiver Off-Hook (ROH) Option Use the following key sequence to set the post-ROH option: Press: # * 9 * # The < > brackets represent the 1-digit post-ROH option: enter: 0 for continuous ROH tone enter: 1 to turn off ROH tone and periodically check for an on-hook condition. You must enter either 0 or 1, otherwise the FWT will not update or store this value and the existing stored parameter will remain.
Technician Programming Commands – Continued How to Enter the Periodic Self Test Option Use the following key sequence to program the periodic self test: Press: # * 76 * # The self test interval is programmed in 1 minute intervals from 1 to 65,535. A value of 0 disables the self test. If the value is not between 9 and 65,535 it will be considered invalid. The factory default setting is 180.
Part No.