frntcvr.
Copyright © 1996 Texas Instruments All Rights Reserved — Printed in Taiwan Extensa Series Notebook Computer User’s Guide TI Part No. 9811345-0001 Original Issue: August 1996 First Revision: September 1996 Changes may be made periodically to the information in this publication. Such changes will be incorporated in new editions of this manual. Record the serial number, purchase date, and model number in the space provided below.
Extensa is a trademark of Texas Instruments. The icons in the Windows Notebook and Startup groups are copyrighted by Texas Instruments. IBM, AT, PS/2, and Token Ring are registered trademarks and OS/2 is a trademark of International Business Machines Corporation. Microsoft, MS-DOS, Windows and Xenix are registered trademarks of Microsoft Corporation. Ethernet is a registered trademark of Xerox Corporation. Kensington is a registered trademark of Kensington Microware, Inc.
This device has been tested and found to comply with the limits for a Class B digital device pursuant to Part 15 of the FCC Rules. These limits are designed to provide reasonable protection against harmful interference in a residential installation. This device generates, uses, and can radiate radio frequency energy and, if not installed and used in accordance with the instructions, may cause harmful interference to radio communications.
FCC Notice Use Conditions This part complies with Part 15 of the FCC Rules. Operation is subject to the following two conditions: (1) this device may not cause harmful interference, and (2) this device must accept any interference received, including interference that may cause undesired operation. Notice: Canadian Users This Class B digital apparatus meets all requirements of the Canadian Interference-Causing Equipment Regulations.
Duracell Notice The Texas Instruments Extensa 600 and 605 are designed to use a Duracell DR35S or DR201 Rechargeable Battery. Texas Instruments participates in the Duracell pro.link program. If you would like to purchase additional batteries, please call the Authorized Duracell Purchase Hotline at 1-800-603-8225. If you have questions about battery performance, recycling a used battery, or any other battery-related question, please call Duracell Consumer Relations at 1-800-551-2355 (9:00 AM - 5:00 PM EST).
Contents Preface Chapter 1 Before You Begin Creating Backup Disks ................................. 1-2 Features of the Computer ............................. 1-3 Environmental Specifications ........................ 1-5 Using the Computer ..................................... 1-6 Power Saving Modes ..................................... 1-8 Securing the Computer ............................... 1-10 Using the AC Adapter .................................
Contents Chapter 4 Options AC Adapter................................................... 4-2 PC Cards...................................................... 4-3 Numeric Keypad ........................................... 4-4 External Monitor .......................................... 4-5 External Mouse ............................................ 4-6 External Keyboard ........................................ 4-7 Memory........................................................ 4-8 Audio Options .................
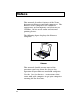
Preface This manual describes features of the Texas Instruments Extensa notebook computers. The Extensa series computers are similar in appearance and incorporate such features as CardBus, 16-bit stereo audio and internal pointing device. The following figure displays the Extensa computer. Extensa This manual should answer most of the questions you have about the day-to-day operation of your Extensa notebook computer.
Preface You should also take advantage of the online help files that are available with almost all of the programs shipped with your computer. We hope you enjoy your Extensa computer. With proper care, your computer will provide you with years of productive service.
1 Before You Begin After completing instructions in Just for Starters…, read this chapter to learn about important functions of your computer. Some, such as Creating Backup Disks, should be performed as soon as possible after the purchase of your computer. Contents Creating Backup Disks ................................ 1-2 Features of the Computer ............................ 1-3 Standard Features ................................ 1-3 Customizing Features ...........................
Creating Backup Disks You should create your backup system disks as soon as possible after purchasing your computer. The process you follow depends on the operating system you selected when you installed the computer for the first time. Windows®95 Backing up Windows 95 requires approximately 43 formatted 3 1/2-inch, 1.44 MB diskettes. Labels for the disks are included with the manual. To create backup system disks, use the Create System Disk tool that is part of Windows 95.
Features of the Computer Standard Features The following list displays the standard features: q 8 MB EDO (Extended Data Out) memory q 1 MB EDO video memory q Fast video graphics accelerator q 0-Volt Suspend and Standby functions q No-reboot setup function q STN color display q 16-bit stereo audio q Serial infrared communication q Duracell NiMH (Nickel-Metal-Hydride) or optional Li-Ion (Lithium-Ion) battery pack q 810 MB (or higher) capacity hard disk with Local Bus q Internal CD-ROM dri
Features of the Computer Customizing Features The following features allow you to customize your computer to fit your requirements.
Environmental Specifications This section provides information on the optimum operating environment for your Extensa notebook computer. Temperature Operating: Storage: 50° to 95°F (10° to 35°C) -4° to 140°F (-20° to +60°C) Relative Humidity (Noncondensing) Operating: 20% to 85% Storage: 20% to 85% Shock Operating: Storage: Vibration Operating: Maximum 5g pulse in X, Y, and Z orientations Maximum 50g pulse in X, Y, and Z orientations Sinusoidal 5 to 25.6 Hz limited to 0.
Using the Computer 1-6 q Never pick up or carry your computer by the display. q Never use the computer in harsh environments where it could be subjected to rapid temperature changes or excessive dust. q Never expose the computer to excessive vibration. q Never expose the hard disk or floppy disk(s) to strong magnetic fields, such as those generated by audio system speakers or telephone handsets.
Using the Computer Caution: In the rare event that you should see or smell anything that indicates overheating (smoke or a strange smell): ! 1. Turn off the power. 2. Disconnect the AC adapter from the power source and the computer. 3. Remove the battery pack. 4. Contact your Texas Instruments dealer or service center.
Power Saving Modes 0V Suspend Mode Suspend mode saves battery power when you are not actively using your computer. In 0V Suspend mode, the computer saves the current system state onto your hard disk drive then shuts off. When you turn the computer on again, it restores the system to the saved state. Press the 0V Suspend hot key (Fn+F2) to enter 0V Suspend mode. To resume normal operation, press the power switch.
Power Saving Modes Standby Mode In Standby mode, data remains in memory while the computer powers down unused devices to save power. The standby indicator lights up in Standby mode. Press the Standby hot key (Fn+F4) to enter Standby mode. The computer also enters Standby mode if the STANDBY TIMEOUT parameter in Setup is enabled and times out. To resume from Standby mode, press any key or touch the touchpad.
Securing the Computer Your computer comes with a Kensington® lock notch. If your computer store does not carry Kensington locks, you can buy one directly from Texas Instruments. To secure your computer, follow these steps: 1. Wrap the cable of a portable computer Kensington security lock ( optional) around a table, desk drawer handle or any immovable object. 2. Insert the lock into the notch at the rear of the computer. 3. Turn the key to secure the lock. 4. Remove the key from the lock.
Using the AC Adapter DC Connector AC Adapter Female Connector Male Plug AC Adapter AC Adapter ! Charges the internal battery pack and operates the computer on AC power whether or not a battery pack is installed. The AC adapter can be operated anywhere where the outlet supplies between 100240 volts AC at 50 - 60 Hz. The AC adapter has a detachable AC power cord. Caution: Use only the AC adapter supplied with your computer. Another adapter can damage your computer and create a safety hazard.
2 Using Your Computer Before beginning this chapter, ensure you have read and understood Chapter 1. Chapter 2 describes how to start and use your Extensa notebook computer. Contents Starting the Computer ................................. 2-3 Running the Demo Program ......................... 2-4 Contents of the Demo Program.............. 2-4 Running the Demo Program .................. 2-4 Deleting the Demo Program .................. 2-5 Using the Brightness and Contrast Controls ...........................
Connecting an External Floppy Disk Drive ............................... 2-25 Floppy Disk Drive Guidelines .............. 2-26 CD-ROM Drive Guidelines .................. 2-27 Adding Memory ......................................... 2-29 Using the Keyboard ................................... 2-30 Special Keys ....................................... 2-30 Windows 95 Keys................................ 2-33 Using the Internal Numeric Keypad ............ 2-34 Num Lock On .....................................
Starting the Computer Power Switch Power Switch Power Switch Turns the computer on and off for both AC and battery operation; also resumes from 0V Suspend mode. When the power is off, the battery continues to charge (if a powered AC adapter is connected to the computer); however, all computer functions cease.
Running the Demo Program Contents of the Demo Program Your computer is loaded with an entertaining and informative demo program which includes the following information: q The features of your computer and how to use them q The livegear accessories available for your computer q The software loaded on your computer q How to get service and technical support q More about Texas Instruments Running the Demo Program To run the demo program, do one of the following: In Windows 95 1.
Running the Demo Program Deleting the Demo Program An uninstall program helps you delete all or part of the demo program to free up space on your hard disk drive. In Windows 95 1. Double-click on the Uninstall Demo icon on the desktop. 2. When the Uninstall window appears, you can choose a complete or partial uninstall. If you want to keep some parts of the demo, you can deselect those parts, then click on OK. To uninstall the entire demo, click on the large uninstall button, then click on OK.
Using the Brightness and Contrast Controls You can adjust the screen brightness and contrast levels using hot keys. Note: The hot keys for brightness and contrast are continuous keys. They will adjust as long as you hold them down. Brightness Control Press Fn+↑ ↑ and Fn+↓ ↓ to increase and decrease the brightness of the display respectively. The brighter the screen, the more power is used during battery operation.
Turning the Speakers On and Off Your computer comes with 16-bit stereo audio. Two built-in speakers are located near the LCD hinges. Left Speaker Right Speaker Built-in Speakers You can turn the built-in speakers on and off using a hot key. Speaker On/Off Press Fn+End to toggle the speaker output on and off. You can also enable or disable the speaker from your Setup screen. The setting in Setup deteremines whether the speakers are enabled when you reboot or turn on your computer.
Using PC Cards Inserting PC Cards You can insert up to two Type I or Type II PC cards, or one Type III PC card, in the slots on the side of the computer. Inserting a PC Card In Windows 95 Windows 95 beeps to indicate it has detected a PC card when you insert one. If Windows 95 recognizes the PC card, it will set up the necessary drivers. If Windows 95 does not recognize the PC card, you are asked to load the driver for the card.
Using PC Cards In Windows for Workgroups Windows for Workgroups beeps to indicate it has detected the card. If a driver for the PC card has already been loaded, you can use the card immediately. If a driver has not been loaded, you must manually load the driver. Windows for Workgroups does not ask you to load a driver. Ejecting PC Cards Eject buttons are located beside each PC card slot. Pressing an eject button ejects the PC Card from the slot. To eject a Type III card, press both eject buttons.
Using PC Cards In Windows 95 Follow these steps to eject a PC Card while using Windows 95. 1. Open the Control Panel. 2. Click on the PC Card icon. 3. Select the card you want to eject. 4. Click on Stop. 5. When Windows 95 responds with the message You may safely remove this device, flip out and press the eject button to eject the PC Card.
Using Indicator Lights The computer uses the following indicator lights to show the status of certain functions. Power/ Battery-Low Indicator Standby Mode Indicator LCD Panel Indicator Lights Power/ Battery-low Indicator Lights when the system is on and there is power to the system. Flashes when the battery power is low. Connect a powered AC adapter to the computer as soon as possible. Standby Mode Indicator Lights when the computer enters Standby mode.
Using Indicator Lights Num NumLock Lock Indicator Indicator Caps Lock Caps Indicator Lock Indicator Battery Charging Charging Battery Indicator Indicator Disk Media Media Indicator Disk Indicator Front Indicator Lights Disk Media Indicator Lights when the computer writes to or reads from the hard disk drive, or reads from the CD-ROM drive. Battery Charging Indicator Lights when a powered AC adapter connected to the computer is charging the battery.
Using Indicator Lights Caps Lock Indicator Lights when the caps lock function is toggled ON using the Caps Lock key. Num Lock Indicator Lights when the embedded numeric keypad is toggled ON using the Num Lock hot key (Fn+F7). Refer to Using the Internal Numeric Keypad later in this section for further details.
Using the Touchpad Moving the Cursor The embedded touchpad offers a unique and efficient way of pointing and selecting in a Windows environment. The following figure shows the touchpad. Left Button Right Button Touchpad Touchpad The touchpad responds to finger movements on its surface. To move the cursor, move your finger on the touchpad surface. Once the cursor is in the proper place, tap once on the surface of the touchpad or use the left button to click just as you would a mouse.
Using the Touchpad Configuring the Touchpad You can personalize the control of the touchpad by configuring various setting using the Synaptics Touchpad utility. You can configure the touchpad using the Mouse utility located in the Control Panel Window. Follow these steps to configure the touchpad: In Windows 95 1. Select the Start button, then select Settings. 2. Select Control Panel to display the Control Panel window. 3. Double-click on the Mouse icon. 4.
Using Disk Drives Hard Disk Drive The Extensa computer comes with a 810-million byte (810 MB) or higher capacity hard disk drive. The hard disk drive is formatted and loaded with software during manufacture. Do not format the hard disk. Floppy Disk Drive All models come with a floppy disk drive. In models with a CD-ROM drive, you can use the floppy disk externally by connecting it to the parallel port. The floppy disk drive can access formatted 3.5-inch, double-sided, highdensity (2HD), 1.
Using Disk Drives Hard Disk Drive Guidelines If you format the hard disk drive, all data on the hard disk drive will be erased. Do not move the computer when the Disk Media indicator is on. Press the 0V Suspend hot key (Fn+F2) to suspend your system or turn off the computer before moving it. If the HARD DISK TIMEOUT parameter in Setup is enabled and expires, the hard disk drive will spin down to save power. ! Caution: If the hard disk drive is damaged, you can lose data.
Using Disk Drives Please read completely through these directions before starting the process. If you have any questions about how to proceed, call the Customer Satisfaction Line at 1-800-TI-TEXAS or 1-817-771-5856. Backing Up Your Old Hard Disk Drive After you install your hard disk drive, the data will still exist on your old hard disk drive. To be able to use the data on your new hard disk drive, however, you must back up the data before removing the old hard disk drive.
Using Disk Drives Backing Up the Operating System on Floppy Disk If you have not already done so, you need to make a full backup of your operating system onto floppy disks.
Using Disk Drives q Tape Drive -- If you have a tape drive connected to a PC card, you can back up to tape. If you do this, ensure you have the original floppy disks for the backup programs; otherwise, you need to back up the tape backup programs to a floppy disk. q MSBACKUP -- If you must back up data to floppy disks, use the MSBACKUP program that is part of your operating system. Be sure to use the same version of MSBACKUP that you plan to use when you restore the files on the new hard disk drive.
Using Disk Drives 4. Locate the release tab on the bottom side of the hard disk drive bay cover. While pressing slightly on the release tab , slide the cover to the right and set aside. Bottom View Removing the Hard Disk Drive Bay Cover 5. While lifting up the hard disk drive release tab (with your fingernails) on the front of the hard disk drive module, use both finger grip areas to pull the module out of the computer. The following illustrations shows the bottom view for clarity.
Using Disk Drives Release Tab Bottom View Removing a Hard Disk Drive 6. Remove the new hard disk drive from its antistatic bag. (The old hard disk drive should be stored in the antistatic bag.) 7. Insert the replacement hard disk drive into the bay with the release tab facing up. Slide the hard disk drive all the way in until you feel it engage with a slight click.
Using Disk Drives 8. Replace the hard disk drive cover by aligning the release tab with the alignment mark on the computer and then seat the cover into the slot making sure the back edge of the cover is flush with the computer. Make sure the bottom of the cover is also flush with the computer. Alignment Mark Aligning the Hard Disk Drive Bay Cover 9. Slide the hard disk drive bay cover to the left until the release tab snaps into place.
Using Disk Drives Configuring the New Hard Disk Drive The process you follow to configure the new hard disk drive mirrors the process you used to back up the old hard disk drive. Load the Operating System Use the floppy disk backup of the operating system to install the operating system onto the new hard disk drive. Load the Backup Software After loading the operating system, load the software you used to back up the data from the old hard disk drive.
Using Disk Drives Restore the Remaining Files Restore the remaining program and data files following the procedures for the backup software. Check the New Hard Disk Drive After restoring all the files, run ScanDisk and Defrag to check the condition of the hard disk drive. Connecting an External Floppy Disk Drive Models with CD-ROM drives have external floppy disk drives. To connect the external floppy disk drive to your computer, follow these steps. 1.
Using Disk Drives Connecting an External Floppy Disk Drive Floppy Disk Drive Guidelines Failure to observe the following precautions can damage both the floppy disk drive and the data on the floppy disk: 2-26 q Insert the floppy disk into the floppy disk drive slot label side up and the metalshutter end first. Gently push the floppy disk into the floppy disk drive slot until the floppy disk clicks into place. q To remove a floppy disk, press the eject button until the floppy disk pops out.
Using Disk Drives q Always remove a floppy disk from the floppy disk drive before turning off the computer. q Never transport the computer with a floppy disk in the floppy disk drive. Doing so can damage the drive head. q If a floppy disk is damaged, try to make a copy of it and immediately discard it. q When floppy disks are not in use keep them in a storage box to protect them from damage or loss.
Using Disk Drives q When handling discs: q Always handle a disc by its edges. Do not touch the surface of the disc. q Never write on a disc or place a label on the disc surface. q Always store a disc in its case to prevent dust contamination, scratches, bending and other damages. q To remove dust or fingerprints, use a clean, soft and dry cloth. Never use benzene or anti-static fluids. q Do not subject a disc to high temperature or direct sunlight.
Adding Memory Your computer is equipped with 8 MB of EDO random access memory (RAM). You can increase the amount of RAM up to 64 MB. Refer to Chapter 4, Options, or to the installation instructions that come with optional memory for further information. ! Caution: TI does not warrant the use of non-TI memory. TI will not be held responsible for problems or degradation of performance incurred by using any memory other than TI memory described in this document.
Using the Keyboard The computer has many special keys, but most of them depend on an application for their functionality. Special Keys The following keys have special functions at the command level of MS-DOS and within many programs.
Using the Keyboard Ctrl-Alt-Del Terminates all programs, reloads MS-DOS and executes the AUTOEXEC file; also called “warm start” or “warm F2 (during POST) Loads the ROM-based Setup when pressed during POST (power on self test) at system startup. Fn+F1 Brings up the Setup screen anytime Fn+F2 Invokes 0V Suspend Fn+F3 Invokes Standby Fn+F4 Invokes Standby Fn+F6 Toggles the scroll lock function ON and OFF. When ON, the screen moves one line up and down when you press the up and down keys.
Using the Keyboard 2-32 Fn+F11 Turns the LCD backlight off (blanks the screen). Press any key to turn it back on.
Using the Keyboard Windows 95 Keys The keyboard also has two Windows 95-specific keys that allow you to perform special functions under Windows 95. Windows logo key Start button Combinations with this key performs special functions.
Using the Internal Numeric Keypad The keyboard has an embedded keypad that provides the same functions as the discrete numeric keypad on an AT enhanced keyboard. The embedded numeric keypad keys shown in the following figure generate AT-keypad characters and functions when pressed in conjunction with Num Lock, Fn and Shift. The embedded numeric keypad has two modes you can enter by toggling Num Lock (Fn+F7) as signaled by the Num Lock indicator: ON or OFF.
Using the Internal Numeric Keypad Pressing Shift with a key generates the characters shown in the following figure. Num Lock On (with Shift) If you press and hold Fn in this mode, the keypad generates their normal characters. Num Lock Off When the Num Lock indicator is OFF , the keyboard acts as normal. Pressing Fn with a key generates the same characters shown in the previous figure, Num Lock On (with Shift).
Using Connectors and Ports This section provides a description of connectors and ports on the rear and left side panel of the Extensa notebook computer. DC-in Line-out Line-in Mic-in SIR Serial Parallel VGA PS/2 PC Card Ports DC In ! 2-36 Connects the AC adapter output connector to this jack to recharge the battery and supply power to the computer. Caution: Use only the supplied AC adapter with your computer. Other adapters can cause serious damage to the electronic circuits.
Using Connectors and Ports Line out Connects to a line out device such as headphones or amplified speakers. Line in Connects to a line in device such as a synthesizer, stereo walkman or audio CD player. Microphone in Connects to an external microphone. SIR Connects to serial IrDa devices (such as another IrDA-compliant computer or printer) without the use of a cord or cable. Serial (9-pin) Connects to external devices such as a serial printer. 16550 UART compatible.
Using Connectors and Ports 2-38 PS/2 Connects to an external PS/2 keyboard, numeric keypad or mouse. If you are connecting a keyboard with a 5-pin DIN connector, you need to purchase a 6-pin mini-DIN adapter. PC Card The PC Card slots supports one Type III or two Type II/I PC Cards.
3 Using Battery Power The primary difference between using battery power and AC power is the limited time you can operate before you must recharge the battery. This chapter covers charging the battery and maximizing the time between charges and assumes that you installed and charged the battery as directed in Just for Starters…. Contents Guidelines for Battery Use ........................... 3-2 Switching to Battery Power .......................... 3-4 Responding to Low Battery Conditions .........
Guidelines for Battery Use ! Caution: Never dispose of exhausted batteries in a fire. Recycle if possible. The battery should be handled carefully to ensure maximum life. In particular: 3-2 q Do not drop the battery or subject it to shocks. q Do not expose the battery to direct sunlight, moisture, chemicals, or temperature extremes. q Do not short the battery leads or insert the battery upside down. q Charge the battery after several days of disuse to keep it fully charged.
Guidelines for Battery Use q This system is designed to only work with the Smart Duracell battery packs. Only use the authorized DR35S and DR201 packs with this system. Note: The Texas Instruments Extensa 600 and 605 are designed to use a Duracell DR35S or DR201 Rechargeable Battery. Texas Instruments participates in the Duracell pro.link program. If you would like to purchase additional batteries, please call the Authorized Duracell Purchase Hotline at 1-800-603-8225.
Switching to Battery Power To use battery power, install batteries as described in Installing the Battery Pack later in this section. As long as the battery has a charge remaining, you can switch to battery power by removing the connection to the AC adapter, even if the computer is already on. Your computer switches back to AC power when an AC adapter is plugged into the computer, even if the computer is already on.
Responding to Low Battery Conditions There are two battery low stages in this computer. When the battery capacity reaches 7% capacity (about 10 minutes remaining), the system enters the first stage of battery-low warning. At this time the battery low LED found on the LCD panel flashes and an audible warning sounds. You can disable the speaker with the Fn+End speaker on/off hot key. You can also keep the battery audible warning from ever sounding by disabling the BATTERY LOW WARNING BEEP option in Setup.
Responding to Low Battery Conditions q If you are using a RAM disk, save the contents of the RAM disk to the hard disk drive. q Press the Standby hot key (Fn+F4) to put the computer into Standby mode whenever you are not actively using the computer. q Turn off the computer or put the computer in 0V Suspend mode (Fn+F2) if it does not need to be active. The computer does not consume power in 0V Suspend mode.
Recharging the Battery ! Caution: Never recharge the battery differently from the procedure described in this manual. The following procedure is acceptable under most circumstances: 1. Install the battery pack in your computer (if not already installed). 2. Connect the AC adapter. To maintain a full charge, leave the computer connected to the AC adapter except when transporting the computer.
Conditioning the Battery The Duracell battery is either a Nickel-MetalHydride (NiMH) DR35S or Lithium-Ion (Li-Ion) DR201 rechargeable battery. While Li-Ion batteries do not need conditioning, NiMH batteries require occasional conditioning to maintain a full battery charge. An unconditioned NiMH battery may hold less than half of full charge.
Removing and Installing the Battery Pack Removing the Battery Pack Follow these steps to remove the battery: ! Caution: Turn off the computer or enter 0V Suspend mode before removing a battery pack. 1. Unlatch the battery compartment door. 2. Slide the battery compartment door out slightly then swing the door open. 3. Pull the battery out by pulling on the loop attached to the battery.
Removing and Installing the Battery Pack Installing the Battery Pack Follow these steps to install the battery: ! Caution: Turn off the computer or enter Suspend mode before installing a battery pack. 1. Unlatch the battery compartment door. 2. Slide the battery compartment cover out slightly then swing the door open. 3. Insert the battery pack (connector side up) into the compartment, then push the battery completely into the compartment until you feel the contacts engage. 4.
Conserving Battery Power The following tips can help you prolong the life of a battery charge: q Keep the display at the lowest comfortable brightness and contrast level. Reducing brightness and contrast even a small amount can significantly reduce power consumption and increase operating time. q Set the power management settings in Setup to optimize the time-outs. q You can minimize the number of times the computer needs to access the hard disk drive by using disk caches or RAM disks.
4 Options This chapter provides information on options available for your Extensa computer. For further information, refer to the installation instructions that come with the specific option. Contents AC Adapter.................................................. 4-2 PC Cards..................................................... 4-3 Numeric Keypad .......................................... 4-4 External Monitor ......................................... 4-5 External Mouse .......................................
AC Adapter The AC adapter charges the internal battery pack and operates the computer on AC power. The AC adapter can be operated anywhere between 100 - 240 volts AC and has a detachable AC power cord. ! Caution: Use only the AC adapter recommended in this document (TI Part No. 9813497-0001). Another adapter may damage your computer.
PC Cards PC cards are used to add functionality to your computer, such as communicating over a telephone or connecting to a network. The computer has built-in slots that support one Type III or two Type II/I PC Cards. For a Type III card, insert it into the lower slot. The following PC Cards are available: q 14.4 KB data/send/receive/fax/ voice modem with XJACK® (TI Part No. 9798074-0001). q Token Ring® Card (TI Part No. 9791774-0001) q 10BaseT Ethernet® Twisted-Pair Card (TI Part No.
Numeric Keypad The optional PS/2 Numeric Keypad (TI Part No. 2581381-0001) can be used instead of the internal numeric keypad. PS/2 Numeric Keypad To use the PS/2 numeric keypad, turn the computer off. Plug the keypad’s cable connector into the computer’s PS/2 (Mouse/Keyboard) connector located on the rear of the computer (Refer to Using Connectors and Ports in Chapter 2). For further information on the PS/2 Numeric Keypad, refer to instructions that come with your keypad.
External Monitor You can connect the computer to external monitors, many of which can display resolutions higher than 640 x 480. When the computer is connected to an external monitor, you can use the computer with the display closed. You can also display images on the external and internal display at the same time. This feature is called SimulSCAN™. To enable this feature, set the DISPLAY parameter in Setup to Both. Setup is accessed via the Setup hot key (Fn+F1).
External Mouse Although the Extensa comes with a pointing device already installed, you may use an external PS/2 or serial mouse. q To connect a PS/2 mouse, insert the connector into the the PS/2 port in the rear of the Extensa. q To connect a serial mouse, attach the connector to the 9-pin serial port in the rear of the Extensa. To detect a serial mouse once plugged in, use the Add New Hardware icon in the Control Panel.
External Keyboard You can connect any IBM -compatible external PS/2 keyboard. Follow these steps. 1. Attach the six-pin mini-DIN connector to the PS/2 connector on the rear of the Extensa. 2. If the external keyboard is not automatically detected by Windows 95, use the Add New Hardware icon in the Control Panel.
Memory Your computer is equipped with 8 MB of random access memory (RAM), occupying one memory upgrade slot. There is another memory upgrade slot on the computer. You can increase memory by installing an upgrade module into this slot. You may order the following options from TI: q 8 MB RAM (TI Part No. 9811344-0001) q 16 MB RAM (TI Part No. 9811344-0002) q 32 MB RAM (TI Part No. 9811344-0003) You can expand RAM from 8 MB up to 64 MB.
Audio Options Your system comes with a set of built-in stereo speakers, but if you wish to use other stereo equipment and/or use a microphone, the system comes with three audio jacks — Line Out, Line In and Microphone In. Connecting Audio Devices Line Out allows you to use external speakers or headset. The system’s internal speakers are disabled when external speakers or headsets are plugged in. Line In allows you to input an external stereo source into your computer.
Audio Options Microphone In allows you to record input into the system through the microphone and allows you to use the speakerphone functions of the Data Race WinMAX PCMCIA speakerphone/ modem offered by TI.
External Floppy Disk Drive To connect the external floppy disk drive to you computer you will need the floppy disk drive cable that was included in the accessory box with the floppy disk drive. Follow these steps. 1. Plug the 25-pin end of the floppy disk drive cable into the parallel port on the rear panel of the computer. 2. Attach the other end of the cable to the floppy disk drive.
Miscellaneous Options There are additional options available for use with your computer . These include: Batteries You can purchase spare batteries — Duracell NiMH or Li-Ion — from your local computer store or directly from Duracell. A list of phone numbers to call to order the Duracell batteries is listed in your system. Simply click on the Duracell icon to view the directory. For information on these batteries, refer to Chapter 3, Using Battery Power.
5 Using Software This chapter describes the software supplied with the computer and how to configure application software to run on the computer. Contents Using Supplied Software .............................. 5-2 Getting Online Help ..................................... 5-3 Guidelines for Installing Applications ........... 5-4 Adjusting the Software for the Computer ............................................. 5-4 Configuring the Computer for the Software...............................................
Using Supplied Software Your computer is shipped with the following software installed on the hard disk drive: 5-2 q Microsoft Windows 95 q Power-saving utilities q PC-Doctor (runs from DOS mode only) q Various third-party application software
Getting Online Help All of the supplied software have online help files, which reduce the need to refer to printed manuals and provide you with help information any time it’s needed. To obtain Windows 95 help, select the Start button and then select Help.
Guidelines for Installing Applications Adjusting the Software for the Computer Your computer can execute almost all programs written to execute on AT computers. When installing software, you may need to provide the following information to the installation program: Display The 10.4-inch display has a 640x480 (VGA) resolution. The 12.1-inch display has an 800x600 (SVGA) resolution. When installing an application, select the highest resolution configuration that both the program and the computer can support.
Guidelines for Installing Applications Mouse If you are using the built-in pointing device or an external PS/2 mouse, you may select the Microsoft or Standard PS/2 port mouse. You can also select Synaptics PS/2 touchpad for the built-in pointing device. Configuring the Computer for the Software Some programs require you to modify the way the computer operates to ensure compatibility. RAM Your computer has 8 MB of memory. This is sufficient to run most software.
Using System Passwords The computer implements a two-password security system — Supervisor and User. The Supervisor password is used by system administrators who manage multiple notebooks and gives an extra level of security while still allowing users to set their individual Setup preferences in the system Setup menu. If only one password is set, the Supervisor password is also the User password.
Using System Passwords Setting a System Password ! Caution: If you forget the system password, you will not be able to use your computer. To regain access, you will need to send your computer to Texas Instruments. See Appendix A. This service is not covered by warranty. To set a password in Setup, follow these steps: 1. Press Fn+F1 (or just F2 during boot) to enter Setup. 2. Press the arrow keys to move to SECURITY. 3. Move down the screen to a Password parameter, then press Enter.
Using System Passwords Disabling or Changing a System Password To disable or change a system password: 1. Press Fn+F1 (or just F2 during boot) to enter Setup. 2. Enter your password when prompted. 3. Press the arrow keys to move to SECURITY. 4. Move down the screen to a Password parameter, then press Enter. Note: You will only be able to change the User Password if you used the User password to enter Setup.
6 Mobility This chapter describes all the considerations to help you take advantage of your computer’s mobility. Contents Overview of Mobility .................................... 6-1 Disconnecting from the Desktop................... 6-3 Moving Around ............................................ 6-4 Preparing the Computer........................ 6-4 What to Bring to Short Meetings ........... 6-4 What to Bring to Long Meetings ............ 6-4 Taking the Computer Home .........................
Overview of Mobility Disconnecting from the Desktop No matter where you are taking your computer, you need to disconnect it from your desktop accessories. Moving Around “Moving around” refers to using your computer at different locations within the same building, for example, taking it with you to meetings. Taking the Computer Home Since you are taking the computer to the same place every night, you can save yourself time and effort by setting up a home desktop.
Disconnecting from the Desktop Follow these steps to disconnect your computer from external accessories. 1. Save your work in progress. 2. Shut down the operating system. 3. Turn off the computer. 4. Disconnect the cord from the AC adapter. 5. Disconnect the keyboard, pointing device, printer, external monitor, and other external devices. 6. Disconnect the Kensington lock if you are using one to secure the computer.
Moving Around Preparing the Computer Before moving the computer, press Fn-F2 to place it in 0V Suspend mode. After placing the computer in 0V Suspend mode, close and latch the cover. You can now safely take the computer anywhere you go within the building. When you turn on the computer, the system is restored to its saved state. What To Bring to Short Meetings A fully charged battery runs the computer for 23 hours under most circumstances.
Taking the Computer Home Preparing the Computer After disconnecting the computer from your desktop, follow these steps to prepare the computer for the trip home. 1. Remove all media from the drives. Failure to remove the media can damage the drive head. 2. Pack the computer in a protective case that can prevent the computer from sliding around and cushion it if it should fall. ! Caution: Avoid packing items next to the top cover of the computer.
Taking the Computer Home Special Considerations Follow these guidelines to protect your computer while traveling to and from work. 6-6 q Minimize the effect of temperature changes by keeping the computer with you. q If you need to stop for an extended period of time and cannot bring the computer with you, leave the computer in the trunk of the car to avoid exposing the computer to excessive heat. q Changes in temperature and humidity can cause condensation.
Taking the Computer Home Setting Up a Home Office If you frequently work on your computer at home, it may be worthwhile purchasing a second AC adapter for use at home. With a second AC adapter, you can avoid transporting the extra weight to and from home. If you use your computer at home for significant periods of time, you might also want to add an external keyboard, monitor, or mouse.
Traveling with the Computer Preparing the Computer Prepare the computer as if you were taking it home. Be sure the battery in the computer is charged. Airport security often requires you to turn on your computer when bringing it to the gate area. What To Bring with You Bring the following items with you.
Traveling Internationally with the Computer Preparing the Computer Prepare the computer as you would normally prepare it for traveling. What To Bring with You Bring the following items with you.
7 Care and Troubleshooting This chapter tells you how to clean your computer safely and solve operational problems. Contents Cleaning the Computer ................................ 7-2 Troubleshooting Tips ................................... 7-3 Startup Error Messages ...............................
Cleaning the Computer Regularly take the time to check your computer and clean the screen, keyboard, and case to ensure trouble-free computing. ! Caution: Never use alcohol, benzene, thinner, or strong chemical agents that could damage the computer’s case, and never apply liquid directly to the computer, only to a clean cloth. Never spray cleaning fluid or any liquid directly onto the case or screen. Keep the case of the computer free of dust.
Troubleshooting Tips Computer does not come on when power switch is pressed o Low battery; use AC adapter and recharge battery. o Ensure AC adapter cable and power cord are securely connected. o Connect AC adapter to another outlet. Computer power is on but screen is blank o Adjust contrast and brightness control. o The LCD standby timer in Setup is enabled and has expired. Press any key or move the mouse.
Startup Error Messages Disk drive A error q Drive A: is present but fails the BIOS POST disk tests. q Enter Setup and check that the drive is defined with the proper disk type. Extended RAM Failed at offset: nnnn q Extended memory is not working or configured properly at offset nnnn. q Contact your dealer or an authorized service center. Failing Bits: nnnn q The nnnn is a map of the bits at the RAM address which failed the memory test. q Contact your dealer or an authorized service center.
Startup Error Messages Invalid NVRAM media type q There is a problem with NVRAM (CMOS) access. q Contact your dealer or an authorized service center. Keyboard controller error q The keyboard controller failed the test. q You may have to replace the keyboard or the controller. Contact your dealer or an authorized service center. Keyboard error q The keyboard is not working. q Contact your dealer or an authorized service center.
Startup Error Messages Press to resume, to Setup Previous boot incomplete - Default configuration used q This message is displayed after any recoverable error message. Press F1 to start the boot process or F2 to enter Setup and change any settings. q Previous POST did not complete successfully. POST then loads default values and offers to run Setup. q Run Setup to check for incorrect settings. Real time clock error q Realtime clock fails test. q This may require board repair.
Startup Error Messages System cache error Cache disabled q RAM cache failed the BIOS test and BIOS disabled the cache. q Contact your dealer or an authorized service center. System CMOS checksum bad run SETUP q System CMOS has been corrupted or modified incorrectly, perhaps by an application program that changes data stored in CMOS. q Run Setup and reconfigure the system either by restoring default values and/or making your own selections.
A Where To Get Help Technical Assistance Customer support for your computer is available 24 hours a day, 7 days a week. Please have your serial number ready when you call. Phone (US / Canada) (800) 848-3927 Phone (International) (817) 771-5856 Fax (817) 774-6660 TDD (800) 735-2989 Email nbk_techsupport@tx.acer.com Mail Customer Satisfaction Line P.O.
Where To Get Help Ordering Notebook Products Phone (US / Canada) (800) TI-TEXAS Option 2,1 Phone (International) (817) 774-6969 Fax (800) 44FAX-TI TDD (800) 735-2989 BBS (817) 774-6809 Email 2TI@msg.ti.com Mail TI Express P.O. Box 6102 MS 3255 Temple, TX 76503-6102 World Wide Web http://www.ti.com/notebook/index.html Feedback on Manuals To comment on the manuals for your computer, send email to *PUBT@msg.ti.
Worldwide Sales Offices Australia Deutschland (Germany) Texas Instruments Australia Ltd. 6-10 Talavera Road North Ryde, NSW 2113 Tel: (02) 878-9000 Fax: (02) 805-1186 Texas Instruments Deutschland GmbH. Personal Productivity Products Haggertystraße 1 85356 Freising Tel: 0180/2326878 Fax: 0180/2326879 Royal Domain Centre 14th Floor 380 St. Kilda Road Melbourne, VIC. 3004 Tel: (03) 696-1211 Fax: (03) 696-4446 Belgique/België (Belgium) S.A. Texas Instruments Belgium N.V.
Worldwide Sales Offices Holland Korea S.A. Texas Instruments Belgium N.V. 11, Avenue Jules Bordetlaan 1, 1140 Bruxelles, Brussel Tel: (32) 27 45 54 00 Fax: (32) 27 45 54 10 Telex: 61161 TEXBEL Texas Instruments Supply Company Korea Branch Hong Kong Texas Instruments Hong Kong Ltd. 15th Floor, Tower 2, The Gateway 25-27 Canton Road Kowloon, Hong Kong Tel: (852) 9567288 Fax: (852) 9561078 Hungary ( ) India ( ) Israel ( ) Italia (Italy) Texas Instruments Italia S.p.A.
Worldwide Sales Offices Österreich (Austria) Sverige (Sweden) Texas Instruments G.m.b.H. Laxenburgerstraße 52 A-1100 Wien Tel: 01/604 19 31 71 Fax: 01/604 19 31 85 Texas Instruments International Trade Corporation (Sverigefilialen) Box 30 S-164 93 Kista Isafjordsgatan 7 Tel: (08) 752 58 00 Fax: (08) 751 97 15 Schweiz/Suisse Texas Instruments (Switzerland) Bernstr.