
User Manual
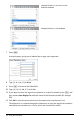
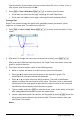
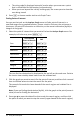
Table Of Contents
- Getting Started with TI-Nspire™ CX II Handhelds
- About Math Modes
- TI-Nspire™ CX II Handheld Keys
- Preparing the TI-Nspire™ CX II Handheld for Use
- Turning On the TI-Nspire™ CX II Handheld for the First Time
- Adjusting the Brightness of the Backlighting
- Using the TI-Nspire™ Touchpad
- Understanding the Scratchpad
- Using the Home Screen
- The TI-Nspire™ CX II Handheld Screen
- Using Hints
- Using Keyboard Shortcuts
- Using the Scratchpad
- Working with Documents on TI-Nspire™ CX II Handhelds
- Opening a Document
- Creating a New Document
- Saving Documents
- Working with Applications
- Using the Application Menu
- Context Menus
- Working with Problems and Pages
- Adding a Problem to a Document
- Viewing and Reordering Pages in a Document
- Copying, Pasting, and Deleting Problems
- Renaming a Problem
- Adding a Page to a Problem
- Moving Through Pages in a Document
- Managing Documents
- Closing a Document
- Understanding the TI-Nspire™ Tools
- Working with Images
- Working in a TI-Nspire™ CX Premium Teacher Software Classroom
- Configuring Handhelds
- Checking Battery Status
- Recharging the Handheld
- Changing Handheld Settings
- Changing a Preferred Language
- Customizing the Handheld Setup
- Customizing Document Settings
- Customizing Graphs & Geometry Settings
- Viewing Handheld Status
- Replacing TI-Nspire™ Rechargeable Batteries
- Precautions for Rechargeable Batteries
- Connecting Handhelds and Transferring Files
- File Management
- Updating the Handheld Operating System
- General Information

22 Using the Scratchpad
▶ To hide the table, click the graph side of the split screen, and then press b >
Table > Remove Table (b 7 2). You can also press Ctrl + T.
▶ To resize columns, click the table and press b > Actions > Resize (b 1 1).
▶ To delete a column, edit an expression, or edit table settings, click the table and
press b > Table (b 2).
Changing the Appearance of the Axes
As you work with graphs, the Cartesian axes are displayed by default. You can change
the appearance of the axes in the following ways:
1. Press b 4 and choose the Zoom tool to use.
2. Select the axes and press / b 2 to activate the Attributes tool.
a) Press £or¤ to move to the attribute to change. For example, choose the end
style attribute.
b) Press ¡or¢ to choose the style to apply.
c) Change any other attributes of the axes as required for your work, and then
press · to exit the attributes tool.
3. Adjust the axes scale and tic mark spacing manually.
a) Click and hold one tick mark, and move it on the axis. The spacing and number
of tic marks increases (or decreases) on both axes.
b) To adjust the scale and tic mark spacing on a single axis, press and hold g,
and then grab and drag a tic mark on that axis.
4. Change axis end values by double-clicking them and typing new values.
5. Adjust the location of the axes. To move the existing axes without resizing or
rescaling them, click in and drag an empty region of the screen until the axes are in
the desired location.
6. Change the axes’ scales by pressing b > Window/Zoom > Window Settings
(b 4 1).