
User manual
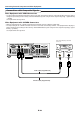
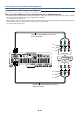
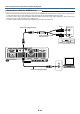
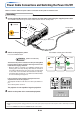
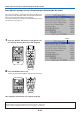

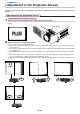
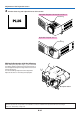

Table Of Contents
- INDEX
- English
- IMPORTANT SAFETY INFORMATION
- Major Features
- Table of Contents
- Checking the Supplied Accessories
- Names of the Main Unit Parts
- Names of the Remote Control Parts/Preparing the Remote Control
- The Procedure Up to Projecting to the Screen
- Placement Guide
- Connecting Personal Computers and Video Equipment
- Power Cable Connections and Switching the Power On/Off
- Adjustment of the Projection Screen
- General Operation
- Input Selection
- Automatic Adjustment
- Selection of Aspect Ratio
- Freezing a Moving Picture
- Cancelling Video and Audio Temporarily
- Lamp Mode
- Keystone
- Adjustment of the Volume
- Enlargement of the Image and Video Movement
- Using the Presentation Timer
- Using the Laser Pointer
- Performing Mouse Operations on the Computer with the Remote Control Unit
- Controlling the Projector from a Computer
- Use as a High-Brightness Monochrome Projector
- Protecting the Projector with the Security Lock
- Using the Quick Menu
- Menu Operation Method
- Image
- Color
- View
- Setup
- Option
- Info.
- When an Indicator is Lit or Flashing
- Troubleshooting
- Cleaning
- Replacing the Lamp Cartridge
- Specifications
- Table of Supported Frequency
- Cabinet Dimensions
E-22
Connecting Personal Computers and Video Equipment
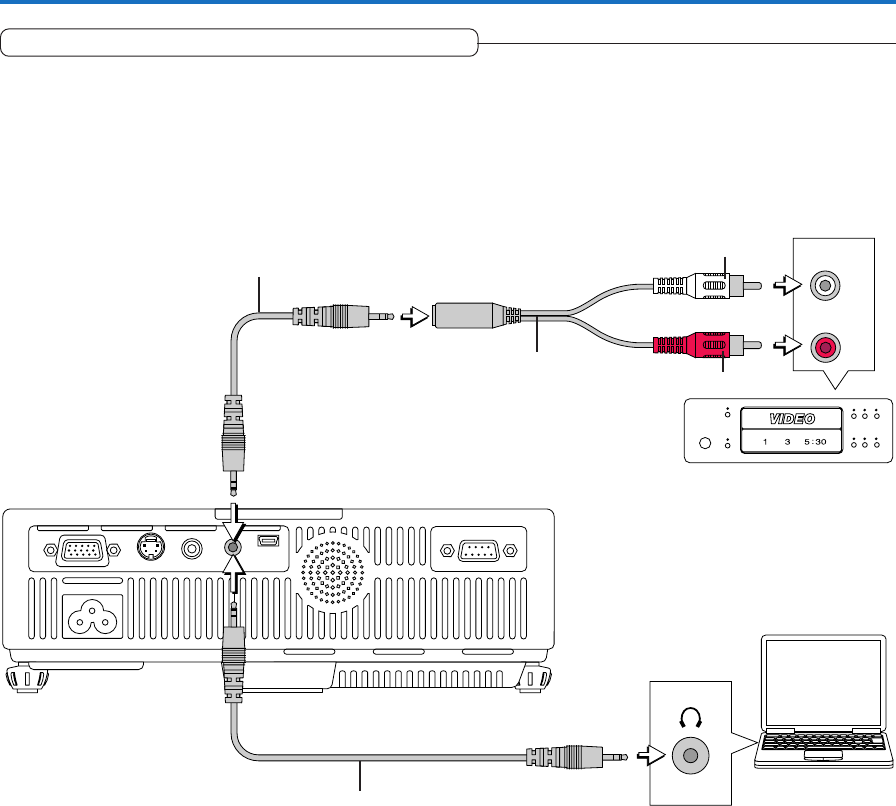
Connections with the AUDIO Jack
* Make the connection to the projector’s AUDIO jack using the supplied audio cable. When the audio jack of the equipment that
is to be connected is of the RCA phono type, make connection via the supplied audio conversion cable.
* The built-in speaker of the projector provides monaural audio. To enjoy convincing audio reproduction, please connect the
audio output of the video equipment to your audio system.
* The built-in speaker outputs the audio of the equipment connected to the AUDIO jack.
R
L
AUDIO OUT
White
Red
Audio conversion cable
(Supplied item)
Audio cable (Supplied item)
Audio cable (Supplied item)