
Printer User Manual

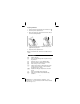


Table Of Contents
- Guidebook
- Manuel d’instructions
- Manual de instrucciones
- Manual de instruções
- English
- Getting Started
- Key Descriptions
- Using Decimals (DECIMAL Switch)
- Rounding (ROUND Switch)
- Entering a Tax Rate (TAX Switch)
- Printing (PRINTER Switch)
- Clearing Errors and Overflows
- Performing Basic Calculations
- Using Memory Operations
- Calculating Gross Profit Margin
- Calculating Percentages
- Calculating Tax
- Using Constants
- Français
- Prise en main
- Description des touches
- Décimalisation comptable (DECIMAL Switch)
- Arrondi (ROUND Switch)
- Entrée d'un taux d'impôt (TAX Switch)
- Impression (PRINTER Switch)
- Effacement des erreurs et des dépassements
- Opérations de base
- Opérations avec touches de mémoire
- Calcul de la marge bénéficiaire brute
- Calcul des pourcentages
- Calcul d'un impôt
- Utilisation de constantes
- Español
- Procedimientos iniciales
- Descripción de las teclas
- Utilización de decimales (Conmutador DECIMAL)
- Redondeo (Conmutador ROUND)
- Introducción de una tarifa impositiva (Conmutador TAX)
- Impresión (Conmutador PRINTER)
- Eliminación de errores y desbordamientos
- Realización de cálculos básicos
- Uso de operaciones de memoria
- Cálculo del margen de beneficio bruto
- Cálculo de porcentajes
- Cálculo de impuestos
- Uso de constantes
- Português
- Introdução
- Descrições das Teclas
- Uso de Decimais (Chave DECIMAL)
- Arredondamento (Chave ROUND)
- Introdução de um Valor de Taxa (Chave TAX)
- Impressão (Chave PRINTER)
- Limpeza de Erros e Estouros
- Realização de Cálculos Básicos
- Utilização de Operações com Memória
- Cálculo de Margem Bruta de Lucro
- Cálculo de Porcentagens
- Cálculo de Imposto
- Uso de Constantes
- English-Service & Warranty Information
- Français-Les services et le contrat de garantie
- Español-Información sobre servicio y garantía
- Português-Informações sobre Assistência e Garantia
1
Getting Started
Installing the Paper Roll
1. Remove the printer compartment cover.
2. Lift the paper holder so that it extends behind the printer
compartment.
3. Remove any packing materials from the printer compartment.
4. Replace the printer compartment cover.
5. Plug the calculator into an electrical outlet.
6. Set the
power
switch on the right side of the calculator to on
(
P
)
.
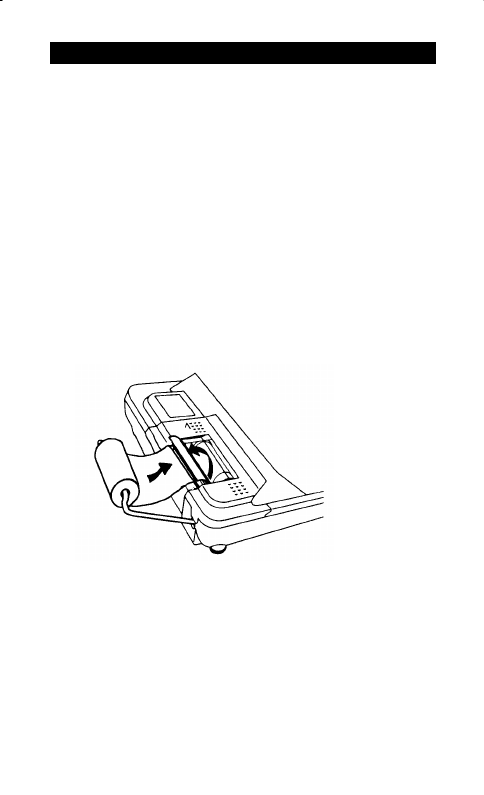
7. Place the paper roll on the paper holder as shown below.
8. Insert the end of the paper into the paper slot on the back of the
calculator above the black “bar”. To avoid paper jams, use quality
bond paper.
9. Feed the paper into the slot; then press and hold
&
.
Note
To prevent damaging the printer (which may void the warranty),
when operating the calculator without paper, move the
PRINTER
switch to
OFF
.