
Application Guide


110 Capturing Screens
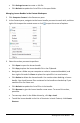
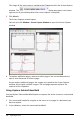
5. Select the file type for the image files. The default format is .jpg. Click¤ to select
another format: .gif, .tif, or .png.
6. Click Save.
The images are saved in the specified folder with system-assigned names
reflecting the current date and a sequence number. For example, MM-DD-YYYY
Image 001.jpg, MM-DD-YYYY Image 002.jpg and so on.
Copying and Pasting a Screen
You can select a captured screen and copy it to the Clipboard for inclusion into other
documents or applications. You can also print copied screens. Copied screens are
captured at 100% zoom level, and they are copied in the order of selection.
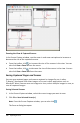
Copying a Screen
1. Select the screen to copy.
2. Click or Edit > Copy.
The selected screen is copied to the Clipboard.
Pasting a Screen
Depending on the application you are pasting to, click Edit > Paste.
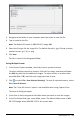
Note: You can also drag a screen capture to another application. This functions as a
copy and paste.
Capturing Images in Handheld Mode
In the Documents Workspace, use the DragScreen feature to capture the emulator
screen or side screen when the TI-SmartView™ Emulator is active.
Teachers can use this feature to drag and paste an image to presentation tools such as
SMART® Notebook, Promethean’s Flipchart, and Microsoft® Office applications
including Word and PowerPoint®.
Capturing Images Using the DragScreen Feature
Complete the following steps to capture an image and copy it to a third-party
application.
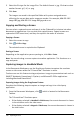
1. From the Documents Workspace, click , which is located in the Documents
Toolbox.
The TI-SmartView™ Emulator opens.
• If the display selected is Handheld + SideScreen, the current document is shown
in the emulator and in the side screen.
• If the display selected is Keypad + SideScreen, the current document is shown in
the side screen.