
Operation Manual


23
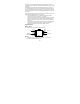
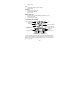
SETTING UP:
Note: This weather station receives only one outdoor transmitter.
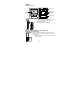
1. First, insert the batteries into the Temperature transmitter. (see “Install
and replace batteries in the temperature transmitter“).
2. Immediately after and within 30 seconds, insert the batteries into
Weather station (see “Install and replace batteries in the weather
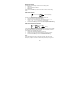
station”). Once the batteries are in place, all segments of the LCD will
light up briefly. Following the time as 0:00 and the weather icon will be
displayed. If these are not displayed after 60 seconds, remove the
batteries and wait for at least 30 seconds before reinserting them.
3. After inserting the batteries, the Weather station will start receiving data
from the transmitter. The outdoor temperature and the signal reception
icon should then be displayed on the Weather station. If this does not
happen after 3 minutes, the batteries will need to be removed from both
units and reset from step 1.
4. In order to ensure sufficient 868 MHz transmission however, this should
under good conditions be a distance no more than 100 meters between
the final position of the weather station and the transmitter (see notes on
“Mounting” and “868 MHz Reception”).
5. Once the remote temperature has been received and displayed on the
weather station, the DCF time (radio controlled time) code reception is
automatically started. This takes typically between 3-5 minutes in good
conditions.
DCF RADIO CONTROLLED TIME
The time base for the radio controlled time is a Cesium Atomic Clock operated
by the Physikalisch Technische Bundesanstalt Braunschweig which has a time
deviation of less than one second in one million years. The time is coded and
transmitted from Mainflingen near Frankfurt via frequency signal DCF-77 (77.5
kHz) and has a transmitting range of approximately 1,500 km. Your radio-
controlled weather station receives this signal and converts it to show the
precise time in summer or wintertime.