
Installation & Assembly

Hinged Tree Assembly Instructions
HELPFUL HINTS
• Read instructions completely before you assemble your tree. The model number of your tree is
printed on t
he side of the carton. Always use this number to identify your tree if any questi
on
arises.
• Save
the carton for storing your tree.
• Use miniature tree lights.
• Replacing burned-out bulbs will make the
other bulbs last longer.
• Handling
the wiring and bulbs with care during packing and unpacking will prolong the life of
the
lighting package.
BEFORE ASSEMBLING
1. Choose a clear, level location
near a wall outlet.
2. Op
en the tree stand and tighten the locking screws on the stand.
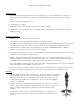
3. Carefully insert the Bottom Section of the tree into the locked stand. (The bottom section is the on
e
with the poi
nt.) Make sure all wires stay clear of the stand opening when
joining the sections.
4. Allow branches to fall into pl
ace or gently pull out and down. IMPORTANT: When adju
sting
branches
be sure that all wires are free of branch hinges.
5. Locate the stacked plugs in the tree section. Plug the stack into the extension cord on the tree po
le.
Do Not Separate Any Plug From the Stack.
6. Plug the extension cord plug into your wall outlet. The tree section should now light up. If any
lights do n
ot light, check the plug stack for loose plugs. Also, check for broken or missing bulbs.
If
you
find broken or missing bulbs, replace with replacement bulbs, as necessary
.
7. Insert
the Middle Section into the top of the pole of the standing Bottom Section. Repeat Asse
mbly
Steps 4
through 6 for the Middle Section of the tr
ee.
8. Insert
the tree top section into the top of the pole for the middle section. Repeat Assembly St
eps 4
throu
gh 6. Plug the single plug for the top section into the top outlet of the middle section.
SHAPING
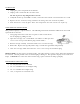
1. Shaping: Work from branches closest to pole. Fan out branches on to the left,
one to the right and one at the center of the main stem. Alternate branches so
that they do not line up one behind the other. At the end of the stem, the
center branch tip should extend straight out. Curve each branch slightly
to
provide a natural look.
2. Shaping at
the top: Pull down branches of lowest layer in an even circul
ar
patt
ern. Repeat for each layer, working towards the top branch. Curve ea
ch
branch strai
ght up into position. Bend the top branch
straight up into
position.
3. Top Section:
Install tree top section by inserting the tree top into
hole
provid
ed at the top of the pole. The tree top should conform to the rest
of
the tree.