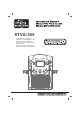
STVG-359 Compact Disc + Graphics with Built - in LCD Karaoke Center Disco Compacto + Gráficos Con El Central De Karaoké En La Pantalla LCD Disque Compact + Graphiques Avec Ecran LCD Centre Karaoke
ENGLISH WARNINGS Warnings: ! This CD player employs a laser light beam. Only a qualified service person should remove the cover or attempt to service this device, due to possible eye injury. ! The use of controls, adjustments, or procedures other than those specified herein might result in hazardous radiation exposure. ! The apparatus shall be used in an open area. WARNING: TO REDUCE THE RISK OF FIRE OR SHOCK HAZARD, DO NOT EXPOSE THIS PRODUCT TO RAIN OR MOISTURE.
NOTE: This digital apparatus does not exceed the Class B limits for radio noise emissions from digital apparatus as set out in the Radio Interference Regulations of Industry Canada. These limits are designed to provide reasonable protection against harmful interference in a residential installation. This equipment generates, uses and can radiate radio frequency energy and, if not installed and used in accordance with the instructions, may cause harmful interference to radio communications.
ENGLISH CONTROL LOCATIONS 9 10 11 13 12 1 14 15 16 2 3 17 18 4 5 6 7 8 19 20 21 FRONT VIEW 1. 2. 3. 4. 5. 6. 7. 8. 9. 10. 11. 3.5" TFT LCD Color screen Power indicator Power ON/OFF button Monitor ON/OFF button Mic Holder MIC VOLUME control A.V.C. control MASTER VOLUME control CD Door PROGRAM button PROGRAM LED E3 12. 13. 14. 15. 16. 17. 18. 19. 20. 21.
22 23 26 24 27 25 28 REA R VIEW DISPLAY CDG TRK 8/8 C 00:16:04 PLAYING TIME REPEAT MODE 1 A - REPEAT ONE - REPEAT ALL - NO REPEAT FUNCTION PROGRAM MODE P- PROGRAM MODE PLAYING C- NO PROGRAM MODE PLAY PLAY/PAUSE/STOP INDICATOR - PLAYING MODE - PAUSE MODE - STOP MODE PLAYING TRACK NUMBER AND TOTAL TRACK NUMBER PLAYING DISC MODE CD - CD PLAYING CDG - CDG PLAYING E4 ENGLISH 22. AUX OUT Jack (L) 23. AUX OUT Jack (R) 24. AUX IN Jack 25. VIDEO OUT Jack 26. MIC 1 Jack 27. MIC 2 jack 28.
ENGLISH MAKING THE CONNECTIONS CONNECTING POWER Insert the DC plug of the power adapter into the DC 9V jack of the unit. You can power the system from a standard AC outlet by using the supplied Power Adapter (The adapter operates on AC 100V240V/50Hz-60Hz ). CAUTION: - The included AC adaptor is for use with this unit only. Do not use it with other equipment. - When the adaptor is plugged in , the apparatus is not completely disconnected from the main , even when the power is turned off .
AUDIO CONNECTION Please follow the steps below to connect the unit to your TV, VCR or home stereo system: (1) Locate the multi-colored RCA cables. (2) Connect audio cables (White and Red) to the Audio Out (White-Left and Red-Right)of the back of the Singing Machine. (3) Connect the other end of the audio cables to the audio/auxiliary input on your TV, VCR or home stereo system.
ENGLISH CD OR CD+G OPERATION This unit is designed to play CDs and CD+Gs bearing the identification logo respectively. If the disc does not conform to the standard, it may not play properly. TURNING POWER ON/OFF ! To turn on the unit, press the ON/OFF button, the ON/OFF LED Indicator will light up. ! To turn it off, press the ON/OFF button again, the ON/OFF LED Indicator will turn off.
PROGRAM ! ! Use this button to program and play back songs in a preselected order. Step 1: Programming should be done in the stop mode only. Press the PROGRAM button, the “PRG P01:XX “(XX-total number of tracks) will show on the monitor. Step 2: Press the SKIP buttons ( - SKIP ) to select a desired track. Step 3: Press PROGRAM button to confirm entry. You can repeat the same steps up to a maximum of 24 tracks.
ENGLISH TROUBLE SHOOTING GUIDE If you have followed the instructions and are having difficulty operating the unit, locate the PROBLEM in the left column below. Check the corresponding POSSIBLE CAUSE column to locate and remedy the problem. PROBLEM No power when POWER is on. POSSIBLE CAUSE SOLUTION No power plug connection at Insert the power plug into the AC outlet. the AC outlet. No power when plugged The AC outlet may not have Check the outlet with a working lamp or other electrical appliance.
PROBLEM POSSIBLE CAUSE SOLUTION Source Selection on your TV, Select AUX IN as the source for VCR or home stereo is not set your TV, VCR or home stereo. No sound - If audio is properly. going through TV, VCR Follow direction on ‘Audio or home stereo. Improper Connection to Connection’ page for connecting to stereo system or PA. a home stereo system. Connect the video cable to the Video cable is not connected Singing Machine’s VIDEO OUT properly to the TV. and to the TV VIDEO IN.
ENGLISH 3.5 8 4 MONITOR SECTION AUX IN SECTION 3.5” COLOR TFT LCD MONITOR NTSC SYSTEM 3.5mm stereo headphone jack DC 9V DIMENSIONS (W x D x H) 2A 9.1 x 8.8 x 13.6 inches / 23.1 x 22.4 x 34.5 cm 7.9 lbs / 3.
In addition to all of the terminology associated with consumer electronics products, a few additional terms are used almost exclusively in karaoke. These terms are meant to familiarize you with the world of Karaoke. The features listed below may not necessarily pertain to the particular model Singing Machine that you have. The following are some brief explanations of karaoke terms: Echo: Echo adds depth and resonance to a singer's voice without affecting the music.
ADVERTENCIAS ADVERTENCIAS: ! El CD Player emplea un haz de rayos láser. Solamente un técnico calificado debe remover la tapa o tentar reparar este dispositivo, debido a posible daño a sus ojos. ! El uso de controles, ajustes de procedimientos que no son los especificados aquí pueden causar una exposición peligrosa a la radiación. ! El aparato debe ser usado en area ábierta. ADVERTENCIA: PARA REDUCIR EL RIESGO DE INCENDIOS O DE CHOQUES ELÉCTRICOS, NO EXPONGA ESTE EQUIPO A LA LLUVIA O HUMEDAD.
NOTA: Este aparato digital no excede los limites de Clase B para las emisiones de ruido de radio del aparato digital como estipulado en las Regulaciones de Interferencia de Radio de Industria Canadá. Estos límites fueran establecidos para proporcionar protección razonable contra la interferencia dañosa en una instalación residencial.
ESPAÑOL 9 10 11 13 12 1 14 15 16 2 3 17 18 4 5 6 7 8 19 20 21 VISIÓN FRONTAL 1. 2. 3. 4. 5. 6. 7. 8. 9. 10. 11. Pantalla en colores LCD de 3.5” Indicador LED de Encendido/Apagado Botón de Encendido/Apagado Monitor ON/OFF Soporte de los Micrófono Control de Volumen del Micrófono Control Automático de Voz .Control de Volumen principal Puerta de CD Botón de Programa Indicador LED de Programa S3 12. 13. 14. 15. 16. 17. 18. 19. 20. 21.
22. Toma de Salida Auxiliar (D) 23. Toma de Salida Auxiliar (E) 24. Toma de Entrada Auxiliar 25. Toma VIDEO OUT 26. Enchufe de Micrófono 1 27. Enchufe de Micrófono 2 28.
HACIENDO LAS CONEXIONES CONEXIÓN ELÉCTRICA ESPAÑOL Introduzca la toma CC del adaptador/cable de alimentación incluido en la toma de entrada CC 9V de la unidad. UD puede alimentar el sistema del tomacorriente normal de CA usando el cable de energía suministrado. (El adaptador funciona con CA ). 100V-240V/50Hz-60Hz CAUTION: - El adaptador CA incluido sólo está pensado para usarse con esta unidad. No lo use con otros equipos.
HACIENDO LAS CONEXIONES CONEXIÓN DE AUDIO ESPAÑOL Siga los pasos siguientes para conectar la unidad a su TV, VCR o sistema estéreo doméstico: (1) Localizar los cables de RCA de multi-colores. (2) Conecte los cables de audio (blanco y rojo) a la salida audio (blanca-izquierda y roja-derecha) de la parte posterior del Singing Machine. (3) Conecte el otro extremo de los cables de audio a la entrada audio/auxiliar de su TV, VCR o sistema estéreo doméstico.
OPERACIÓN CD O CD+G ESPAÑOL Esta unidad está diseñada para reproductor CD y CD+G que tengan los logos identificativos correspondientes. Si el disco no cumple con el estándar, puede que no se reproduzca correctamente. ENCENDIENDO Y APAGANDO ! Para activar el Karaoke Center, presione el botón Encender/Apagar, el LED de Encender/Apagar enciende. ! Para desligar el sistema, presione el botón Encender/Apagar de nuevo, el LED de Encender/Apagar apaga.
OPERACIÓN CD O CD+G REPETIR 1 ). Para repetir la pista actual, presione el botón REPETIR. Se encenderá el indicador de REPETIR UNA ( Para repetir todas las pistas, presione dos veces, el botón REPETIR. Se encenderá el indicador de REPETIR TODO ( A ). Presione el botón REPRODUCIR/PAUSA para iniciar la reproducción aleatoria en el CD. ). ! Para borrar la función de repetir, presione, nuevamente, Se encenderá el indicador de NO REPETIR ( ! ! ! Use el botón de PROGRAMA para reproducir pistas seleccionadas.
GUIA DE DIAGNOSTICO Y SOLUCIÓN DE PROBLEMAS Sí UD ha seguido las instrucciones y está con dificultades en operar la unidad, localice el PROBLEMA en la columna izquierda abajo. Verifique la columna CAUSA PROBABLE para localizar y reparar el problema. ESPAÑOL PROBLEMA CAUSA PROBABLE SOLUCIÓN La unidad no enciende. El cable de alimentación no Conecte el cable a la toma de alimentación. está conectado. La unidad no enciende.
GUIA DE DIAGNOSTICO Y SOLUCIÓN DE PROBLEMAS CAUSA PROBABLE SOLUCIÓN La selección de la fuente no Seleccione AUX IN como entrada Sin sonido - sí el audio está bien configurada en el para su equipo doméstico de música. estuviera pasando por el TV o VCR o estereofónico. TV o VCR o sistema de Conexión inadecuada al Siga las instrucciones de conexión sonido. s i s t e m a e s t é r e o o de audio para un sistema amplificador de potencia. estereofónico domestico.
ESPECIFICACIONES ESPAÑOL SECCIÓN DE AUDIO: POTENCIA DE SALIDA (MÁXIMA) IMPEDANCIA DE SALIDA SECCIÓN DEL CD PLAYER: FRECUENCIA DE RESPUESTA RELACIÓN SEÑAL/RUIDO NÚMERO DE LOS PROGRAMAS SISTEMA DE MUESTRA 3.5 W (RMS) 8 ohm 100 Hz - 20 kHz 50 dB PROGRAMACIÓN DE ACCESO ALEATORIO DE 24 PASOS ANTIALIASING (REDUCCION DE DISTORSION) 8 VECES SECCIÓN DEL MONITOR MONITOR EN COLORS TFT LCD DE 3.5" SISTEMA NTSA SECCIÓN DEL AUX IN La entrada de las auriculares estéreos de 3,5 mm.
GLOSARIO DE TÉRMINOS DE KARAOKE DE LA SINGING MACHINE Control ECHO: El eco da profundidad y resonancia a la voz del cantante, sin afectar la música. El eco es producido por una realimentación controlada de la voz del cantante. Grabación Múltiplex: Nuestras grabaciones múltiplex tienen 2 copias de la misma canción. Una versión es una grabación estereofónica de la canción sin la voz del cantante.
AVERTISSEMENTS AVERTISSEMENTS: ! Le lecteur de CD utilise un rayon laser. Le couvercle ne pourra être retiré que par une personne qualifiée et les tentatives de réparations de cet appareil aussi, à cause de possibles blessures aux yeux. ! L'utilisation de contrôles, réglages, ou procédures autres que ceux/celles spécifié(e)s ici pourrait causer une exposition dangereuse à des radiations. ! Utilisez l’appareil dans un endroit ouvert.
AVERTISSEMENTS REMARQUE: Cet appareil numérique ne dépasse pas les limites de classe B se rapportant aux émissions de parasites radio provenant d'appareils numériques, selon les restrictions d'Industrie Canada relatives aux interférences radio. Cet appareil génère, utilise et peut émettre des fréquences radio et s'il n'est pas installé et installé selon les instructions, peut nuire aux radiocommunications. Toutefois, rien ne garantit que des parasites ne surviendront pas dans une installation particulière.
LOCALISATION DES CONTRÔLES 9 10 11 13 FRANÇAIS 12 1 14 15 16 2 3 17 18 4 5 6 7 8 19 20 21 1. 2. 3. 4. 5. 6. 7. 8. 9. 10. 11. Moniteur Couleur LCD de 8,9 CM Indicateur LED ALLUME/ETEINDRE Bouton ALLUME/ETEINDRE ETEINDRE / ALLUMER le moniteur Support de Micro Contrôle de VOLUME MICRO Contrôle Automatique de Voix Contrôle de VOLUME PRINCIPAL Porte du CD Bouton PROGRAMME LED PROGRAMME 12. 13. 14. 15. 16. 17. 18. 19. 20. 21.
LOCALISATION DES CONTRÔLES 22. Jack de sortie auxiliaires (Gauche) 23. Jack de sortie auxiliaires (Droite) 24. Jack d'entrée auxiliaires 25. Prise jack SORTIE VIDEO 26. Prise jack MIC 1 27. Prise jack MIC 2 28.
POUR FAIRE LES CONNECTIONS BRANCHEMENT DE L'ALIMENTATION Insérez la prise DC de l'adaptateur/cordon d'adaptateur fourni dans la prise jack DC 9V de l'appareil. Vous pouvez brancher le système à une prise AC normale en utilisant le fil d'alimentation fourni. (L'adaptateur fonctionne sur AC ). 100V-240V/50Hz-60Hz AVERTISSEMENT: - L'adaptateur AC fourni est à utiliser uniquement FRANÇAIS avec cet appareil. Ne les utilisez pas avec d'autres appareils.
POUR FAIRE LES CONNECTIONS CONNEXION AUDIO VUE ARRIÈRE DE LA TV, MAGNETSCOPE OU CHAÎNE STÉRÉO AUDIO INPUT VIDEO INPUT VUE ARRIÈRE DE LA SINGING MACHINE R L Home Stereo System ENTREE AUDIO Droite (Jack Rouge) SORTIE AUX Droite (Jacks Rouge) SORTIE AUX Gauche (Jacks Blanc) F6 ENTREE AUDIO Gauche (Jack Blanc) FRANÇAIS Veuillez suivre les étapes ci-dessous pour connecter votre appareil au téléviseur, magnétoscope ou système stéréo. (1) Localisez les câbles multicolores RCA.
FONCTIONNEMENT DU CD OU CD+G Cet appareil est conçu pour lire des CD et des CD+G portant respectivement le logo d'identification. Si le disque n'est pas conforme au standard, il pourrait ne pas être lu correctement. POUR ALLUMER/ETEINDRE ! Pour allumer le Centre Karaoké, pressez le bouton ALIMENTATION, l’indicateur LED ALLUME s'allume. ! Pour ETEINDRE le système, pressez le bouton ALIMENTATION à nouveau, l’indicateur LED ALLUME s'éteint.
FONCTIONNEMENT DU CD OU CD+G REPETER ! Pour répéter la piste actuelle, pressez le bouton REPETITION une fois. L'indicateur REPETEZ UNE s'allumera 1 ) ( Pour répéter toutes les pistes, pressez le bouton REPETITION deux fois. L'indicateur REPETEZ TOUTES s'allumera. ( A ) Appuyez sur le bouton LECTURE/PAUSE pour commencer. ! Pour annuler la fonction Répétition, pressez le bouton REPETITION à nouveau. L'indicateur PAS RÉPÉTER ( ) s'allumera.
GUIDE DE LOCALISATION DE PROBLEMES Si vous avez suivi les instructions et que vous avez des difficultés à faire fonctionner l'appareil, localisez le PROBLEME dans la colonne de gauche ci - dessous. Vérifiez la CAUSE POSSIBLE correspondante dans la colonne de localisation et réglez le problème. PROBLEME CAUSE POSSIBLE SOLUTION Ne s'allume pas quand il Pas de connexion de la prise Insérez la prise d'alimentation dans est en position ALLUME. d'alimentation à la prise AC. la prise AC.
GUIDE DE LOCALISATION DE PROBLEMES PROBLEME CAUSE POSSIBLE SOLUTION Raccorder le câble vidéo à la prise Le câble vidéo n'est pas de sortie VIDEO OUT du Singing connecté correctement à la Machine et à la prise d'entrée TV. VIDEO IN du téléviseur. Le sélecteur de source de la Utilisez la télécommande de votre TV n'est pas placé sur TV pour sélectionner l'entrée VIDEO. VIDEO. L e s p a r o l e s n'apparaissent pas sur l'écran. La TV ne possède pas d'entrée vidéo.
DETAILS TECHNIQUES SECTION AUDIO: ALIMENTATION DE SORTIE (MAXIMUM) IMPÉDANCE DE SORTIE FRANÇAIS SECTION DU LECTEUR DE CD: RÉPONSE DE FRÉQUENCE RAPPORT SIGNAL - BRUIT NOMBRE DE PROGRAMMES SYSTÈME D’ÉCHANTILLONNAGE 3,5 WATTS (RMS) 8 OHMS 100 Hz - 20 kHz 50 dB PROGRAMMATION ALÉATOIRE À 24 TOURS ANTICRÉNELAGE 8 FOIS SECTION MONITEUR MONITEUR LCD TFT DE 8,9cm SYSTÈME NTSC SECTION AUX IN Prise casque stéréo MICRO IMPEDANCE -73 dB 600 OHMS AVEC MICRO DYNAMIQUE Æ6,3mm SECTION ALIMENTATION DC 9V DMENSIO
GLOSSAIRE DES TERMES DU KARAOKE SINGING MACHINE En plus de la terminologie associée avec les appareils électroniques de consommation, des termes supplémentaires sont utilisés presque exclusivement pour le karaoké. Ces termes servent à vous familiariser avec l'univers du Karaoké. Les caractéristiques énumérées cidessous, ne s'appliquent peut - être pas nécessairement au modèle particulier du Singing Machine que vous avez.
The Singing Machine Company, Inc. 280 Machlin Court City of Industry, CA 91789 USA 359-1106-ENG-SPA-FRE01 PRINTED IN CHINA IMPRESO EN CHINA IMPRIMÉ EN CHINE VISIT OUR WEBSITE www.singingmachine.com VISITE NUESTRO SITIO INTERNET www.singingmachine.com VISITE NOTRE SITE INTERNET www.singingmachine.