
Instructions

Finishing Instructions
2.6 2014 SITE 2
Painting Tips
Therma-Tru Fiber-Classic
®
& Classic-Craft
®
Fiberglass Entry and Patio Door Systems
All Therma-Tru Fiber-Classic
®
and Classic-Craft
®
berglass entry and patio door systems must be nished within 6
months** of the installation date for continued warranty coverage.
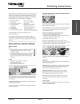
Painting The Door
1. Clean rst with mild detergent and water or use a TSP (tri-sodium phosphate) solution.
2. Rinse well and allow to dry completely. Mask off hardware, glass and remove weather-stripping before
painting.
3. Weather-stripping may be removed by gently pulling out. Re-insert after door is completely dry.
4. Prime with an alkyd or acrylic-based primer. Allow primer to dry completely.
5. Use high-quality acrylic latex house paint, following manufacturer’s directions for application.
6. Use a primer and paint that are compatible.
7. Use exterior grade paints for outside surfaces.
8. Paint edges and exposed ends of door.
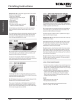
Painting Doorlite Frames
1. Remove any excess glass glazing sealant by rst spraying with a window cleaner or water.
2. Use a single edge razor blade to score the glazing along the edge of the frame. Holding the razor
blade at a 45 degree angle, scrape glazing from glass.
3. Wipe remaining residue off with window cleaner or mineral spirits.
4. Clean frame with a mild detergent and water, or use a TSP solution. Rinse well and allow to dry com-
pletely.
5. Mask off glass.
6. Prime doorlite frames with an alkyd or acrylic-based primer. Allow primer to dry before applying nish
paint coats.
7. Use high-quality acrylic latex house paint, following manufacturer’s application instructions. Use exte-
rior grade paints for outside surfaces.
Hints
1. Provide and maintain a properly installed cap or head ashing to protect top of surfaces from water
intrusion and damage. Tape and properly seal the top ap of the Water Resistive Barrier (WRB) over
the head ashing.
2. Caulk around entire “weather” side of the door system, sealing along the brickmould to the ashing
material or siding and seal all joints between the jambs and moldings.
3. Seal the joints between the exterior hardware trim and the door face to prevent air and water inltra-
tion.
4. Place and set galvanized nish nails through the brickmould around the perimeter. Use exterior grade
screws if you are installing a storm door to the brickmould. Countersink all fasteners and cover with
exterior grade putty.
5. Add insulation material to the cavity between the opening and the door system to reduce air inltra-
tion and heat transfer.
6. **All Therma-Tru Fiber-Classic and Classic-Craft door systems must be nished within 6 months of
the installation date for continued warranty coverage, however, all bare wood surfaces (such as door
frames) should be primed and painted (or stained – see NOTE below) and top coated within 2 weeks
of installation or exposure to weather.
7. Paint (or stain – see NOTE below) according to Therma-Tru nishing instructions (see NOTE below).
Do Not paint or stain the weather-strip, it is “friction-t” and easily removed for painting or staining.
8. All doors must have all 6 sides nished and for out-swing doors the sides, top and bottom must be
inspected and maintained as regularly as all other surfaces.
9. Maintain or replace sealants and nishes as soon as any deterioration is evident. For semi-gloss or
glossy paint or clear coats, do this when the surface becomes dull or rough. More severe climates and
exposures will require more frequent maintenance.
10. Access our website www.thermatru.com for printable versions of the installation and to view our
Troubleshooting video for minor installation issues and adjustments.
NOTE: For detailed information on nishing and warranty coverage see “THERMA-TRU FIBERGLASS and
STEEL DOOR SYSTEMS RECOMMENDATIONS FOR PROPER FINISHING AND PAINTING OR STAINING”
located in the warranty section of the Therma-Tru website @ www.therma-tru.com. (Last Edited 9/30/09)