
Use and Care Guide


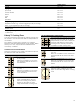
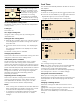


Table Of Contents
- Table of Contents Use and care manual
- IMPORTANT SAFETY INSTRUCTIONS
- READ AND SAVE THESE INSTRUCTIONS
- WARNING
- Fire Safety
- WARNING
- to reduce the risk of a grease fire:
- a. Never leave surface units unattended at high settings. Boilovers cause smoking and greasy spillovers that may ignite. Heat oils slowly on low or medium settings.
- b. Always turn hood ON when cooking at high heat or when flambéing food (i.e. Crepes Suzette, Cherries Jubilee, Peppercorn Beef Flambé).
- c. Clean ventilating fans frequently. Grease should not be allowed to accumulate on fan or filter.
- d. Use proper pan size. Always use cookware appropriate for the size of the surface element.
- WARNING
- TO REDUCE THE RISK OF INJURY TO PERSONS IN THE EVENT OF A GREASE FIRE, OBSERVE THE FOLLOWING:
- a. SMOTHER FLAMES with a close-fitting lid, cookie sheet, or metal tray, then turn off the burner. BE CAREFUL TO PREVENT BURNS. If the flames do not go out immediately, EVACUATE AND CALL THE FIRE DEPARTMENT.
- b. NEVER PICK UP A FLAMING PAN – You may be burned.
- c. DO NOT USE WATER, including wet dishcloths or towels – a violent steam explosion will result.
- d. Use an extinguisher ONLY if:
- Cooking Safety
- Burn Prevention
- Child Safety
- Cleaning Safety
- Cookware Safety
- Proper Installation and Maintenance
- Electromagnetic interference
- Cooling fan
- Proposition 65 Warning:
- Causes of damage
- Protecting the Environment
- Cooking with Induction
- Getting familiar with the appliance
- Operation
- Main power switch
- Setting a Cooking Zone
- Settings table
- 9 CAUTION
- Liberty™ Cooking Zone
- Cook Timer
- Setting procedure:
- 1. Select the cooking zone and the required power level.
- 2. Touch the COOK TIMER key. The ‹‹ symbol and the Ú indicator light up in the cook timer display.
- 3. Within the next 10 seconds, set the required cooking time using the number keys.
- 4. Touch the COOK TIMER key to confirm the selected setting.
- Note:
- Using Cook timer with CookSmart®
- Changing or deleting the time
- When the time has elapsed
- Notes
- Kitchen timer
- Stop Watch Function
- PowerBoost® Function
- ShortBoost function
- CookSmart®
- Temperature settings
- Frying chart
- Teppan Yaki for the Flex Zone
- Note:
- Setting procedure
- 1. Select the cooking zone. Touch COOK SMART. é lights up in the cooking zone display.
- HeatShift™ function
- MoveMode™
- Panel Lock
- Wipe Protection
- Automatic time limitation
- Basic settings
- To access the basic settings:
- 1. Turn on the cooktop.
- 2. Within 10 seconds, touch the KITCHEN TIMER key for about 4 seconds.
- 3. Touching the KITCHEN TIMER key again takes you to the basic settings.
- 4. Touch the KITCHEN TIMER key repeatedly until the required function is displayed.
- 5. Select the desired setting from the settings area.
- 6. Touch the KITCHEN TIMER key for at least 4 seconds.
- Quit basic settings
- Energy consumption indicator
- Power Manager
- Home Connect
- Notes
- Setting Up
- Automatic Registration in the Home Network
- 1. Turn on the cooktop.
- 1. Turn on the cooktop.
- 2. Touch and hold the KITCHEN TIMER key for 4 seconds.
- 3. Touch the KITCHEN TIMER key repeatedly until •’ and ‚ are displayed alternately.
- 4. Set the ƒ value on the control panel.
- 5. Use the "Home Connect" SSID and the "Home Connect" key to register the mobile device on the cooktop network.
- 6. Start the app on the mobile device and follow the instructions for manual network registration.
- Home Connect Settings
- Notes
- Deactivating Wi-Fi
- Note:
- 1. Turn on the cooktop.
- 1. Turn on the cooktop.
- 1. Turn on the cooktop.
- 2. Touch and hold the KITCHEN TIMER key for 4 seconds.
- 3. Touch the KITCHEN TIMER key repeatedly until •’ and ‚ are displayed alternately.
- 4. On the control panel
- 5. Follow the instructions as per ~ "Automatic Registration in the Home Network" or ~ "Manual Registration in the Home Network".
- Connect to App
- Notes
- 1. Turn on the cooktop.
- 1. Turn on the cooktop.
- Software Update
- Remote diagnostics
- Information on Data Protection
- Wi-Fi® Module
- Cooktop - Hood Sync
- Notes
- Setting up a connection
- Connecting directly
- Note:
- 1. Turn on the cooktop.
- 2. Touch and hold the KITCHEN TIMER key for 4 seconds.
- 3. Touch the KITCHEN TIMER key repeatedly until ™ and ‚‡ are displayed alternately.
- 4. Set the value ‚ in the settings area.
- 5. You have two minutes to initiate the connection process on the hood.
- 6. Once the cooktop is connected to the hood, the value „ appears in the cooking position display. After you exit the settings menu, the symbols for the cooktop- based hood controls are displayed in the cooktop's control panel.
- Connecting via your home network
- 1. Turn on the cooktop.
- 2. Touch and hold the KITCHEN TIMER key for 4 seconds.
- 3. Touch the KITCHEN TIMER key repeatedly until ™ and ‚‡ are displayed alternately.
- 4. Set the value ‚ in the settings area.
- 5. If the appliance is not yet connected to your home network, press the WPS button on the router within the next 2 minutes.
- 6. Initiate the process for connecting to the hood.
- 7. Once the cooktop is connected to the hood, the value „ appears in the cooking position display. After you exit the settings menu, the symbols for the cooktop- based hood controls are displayed in the cooktop's control panel.
- Note:
- Disconnecting from the Network
- Controlling the hood via the cooktop
- Hood control settings
- Cleaning and Maintenance
- Service
- Frequently-asked questions and answers (FAQ)
- Fixing Malfunctions
- How to Obtain Warranty Service
- STATEMENT OF LIMITED PRODUCT WARRANTY
- THERMADOR® Support
- READ AND SAVE THESE INSTRUCTIONS
- Table des Matières Notice d’utilisation
- 9 Définitions de sécuritéDéfinitions de sécurité
- CONSIGNES DE SÉCURITÉ IMPORTANTES
- LIRE ET CONSERVER CES INSTRUCTIONS
- AVERTISSEMENT
- Sécurité-incendie
- AVERTISSEMENT
- POUR RÉDUIRE LES RISQUES DE FEUX DE GRAISSE :
- a. Ne jamais faire fonctionner les unités de surface à des températures élevées sans surveillance. Des débordements causant de la fumée et des déversements graisseux peuvent prendre feu. Chauffer l'huile lentement à réglage faible ou moyen.
- b. Mettre toujours la hotte EN MARCHE pendant la cuisson à température élevée et au moment de flamber des aliments (p.ex., crêpes Suzette, cerises jubilée, steak au poivre flambé).
- c. Nettoyer souvent les ventilateurs d'aération. Il ne faut pas que la graisse s'accumule sur le ventilateur ou sur le filtre.
- d. Utiliser des casseroles de taille adéquate. Utiliser toujours des casseroles dont les dimensions conviennent à la taille de l'élément.
- AVERTISSEMENT
- POUR RÉDUIRE LE RISQUE DE LÉSIONS CORPORELLES DANS L'ÉVENTUALITÉ D'UN FEU DE GRAISSE, OBSERVER LES CONSIGNES SUIVANTES :
- a. ÉTOUFFER LES FLAMMES à l'aide d'un couvercle bien hermétique, d'une tôle à biscuits ou d'un plateau en métal, puis éteindre l'appareil. FAIRE ATTENTION À NE PAS SE BRÛLER. Si les flammes ne s'éteignent pas immédiatement, ÉVACUER LES LI...
- b. NE JAMAIS SAISIR UN RÉCIPIENT QUI BRÛLE. Vous pourriez vous brûler.
- c. NE PAS UTILISER D'EAU, y compris les chiffons ou serviettes mouillées. Une violente explosion de vapeur risque de se produire.
- d. Utiliser un extincteur uniquement si :
- Sécurité de cuisson
- Prévention des brûlures
- Sécurité des enfants
- Consignes en matière de nettoyage
- Sécurité pour la batterie de cuisine
- Installation et entretien corrects
- Perturbations électromagnétiques
- Ventilateur de refroidissement
- Avertissement issu de la proposition 65 :
- Éléments qui peuvent endommager l'appareil
- Protection de l'Environnement
- Cuisson par Induction
- Faire connaissance avec l’appareil
- Fonctionnement
- Interrupteur d'alimentation principal
- Réglage d’une zone de cuisson
- Tableau des réglages
- 9 ATTENTION
- Zone de cuisson LibertyMC
- Recommandations d'utilisation de l'ustensile de cuisson
- En tant que deux foyers indépendants
- Activation
- En tant que foyer unique
- Liaison de deux zones de cuisson
- 1. Déposez l’ustensile de cuisine. Sélectionnez une des deux zones de cuisson assignées à la zone de cuisson polyvalente et réglez le niveau de puissance.
- Minuterie de cuisson
- Réglages :
- 1. Sélectionnez la zone de cuisson et le niveau de puissance requis.
- 2. Effleurez la touche COOK TIMER. Le symbole ‹‹ et le témoin Ú s’allument à l’écran de la minuterie de cuisson.
- 3. Dans les 10 secondes qui suivent, réglez le temps de cuisson requis avec les touches numérotées.
- 4. Effleurez la touche COOK TIMER pour confirmer le réglage choisi.
- Remarque :
- Utilisation de la Minuterie de cuisson avec CookSmart®
- Modification ou annulation du temps
- Une fois le temps écoulé
- Remarques
- Minuterie de cuisine
- Arrêt du chronomètre
- Fonction PowerBoost® (Haute vitesse)
- Fonction ShortBoost (Puissance rapide)
- CookSmart®
- Niveaux de température
- Tableau pour la friture
- Teppanyaki pour zone Flex
- Remarque :
- Réglages
- 1. Sélectionnez la zone de cuisson. Effleurez COOK SMART. Le symbole é s’allume à l’écran de la zone de cuisson.
- Fonction HeatShiftMD
- MoveModeMC
- Verrouillage du panneau de commande
- Anti-effacement
- Durée limitée automatique
- Réglages de base
- Pour accéder aux réglages de base :
- 1. Allumez la table de cuisson.
- 2. Dans les 10 secondes qui suivent, effleurez KITCHEN TIMER pendant près de 4 secondes.
- 3. Effleurez de nouveau la touche KITCHEN TIMER pour revenir aux réglages de base.
- 4. Effleurez la touche KITCHEN TIMER à plusieurs reprises jusqu'à ce que la fonction requise s'affiche.
- 5. Puis sélectionnez le réglage requis à partir de la zone de réglages.
- 6. Effleurez la touche KITCHEN TIMER pendant au moins 4 secondes.
- Sortie des réglages de base
- Indicateur de consommation énergétique
- Gestion de puissance
- Home Connect
- Remarques
- Configuration
- Connexion automatique au réseau domestique
- 1. Allumez la table de cuisson.
- 2. Effleurez la KITCHEN TIMER et tenez-la enfoncée pendant 4 secondes.
- 3. Effleurez la touche KITCHEN TIMER à plusieurs reprises jusqu’à ce que •’ et ‚ sont affichés en alternance.
- 4. Réglez la valeur du symbole ‚ sur le panneau de commande.
- 5. Appuyez sur le bouton du routeur WPS dans les 2 prochaines minutes.
- Remarque :
- Connexion manuelle au réseau domestique
- 1. Allumez la table de cuisson.
- 2. Effleurez la KITCHEN TIMER et tenez-la enfoncée pendant 4 secondes.
- 3. Effleurez la touche KITCHEN TIMER à plusieurs reprises jusqu’à ce que •’ et ‚ sont affichés en alternance.
- 4. Réglez la valeur du symbole ƒ sur le panneau de commande.
- 5. Utilisez le SSID « Home Connect » et la clé « Home Connect » pour enregistrer l’appareil mobile au réseau de la table de cuisson.
- 6. Démarrez l’application sur l’appareil mobile et respectez les directives pour une inscription manuelle au réseau.
- Réglages Home Connect
- Remarques
- Désactivation du Wi-Fi
- Remarque :
- 1. Allumez la table de cuisson.
- 1. Allumez la table de cuisson.
- 1. Allumez la table de cuisson.
- 2. Effleurez la KITCHEN TIMER et tenez-la enfoncée pendant 4 secondes.
- 3. Effleurez la touche KITCHEN TIMER à plusieurs reprises jusqu’à ce que •’ et ‚ sont affichés en alternance.
- 4. Sur le panneau de commande
- 5. Respectez les directives selon ~ "Connexion automatique au réseau domestique" ou ~ "Connexion manuelle au réseau domestique".
- Connexion avec l'appli
- Remarques
- 1. Allumez la table de cuisson.
- 2. Effleurez la KITCHEN TIMER et tenez-la enfoncée pendant 4 secondes.
- 3. Effleurez la touche KITCHEN TIMER à plusieurs reprises jusqu’à ce que •’ et ƒ sont affichés en alternance.
- 4. Réglez la valeur du symbole ‚ sur le panneau de commande.
- 5. Respectez les directives de l’application pour achever le processus de connexion.
- Réglages par l'appli
- Remarques
- 1. Allumez la table de cuisson.
- 2. Effleurez la KITCHEN TIMER et tenez-la enfoncée pendant 4 secondes.
- 3. Effleurez la touche KITCHEN TIMER à plusieurs reprises jusqu’à ce que •’ et … sont affichés en alternance.
- 4. Pour actionner le transfert, sélectionnez le symbole ‚ sur le panneau de commande. Pour le désactiver, sélectionnez le symbole ‹.
- Confirmer les réglages de cuisson
- Mise à jour logicielle
- Diagnostic à distance
- Remarque liée à la protection des données
- Module Wi-Fi®
- Table de Cuisson - Synchronisation de la Hotte
- Remarques
- Configuration
- Connexion directe
- Remarque :
- 1. Allumez la table de cuisson.
- 2. Effleurez la KITCHEN TIMER et tenez-la enfoncée pendant 4 secondes.
- 3. Effleurez la touche KITCHEN TIMER à plusieurs reprises jusqu’à ce que ™ et ‚‡ sont affichés en alternance.
- 4. Réglez la valeur du symbole ‚ dans la zone de réglage.
- 5. Vous disposez de deux minutes pour lancer le processus de connexion sur la hotte.
- 6. Une fois la table de cuisson connectée à la hotte, le symbole „ s’affiche à l’écran de l’élément de cuisson. Après avoir quitté le menu de réglages, les symboles des commandes de la hotte de la table de cuisson apparaissent sur le...
- Connexion par le réseau domestique
- 1. Allumez la table de cuisson.
- 2. Effleurez la KITCHEN TIMER et tenez-la enfoncée pendant 4 secondes.
- 3. Effleurez la touche KITCHEN TIMER à plusieurs reprises jusqu’à ce que ™ et ‚‡ sont affichés en alternance.
- 4. Réglez la valeur du symbole ‚ dans la zone de réglage.
- 5. Si l’appareil électroménager n’est pas encore connecté au réseau domestique, appuyez sur le bouton WPS du routeur dans les 2 prochaines minutes.
- 6. Lancez le processus de connexion à la hotte.
- 7. Une fois la table de cuisson connectée à la hotte, le symbole „ s’affiche à l’écran de l’élément de cuisson. Après avoir quitté le menu de réglages, les symboles des commandes de la hotte de la table de cuisson apparaissent sur le...
- Remarque :
- Se déconnecter du réseauSe déconnecter du réseau
- Commander la hotte par la table de cuisson
- Réglages de la commande de la hotte
- Nettoyage et Entretien
- Entretien
- Foire aux questions (FAQ)
- Corrections des défaillances
- Comment bénéficier du service de garantie
- ÉNONCÉ DE LA GARANTIE LIMITÉE
- Soutien THERMADOR®
- LIRE ET CONSERVER CES INSTRUCTIONS

16
ShortBoost function
The ShortBoost function enables you to heat cookware
faster than when using heat setting
Š.
After deactivating the function, select the appropriate
heat setting for your food.
This function can be activated for a cooking zone at any
time, provided the other cooking zone in the same group
is not in use (see illustration).
Note: The ShortBoost function can also be activated in
the Liberty™ cooking zone if it is being used as a single
cooking zone.
Recommendations for use
▯ Always use cookware that has not been pre-heated.
▯ Use pots and pans with a flat base. Do not use
containers with a thin base.
▯ Never leave empty cookware, oil, butter or lard to heat
up unattended.
▯ Do not place a lid on the cookware.
▯ Place the cookware on the center of the element.
Ensure that the diameter of the base of the cookware
corresponds to the size of the element.
▯ You can find information on the type, size and
positioning of the cookware in section ~ "Cooking
with Induction"
Activating
1.
Select a cooking zone.
2.
Touch the POWER BOOST key twice.
The ˜›Ú indicator lights up.
The function is activated.
Deactivating
1.
Select a cooking zone.
2.
Touch the POWER BOOST key.
The ˜›Ú display goes out and the cooking zone
switches back to power level Š.
The function is deactivated.
Note: After 30 seconds, this function will automatically
switch off.
CookSmart
®
When you are using CookSmart
®
to operate the cooking
zone, a sensor controls the temperature of the pan.
Advantages when frying
▯ The cooking zone only heats up if this is required to
maintain the temperature. This saves energy and
prevents the oil or fat from overheating.
▯ The CookSmart
®
function reports when the empty
frying pan has reached the optimum temperature for
adding oil and then for adding the food.
Notes
▯ Do not place a lid on the pan. Otherwise, the function
does not activate correctly. You can use a splash
guard to prevent splashes of grease.
▯ Use oil or grease that is suitable for deep fat frying. If
butter, margarine, extra virgin olive oil, or lard is used,
use heat setting 1 or 2.
▯ Never leave a frying pan, with or without food,
unattended when it is being heated.
▯ If the temperature of the cooking zone is higher than
that of the cookware or vice-versa, the frying sensor is
not activated correctly.
Frying pans for CookSmart
®
Frying pans specifically suited for use with the
CookSmart
®
function can be purchased from specialist
retailers, Customer Support or THERMADOR
®
eShop.
Order the relevant reference number:
▯ HEZ3902106" (15 cm) frying pan.
▯ CHEFSPAN088¼" (21 cm) frying pan.
▯ TEPPAN1016teppan yaki (large). Recommended for
the Liberty™ cooking zone only.
9 CAUTION
▯ The frying sensor has been configured
specifically for this types of frying pan.
▯ Make sure that the diameter of the base of the
frying pan corresponds to the size of the cooking
zone. Place the pan in the centre of the cooking
zone.
▯ Using a frying pan of a different size or one that is
poorly positioned on the flexible cooking zones
may result in the frying sensor not being
activated. See the section on ~ "Liberty™
Cooking Zone".
▯ Other frying pans may overheat. They may reach
a temperature above or below the selected
temperature setting. Try the lowest heat setting
first and then change it according to your
requirements.