
Use and Care Guide
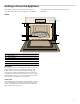
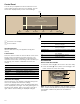

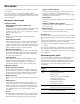
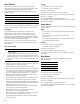
Table Of Contents
- Table of ContentsUse and care manual
- IMPORTANT SAFETY INSTRUCTIONS
- READ ALL INSTRUCTIONS BEFORE USING THE APPLIANCE
- 9 PRECAUTIONS TO AVOID POSSIBLE EXPOSURE TO EXCESSIVE MICROWAVE ENERGY
- WARNING
- WARNING
- Grounding Instructions
- TV / Radio Interference
- Intended Use
- Child Safety
- Cleaning Safety
- Cooking Safety
- In Case of Fire
- Liquids
- Cooking Items
- Cooking Utensils
- Glass Tray / Turntable Ring
- Thermometers
- Pacemakers
- Fan Motor Operation
- State of California Proposition 65 Warnings:
- SAVE THESE INSTRUCTIONS.
- Causes of Damage
- Protecting the environment
- Getting to Know the Appliance
- Before First Use
- Operating the appliance
- Microwave
- Microwave utensil guide
- Microwave power levels
- Setting the microwave
- 1. Touch the ON l OFF touch button to switch on the appliance.
- 2. Touch “Microwave”.
- 3. A microwave power level in percent is suggested.
- 4. Touch the power level field and swipe to the left or right to select a different power level.
- Note:
- Note:
- Changing the cooking time
- Add 30 seconds cooking time
- Changing the microwave power level
- The cooking time has elapsed
- Pausing the operation
- Switching the appliance off
- 1. Touch the ON l OFF touch button to switch on the appliance.
- Suggestions for best results
- Microwave programs
- Note:
- Information on the settings
- Setting a Microwave Program
- Beverage
- Popcorn
- Sensor Cook
- Sensor Reheat
- Auto Defrost
- Keep Warm
- Melt Butter
- Melt Chocolate
- Soften Ice Cream
- Soften Cream Cheese
- Timer
- Childproof Lock
- Adjust Basic Settings
- Cleaning and Maintenance
- Before Calling for Service
- THERMADOR® Support
- STATEMENT OF LIMITED PRODUCT WARRANTY
- READ ALL INSTRUCTIONS BEFORE USING THE APPLIANCE
- Table des MatièresNotice d’utilisation
- Définitions de sécuritéDéfinitions de sécurité
- CONSIGNES DE SÉCURITÉ IMPORTANTES
- LISEZ TOUTES LES INSTRUCTIONS AVANT D'UTILISER L'APPAREIL
- 9 MESURES DE PRÉCAUTION POUR ÉVITER L’EXPOSITION EXCESSIVE À L’ÉNERGIE MICRO-ONDE
- AVERTISSEMENT
- AVERTISSEMENT
- Instructions de mise à la terre
- Interférences radio/télévision
- Utilisation prévue
- Sécurité des enfants
- Consignes en matière de nettoyage
- Sécurité de cuisson
- En cas d’incendie
- Liquides
- Articles de cuisson
- Utensiles de cuisson
- Plateau en verre/Anneau du plateau tournant
- Thermomètres
- Pacemakers
- Fonctionnement du moteur du ventilateur
- Avertissement issue de la proposition 65 de l’État de la Californie :
- CONSERVEZ CES INSTRUCTIONS.
- Causes des dommages
- Protection de l'environnement
- Familiarisation avec l'appareil
- Avant la première utilisation
- Avant d’utiliser l’appareil pour la première fois
- Fonctionnement initial
- Réglage de l’heure du jour
- 1. Effleurez la ligne du bas.
- 2. Effleurez le champ tactile « Heure » et glissez vers la gauche ou la droite pour sélectionner l’heure actuelle.
- 3. Effleurez le champ tactile « Minute » et glissez vers la gauche ou la droite pour sélectionner les minutes actuelles.
- 4. Effleurez le symbole 8 pour confirmer les réglages.
- Réglage de la langue
- 1. Glissez vers la gauche pour accéder au prochain réglage.
- 1. Glissez vers la gauche pour accéder au prochain réglage.
- Accessoires de nettoyage
- Utilisation de l’appareil
- Micro-ondes
- Guide des ustensiles pour micro-ondes
- Niveaux de puissance du micro-ondes
- Réglage du micro-ondes
- 1. Effleurez la touche tactile ON l OFF pour mettre l’appareil sous tension.
- 2. Effleurez “Micro-ondes”.
- 3. L'appareil suggère un niveau de puissance en pourcentage.
- 4. Effleurez le champ niveau de puissance et glissez vers la gauche ou la droite pour sélectionner un niveau de puissance différent.
- Remarque :
- Remarque :
- Modification du temps de cuisson
- Ajout de 30 secondes au temps de cuisson
- Modification du niveau de puissance du micro-ondes
- Temps de cuisson écoulé
- Mise en pause
- Mise hors tension de l'appareil
- 1. Effleurez la touche tactile ON l OFF pour mettre l’appareil sous tension.
- Suggestions pour les meilleurs résultats
- Programmes du micro-ondes
- Remarque :
- Renseignements à propos des réglages
- Réglage du programme de micro-ondes
- 1. Effleurez la touche tactile ON I OFF.
- 2. Glissez vers la droite ou la gauche pour sélectionner un programme micro-ondes.
- 3. Effleurez le programme Fondre du Beurre.
- 4. Glissez vers la gauche ou la droite pour sélectionner 1/4 tasse.
- 5. Effleurez « Continuer ».
- 6. Effleurez la touche tactile START l STOP.
- Changer le programme
- À la fin du programme
- Mise hors tension de l'appareil
- 1. Effleurez la touche tactile ON I OFF.
- Boisson
- Popcorn
- Capteur cuisson
- Remarques
- Réglage
- 1. Effleurez la touche tactile ON I OFF.
- 2. Sélectionnez « Capteur cuisson ».
- 3. Glissez vers la gauche ou la droite pour sélectionner l’aliment désiré.
- 4. Effleurez la touche tactile START l STOP (DÉMARRAGE l ARRÊT).
- 5. Une fois la détection terminée, s’affiche un avis sur l’écran. L’appareil amorce la cuisson. Le temps de cuisson calculé s’écoule à l’écran.
- Remarque :
- Capteur Réchaud
- Décongélation automatique
- Garder au Chaud
- Fondre du beurre
- Fondre du chocolat
- Amollir de la crème glacée
- Amollir du fromage à la crème
- Minuterie
- Verrou pour enfants
- Réglages de base
- Modification des réglages
- 1. Effleurez la touche tactile SETTINGS.
- 2. Glissez vers la gauche ou la droite pour sélectionner le réglage requis.
- 3. Effleurez la ligne du bas.
- 4. Glissez vers la gauche ou la droite pour sélectionner le réglage requis.
- 5. Au besoin, effleurez le symbole 8 pour confirmer le réglage.
- 6. Effleurez la ligne supérieure.
- 7. Effleurez la touche tactile SETTINGS.
- 8. Appuyez sur « Sauvegarder » pour conserver les modifications.
- 1. Effleurez la touche tactile SETTINGS.
- Réglages offerts
- Modification des réglages
- Nettoyage et entretien
- Dépannage
- Soutien THERMADOR®
- ÉNONCÉ DE LA GARANTIE LIMITÉE
- LISEZ TOUTES LES INSTRUCTIONS AVANT D'UTILISER L'APPAREIL

20
Auto Defrost
With the Auto Defrost mode you can defrost three
different types of food by entering the weight. The ideal
defrost time will be calculated by the program.
The following chart shows the available options and
settings ranges.
Ovenware for defrosting
Place the food in a microwaveable shallow dish, such as
a glass casserole dish or glass plate, but do not cover.
Stand time
The defrosted food should be left to stand for an
additional 10 to 30 minutes until it reaches an even
temperature. Large pieces of meat require a longer
standing time than smaller pieces. Flat pieces of meat
and items made from ground meat should be separated
from each other before leaving to stand.
After this time, you can continue to prepare the food,
even though thick pieces of meat may still be frozen in
the middle.
Tips for defrosting
9 WARNING
HEALTH RISK
Liquid will be produced when defrosting meat or
poultry. Drain off this liquid when turning meat and
poultry, and under no circumstances, use it for other
purposes, or allow it to come into contact with other
foods.
▯ Always enter the weight in lb when using the defrost by
weight feature (see program table).
▯ Use the defrost mode for raw food items only.
▯ Defrosting gives best results when food to be thawed
is a minimum of 0° F (taken directly from a freezer). If
the food has been stored in a refrigerator-freezer that
does not maintain a temperature of 5° F or below,
always program a lower food weight or lower cook
time to prevent cooking the food.
▯ If the frozen food is stored outside the freezer for up to
20 minutes, enter a reduced cook time or weight.
▯ The shape of the package will alter the defrosting time.
Shallow rectangular food packets defrost more quickly
than a deep frozen block of food.
▯ Separate pieces as they begin to defrost. Separated
frozen pieces of food defrost better.
▯ Shield warm areas of food with small pieces of
aluminum foil, if they start to heat up.
Use small pieces of aluminum foil to shield food items
like chicken wings, leg tips and fish tails.
Do not allow aluminum foil to touch the oven cavity
when defrosting.
Setting
1.
Touch the ON l OFF touch button.
The main menu is displayed.
2.
Select “Auto Defrost”.
3.
Touch the type of food you want to defrost.
4.
Swipe to the left or right to set the weight of the food.
5.
Touch “Continue”.
6.
Touch the START l STOP touch button.
The appliance starts operating and the cook time counts
down on the display.
Keep Warm
Use the Keep Warm mode to keep cooked foods hot and
ready to serve.
Notes
▯ Food cooked covered should remain covered during
Keep Warm.
▯ Pastry items (pies, turnovers, etc.) should be
uncovered.
▯ Complete meals kept warm on a dinner plate can be
covered during Keep Warm.
Setting
1.
Touch the ON l OFF touch button.
The main menu is displayed.
2.
Select “Keep Warm”.
3.
Touch the START l STOP touch button.
The status bar fills up quickly and the appliance starts
operating.
Melt Butter
The following chart shows the available options and
settings ranges.
Setting
1.
Touch the ON l OFF touch button.
The main menu is displayed.
2.
Select “Melt Butter”.
3.
Swipe to the left or right to select the desired amount.
4.
Touch “Continue”.
5.
Touch the START l STOP touch button.
The appliance starts operating and the cook time counts
down on the display.
Food type Quantity (lb)
Ground Meat 0.5 - 2 lb
Meat Pieces (Steaks/Chops) 0.5 - 3 lb
Poultry Pieces 0.5 - 3 lb
Quantity in display
2 tbsp (tablespoons)
1/4 cup
1/2 cup