
Instructions for Use
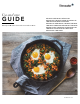


Table Of Contents
- Table of Contents Use and care manual
- IMPORTANT SAFETY INSTRUCTIONS
- READ AND SAVE THESE INSTRUCTIONS
- WARNING
- Proper Installation and Maintenance
- Fire Safety
- WARNING
- WARNING
- WARNING
- TO REDUCE THE RISK OF INJURY TO PERSONS IN THE EVENT OF A GREASE FIRE, OBSERVE THE FOLLOWING:
- a. SMOTHER FLAMES with a close-fitting lid, cookie sheet, or metal tray, then turn off the burner. BE CAREFUL TO PREVENT BURNS. If the flames do not go out immediately, EVACUATE AND CALL THE FIRE DEPARTMENT.
- b. NEVER PICK UP A FLAMING PAN – You may be burned.
- c. DO NOT USE WATER, including wet dishcloths or towels – a violent steam explosion will result.
- d. Use an extinguisher ONLY if:
- Burn Prevention
- Child Safety
- Cleaning Safety
- Cookware Safety
- Proposition 65 Warning:
- Causes of Damage
- Protecting the Environment
- Tested for You in Our Cooking Studio
- Heating Modes - Steam Oven
- Heating Modes - Conventional Oven
- Heating Modes - Conventional Oven
- True Convection
- Tips:
- Convection Bake
- Tips:
- Bake
- Tips:
- Convection Roast
- Tips:
- Roast
- Tips:
- Convection Broil
- Tips:
- Max Convection Broil
- Broil
- Tips:
- Max Broil
- Pizza
- Speed Convection
- Slow Roast
- Rotisserie
- Assembling the Rotisserie:
- 1. Insert the rotisserie rack half way into the oven on rack position 5.
- 2. Slide the left fork into the skewer and tighten the screw.
- 3. Slide meat or poultry for roasting onto the skewer and tighten the screw.
- 4. Slide the right fork onto the skewer and tighten the screw.
- 5. Check the balance of the food on the skewer by rolling the skewer in the palms of your hands. Food that is not evenly balanced on the skewer will not cook evenly.
- 6. Place the rotisserie skewer onto the rack.
- 7. Place the skewer rack into the oven and insert the drive shaft into the opening on the back oven wall.
- 8. If necessary, turn the rotisserie skewer slightly so that the drive shaft fits properly into the opening.
- 9. Insert flat rack on position 1 and insert broil pan to catch drippings.
- Trussing Poultry for the Rotisserie
- 1. Slip one of the forks on the skewer with the tines pointing to the tip of the skewer. Loosely tighten the screw to keep it from slipping.
- 2. Insert the skewer through the poultry securing with the fork.
- 3. Cut 24" (61 cm) of kitchen string and lay it under the poultry, breast side up, with equal lengths of string on each side.
- 4. Wrap each end of the string around each of the wings; catch each wing tip as the string is brought tightly together at the top and knotted. Do not cut off the extra string.
- 5. Cut another 24" (61 cm) of string and lay it under the back. Wrap it around the tail and then around the skewer. Cinch tightly.
- 6. Pull legs forward; cross them on top of the skewer, bring string around and tie a knot.
- 7. Connect the string holding the legs to the string holding the wings; then knot. Add the other fork and push tines into the drumsticks to secure.
- 8. Check the balance by rolling the skewer in your palms. Poultry should not rotate or be loose in any way. If so, redo the trussing. The poultry will not cook evenly if it is not balanced on the skewer.
- Start
- Cooking Chart for Rotisserie
- Dehydrate
- Dehydrate Chart
- Warm
- Proof
- Dough Fermentation
- Final Fermentation
- Conventional Oven Cooking Charts
- Heating Modes - Conventional Oven
- Troubleshooting
- STATEMENT OF LIMITED PRODUCT WARRANTY
- THERMADOR® Support
- READ AND SAVE THESE INSTRUCTIONS
- Table des Matières Notice d’utilisation
- 9 Définitions de sécuritéDéfinitions de sécurité
- IMPORTANTES CONSIGNES DE SÉCURITÉ
- LIRE ET CONSERVER CES INSTRUCTIONS
- AVERTISSEMENT
- Installation et entretien corrects
- Sécurité-incendie
- AVERTISSEMENT
- AVERTISSEMENT
- AVERTISSEMENT
- POUR RÉDUIRE LE RISQUE DE LÉSIONS CORPORELLES DANS L'ÉVENTUALITÉ D'UN FEU DE GRAISSE, OBSERVER LES CONSIGNES SUIVANTES :
- a. ÉTOUFFER LES FLAMMES à l'aide d'un couvercle bien hermétique, d'une tôle à biscuits ou d'un plateau en métal, puis éteindre l'appareil. FAIRE ATTENTION À NE PAS SE BRÛLER. Si les flammes ne s'éteignent pas immédiatement, ÉVACUER LES LI...
- b. NE JAMAIS SAISIR UN RÉCIPIENT QUI BRÛLE. Vous pourriez vous brûler.
- c. NE PAS UTILISER D'EAU, y compris les chiffons ou serviettes mouillées. Une violente explosion de vapeur risque de se produire.
- d. Utiliser un extincteur uniquement si :
- Prévention des brûlures
- Sécurité des enfants
- Consignes en matière de nettoyage
- Sécurité pour la batterie de cuisine
- Avertissement issu de la proposition 65 :
- Causes des dommages
- Protection de l'Environnement
- Testé pour vous dans notre laboratoire culinaire
- Modes de cuisson - Four à vapeur
- Modes de cuisson - Four à vapeur
- Cuisson à l’aide de vapeur
- Convection véritable
- Conseils :
- Cuisson à convection
- Conseils :
- Cuisson
- Conseils :
- Rôtisserie à convection
- Conseils :
- Rôtissage
- Conseils :
- Gril à convection
- Conseils :
- Gril
- Conseils :
- Pizza
- Convection rapide
- Cuisson lente
- Déshydratation
- Tableau de déshydratation
- Garder chaud
- Vapeur
- Convection à la vapeur
- Réchaud
- Apprêt
- Fermentation de la pâte
- Fermentation finale
- Décongélation
- Conversion Convection Auto
- Programmes à vapeur
- Tableaux de cuisson au four à vapeur
- Modes de cuisson - Four à vapeur
- Modes de cuisson - Four conventionnel
- Modes de cuisson - Four conventionnel
- Convection véritable
- Conseils :
- Cuisson à convection
- Conseils :
- Cuisson
- Conseils :
- Rôtisserie à convection
- Conseils :
- Rôtissage
- Conseils :
- Gril à convection
- Conseils :
- Gril à convection max
- Gril
- Conseils :
- Gril max.
- Pizza
- Convection rapide
- Cuisson lente
- Tournebroche
- Montage du rôtisserie :
- 1. Insérez à moitié la grille du rôtisserie dans le four au niveau 5.
- 2. Coulissez l’attache gauche sur la broche et serrez la vis.
- 3. Glissez la viande ou la volaille à rôtir sur la broche et serrez la vis.
- 4. Coulissez l’attache droite sur la broche et serrez la vis.
- 5. Vérifiez l’équilibre de l’aliment sur la broche en la tournant dans la paume de vos mains. La cuisson d’un aliment mal équilibré sur la broche ne sera pas uniforme.
- 6. Placez la broche du rôtisserie sur la grille.
- 7. Insérez la grille de la broche dans le four et insérez l’arbre d’entraînement dans l’orifice de la paroi arrière du four.
- 8. Au besoin, tournez légèrement la broche pour bien l’insérer dans l’orifice.
- 9. Insérez la grille plate au niveau 1 et le plat à rôtir pour recueillir la graisse.
- Brider la volaille pour la rôtisserie
- 1. Glissez une attache sur la broche, les dents pointant vers l’extrémité de la broche. Serrez légèrement la vis pour l’empêcher de glisser.
- 2. Insérez la broche dans la volaille et fixez avec l’attache.
- 3. Coupez 24 po (61 cm) de corde de cuisine. Déposez la corde sous la volaille, poitrine vers le haut, en gardant les deux bouts égaux de chaque côté.
- 4. Enroulez les extrémités de la corde autour des ailes. Ramenez bien la pointe des ailes en serrant les cordes sur le haut. Faites un nœud. Ne coupez pas la corde restante.
- 5. Coupez un autre bout de corde de cuisine de 24 po (61 cm) et déposez-la sur le dos. Enroulez la corde autour de la queue puis de la broche. Serrez bien.
- 6. Amenez les pattes vers l’avant. Croisez-les sur le dessus de la broche. Enroulez avec la corde et faites un nœud.
- 7. Reliez la corde des pattes à la corde restante des ailes. Faites un nœud. Glissez l’autre attache et enfoncez les dents dans les pilons de la volaille pour les fixer solidement.
- 8. Vérifiez l’équilibre tournant la broche dans la paume de vos mains. La volaille ne devrait pas tourner sur la broche ni être lâche à un endroit quelconque. Si la volaille glisse, bridez-la de nouveau. La cuisson d’une volaille mal équili...
- Démarrer
- Tableau de cuisson á la Rôtisserie
- Déshydratation
- Tableau de déshydratation
- Garder chaud
- Apprêt
- Fermentation de la pâte
- Fermentation finale
- Tableaux de cuisson au four conventionnel
- Modes de cuisson - Four conventionnel
- Dépannage
- ÉNONCÉ DE LA GARANTIE LIMITÉE
- Soutien THERMADOR®
- LIRE ET CONSERVER CES INSTRUCTIONS

7
Causes of Damage
NOTICES
▯ Do not place accessories, foil, greaseproof paper or
ovenware on the oven cavity bottom. This will prevent
the oven from heating properly resulting in increased
cooking (or baking and roasting) times and overheat
the oven cavity bottom causing damage to the enamel.
▯ Aluminum foil: Aluminum foil in the oven cavity must
not come into contact with the door glass. This could
cause permanent discoloration of the door glass.
▯ Water in a hot oven cavity: Do not pour water into the
oven cavity when it is hot. This will cause steam. The
change in temperature can cause damage to the
enamel.
▯ Moisture in the oven cavity: Over an extended period
of time, moisture in the oven cavity may lead to
corrosion. Allow the oven cavity to dry after use. Do
not keep moist food in the closed oven cavity for
extended periods of time. Do not store food in the
oven cavity.
▯ Cooling with the appliance door open: Following
operation at high temperatures, only allow the oven
cavity to cool down with the door closed. Do not use
anything to block the door from closing. Even if the
door is only left ajar, the front of nearby furniture may
become damaged over time.
Only leave the oven cavity to dry with the door open if
a large amount of moisture was produced during
operation.
▯ Fruit juice: When baking juicy fruit pies, do not pack
the dish too generously. Dripping fruit juice leaves
stains that cannot be removed. If possible, place on a
baking sheet lined with aluminum foil.
▯ Dirty gasket: If the steam oven door gasket is dirty, the
appliance door may not close properly during
operation. The fronts of adjacent cabinets could be
damaged. Always keep the gasket clean.
▯ Appliance door: Do not sit on the appliance door, or
place or hang anything on it. Do not place any
cookware or accessories on the appliance door. The
appliance door should never be used as a seat, shelf
or worktop.
▯ Inserting accessories: Depending on the appliance
type, accessories can scratch the door glass when
closing the door. Always fully slide accessories into
the oven cavity.
▯ Transporting the appliance: Do not carry or hold the
appliance by the door handle. The door handle cannot
support the weight of the appliance and could break.
Protecting the Environment
Your new appliance is energy-efficient. Here you can find
tips on how to save even more energy when using the
appliance, and how to dispose of your appliance
properly.
Unpack the appliance and dispose of the packaging in
an environmentally friendly manner.
Saving Energy
▯ You may remove unneeded oven racks or accessories
from the oven cavity before cooking. This will reduce
the amount of preheat time required.
▯ Open the appliance door as infrequently as possible
when the appliance is in use.
▯ It is best to bake several cakes one after the other
while the cavity is still warm and the oven does not
need to preheat again.
▯ Keep your oven clean and avoid grease buildup as
this may lengthen preheat times and increase
emissions.